Creation Station Inaugural Post

creation station header

It has been a busy couple of days on the JK Cards blog! Friday I had four projects, yesterday I had two and today I have three! Today is the first post for a new design team called the Creation Station. We are here to give you lots of inspiration, so there will be plenty of photos. Every other Sunday we will focus on a few stamp sets and other items from the catalog giving you ideas on how to incorporate different items together in new and fun ways. I was honored when I was asked by Jen Arkfeld to participate and what fun it is to be with such a talented group of people. Feedback from you is very important, so be sure to let us know what you think! Let’s get started, shall we?

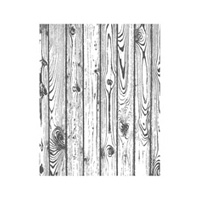
The first stamp set that we are focusing on today is the Stippled Blossoms Stamp Set. It’s a two step stamp set that gives you great shading details. My card begins with a base of Whisper White Card Stock and I stamped the Hardwood Background Stamp in Sahara Sand directly on it. Across the top is a thin piece of Gold Foil Sheet. The flowers from the stamp set are stamped in Strawberry Slush and Rose Red.

Creation Station Card 1 Creation Station Card 2

The Stamp-a-ma-jig make the two step stamping nice and easy. The leaves are stamped in Old Olive and Always Artichoke. They are all cut out with my Paper Snips.

Creation Station Card 3

To back them, I created a tag from Crumb Cake Card Stock using the Scalloped Tag Topper Punch. I stamped the flourish from the Everything Eleanor Stamp Set in Old Olive and adhered the tag and flowers to the base with Stampin’ Dimensionals. My greeting is from the Label Something Stamp Set and in stamped in Old Olive, punched out with the Ticket Duo Builder Punch and it too is adhered with Stampin’ Dimensionals. I cut the card base to 4 inches wide so I could let the flowers hang off the side of the card, while still allowing the card to fit into a standard sized envelope. I really like the Hardwood Background with the florals, it gives the card a nice, outdoorsy feel.

Creation Station Card 5

Creation Station Card 4

On to the next card! The next stamp set we focused on is the Geometrical Stamp Set. I did a hybrid card using both the stamp set and the digital download with my E-Cutter. The card base is Strawberry Slush Card Stock. The panel is a piece of Bermuda Bay that I cut out with my E-Cutter and the Geometrical Digital Download.

Creation Station Card 6

I stamped the second part of the greeting in Basic Black from the Traditional Stamp Set.

Creation Station Card 7

Each of the cut out triangles is backed with a piece of the Kaleidoscope Designer Series Paper. The triangles are stamped in Basic Black, Basic Gray and Crushed Curry and they are all punched out with the Triangle Punch. The panel and all of the triangles are adhered to the card with Stampin’ Dimensionals. I think the sentiment and the triangles look really cool when they are cut out of the panel and the DSP behind the triangles is a fun way to tie in the colors of the card.

Creation Station Card 9

Creation Station Card 8

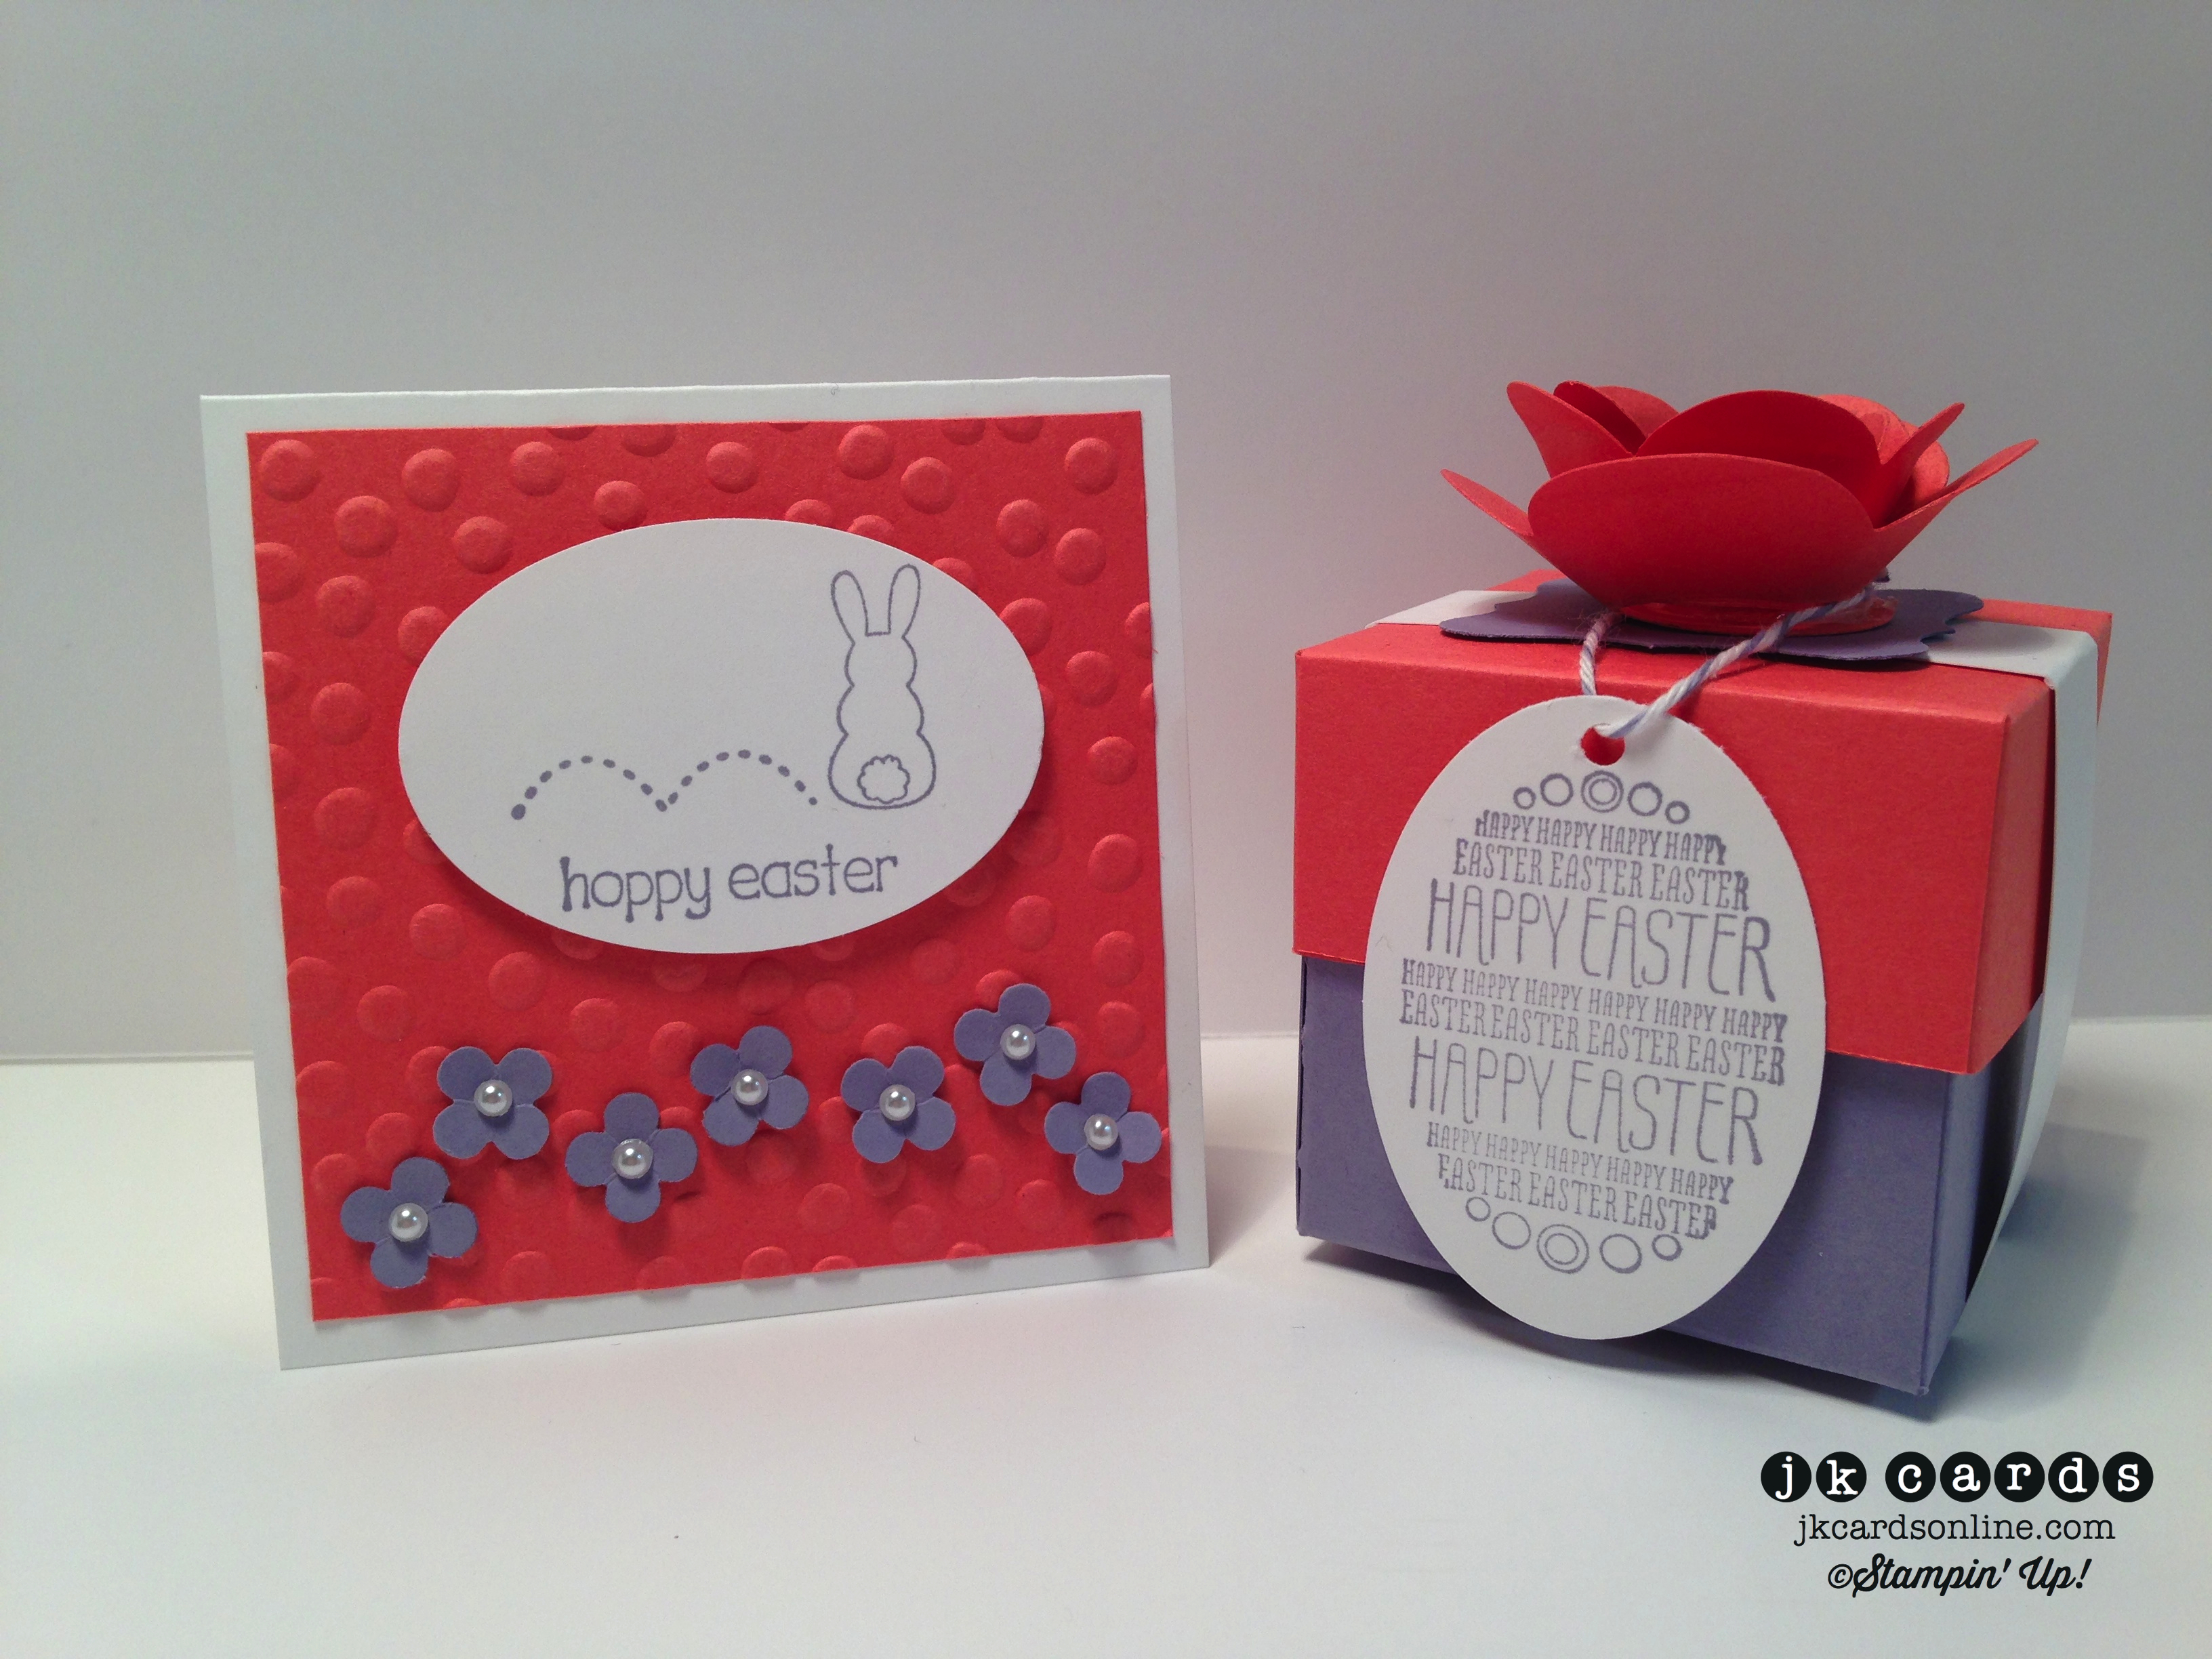
The last we are focusing on today are the Tag a Bag Gift Boxes. There is a neat accessory kit that you can buy to go with them, but I opted to do something a little different. After assembling the box, I stamped a piece of Very Vanilla Card Stock with the Dictionary Background Stamp and scored it with the Simply Scored Scoring Tool.

Creation Station Box 10

I wrapped a piece of Watercolor Wonder Designer Washi Tape and a piece of Crushed Curry 3/4″ Chevron Ribbon lengthwise around the card stock before adhering it to the acetate sleeve with the new Fast Fuse Adhesive. My flowers are from the Secret Garden Stamp Set, I stamped them in Memento Tuxedo Black and colored them in using the Daffodil Delight Stampin’ Blendabilities Markers.

Creation Station Box 11

The Secret Garden Framelits cut them out and Stampin’ Dimensionals adhere them to the ribbon. My greeting is from the Four You Stamp Set and is stamped, again, in Memento Tuxedo Black. I flagged the ends of the strip and adhered it to the box with Stampin’ Dimensionals. Some Basic Jewels Pearls in the centers of the flowers complete the box. I think the Dictionary Background Stamp is a perfect background canvas for a little box like this and I really love the way the flowers came out using the new Blendabilities Markers.

Creation Station Box 13

Creation Station Box 12

And there are my three projects for my first ever Creation Station Design Team post!

Be sure to take the entire tour; if you started with me, click the ‘Next’ button below to visit our fearless leader, Jen Arkfeld! I really hope you enjoyed the projects today and that you will join us again two weeks from now for the next Creation Station blog tour! 🙂

creation station back     creation station next


Full Blog Tour List:

Jen Arkfeld

Ilina Crouse

Kathy Kartak

Cindy Beach


Stampin’ Up! products used:


Stippled Blossoms Card:

Card Stock: Very Vanilla and Crumb Cake

Specialty Paper: Gold Foil Sheet

Ink: Sahara Sand, Strawberry Slush, Rose Red, Old Olive and Always Artichoke Classic Stampin’ Ink

Stamp Sets: Stippled Blossoms, Everything Eleanor and Label Something Clear Mount

Punches: Scalloped Tag Topper and Ticket Duo Builder

Tools: Paper Snips, Stamp-a-ma-jig, Stampin’ Dimensionals and SNAIL


Geometrical Card:

Card Stock: Strawberry Slush, Bermuda Bay and Whisper White

Designer Series Paper: Kaleidoscope

Ink: Basic Black, Basic Gray and Crushed Curry Classic Stampin’ Ink

Stamp Set: Geometrical Clear Mount

MDS: Geometrical Digital Download

Punch: Triangle

Tools: E-Cutter, Stamp-a-ma-jig, Stampin’ Dimensionals and SNAIL


Tag a Bag Gift Box:

Card Stock: Very Vanilla

Ink: Memento Tuxedo Black

Stampin’ Blendabilities Markers: Daffodil Delight

Stamp Sets: Secret Garden and Four You Clear Mount

Framelits: Secret Garden

Embellishments: Watercolor Wonder Designer Washi Tape, Crushed Curry 3/4″ Chevron Ribbon and Basic Jewels Pearls

Tools: Big Shot, Paper Snips, Stamp-a-ma-jig, Stampin’ Dimensionals and SNAIL

Double Header – Freshly Made Sketches 134 & Pals Paper Arts 202

Today was a very nice day! It was sunny and in the high 60’s and the best part was that I was out of the office for a good part of the day! I had to stop at WalMart on the way to work and pick up a TV stand. When I got to work I assembled it and did some other things before I headed to the Airport. I took one of the vans, the TV and stand didn’t fit in my car! I got to MacArthur around 11:45 and installed the TV in the exhibit space. One small problem was that there was no extension cord but the woman that I spoke to assured me that they would take card of that. I stopped home on the way back to get my boss a few cards that she needed. I got back to the office around 2:30 and then had to run out again to pick up some flowers. I got in my car and put the top down and had a nice ride! After work I had some dinner and came home and unpacked my pre-order, mounted my stamps and made a few projects. Like I said a very nice day!

Today I have a double post for you! Tomorrow I’m starting a new adventure with a few talented stampers, most of whom I’m sure you are familiar with. I wanted to get my Freshly Made Sketches and Pals Paper Arts cards posted before that so those are the two projects I have for you today. As a bonus they both use goodies from my pre-order! Let’s get to them, shall we?!

Up first is my card for this week’s Freshly Made Sketches and this week’s sketch is courtesy of the lovely Karren…

Freshly Made Sketches #134

The card base is Night of Navy Card Stock. My background consists of two pieces of paper from the Maritime Designer Series Paper Pack. All of the stamped images except for the greeting are from the Sea Street Stamp Set. The octopus is stamped in Coastal Cabana on Whisper White and backed with some Real Red that I cut out with the Circle Collection Framelits. The strip of flags is stamped in Night of Navy and adhered to the card with Stampin’ Dimensionals. The two starfish are stamped in Coastal Cabana and cut out with my Paper Snips and also adhered with Stampin’ Dimensionals. My greeting is from the Something to Say Stamp Set and is stamped in Night of Navy and cut out with the Bitty Banners Framelits. To finish off the card I added some Brights Candy Dots to the banner of flags. A nice bright fun card with neat Designer Series Paper and a whimsical stamp set don’t you think?!

FMS 134-WM

Next up is my project for this week’s Pals Paper Arts color challenge…

PPA 202

I always do a card but since I had some new stuff to play with I thought I would do a 3D project instead. The box is created with the Hamburger Box Bigz XL Die cut from a piece of Crumb Cake Card Stock. A quick run through the Big Shot and some folding and Sticky Strip and you have a neat little box! I used some Multi-Purpose Adhesive to attach the Tea Lace Paper Doily to the top. The onesie, socks and duck are from the Something for Baby Stamp Set, stamped in Bermuda Bay and Real Red, and cut out with the Baby’s First Framelits. My greeting is from the Baby We’ve Grown Stamp Set and is stamped in Bermuda Bay and cut out with the Starburst Framelits. All of the elements are adhered with Stampin’ Dimensionals. A fun and easy favor for a baby shower or a neat way to give a gift card to a new arrival! I wasn’t sure about the Hamburger Box but I’m really glad that I got it now!

PPA 202-WM

PPA 202 Front-WM

PPA 202 Open-WM

And there are my projects for this week’s Freshly Made Sketches and Pals Paper Arts. I had a lot of fun playing with my new stuff and I hope that you enjoyed both the card and the box! I thank you, as always for coming by and I hope you all have a great Saturday! Don’t forget to come back tomorrow and see what new adventures await! 🙂

Stampin’ Up! products used:

Card:

Card Stock: Night of Navy, Real Red and Whisper White

Designer Series Paper: Maritime*

Ink: Coastal Cabana and Night of Navy Classic Stampin’ Ink

Stamp Sets: Sea Street* and Something* to Say Clear Mount

Framelits: Circles Collection and Bitty Banners

Embellishments: Brights Candy Dots

Tools: Big Shot, Paper Snips, Stampin’ Dimensionals and SNAIL


Box:

Card Stock: Crumb Cake and Whisper White

Ink: Bermuda Bay and Real Red Classic Stampin’ Ink

Stamp Sets: Something for Baby* and Baby We’ve Grown Clear Mount

Framelits: Baby’s First* and Starburst

Bigz Die: Hamburger Box XL*

Embellishments: Tae Lace Paper Doilies

Tools: Big Shot, Multi-Purpose Glue, Stampin’ Dimensionals and SNAIL


*2014-2015 Annual Catalog

Current Promotions:

The Retired List is HERE! Get your favorite soon to be “Vintage” products before they sell out!

With our personalized stamps you can create a cool address label or even use it for everything from marking your territory on books or other belongings to having a fun way to give a personal touch to gifts and goodies. Click HERE for a PDF of the flyer.

It’s here! The 2014 Occasions Catalog is ready for you to place your order! It’s packed with fun trendy products and quick kits! Click on the image in the sidebar and place your order today!

Need some cards quicky? Stampin’ Up! has a brand new kit that allows you to create 20 cards, all you need is some adhesive and you’re all set. Click here for the Everyday Occasion Card Kit!

Make your own stamp! New Undefined stamp carving kit. Available now! Click here for the PDF.

Check out all of the Photopolymer Stamp Sets! The two newest sets are Sweetie Pie and Sweetie Pie Frames. It’s a completely clear stamping option you are going to love!

SplitCoast Creative Crew

So after all of that rain that we had yesterday, and I think they said that we got around 6 inches, the sun came out around noon and it turned out to be a beautiful afternoon! We got up to 68 degrees, made the rain yesterday sort of worth it. It was so nice to go outside and feel the warm sun and not have to wear a jacket! And today is Friday! What could be better than that! I don’t have anything specific planned for the weekend with the exception of some projects to make. It should be a great weekend too because I get my Catalog pre-order today, yes I overnighted it! The addiction continues! LOL!

My post for today is a big one. I have been asked to join the SplitCoast Creative Crew again! I had so much fun making the projects when I was on last year I was happy to join the talented group of 24 people this time around! I have four projects for you today, three cards and a mini album. Lets get to them!

My first card is for the DSP/Color Focus: Daffodil Delight, Island Indigo, Gumball Green, Smoky Slate. We are asked to use a technique of our choosing that imitates our watercolor wonder designer papers. I love the Watercolor Wonder Designer Series Paper so here is my take. The base of the card is Island Indigo Card Stock. I used a piece of Gumball Green and Daffodil Delight to create the mat for my piece of Watercolor Card Stock. Using the Flower Shop Stamp Set I inked the stamp in Island Indigo, Gumball Green and Daffodil Delight. I spritzed them each time with water from my Stampin’ Spritzer and stamped each one three times to create the background. I stamped them again in the same colors on some Whisper White and punched them out with the Pansy Punch. My leaves are from the Secret Garden Stamp Set and are stamped in Basic Gray and cut out with the Secret Garden Framelits. The leaves are adhered to the background with Multi-Purpose Glue and the flowers with Stampin’ Dimensionals. My greeting is from the Quite the Pair Stamp Set and is stamped in Smoky Slate and cut out with my Paper Snips. I really do love the effect that spritzing water on the stamp gives the image and the colors are nice and bright!

CCREW0514DF-JK-WM

My next card is for the Catalog Focus: scoring tools. We are asked to use all or one of these scoring tools-Simply Scored Tool, Simply Scored Borders Plate and/or Simply Scored Diagonal Plate to add interest to a gatefold card. My card base is Daffodil Delight Card Stock cut so it’s a gatefold card. The two Whisper White panels on the front are created using the Simply Scored Diagonal Plate. It gives it a lattice like look. The flowers and butterfly are from the Polka-Dot Pieces Stamp Set and are stamped in Melon Mambo, Island Indigo and Night of Navy. I used the 1 3/4″ and 1 1/4″ Scallop Circle Punches and the Elegant Butterfly Punch to punch them out. I created a belly band from a piece of Pear Pizzaz and adhered all of my stamped images to it with SNAIL and Stampin’ Dimensionals. My greeting is from the A Round Array Stamp Set and is stamped in Night of Navy and punched out with the 7/8″ Scallop Circle Punch. I love the lattice look behind the flowers and the colors are inspired by the Gingham Garden Designer Series Paper. A fun simple card, don’t you think?!

CCREW0514CF-JK-WM

My third card is for the Holiday Focus: National Photograph Month. We are asked to create a card that looks like a photograph by putting a border around our image and making the image glossy. You may use On Film Framelits or make your own, you may use Window Sheets for glossiness or Crystal Effects. My card starts off with a base of Whisper White Card Stock. The background is a piece of Soft Suede that I stamped in Soft Suede with the Hardwood Background Stamp. My greeting is from the A Dozen Thoughts Stamp Set and is heat embossed with White Stampin’ Emboss Powder. The stamped images are from the Secret Garden Stamp Set, the flowers are stamped in Elegant Eggplant and the leaves in Garden Green. I masked them off to give it a more realistic look. A piece of Whisper White is cut out with the On Film Framelits. I adhered it and a piece of Window Sheet to the Soft Sky stamped piece and the to the card. Very clever the way the Window Sheet does really make it look like a glossy photo, I’ll definitely do that again!

CCREW0514HF-JK-WM

The final project is for the Scrapbook and More Focus: Mini Books. I used the new Project Life by Stampin’ Up! Cards, Stamps and Framelits to create my mini book. The cover and back are Bermuda Bay and Pear Pizzaz that I cut out with the Project Life Cars & Labels Framelits Dies. On the cover I cut the speech bubble out with the Word Bubbles Framelits and stamped the stars from the Project Life Point & Click Photopolymer Stamp Set in Basic Black. The NYC is from the Sans & Stripes Photopolymer Stamp Set and is also stamped in Basic Black. All of the pages in the middle are the cards from the Everyday Adventure Project Life Cards Collection and I rounded the corners using the Project Life Corner Rounder. I used the Washi tape from the Everyday Adventure Project Life Accessory Pack to “hold” the photos in place and some Bermuda Bay 1/8″ Taffeta Ribbon to hold the cards together. I love the way you can see the photo on the first page through the Word Bubble! A fun simple mini book using the new Project Life by Stampin’ Up! line. Pretty neat huh?!

CCREW0514SF Cover-JK-WM

CCREW0514SF Page 1-JK-WM

CCREW0514SF Page 2-JK-WM

CCREW0514SF Page 3-JK-WM

Selfies with some of my peeps in a little pocket album, what could be better than that! LOL! I hope that you enjoyed my rather lengthy post today for my projects for this month’s SplitCoast Creative Crew Design Team challenges. I had a great time making them! You can see the rest of the design teams projects by heading over to SplitCoast and searching for CreativeCrew. Thank you very much for spending a little extra time with me today, I hope that you have an awesome Friday! 🙂

Stampin’ Up! products used:

Designer Series Paper Focus Card:

Card Stock: Island Indigo, Gumball Green, Daffodil Delight and Whisper White

Specialty Card Stock: Watercolor

Ink: Island Indigo, Gumball Green, Daffodil Delight and Smoky Slate Classic Stampin’ Ink

Stamp Sets: Flower Shop, Secret Garden and Quite the Pair Clear Mount

Framelits: Secret Garden

Punch: Pansy

Tools: Big Shot, Paper Snips, Stampin’ Spritzer, Stampin’ Dimensionals and SNAIL

Catalog Focus Card:

Card Stock: Daffodil Delight and Whisper White

Ink: Melon Mambo, Island Indigo and Night of Navy Classic Stampin’ Ink

Stamp Sets: Polka-Dot Pieces and A Round Array Clear Mount

Punches: 1 3/4″, 1 1/4″ and 7/8″ Scallop Circle and Elegant Buttefly

Tools: Simply Scored, Simply Scored Diagonal Plate, Sticky Strip, Stampin’ Dimensionals and SNAIL

Holiday Focus Card:

Card Stock: Whisper White, Soft Suede and Soft Sky

Ink: Elegant Eggplant and Garden Green Classic Stampin’ Ink

Specialty Ink: Versa-Mark

Stampin’ Emboss Powder: White

Stamps: Secret Garden, Delightful Dozen and Hardwood Clear Mount

Framelits: On Film

Tools: Big Shot, Stamp-a-ma-jig, Heat Tool, Multi-Purpose Glue and SNAIL

Mini Book:

Card Stock: Bermuda Bay and Pear Pizzaz

Specialty: Window Sheet

Ink: Basic Black Classic Stampin’ Ink

Stamp Sets: Project Life Point & Click and Sans & Stripes Alphabet Photopolymer

Framelits: Word Bubbles and Project Life Cards & Labels

Journaling Cards: Project Life Everyday Adventure

Embellishments: Project Life Everyday Adventure Pack and Bermuda Bay 1/8″ Taffeta Ribbon

Tools: Big Shot and SNAIL

Current Promotions:

The Retired List is HERE! Get your favorite soon to be “Vintage” products before they sell out!

With our personalized stamps you can create a cool address label or even use it for everything from marking your territory on books or other belongings to having a fun way to give a personal touch to gifts and goodies. Click HERE for a PDF of the flyer.

It’s here! The 2014 Occasions Catalog is ready for you to place your order! It’s packed with fun trendy products and quick kits! Click on the image in the sidebar and place your order today!

Need some cards quicky? Stampin’ Up! has a brand new kit that allows you to create 20 cards, all you need is some adhesive and you’re all set. Click here for the Everyday Occasion Card Kit!

Make your own stamp! New Undefined stamp carving kit. Available now! Click here for the PDF.

Check out all of the Photopolymer Stamp Sets! The two newest sets are Sweetie Pie and Sweetie Pie Frames. It’s a completely clear stamping option you are going to love!

SUO Challenges 93

Oh Monday why must you be so mean! LOL! Nah, it actually wasn’t too bad for a Monday. Work was the usual crazy and when I got to my parents for dinner my brother, his wife and the baby were there. Oh, and my child was there too! Little Daniel is a cutie, I love his hair and he smiles for me all the time! I posted a picture of him to Instagram last night and it was over on the right on the feed on my blog but for those of you that missed it here he is in all his cuteness!

Daniel 3-24-2014

And if you look at the pictures in the background they are of Taylor when she was little, she was a cutie too, oh alright she still is!

Before I get to today’s post I was over on Mary Fish’s blog yesterday and I noticed that her supply list was quite neat and cool looking. At the end it said try Stampin’ Buddy free. I clicked on the link and came to a very non-descript page with Demo ID and Product Number spaces. I typed them in and it created a clickable supply list. I’m trying it out and you’ll have to let me know what you think of it!

Today I’m over on the SUO Challenges blog for our Boxes, Bags and Baskets challenge. I haven’t made a box in a long time so I was quite happy to get to work! My box is made from Wisteria Wonder and Calypso Coral Card Stock. I used my Simply Scored, Paper Snips and Sticky Strip to assemble it. The belly band is a piece of Whisper White and on top is a piece of Wisteria Wonder that I punched out with the Curly Label Punch. I finally got to use my Spiral Flower Bigz Die with some Calypso Coral. The flower is quite easy to make, a run through the Big Shot, some rolling and a bit of hot glue and done! The Easter egg is from the Eggstra Spectacular Stamp Set and is stamped in Wisteria Wonder and punched out with the Extra Large Oval Punch. Some “Vintage” Wisteria Wonder Bakers Twine holds it in place. I couldn’t just have the box, it needed a little card too. The card is a piece of Whisper White Card Stock with a piece of Calypso Coral  embossed with the Decorative Dots Textured Impressions Embossing Folder for the background. The stamp is also from the Eggstra Spectacular Stamp Set and is stamped in Wisteria Wonder and also punched out with the Extra Large Oval Punch. My little flowers are Wisteria Wonder punched out with the Itty Bitty Shapes Punch Pack with some Basic Jewels Pearls in the middles. The box would make a great place to put some jelly beans which I would have done but I finished the bag the other night! LOL! I hope that you enjoyed my project for the SUO Challenges Boxes and Bags challenge. Head on over to the blog to see what my fellow Design Team members have done and enter your project in the gallery for us to see! I hope that you all have a great Tuesday and thank you, as always, for coming by! 🙂

SUO Challenges 93-JK-WM


SUO Challenges 93 Open-WM

Stampin’ Up! products used:

Card Stock: Wisteria Wonder, Calypso Coral and Whisper White

Ink: Wisteria Wonder Classic Stampin’ Ink

Stamp Set: Eggstra Spectacular Clear Mount

Embossing Folder: Decorative Dots

Bigz Die: Spiral Flower Original

Punches: Extra Large Oval, Curly Label and Itty Bitty Shapes Pack

Embellishments: Basic Jewels Pearls and Wisteria Wonder Bakers Twine (Vintage)

Tools: Big Shot, Simply Scored, Sticky Strip, Mini Glue Dots, Stampin’ Dimensionals and SNAIL

Current Promotions:With our personalized stamps you can create a cool address label or even use it for everything from marking your territory on books or other belongings to having a fun way to give a personal touch to gifts and goodies. Click HERE for a PDF of the flyer.It’s time for Sale-A-Bration! January 28th thru March 31st get a free product from the 2014 Sale-A-Bration Catalog for every $50 you spend (does not include tax and shipping). Click HERE for a PDF of the Catalog!Big Clearance Rack Sale starts today! New items added up to 80% off!It’s here! The 2014 Occasions Catalog is ready for you to place your order! It’s packed with fun trendy products and quick kits! Click on the image in the sidebar and place your order today!

Need some cards quicky? Stampin’ Up! has a brand new kit that allows you to create 20 cards, all you need is some adhesive and you’re all set. Click here for the Everyday Occasion Card Kit!

Make your own stamp! New Undefined stamp carving kit. Available now! Click here for the PDF.

Check out all of the Photopolymer Stamp Sets! The two newest sets are Sweetie Pie and Sweetie Pie Frames. It’s a completely clear stamping option you are going to love!

Control Freaks November Blog Tour

freakwelcome2013

Hello everyone and welcome to the November Control Freaks Blog Tour! Our theme for this month’s tour is Christmas! If you are following the tour then you have arrived here from Cindy Elam’s blog. She had some great stuff, didn’t she?! I have two home decor projects for you. Who couldn’t use a little inspiration to help with the decorating around your house this time of year?

The first of the two projects I have for you today is a banner. I’m a big fan of nontraditional holiday colors and this banner is no exception. The bases for the banner are Cherry Cobbler Card Stock that I stamped in Cherry Cobbler with the Dictionary Background Stamp. I flagged the bottoms and used the 1″ Circle Punch to create the ticket corners on the top. The rosettes are made from Winter Frost Specialty Designer Series Paper using my Simply Scored Scoring Tool. My next layer is a piece of Blushing Bride that I cut out with the Chalk Talk Framelits Dies and embossed with the Alphabet Press Textured Impressions Embossing Folder. The letters that spell out JOY are cut out using the Typeset Alphabet Bigz Dies from Cherry Cobbler. To add a little interest I stamped some snowflakes from the Festive Flurry Stamp Set in Pool Party and cut them out with the Festive Flurry Framelits Dies. The flags are held on to the jute twine with some Pool Party that is punched out with the “Vintage” Tab Punch. The snowflakes are held on with Card Stock that is punched out with the Word Window Punch. It’s a fun and relatively simple banner to make, but it’s sure to dress up any home for the holidays!

Control Freaks Nov. Tour Banner

Control Freaks Nov. Tour Banner Close

Control Freaks Nov. Tour Banner Snowflake

My second project for today I’m going to use as a tree topper, but you could also use it as an ornament on a bigger tree or it could be hung on a door. The base for my project is a piece of Soft Sky Card Stock that I cut out with the Circles Collections Framelits Dies. The background is a piece of Very Vanilla that I stamped with the World Map Background Stamp in Old Olive and that is also cut out with the Circles Framelits. I used the Christmas Star Single Stamp heat embossed with Gold Stampin’ Emboss Powder, cut out with my Paper Snips and scored with my Simply Scored Scoring Tool. Some stacked Stampin’ Dimensionals adhere it to the background. The greeting is from the Greetings of the Season Stamp Set, stamped in Cherry Cobbler and punched out with the 1 3/4″ Scallop Circle Punch. It is backed with a piece of Cherry Cobbler that I cut out with the Deco Labels Collection Framelits Dies. Two flagged pieces of Brushed Gold Card Stock are adhered behind it. On the back of it is a tube of Soft Sky that I will use to place it on top of my tree.

Control Freaks Nov. Tour Tree Topper

I hope that you enjoyed my projects for this month’s Control Freaks Blog Tour. Now on to your next stop, up next is Lisa Martz, enjoy! Thanks so much for stopping by here and have a great day!

clickhere2013

Stampin’ Up! products used:

Banner:

Card Stock: Cherry Cobbler, Blushing Bride, Pool Party and Whisper White

Designer Series Paper: Winter Frost Specialty

Ink: Cherry Cobbler and Pool Party Classic Stampin’ Ink

Stamp Sets: Festive Flurry and Dictionary Background Stamp Clear Mount

Framelits: Festive Flurry and Chalk Talk

Embossing Folder: Alphabet Press

Punch: 1″ Circle

Bigz Dies: Typeset Alphabet

Tools: Big Shot, Simply Scored Scoring Tool, Paper Snips, Stampin’ Dimensionals and SNAIL

Tree Topper:

Card Stock: Soft Sky, Very Vanilla and Cherry Cobbler

Specialty Card Stock: Brushed Gold

Ink: Cherry Cobbler and Old Olive

Specialty Ink: Versa-Mark

Stampin’ Emboss Powder: Gold

Stamp Sets: Christmas Star Single and Greetings of the Season Clear Mount

Framelits: Circles Collection and Deco Labels

Punch: 1 3/4″ Scallop Circle

Tools: Big Shot, Heat Tool, Simply Scored Scoring Tool, Paper Snips, Stampin’ Dimensionals and SNAIL

Control Freaks October Blog Tour

freakwelcome2013

Hello everyone and welcome to the October Control Freaks Blog Tour! Our theme for this month’s tour is Gratitude. A very fitting theme seeing as the time of year we are coming up on there are so many things that we all have to be grateful for. The holiday’s help us to stop and remember that. If you are following the tour then you have arrived here from LeeAnne Greff’s blog. When I think of grateful I think of thank you cards so I made a box of thank you cards that are great to have handy or they would make a fun gift for someone.

I saw a tutorial on Pinterest where someone had used the Envelope Punch Board to make a box to hold four cards with envelopes, well, I had to give that a try! The box for the cards is made from Crumb Cake Card Stock that is cut to 9″ x 9″ and then using the Envelope Punch Board it’s scored and punched at 3 1/2″ and 4 1/2″. You then flip it and do the same on the opposite side. For the two remaining sides you follow the score lines from the previous sides and when you are finished you have your box. Some Sticky Strip holds it together and a piece of 1 1/4″ Burlap Ribbon is wrapped around it to hold it closed. I used the Snow Day Stamp Set to stamp my snow man in Whisper White Craft Ink on Soft Sky and cut him out with my Paper Snips. His buttons and face are Basic Black and his nose is Pumpkin Pie. A piece of Sahara Sand and a piece of Soft Sky are cut out with the Deco Labels Collection Framelits Dies. The Soft Sky piece has his arms stamped in Soft Suede on it and its all adhered to the Burlap with Sticky Strip. A little piece of Burlap is also used for his scarf. I did the same process for the four snowmen on the cards. The greeting along the bottom and snowflakes are stamped in Soft Sky on Sahara Sand. The main greeting is from the Lots of Thanks Stamp Set and is stamped in Soft Suede on Soft Sky and punched out with the Label Bracket Punch. Some Crumb Cake Envelopes complete the set. I’m going to use mine as a gift for someone this holiday season. Who couldn’t use a nice set of handmade thank you’s to send out?! I hope that you enjoyed my project for this month’s Control Freaks Blog Tour. Now on to your next stop, up next is Jan Tinklenberg, enjoy! Thanks so much for stopping by here and have a great day! 🙂

Control Freaks Blog Tour October 2013

Control Freaks Blog Tour October 2013

Control Freaks Blog Tour October 2013

Control Freaks Blog Tour October 2013


clickhere2013

Stampin’ Up! products used:

Card Stock: Crumb Cake, Sahara Sand and Soft Sky

Ink: Soft Suede, Basic Black and Pumpkin Pie Classic Stampin’ Ink

Craft Ink: Whisper White

Stamp Sets: Snow Day and Lots of Thanks Clear Mount

Framelits: Deco Labels

Punch: Label Bracket

Embellishments: 1 1/4″ Burlap Ribbon

Tools: Big Shot, Envelope Punch Board, Stamp-a-ma-jig, Paper Snips, Sticky Strip, Stampin’ Dimensionals and SNAIL

Control Freaks September Blog Tour

freakwelcome2013

Hello everyone and welcome to the September Control Freaks Blog Tour Featuring Halloween Projects! I’m on a plane at the moment on my way to see a very good friend. Nothing like posting from 30,000 feet! If you are following the tour you should have arrived here from my good friend and very talented stamper Sandy Mathis’ blog. Her projects were just amazing weren’t they?!?! I have two fun and different projects for you this month. A nifty Halloween Wreath and a fun Halloween clock! Yes… a clock!

First up I have my Wreath. I was in a store the other day and I saw this pre-packaged halloween wreath and I thought well I can make that with my Stampin’ Up! goodies so that’s exactly what I did! For the backing of the wreath I cut out a piece of Basic Black Card Stock with my Circles Collection Framelits Dies. The cones are made from 12 sheets of Witches’ Brew Designer Series Paper cut in 4″ x 4″ squares. Out came the hot glue gun and after about two full sticks my cones were assembled and glued to the base. The center of the wreath is a piece of Basic Gray, again cut out with the Circles Framelits, and a rosette made from some more Witches’ Brew DSP. A piece of Summer Starfruit cut out with the Labels Collection Framelits Dies and pierced with the Festive Paper-Piercing Pack is the backing for the stamps. Both of the stamps are from the Halloween Bash Stamp Set, the Pumpkin Pie one is cut out with the Decorative Label Punch and the Basic Black one with the Scallop Oval Punch. They are all adhered to one another with Stampin’ Dimensionals. A pretty neat take on a wreath that you can make larger just by changing the dimensions of your squares!

Control Freaks Sept Blog Tour

My second project is a really fun one. I was inspired when I was meandering through one of the local craft stores and happened down the clock aisle. I thought wouldn’t it be fun to make a Halloween clock?! For the base of the clock I used my Circles Collection Framelits to cut out a piece of Coaster Board and a piece of Witches’ Brew Designer Series Paper. I glued them to each other using Multi-Purpose glue and used my Paper Snips to make the hole in the middle for the movement to go through. The numbers are from the ABC-123 Sketch Alphabet & Numbers Stamp Set and are stamped in Pumpkin Pie and punched out with the 7/8″ Scallop Circle Punch. All of the other stamped images and greeting are from the Halloween Hello Stamp Set and are stamped in Pumpkin Pie too. I used my Pumpkin Pie and Daffodil Delight Stampin’ Write Markers to color in the candy corn and adhered everything to the clock face with Stampin’ Dimensionals. I really love the way the greeting spins around the center and the candy makes it’s way around the clock face too!

Control Freaks Sept Blog Tour

So what do you think?!?! A little different and fun huh?! I really hope that you enjoyed my projects for this month’s Control Freaks Blog Tour featuring Halloween Projects. Now you are off to see the talented Connie Babbert’s projects. She always has some fun ideas! Thank you for stopping by and enjoy the rest of the tour! 🙂

clickhere2013

Stampin’ Up! products used:

Wreath:

Card Stock: Basic Black, Basic Gray, Summer Starfruit and Very Vanilla

Designer Series Paper: Witches’ Brew

Ink: Pumpkin Pie and Basic Black Classic Stampin’ Ink

Stamp Set: Halloween Bash Clear Mount

Framelits: Circles Collection and Labels Collection

Punches: Decorative Label and Scallop Oval

Tools: Big Shot, Simply Scored, Festive Paper-Piercing Pack, Paper-Piercing Tool, Hot Glue Gun, Stampin’ Dimensionals and SNAIL

Clock:

Card Stock: Very Vanilla

Specialty: Coaster Board

Designer Series Paper: Witches’ Brew

Ink: Pumpkin Pie Classic Stampin’ Ink

Stampin’ Write Markers: Pumpkin Pie and Daffodil Delight

Stamp Set: Halloween Hello and ABC-123 Sketch Alphabet & Numbers Clear Mount

Framelits: Circles Collection

Punches: 7/8″ Scallop Circle and 1 1/4″ Scallop Circle

Tools: Big Shot, Paper Snips, Multi-Purpose Glue, Stampin’ Dimensionals and SNAIL

Control Freaks August Blog Tour

freakwelcome2013

Hello there and welcome to the Control Freaks August Blog Tour! We are so glad to have you along. This month we are featuring products from the 2013 Holiday Catalog. If you are following the tour then you have arrived here from the amazing Julie Davidson’s blog. She has cool stuff didn’t she? I have been having lots of fun playing with all of the goodies in the Holiday Catalog and I have also been having lots of fun with the new Thinlits Dies. I have a card for you today that uses the Thinlits and two fun projects that use Vellum.

First up we have the card. When they introduced the Thinlits at Convention I knew that I was going to love them and I was right! They are so much fun to play with and not just to make the cards. The elements they come with are great too! The base of my card is Smoky Slate Card Stock and I used the Circle Card Thinlits Die to cut it out. The circle in the middle starts off with a piece of Costal Cabana that I punched out with the 2 1/2″ Circle Punch. I used the scallop circle from the Thinlits set to cut out a piece of Silver Glimmer Paper. The snowflake is from the Festive Flurry Stamp Set and is cut out with the Festive Flurry Framelits Dies. The circle of Glimmer paper is cut out using the Circles Collection Framelits Dies. I adhered only the left side so that when you flip the card it circles the greeting which is from the Christmas Messages Stamp Set and is stamped in Costal Cabana. The greeting is from the Joy to the World Stamp Set and is stamped in Smoky Slate. A strip of Silver Glimmer Paper, the one on the left is punched with the Scallop Edge Punch, finish the card off with some more sparkle. I love the way the circle flips around to surround the greeting too!

Control Freaks August Blog Tour Card Closed

Control Freaks August Blog Tour Card Open

Next up I have a simple Votive Holder that I made with some Vellum Card Stock and my Simply Scored Scoring Tool. Another one of the snowflakes from the Festive Flurry Stamp set is stamped in Costal Cabana on Vellum and cut out with the Festive Flurry Framelits Dies. I used the Boho Blossom Punch to punch out the piece of Silver Glimmer Paper in the center, it fits just perfectly! A nice simple way to dress up a table or mantle for the Holidays!

Control Freaks August Blog Tour Votive

Finally I have a quick project that you could use as an ornament or to hang in a window. I stamped the Wonderful Wreath in Costal Cabana on more Vellum Card Stock and cut it out with the Circles Collection Framelits Dies. The berries are colored in with my Cherry Cobbler Stampin’ Write Marker. I used the Expressions Thinlits Dies to cut out Merry from some more Costal Cabana and adhered it to the wreath with 2-Way Glue. It looks really neat with some light behind it and could also easily be used on a card front or a gift package.

Control Freaks August Blog Tour Window Hanging

I hope that you enjoyed my card and projects for this month’s Control Freaks Blog Tour and that you are inspired to go and play with some goodies from the Holiday Catalog! Next up for you crafty pleasure we have the talented LeeAnn Greff. I’ll bet you can’t wait to see what she has in store for you! Thanks for hopping by and enjoy the rest of the tour! 🙂

clickhere2013


Stampin’ Up! products used:

Card:

Card Stock: Smoky Slate and Costal Cabana

Specialty Paper: Silver Glimmer

Ink: Costal Cabana and Smoky Slate Classic Stampin’ Ink

Stamp Sets: Festive Flurry, Joy to the World and Christmas Messages Clear Mount

Thinlits: Circle Card

Framelits: Festive Flurry

Punches: 2 1/2″ Circle and Scallop Border

Tools: Big Shot, 2-Way Glue, Stampin’ Dimensionals and SNAIL

Votive Holder:

Specialty Card Stock: Vellum

Specialty Paper: Silver Glimmer

Ink: Costal Cabana Classic Stampin’ Ink

Stamp Set: Festive Flurry

Framelits: Festive Flurry

Punch: Boho Blossom

Tools: Big Shot, Simply Scored and SNAIL

Wreath:

Card Stock: Costal Cabana

Specialty Card Stock: Vellum

Stamp Set: Wonderful Wreath

Ink: Costal Cabana Classic Stampin’ Ink

Marker: Cherry Cobbler Stampin’ Write

Framelits: Circles Collection

Thinlits: Expressions

Tools: Big Shot and 2-Way Glue

SUO Challenges 77

Rain, rain go away come again another day. Hello there! It’s  going to rain here and it is supposed to be heavy at times so that should make for a fun day! I have been spoiled by all the beautiful weather we have been having lately. So let’s see, work was insane yesterday, not the best way to start off the week. I’m hoping that I got all of the craziness out of the way and the rest of the week will be smooth sailing. Now that is wishful thinking! LOL!

For today’s post I have my project for SUO Challenges and this time it’s birthday’s…

happy-birthday-1

It was my boss’ birthday last week and this is the card and coordinating gift bag that I made. The base of the card is Rich Razzleberry Card Stock. For the background I embossed a piece of Smoky Slate with the Perfect Polkadots Textured Impressions Embossing Folder and backed it with a piece of Bermuda Bay. All of the stamped elements are from the Cycle Celebration Stamp Set. I stamped the candles in Versa-Mark and heat embossed them with Smoky Slate Stampin’ Emboss Powder and some Crystal Effects are added to the flame for a little shine. The greeting is stamped in Bermuda Bay and again in Rich Razzleberry. The Bermuda Bay one is punched out with the Decorative Label Punch and the Rich Razzleberry one with the Large Oval Punch. Some Stampin’ Dimensionals adhere all of the elements to the card. The gift bag is just a white one that I picked up from the craft store. I used some Smoky Slate Textured Card Stock and cut it out with the Gift Bow Bigz L Die. The sentiment is stamped in Bermuda Bay on Very Vanilla and is backed with a piece of Rich Razzleberry. I flagged the ends of both pieces and adhered it all to the bag with some Sticky Strip. I love the color combination and the Smoky Slate Embossing Powder gives the candles a waxy look! My boss loved the card and and bag and I hope you do too. Thank you very much for stopping by to take a look at my SUO Challenges  card for the birthday’s challenge. Stop by the blog and see what the my teammates have come up with and enter a project of yours in the gallery! I hope that you have a super day! 🙂

SUO Challenges 77

Stampin’ Up! products used:

Card Stock: Rich Razzleberry, Bermuda Bay, Smoky Slate and Very Vanilla

Specialty Card Stock: Smoky Slate Textured

Ink: Bermuda Bay and Rich Razzleberry Classic Stampin’ Ink

Specialty Ink: Versa-Mark

Stamp Set: Cycle Celebration Clear Mount

Bigz Die: Gift Bow L

Embossing Folder: Large Oval and Decorative Label

Embossing Powder: Smoky Slate Stampin’ Emboss

Embellishment: Crystal Effects

Tools: Big Shot, Paper Snips, Stamp-a-ma-jig, Heat Tool, Sticky Strip, Stampin’ Dimensionals and SNAIL

Cycle Celebration CM

Island Indigo-Smokey Slate Textured CS

Gift Bow Bigz L Die

Perfect Polka Dots Texture Embossing Folder

Large Oval Punch

Decorative Label Punch

Smokey Slate Embossing Powder

Crystal Effects

Current Promotions:

Paper Pumpkin! Get your first two months for only $10! Click HERE to sign up!

Make your own stamp! New Undefined stamp carving kit. Available now! Click here for the PDF.

Designer Series Paper – buy three and get one FREE until July 31st!

Check out all of the Photopolymer Stamp Sets! It’s a completely clear stamping option you are going to love!

Thinlits Card Dies! A fast and easy way to make a flip fold card! Available August 1st! Click here for the PDF.

Paper Players 157 & Display Project 9

Monday, Monday… back again already! That weekend was a quick but very good! I had a splendid day yesterday, I got a lot of crafting time and it was a beautiful day here. The temperatures dropped a little last night so I got open up the windows and let in some fresh air. Tonight I get to see Sandy and all of the ladies from card class, something that the child and I look forward to every month. What’s going on in your neck of the woods?

Today’s post is for this week’s Paper Players Challenge. This week it’s a fun one! The lovely Anne Marie has given us an anything but a card fall themed project…

Paper Players #157

I do love a 3D project and it has been a while since I have done one. I used one of the Tag a Bag Gift Boxes for the base of my box. I put some of the cool birch paper from the Thankful Tablescape Simply Created Kit on either side and slid the plastic cover on. The top greeting is made by cutting out thankful with one of the Expressions Thinlits Dies and using the negative. I backed it with some more of the birch paper and adhered it to the top of the box with some Sticky Strip. The bow is made with Early Espresso Core’dinations and the Gift Bow Bigz L Die. I then embossed it with the Woodgrain Textured Impressions Embossing Folder and wrapped another small piece of the birch paper around the center to “tie” it all together! I really love the Expressions Thinlits and the negative cut out is just as great as the regular one. I thank you very much for taking some time to come by and see my Paper Players project for this week’s fall themed anything but a card challenge from Anne Marie. Scroll down past the supplies to see my third Display Project using the Mosaic Suite. Enjoy your day! 🙂

Paper Players 157

Paper Players 157

Paper Players 157

Stampin’ Up! products used:

Card Stock: Early Espresso

Specialty Card Stock: Early Espresso Core’dinations

Thinlits: Expressions

Embossing Folder: Woodgrain

Bigz Die: Gift Bow L

Kit: Thankful Tablescape Simply Created

Tools: Big Shot, Sticky Strip, Multi-purpose Glue and SNAIL

Thankful Tablescape Simply Created Kit

Tag a Bag Gift Boxes

Expressions Thinlits Dies

Gift Bow Bigz L Die

Woodgrain Embossing Folder

Early Espresso Core'dinations

Display Project 9

SU! 2013 Conv Disp Proj 9 - Quatrefancy

Stampin’ Up! products used:

Card Stock: Pool Party, Daffodil Delight and Whisper White

Designer Series Paper: Quatrefancy Specialty

Ink: Strawberry Slush Classic Stampin’ Ink

Stamp Sets: Mosaic Madness and Really Good Greetings Clear Mount

Punches: Mosaic and Curly Label

Tools: Paper Trimmer, Sticky Strip, Stampin’ Dimensionals and SNAIL

Current Promotions:

Paper Pumpkin! Get your first two months for only $10! Click HERE to sign up!

Make your own stamp! New Undefined stamp carving kit. Available now! Click here for the PDF.

Designer Series Paper – buy three and get one FREE until July 31st!

Check out all of the Photopolymer Stamp Sets! It’s a completely clear stamping option you are going to love!

Thinlits Card Dies! A fast and easy way to make a flip fold card! Available August 1st! Click here for the PDF.