Control Freaks June Blog Tour

freakwelcome2013

Hello there and welcome to this month’s Control Freaks Blog Tour! The theme for this month’s tour is more goodies from the NEW 2015-2016 Annual Catalog! If you are following along with the tour then you have arrived here from the very clever Debbie Henderson’s blog, she always has great projects doesn’t she?! Today, I have a card and a matching tag using one of my favorite new stamp sets from the new Catalog!

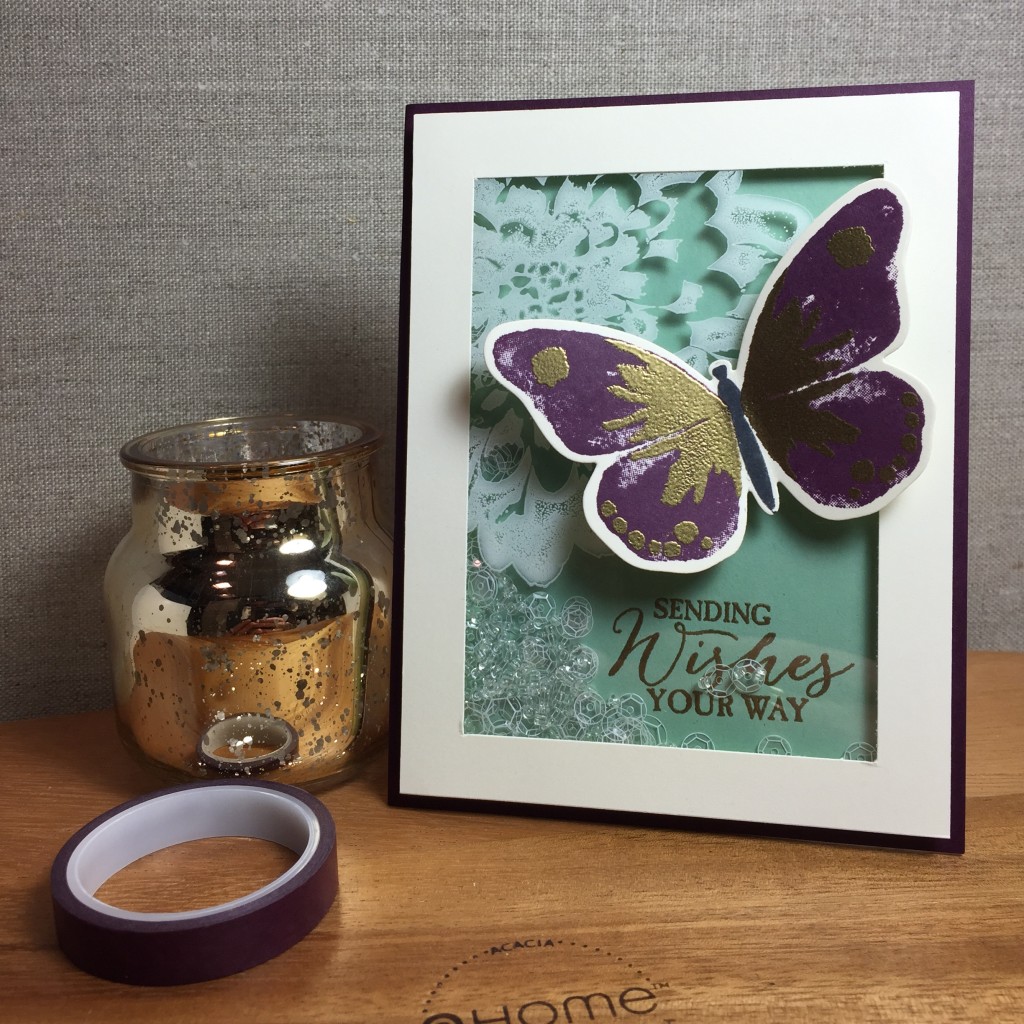
Up first is the card that starts with a base of Whisper White Card Stock. I covered the front with a piece of Blackberry Bliss. To create the shaker I started by stamping the Definitely Dahlia Background Stamp in White Staz-On Ink on a piece of Window Sheet. The frame is a piece of Very Vanilla that I cut using my Stampin’ Trimmer. It’s adhered to the Window Sheet with SNAIL. My greeting is from the Butterfly Basics and is heat embossed in Gold Stampin’ Emboss Powder on a piece of Mint Macaroon. I put some Foam Tape around the edges of the back of the frame, doubled up for a little extra height, and then filled it with some clear seed beads and clear sequins. The back and the front are adhered together and then to the card base. My large butterfly is from the Watercolor Wings Photopolymer Stamp Set and is stamped in Blackberry Bliss on Very Vanilla. The second layer is heat embossed in Gold Stampin’ Emboss Powder and the I cut it out with the Bold Butterfly Framelits and adhered it to the card with some more Foam Tape. I do love to make a shaker card and the addition of seed beads keeps everything moving!

CF June Tour - Card-WM

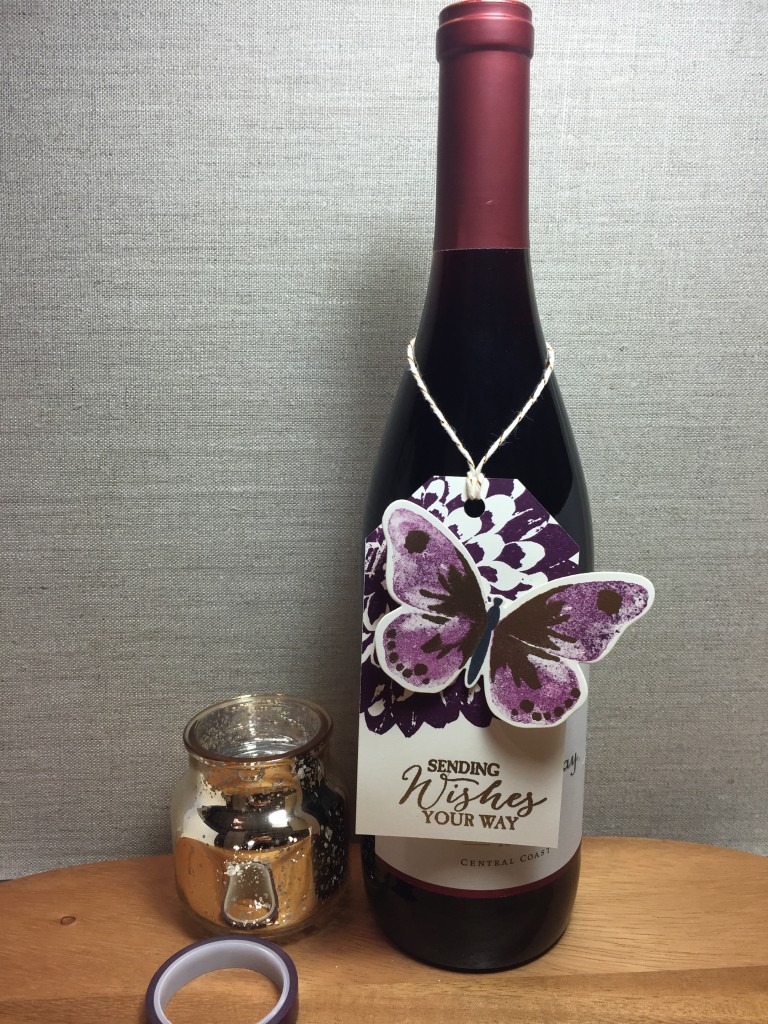
For the coordinating tag the butterfly is created in the same way except it is stamped off once. I made the tag myself because I wanted it a little wider than the punch would accommodate. The Definitely Dahlia Background Stamp is stamped on the tag with Blackberry Bliss and the greeting is again heat embossed in Gold Stampin’ Emboss Powder. I adhered the butterfly to the tag and tied a piece of Gold Baker’s Twine through the top. It hung on a bottle of MacMurray Ranch Pinot Grigio. A nice quick way to dress up a bottle of wine!

CF June Tour - Tag-WM

I hope that you enjoyed my card and tag for this month’s Control Freaks Blog Tour and your look at some more of the new products from the 2015-2016 Annual Catalog! Thank you very much for stopping by! Now to continue on with the tour I’ll send you off to my very talented friend Melissa Davies! Have a wonderful day everyone! 🙂

clickhere2013

Products used:

Card:

Stamp Sets: Watercolor Wings and Butterfly Basics Photopolymer

Ink: Blackberry Bliss Classic Stampin’ Ink

Specialty Ink: Versa-Mark and White Staz-On

Stampin’ Emboss Powder: Gold

Card Stock: Whisper White, Blackberry Bliss and Mint Macaroon

Specialty: Window Sheet

Framelits: Bold Butterfly

Embellishments: Clear Seed Beads and Clear Sequins

Tools: Big Shot, Heat Tool, Stampin’ Trimmer, Foam Tape and SNAIL

Tag:

Stamp Sets: Watercolor Wings and Butterfly Basics Photopolymer

Ink: Blackberry Bliss Classic Stampin’ Ink

Specialty Ink: Versa-Mark

Stampin’ Emboss Powder: Gold

Card Stock: Very Vanilla

Framelits: Bold Butterfly

Embellishments: Gold Baker’s Twine

Tools: Big Shot, Heat Tool, Foam Tape and SNAIL

Piglet MAT

Control Freaks May Blog Tour

freakwelcome2013

Hello there and welcome to this month’s Control Freaks Blog Tour! The theme for this month’s tour is goodies from the NEW 2015-2016 Annual Catalog! It’s always nice to little sneak peek of some of the cool new products that Stampin’ Up! has in store for don’t you think?! If you are following along with the tour then you have arrived here from the very clever and crafty Debbie Henderson’s blog, she always has great projects doesn’t she?! Today, I have two cards, both using some new Designer Series Paper and a new Stamp Set for the upcoming 2015-2016 Annual Catalog!

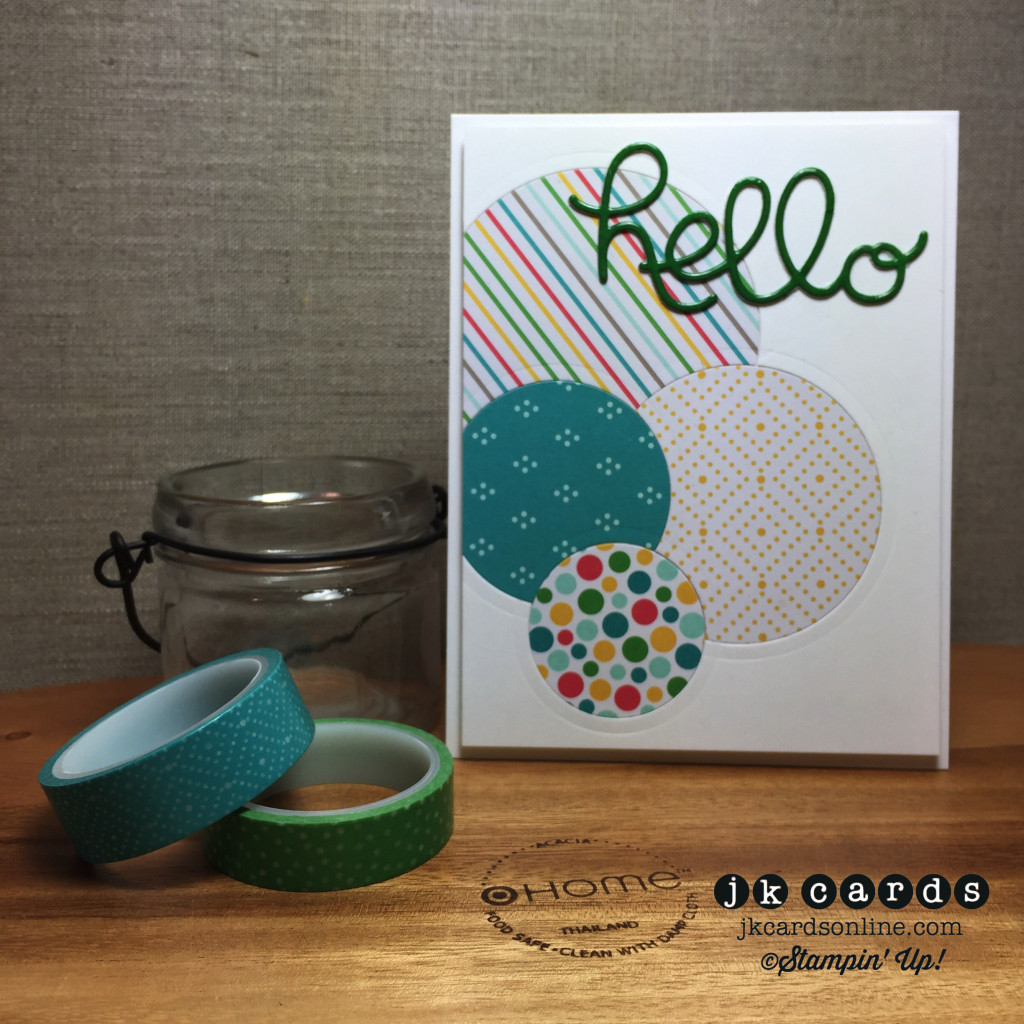
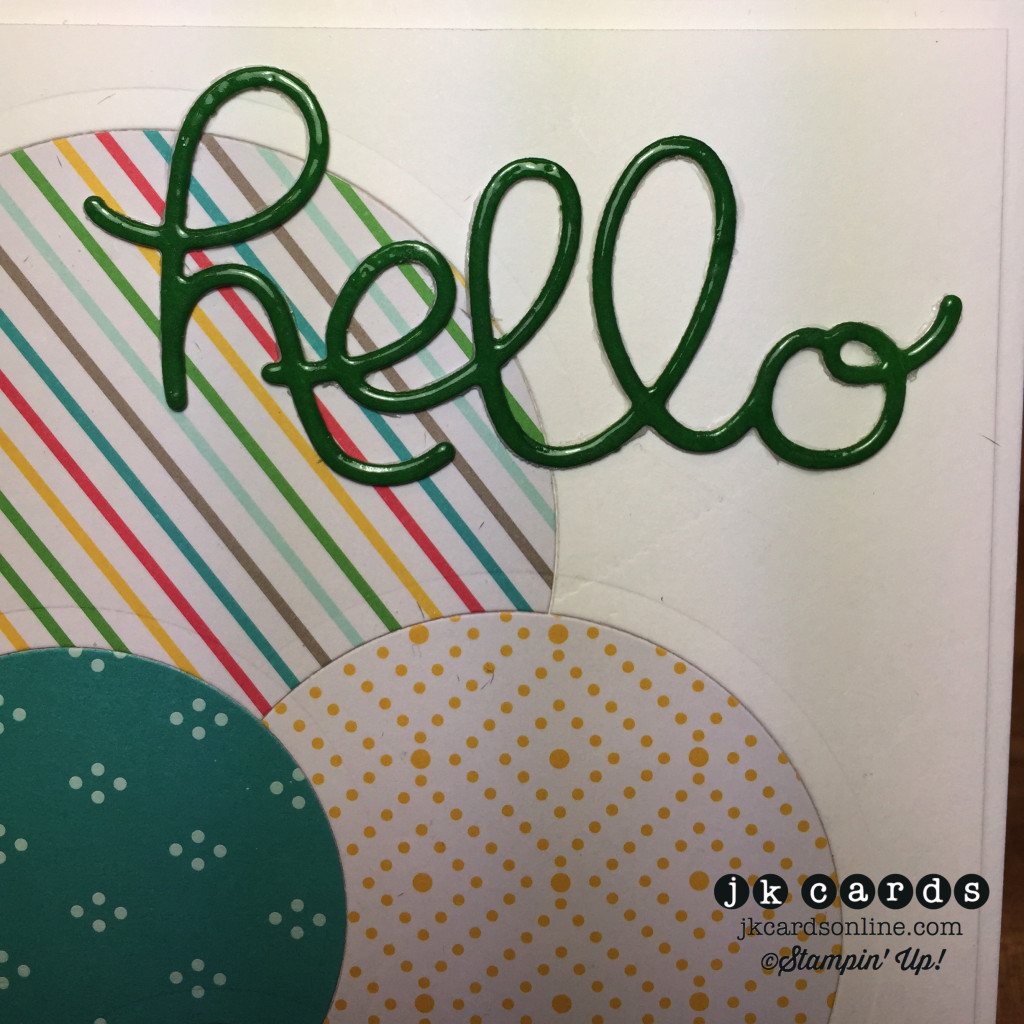
First up is a simple card that would be great for using up some scraps of DSP. The card base is Whisper White Card Stock. I took another piece of Whisper White and used the Circles Collection Framelits to cut out pieces from the left side. I also cut out pieces of paper from the NEW Cherry on Top Designer Series Paper Stack with to same size circle. After I cut the first one I put the DSP back in the negative space and cut the rest out working from top to bottom. They were held in place with some Post-It Tape and then I put some SNAIL on another piece of Whisper White the same size and adhered the them together. A whole bunch of Stampin’ Dimensionals adhere the panel to the card. My greeting is a piece of Cucumber Crush cut out with the Hello You Thinlits. I also cut out a piece of Whisper White and adhered them together. They are then coated with Versa-Mark and dipped in Clear Stampin’ Emboss Powder and heated to give it that shiny look that I love so much! A little Multi-Purpose Glue holds it in place. I love the simplicity of the card, you can use it for so many different occasions with just a quick greeting change!

CF May Blog Tour - Card 2-WM

CF May Blog Tour - Card 2 Close-WM

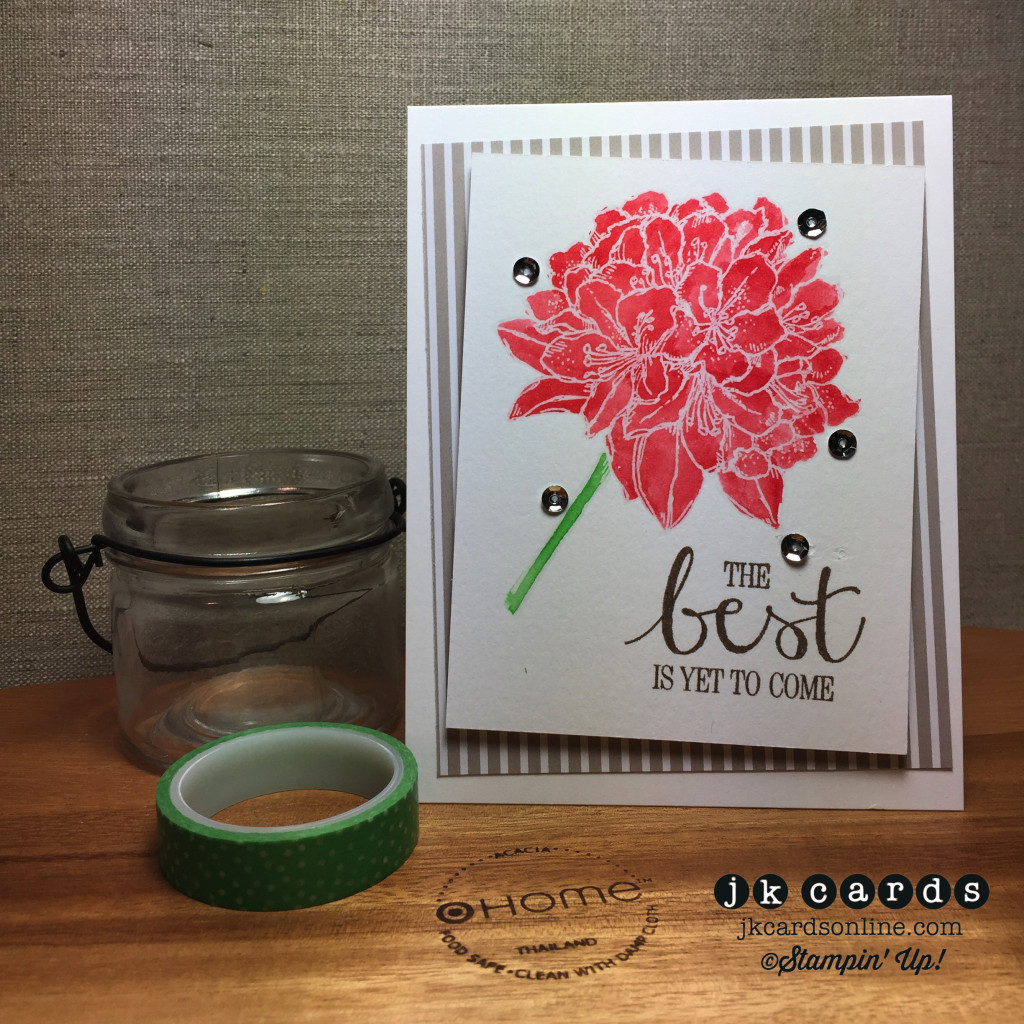
My second card that I have for you uses one of my favorite techniques, watercoloring with ink! The base for this card is also Whisper White Card Stock. A piece of paper from the NEW Cherry on Top Designer Series Paper Stack is adhered to the base on an angle. The image is from the NEW Best Thoughts Host Stamp Set and is heat embossed on Watercolor Paper with Clear Stampin’ Emboss Powder. I used a paint brush, water and some Watermelon Wonder and Cucumber Crush Ink to color in the image. The greeting is from the same set and is stamped in the NEW Tempting Taupe Ink. It’s adhered to the card with Stampin’ Dimensionals and a few sequins from the “Vintage” Frosted Sequins Pack are adhered with Crystal Effects randomly around the flower. Again, I love the simplicity of the card and the soft look of the watercoloring!

CF May Blog Tour - Card 1-WM

I hope that you enjoyed my cards for this month’s Control Freaks Blog Tour and your sneak peek at some of the new In-Colors, Designer Series Paper and Stamp Set! Thank you very much for stopping by! Now to continue on with the tour I’ll send you off to my very talented friend Melissa Davies! Have a wonderful day everyone! 🙂

clickhere2013

Products used:

Card 1:

Specialty Ink: Versa-Mark

Stampin’ Emboss Powder: Clear

Card Stock: Whisper White and NEW Cucumber Crush

Designer Series Paper: NEW Cherry on Top Stack

Framelits: Circles Collection

Thinlits: Hello You

Tools: Big Shot, Heat Tool, Multi-Purpose Glue, Stampin’ Dimensionals and SNAIL

Card 2:

Stamp Set: NEW Best Thoughts (Host) Clear Mount

Ink: NEW Watermelon Wonder, Cucumber Crush and Tempting Taupe Classic Stampin’ Ink

Specialty Ink: Versa-Mark

Stampin’ Emboss Powder: Clear

Card Stock: Whisper White

Specialty Paper: Watercolor

Designer Series Paper: NEW Cherry on Top Stack

Embellishments: Frosted Sequins (Vintage)

Tools: Big Shot, Heat Tool, Crystal Effects, Stampin’ Dimensionals and SNAIL

Piglet MAT

Control Freaks March Blog Tour

freakwelcome2013

Hello there and welcome to this month’s Control Freaks Blog Tour! The theme for this month’s tour is Spring! Who couldn’t use some Spring! I’m over the Winter and have been for quite some time! We are supposed to get snow today too. Will it ever end?! LOL! If you are following along with the tour then you have arrived here from the very clever Debbie Henderson’s blog, she had some great projects didn’t she?! I have two cards for you this time around so lets get right to them!

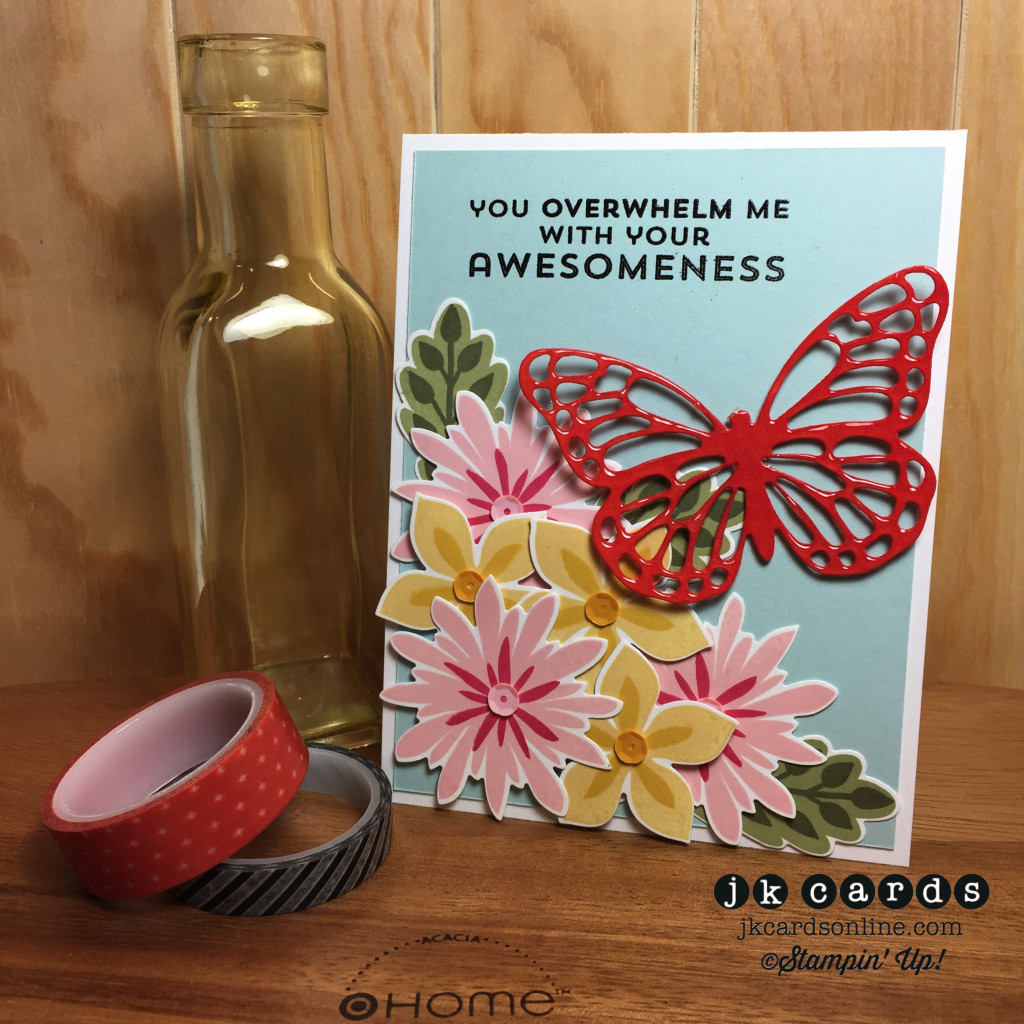
My first card definitely has real Spring feel to it! The card starts off with a base of Whisper White Card Stock. My background is a piece of Soft Sky and I stamped the greeting from the Flower Fair Photopolymer Stamp Set in Versa-Mark and heat embossed it with Black Stampin’ Emboss Powder. All of the flowers are from the same set and are stamped in So Saffron, Crushed Curry, Blushing Bride, Strawberry Slush, Pear Pizzaz and Always Artichoke. I used the coordinating Flower Patch Framelits to cut out all of the stamped images. Some are adhered to the card with SNAIL and others with Stampin’ Dimensionals. I adhered a sequin in the middle of each one. The butterfly is a piece of Calypso Coral that I cut out with the Butterfly Thinlits. I covered the entire die cut with Versa-Mark and then heat embossed it multiple time with Clear Stampin’ Emboss Powder. A piece of Stampin’ Dimensional holds it to the card. I love all of the colors mixed together and I just can’t get enough of the clear embossed die cuts, I think they are so cool!

Control Freaks March Blog Tour - Card 1-WM

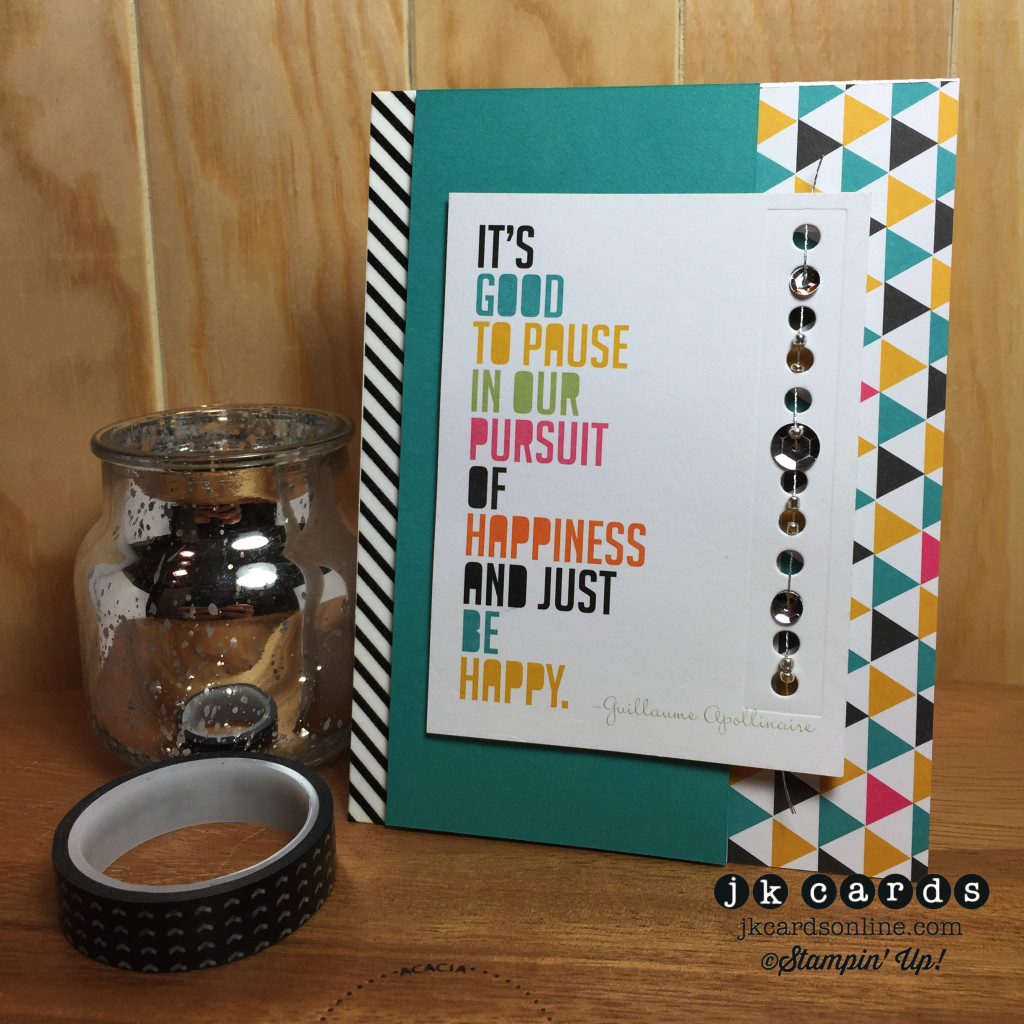
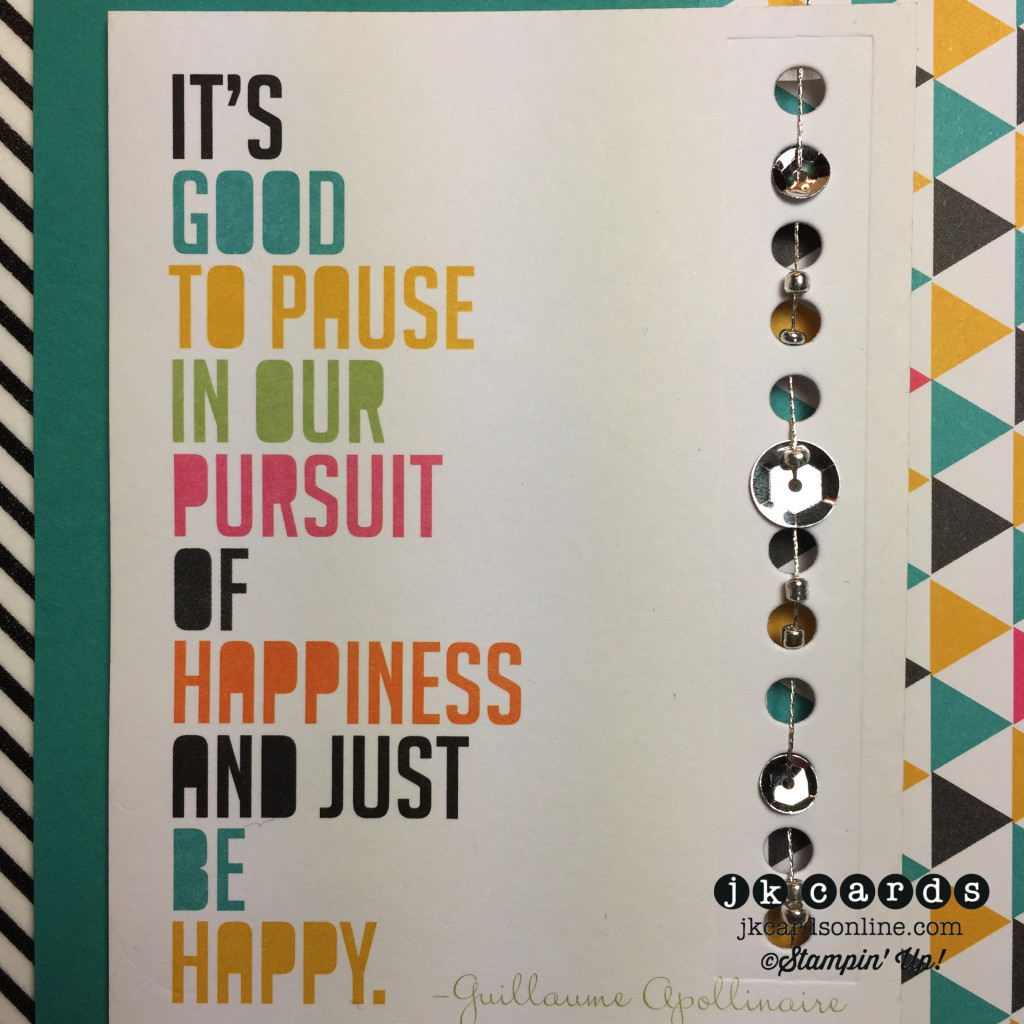
The second card that I have for you today is another card with a spring feel but could be used for so many different occasions. It was also pretty easy to make using one of the card from the Project Life Everyday Adventure Card Kit! The base for this card is also Whisper White Card Stock. I adhered a piece of Stacked with Love Designer Washi Tape down the left side and part of one of the cards from the Everyday Adventure Card Kit down the right side. In the middle os a panel of Bermuda Bay that is adhered to the card with Stampin’ Dimensionals. The greeting is another card from the kit and I used one of the dies form the Mini Treat Bag Thinlit to cut out the holes on the right side. A piece of Silver Thread is threaded through the holes with some “Vintage” Frosted Sequins and silver seed beads randomly added. The card is then adhered to the card with more Stampin’ Dimensionals. I love that saying and the card and I’m always looking for ways to use the Project Life cards since I’m not a big scrapbooker!

Control Freaks March Blog Tour - Card 2-WM

Control Freaks March Blog Tour - Card 2 Close-WM

I hope that you enjoyed my cards for this month’s Control Freaks Blog Tour! Thank you very much for stopping by! Now to continue on with the tour I’ll send you off to my very talented friend Wendy Weixler! Have a wonderful day everyone! 🙂

clickhere2013

Stampin’ Up! products used:

Card 1:

Stamp Set: Flower Patch Photopolymer

Ink: So Saffron, Crushed Curry, Blushing Bride, Strawberry Slush, Pear Pizzaz and Always Artichoke Classic Stampin’ Ink

Specialty Ink: Versa-Mark

Stampin’ Emboss Powder: Black and Clear

Card Stock: Whisper White, Soft Sky and Calypso Coral

Framelits: Flower Patch

Thinlits: Butterfly

Tools: Big Shot, Heat Tool, Crystal Effects, Stampin’ Dimensionals and SNAIL

Card 2:

Stamp Set: NONE!

Ink: NONE!

Card Stock: Whisper White and Bermuda Bay

Project Life: Everyday Adventure Card Kit

Thinlits: Mini Treat Bag

Embellishments: Frosted Sequins (Vintage), silver thread and seed beads

Tools: Big Shot, Stampin’ Dimensionals and SNAIL

Piglet MAT

Control Freaks February Blog Tour

freakwelcome2013

Hello there and welcome to this month’s Control Freaks Blog Tour! I’m always happy to have you along! The theme for this month’s tour is Sale-A-Brate! We are featuring products from the 2015 Sale-A-Bration Catalog. You can get one of these products for FREE with every $50 you spend now through March 31st! If you are following along with the tour then you have arrived here from the very clever Heidi Baks blog, she had some great projects didn’t she?! I have three cards for you this time around so lets get right to them!

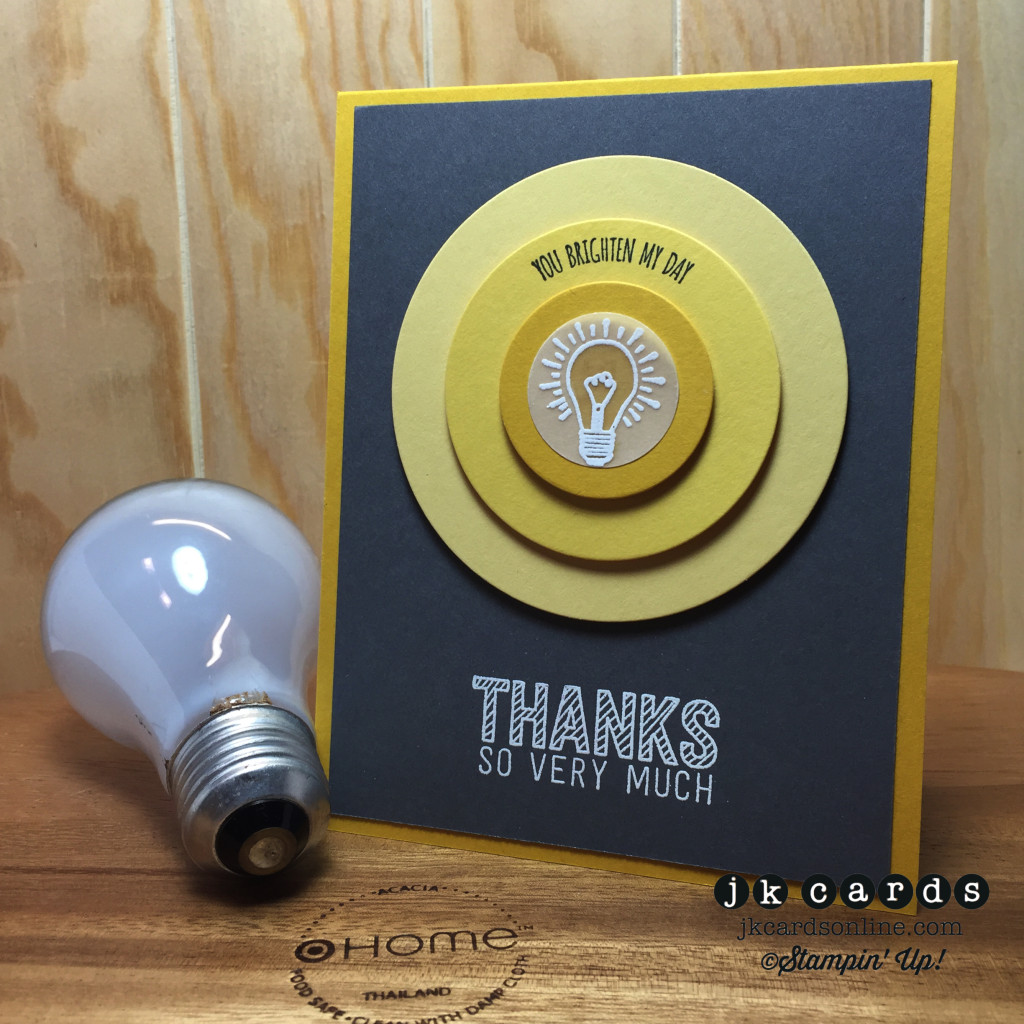
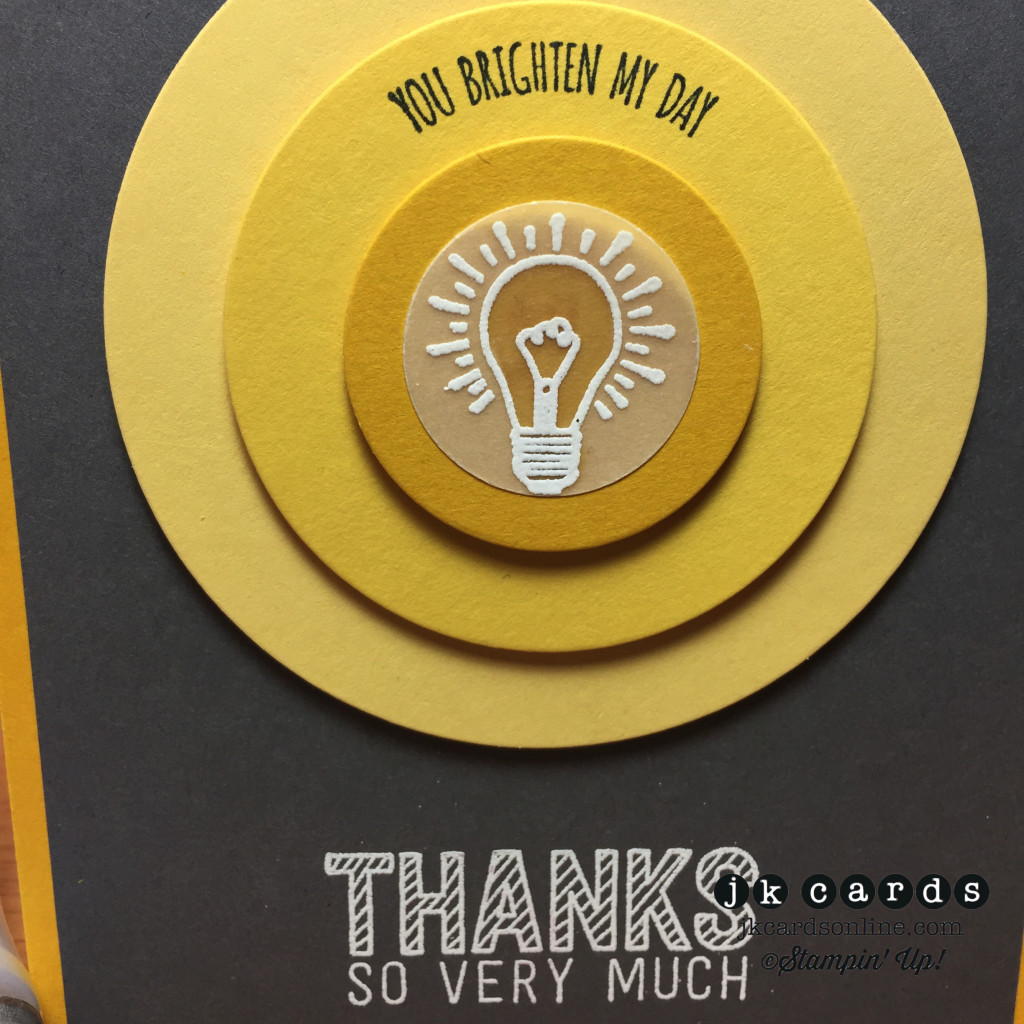
For my first card I made a simple thank you using some colors that are very popular at the moment! The base for the card is Crushed Curry Card Stock. For my background I used a piece of Basic Gray and heat embossed the sentiment from the Simply Wonderful Stamp Set in White Stampin’ Emboss Powder. The lightbulb image and the “You Brighten My Day” sentiment are from the You Brighten My Day Stamp Set, I heat embossed the light bulb in White Stampin’ Emboss Powder on Vellum Card Stock and then used the Circles Collection Framelits to cut it and some Crushed Curry, Daffodil Delight and So Saffron out. My Daffodil Delight and Smoky Slate Stampin’ Blendabilities Markers are used to color in the back of the light bulb. The light bulb is then adhered to the Crushed Curry circle with 2-Way Glue and the rest of the circles are adhered to each other and the card with Stampin’ Dimensionals. A fun cheery thank you for someone that did something nice for you don’t you think?!

Control Freaks February Blog Tour Card 1-WM

Control Freaks February Blog Tour Card 1 Close-WM

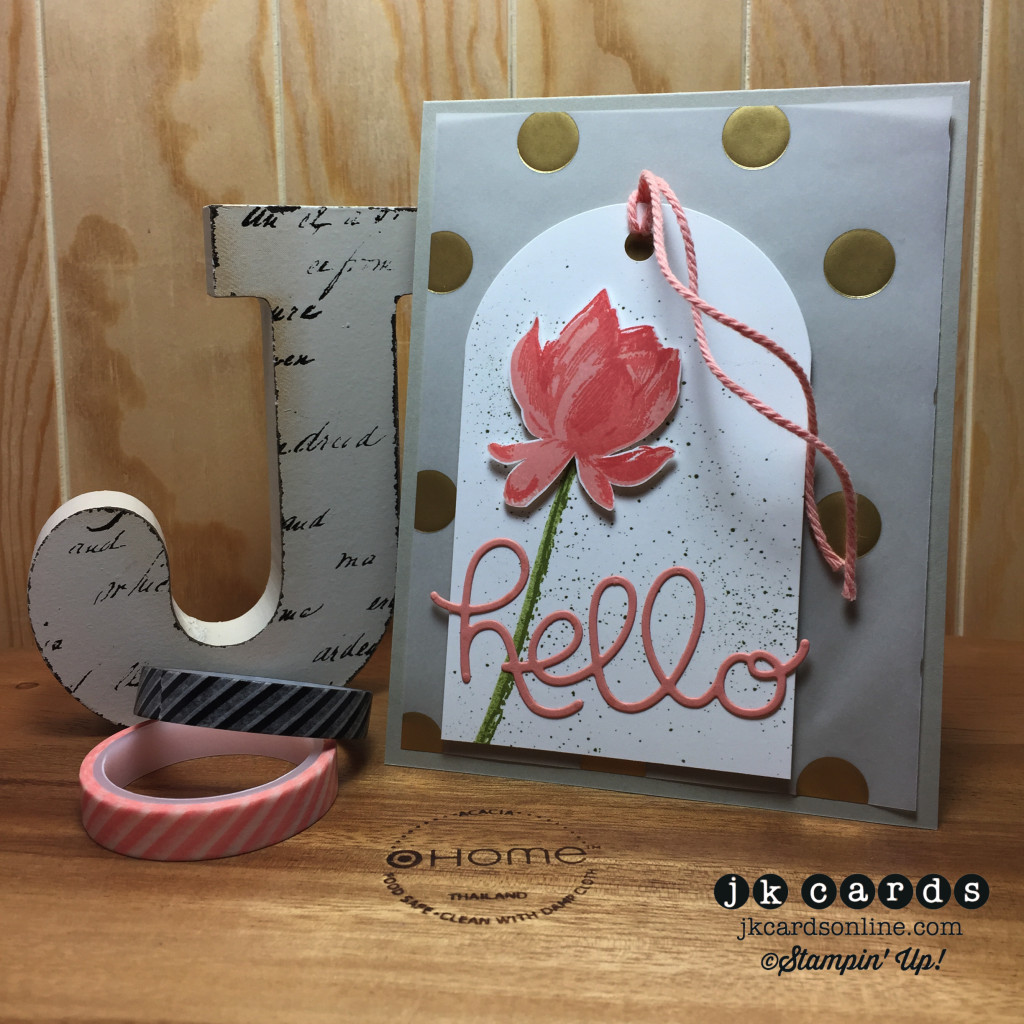
My next card uses the beautiful Lotus Blossom Photopolymer Stamp Set. The base for this card is Sahara Sand Card Stock and the background is a piece of the Gold Fancy Foil Designer Vellum. I used the Circles Collection Framelits and some Whisper White to make my tag. My Old Olive Stampin’ Write Marker and the “Vintage” Color Spritzer create the base for my stamping. I stamped the stem from the Lotus Blossom Photopolymer Stamp Set in Old Olive and the flower in Crisp Cantaloupe and Calypso Coral. The flower is cut out with my Paper Snips and adhered to the tag with Stampin’ Dimensionals. A piece of Crisp Cantaloupe is cut out with the Hello You Thinlits and adhered to the tag with 2-Way Glue. Some Crisp Cantaloupe Thick Baker’s Twine is tied through the tag and it’s adhered to the card with Stampin’ Dimensionals. Isn’t that lotus blossom gorgeous, the three step stamping gives it some really nice depth and it’s so easy to do to!

Control Freaks February Blog Tour Card 2-WM

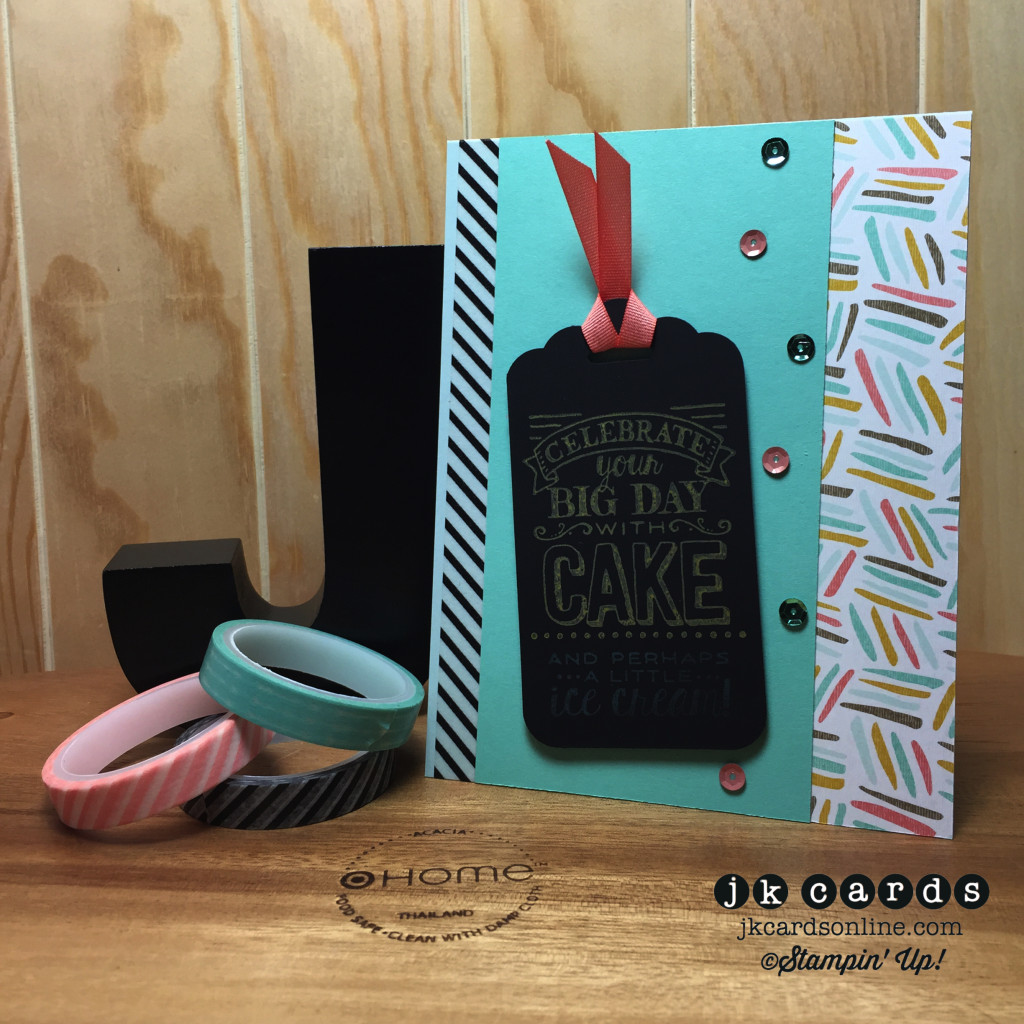
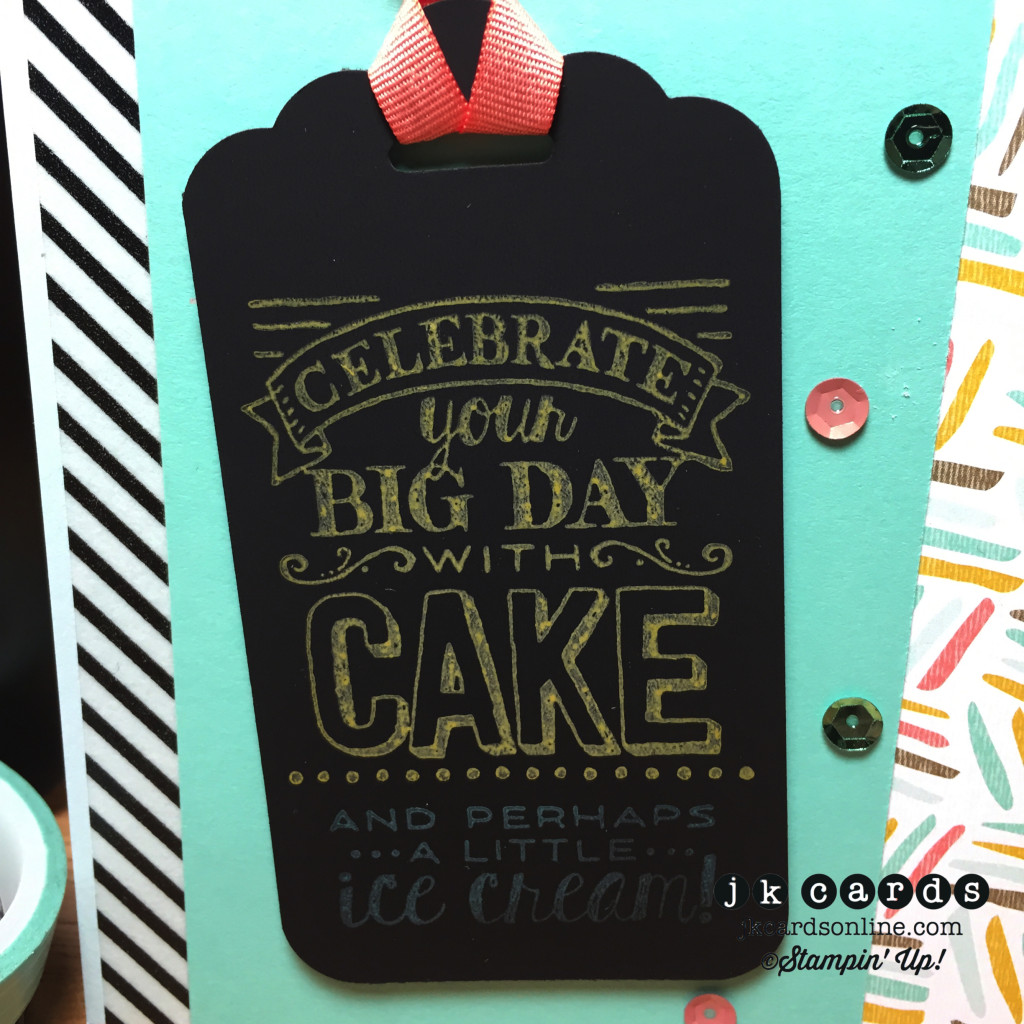
For my final card I used some of the new Chalk Ink with a stamp set that is just made for it! The base for this card is Soft Sky Card Stock. Down the left side is a piece of the Stacked with Love Designer Washi Tape and down the right is a piece of paper from the Best Year Ever Designer Series Paper Pack. The raised panel is a piece of Coastal Cabana adhered to the card with Stampin’ Dimensionals. For the tag I used a piece of the Chalkboard Paper and my Scalloped Tag Topper Punch along with the Project Life Corner Rounder. The images are from the Big Day Stamp Set and are stamped in Yellow Citrus and Aquamarine ColorBox Chalk Ink. A piece of ribbon from the Best Year Ever Accessory Pack is tied through the top and the tag is adhered to the card with Stampin’ Dimensionals. A few of the 2013-2015 In-Color Sequins adhered to the card with Crystal Effect give it a little sparkle and finish it off nicely. I love the look of the chalk ink on the Chalkboard Paper, it really does look just like the real thing!

Control Freaks February Blog Tour Card 3-WM

Control Freaks February Blog Tour Card 3 Close-WM

And there are my three cards, all using some of the really cool products form the 2015 Sale-A-Bration Catalog and a few from the 2015 Occasions Catalog. I hope that you enjoyed them and that you are inspired to get some of your own Sale-A-Bration goodies! Next up on the tour is the talented Connie Babbert! I’m sure that you will love her projects too! Thank you very much for touring with and have a wonderful Friday! 🙂

clickhere2013

Stampin’ Up! products used:

Card 1:

Stamp Sets: You Brighten My Day and Simply Wonderful Clear Mount

Ink: Memento Tuxedo Black

Specialty Ink: Versa-Mark

Stampin’ Blendabilities Markers: Daffodil Delight and Smoky Slate

Stampin’ Emboss Powder: White

Card Stock: Crushed Curry, Basic Gray, Daffodil Delight and So Saffron

Specialty Card Stock: Vellum

Framelits: Circles Collection

Tools: Big Shot, Heat Tool, 2-Way Glue, Stampin’ Dimensionals and SNAIL

Card 2:

Stamp Set: Lotus Blossom Photopolymer

Ink: Crisp Cantaloupe, Calypso Coral and Old Olive Classic Stampin’ Ink

Stampin’ Write Marker: Old Olive

Card Stock: Sahara Sand and Whisper White

Specialty Paper: Gold Fancy Foil Designer Vellum

Framelits: Circles Collection

Thinlits: Hello You

Embellishments: Crisp Cantaloupe Thick Baker’s Twine

Tools: Big Shot, Paper Snips, 2-Way Glue, Stampin’ Dimensionals and SNAIL

Card 3:

Stamp Set: Big Day Clear Mount

Ink: Yellow Citrus and Aquamarine ColorBox Chalk Ink

Card Stock: Soft Sky and Coastal Cabana

Specialty Paper: Chalkboard

Designer Series Paper: Best Year Ever

Punches: Scalloped Tag Topper and Project Life Corner Rounder

Embellishments: Stacked with Love Designer Washi Tape, Best Year Ever Accessory Pack and 2013-2015 In-Color Sequin Assortment

Tools: Stamp-a-ma-jig, Crystal Effects, Stampin’ Dimensionals and SNAIL

Piglet MAT

Control Freaks January Blog Tour

freakwelcome2013

Hello! I hope that your week is off to a good start! I had a nice day at work and another crafty evening when I got home apart from my little Target run. Guess what?! It’s time for another Control Freaks Blog Tour! This month our theme is Love and just in time for Valentine’s day! There are lots of fun new products in the 2015 Occasions Catalog with a love theme and I hope that you get some inspiration from my projects today. If you are following along with the tour you have arrived here from my talented friend Debbie Henderson’s blog. I have two cards and a little treat holder for you this time around so let’s get to them!

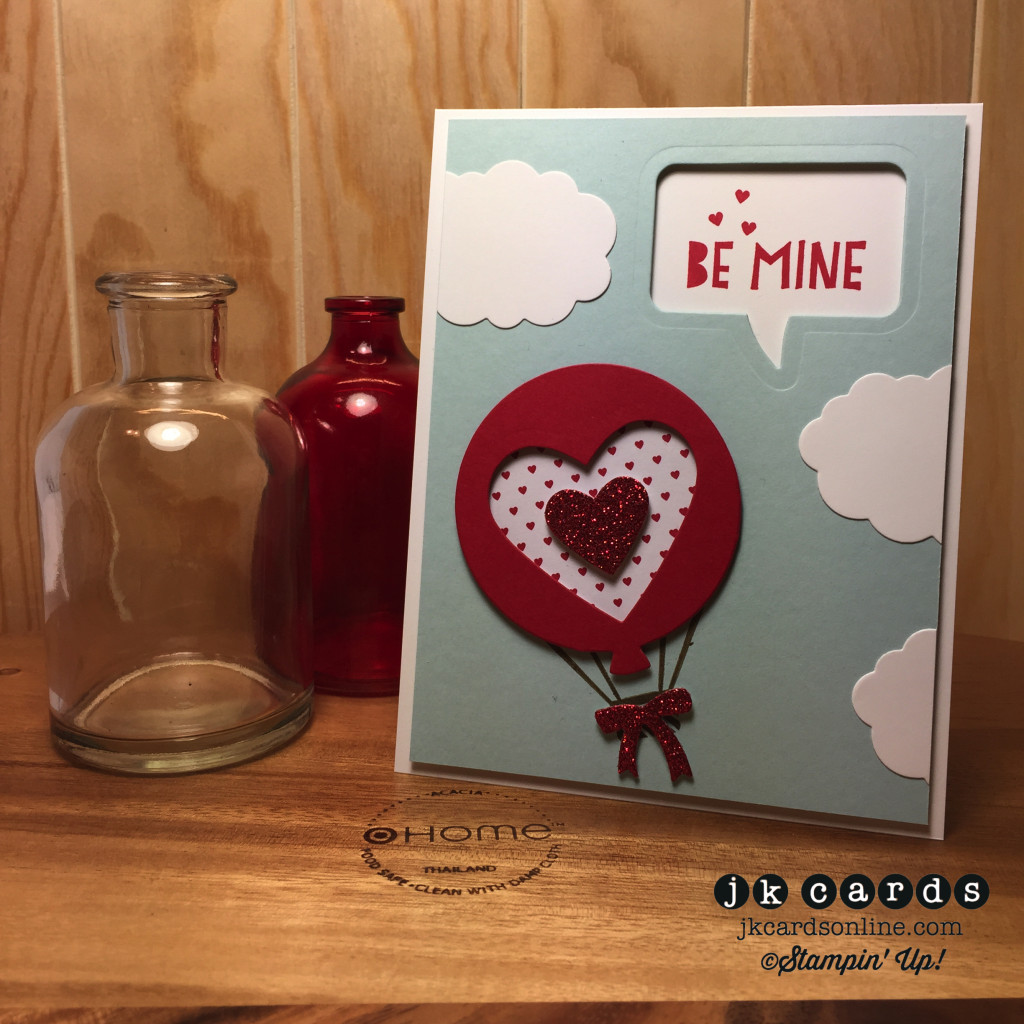
The first card that I have is a fun Valentine that would work for anyone. The base of the card is Whisper White Card Stock. I took a piece of Soft Sky and used the Word Bubbles Framelits to cut out the negative in the upper right corner. I also used the dies for the clouds that are cut from more Whisper White. The greeting is from the You Plus Me Stamp Set and is stamped in Real Red, using the negative cut out for placement and my Stamp-a-ma-jig. The ballon and the bow are cut out from Real Red and Red Glimmer paper using the Balloons Framelits. I cut out the heart in the middle of the ballon and another one from Red Glimmer Paper using the Hearts Collection Framelits. The basket is stamped in Soft Suede from the Celebrate Today Photopolymer Stamp Set. A piece of Stacked With Love Designer Series Paper is adhered behind the negative heart in the ballon and the balloon and red glimmer heart are adhered with Stampin’ Dimensionals. Finally I adhered my clouds to the background and the background to the base using Stampin’ Dimensionals. I think that this card would work for just about any age, don’t you?

Control Freaks January Blog Tour Love Balloon Card-WM

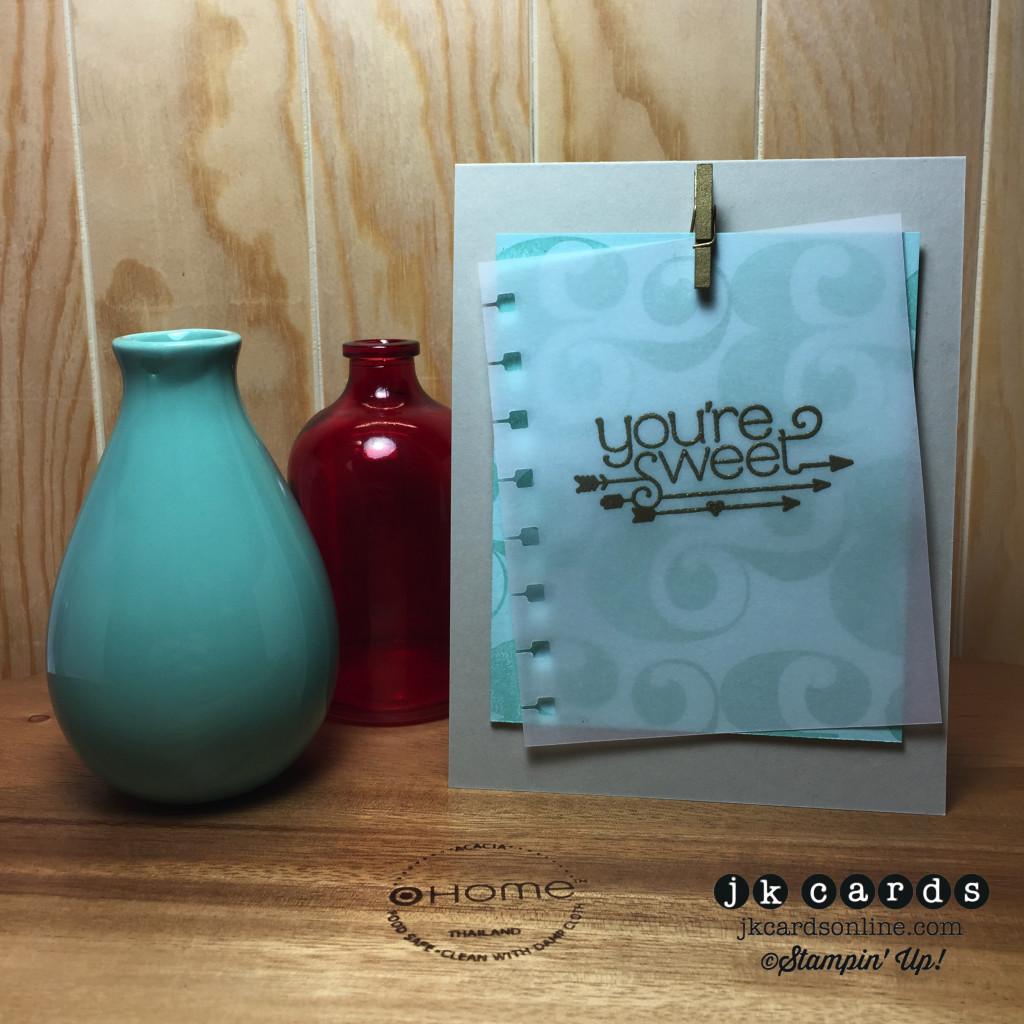
My second card is a nice simple one that would work for many different occasions. It begins with a base of Sahara Sand Card Stock. I used the You Plus Me Stamp Set and repeatedly stamped the ampersand in Pool party on Pool Party for the background. A piece of Vellum Card Stock cut to the same size as the Pool Party and has one of the greetings from the same set heat embossed in Gold Stampin’ Emboss Powder. I used the Spiral Border Punch along the left side and a Mini Metallic Clothespin holds the two sheets together. Some Stampin’ Dimensionals along the back of the Pool Party piece adhere the background to the card. A simple card that would make a great birthday, thank you or Valentine!

Control Freaks January Blog Tour Sweet Notebook Paper Vellum Card-WM

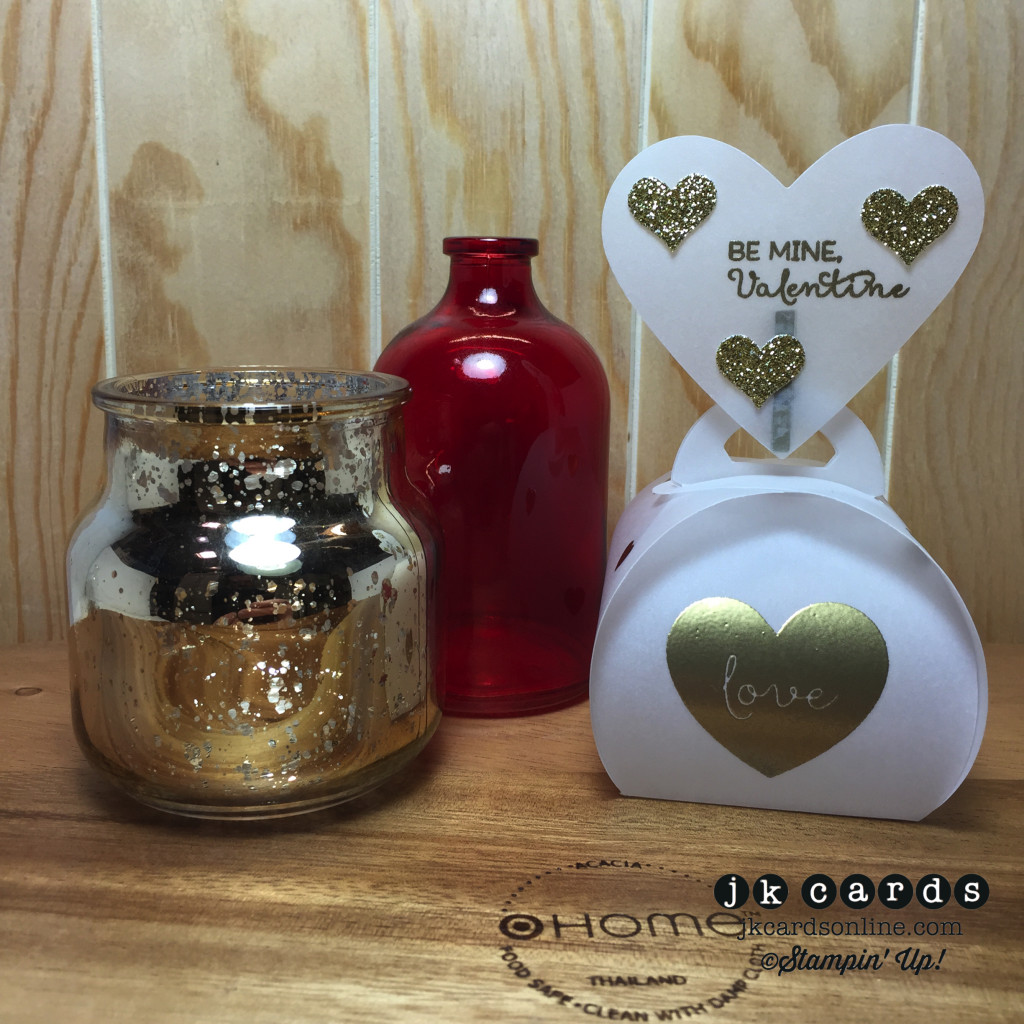
My last project for today is a little treat holder. I used some Vellum Card Stock and the Curvy Keepsake Box Thinlits for the holder. I cut another piece of Vellum out with the Hearts Collection Framelits for my topper. All of the stamps are from the January Paper Pumpkin Kit and are heat embossed in Gold Stampin’ Emboss Powder. Some Gold Glimmer paper is punched out with the heart from the Itty Bitty Accents Punch Pack and adhered to the Vellum heart with Glue Dots. A Mini Metallic Clothespin is adhered to the back of the heart with Sticky Strip and holds it to the handle on the that box. I would have filled this up with some M&M’s but unfortunately I finished the bag the other day! Time to get some more!

Control Freaks January Blog Tour Vellum Gold Lover Treat Holder-WM

So there you have my projects for this month’s Control Freak Blog Tour. I hope that you enjoyed them and that you are inspired to get started on some of your Valentine’s Day Cards! Next up is Clever Julie Davidson! Enjoy the rest of the tour and thanks so much for spending some time with me! Have a wonderful Tuesday!! 🙂

clickhere2013

Stampin’ Up! products used:

Love Balloon Card:

Stamp Sets: You Plus Me Clear Mount and Celebrate Today Photopolymer

Ink: Real Red and Soft Suede Classic Stampin’ Ink

Card Stock: Whisper White, Soft Sky and Real Red

Specialty Paper: Red Glimmer

Designer Series Paper: Stacked with Love stack

Framelits: Word Bubbles, Hearts Collection and Balloons

Tools: Bog Shot, Stampin’ Dimensionals and SNAIL


Sweet Notebook Paper Vellum Card:

Stamp Set: You Plus Me Clear Mount

Ink: Pool Party Classic Stampin’ Ink

Specialty Ink: Versa- Mark

Stampin’ Emboss Powder: Gold

Card Stock: Sahara Sand and Pool Party

Specialty Card Stock: Vellum

Punch: Spiral Border

Embellishments: Mini Metallic Clothespins

Tools: Sticky Strip, Stampin’ Dimensionals and SNAIL


Vellum Gold Love Treat Holder:

Stamp Set: January paper Pumpkin Kit

Specialty Ink: Versa-Mark

Stampin’ Emboss Powder: Gold

Specialty Card Stock: Vellum

Thinlits: Curvy Keepsake Treat Box

Framelits: Hearts Collection

Embellishments: Mini Metallic Clothespins

Tools: Big Shot, Fast Fuse, Sticky Strip and Glue Dots

Piglet MAT


Control Freaks December Blog Tour

freakwelcome2013

Hello everyone and welcome to the Control Freaks December Blog Tour. This month we are featuring sneak peeks from the upcoming 2015 Occasions and Sale-A-Bration Catalogs. You can order from the catalogs starting January 6, 2015. If you are following along on the tour you have arrived here from Melissa Davies blog. Such awesome projects as always. I have two cards and a treat holder for you today! I kept my theme very masculine too! Love all of the new “guy” stamp sets and Designer Series Paper in the new catalog!

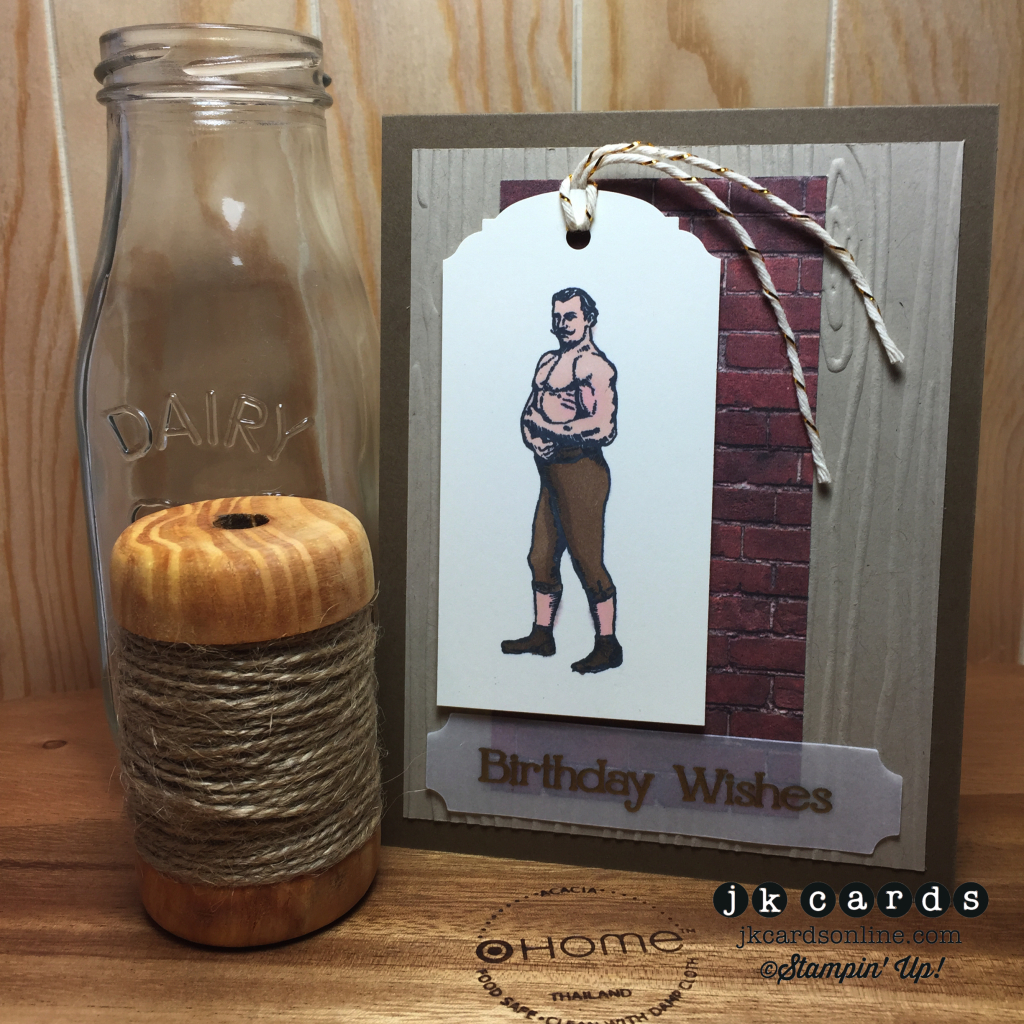
Lets get started with my first card which is a birthday card. The card base is Soft Suede Card Stock and the background is a piece of Crumb Cake that I embossed with my favorite, the Woodgrain Textured Impressions Embossing Folder. A piece of paper from the Adventure Bound Designer Series Paper Stack is adhered on top of that. To create my tag I used the new Ornate Tag Topper punch and a piece of Very Vanilla. My image is from the Guy Greetings Photopolymer Stamp Set and is stamped in Memento Tuxedo Black and colored in with my Crumb Cake and Skin Tone Assortment Stampin’ Blendabilities Markers. A piece of Gold Baker’s Twine is knotted in the top and the tag is adhered to the card with Stampin’ Dimensionals. A few dots of Crystal Effects keep the tails in place. My greeting is from the Four You Stamp Set and is heat embossed on Vellum and cut out with the Project Life Cards and Labels Framelits. Some carefully placed 2-Way Glue adheres it to the card. I love the new Adventure Bound Designer Series Paper Stack, the photographic pages are great and they are all neat prints on the other side!

Control Freaks December Tour Card 1-WM

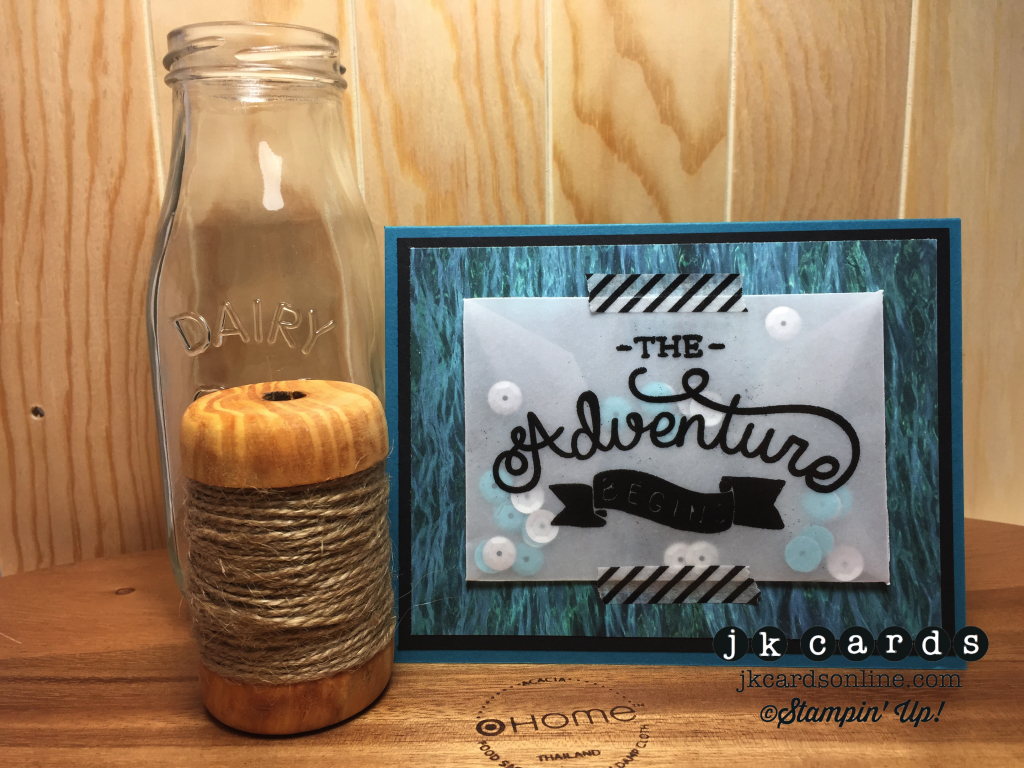
The second card that I have for you is a masculine take on a shaker card. For this one I used Island Indigo Card Stock for the card base. The background is another piece of paper from the Adventure Bound Designer Series Paper Stack backed with a piece of Basic Black before adhering it to the card base. I used the Gift Card Envelope & Trims Thinlit to cut out a piece of Vellum. The greeting is from the Adventure Awaits Photopolymer Stamp Set and is heat embossed in Black Stampin’ Emboss Powder. I put the envelope together with some Fast Fuse Adhesive and before closing the last flap I sprinkled in some Frosted Sequins and a few light blue ones that I had. The envelope is adhered to the card with some more Fast Fuse and two pieces of Stacked with Love Designer Washi Tape are placed on the top and bottom. I love the rippled water picture with the Island Indigo and Basic Black. The envelope makes a cool shaker for the sequins too!

Control Freaks December Tour Card 2-WM

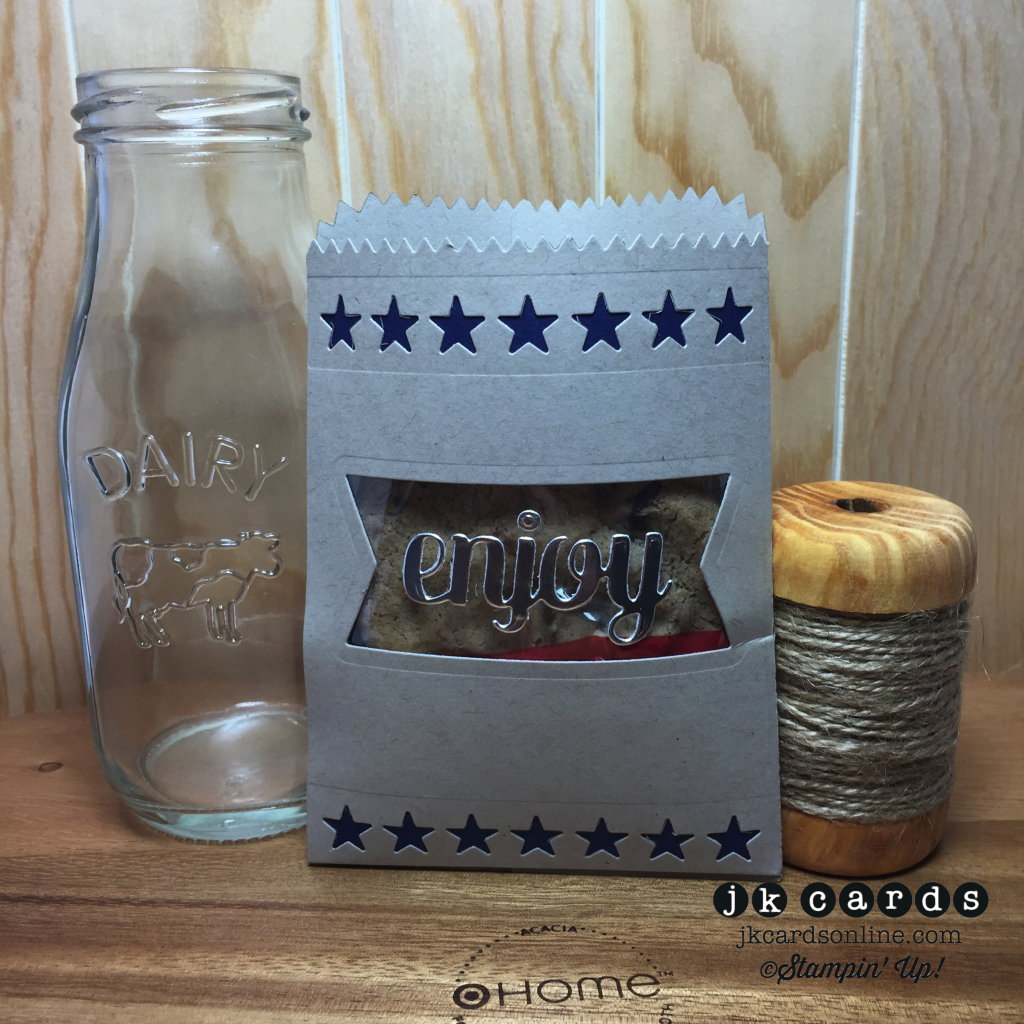
For my final project I have a little treat bag. This is a made with a new Thinlit that’s pretty cool! Some Crumb Cake Card Stock is cut out with the new Mini Treat Bag Thinlits. I used some of the other elements in the Thinlits to cut out the two star borders and the center window. A piece of Window Sheet is adhered behind the middle cut out and some Night of Navy behind the stars. The enjoy is cut out form a piece of Silver Foil Sheet and adhered to the window with Multi-Purpose Glue. I put the bag together with Sticky Strip and slid a rather large chocolate chip cookie inside. A pretty neat way to give a little gift and since you make the bag yourself it can be made from and Designer Series Paper or Card Stock. You can coordinate it with anything that you would like!

Control Freaks December Tour Mini Treat Bag-WM

So there is a nice big sneak peek at some of my favorite things from the upcoming 2015 Occasions Catalog! I hope that you enjoyed the card and treat bag and that you have found a little inspiration for what you might like from the catalog! Now you can continue on with the tour by visiting the talented Judy DiScipio’s blog. She has some fun stuff for you! Thank you very much for touring with us and I wish you all a very Merry Christmas and Happy New Year!! 🙂

clickhere2013

Stampin’ Up! products used:

Card 1:

Stamp Sets: Guy Greetings Photopolymer and Four You Clear Mount

Ink: Memento Tuxedo Black

Stampin’ Blendabilities Markers: Crumb Cake and Skin Tone

Specialty Ink: Versa-Mark

Stampin’ Emboss Powder: Gold

Card Stock: Soft Suede, Crumb Cake and Very Vanilla

Specialty Card Stock: Vellum

Designer Series Paper: Adventure Bound Stack

Framelits: Project Life Cards and Labels

Punch: Ornate Tag Topper

Embossing Folder: Woodgrain

Embellishment: Gold Baker’s Twine

Tools: Big Shot, Heat Tool, 2-Way Glue, Crystal Effects, Stampin’ Dimensionals and SNAIL

Card 2:

Stamp Set: Adventure Awaits Photopolymer

Specialty Ink: Versa-Mark

Stampin’ Emboss Powder: Black

Card Stock: Island Indigo and Basic Black

Specialty Card Stock: Vellum

Designer Series Paper: Adventure Bound Stack

Embellishments: Stacked with Love Designer Washi Tape and Frosted Sequins

Tools: Big Shot, Heat Tool, Fast Fuse and SNAIL

Treat Pouch:

Card Stock: Crumb Cake and Night of Navy

Specialty: Window Sheet and Silver Foil Sheet

Thinlits: Mini Treat Bag

Tools: Big Shot, Multi-Purpose Glue and Sticky Strip


Piglet MAT

Control Freaks October Blog Tour

freakwelcome2013

Hello there and welcome to this month’s Control Freaks Blog Tour! This time around our theme is Fall/Grateful! If you are following along on the tour that means that you have arrived here from the talented Heidi Boos! She’s so clever isn’t she?!?! I have two cards for you, a fun shaker and a simple card! I’m still loving all of the fun goodies in the Holiday Catalog, what have you gotten so far?!

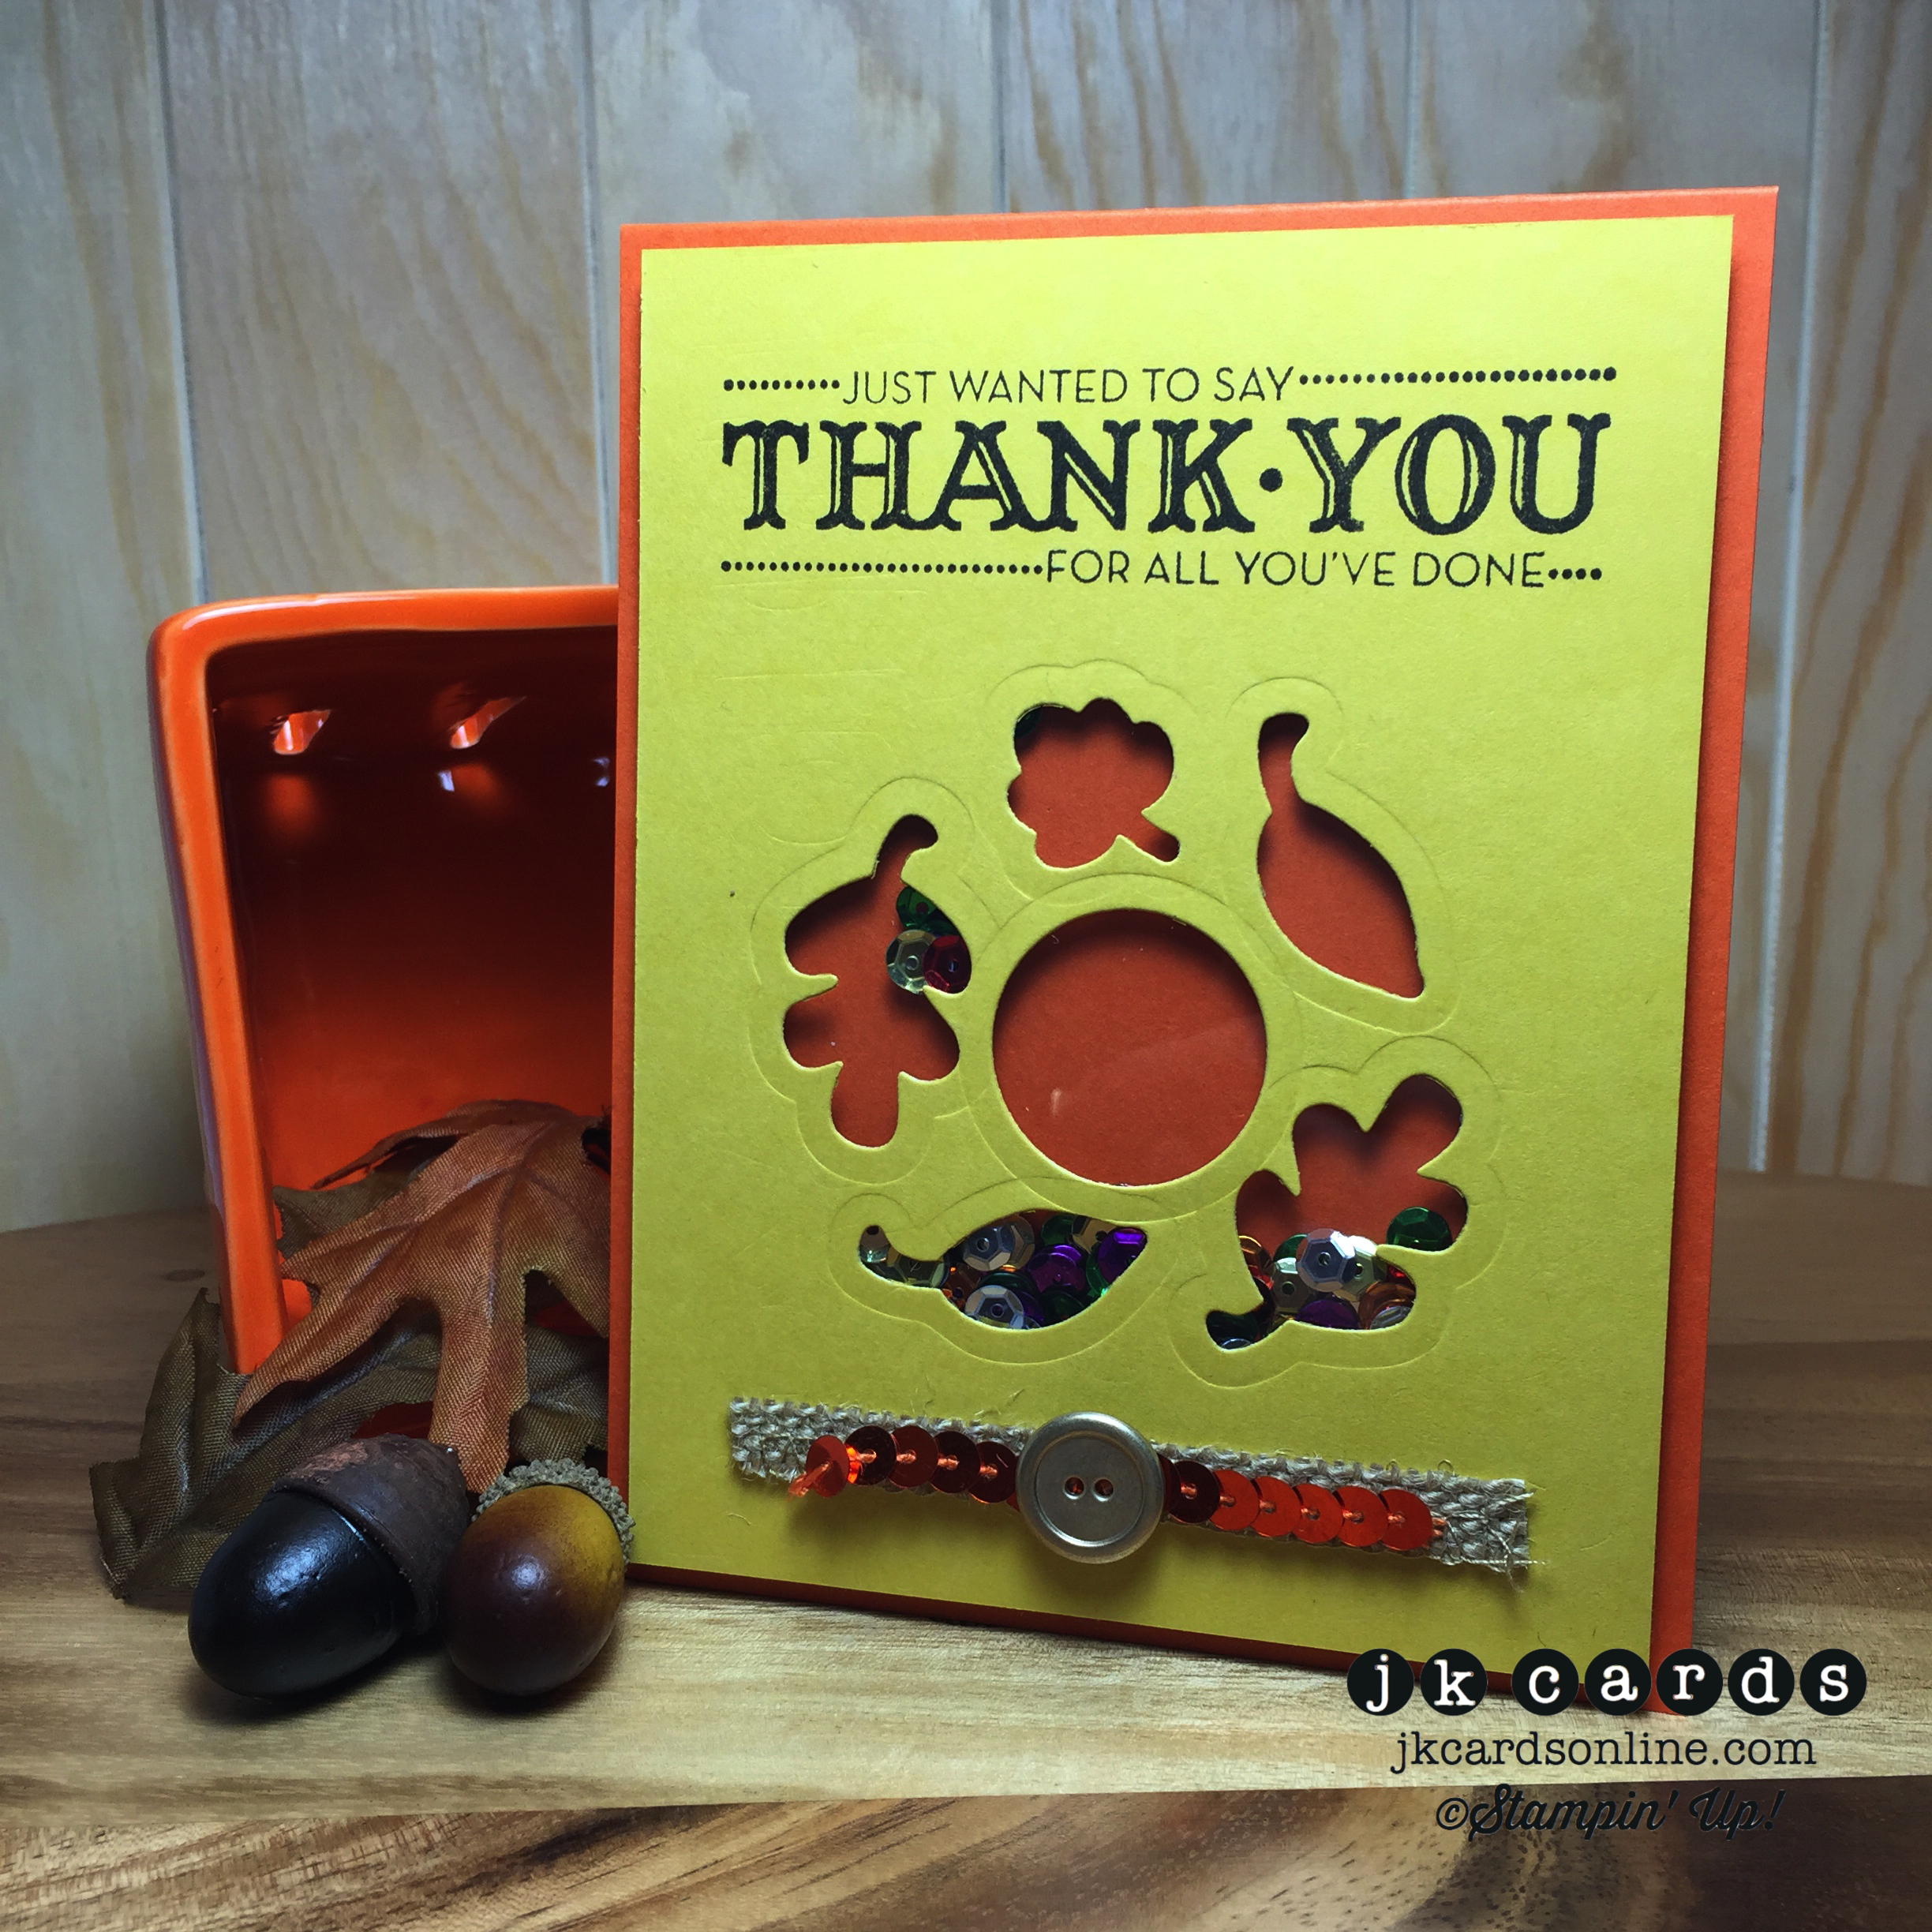
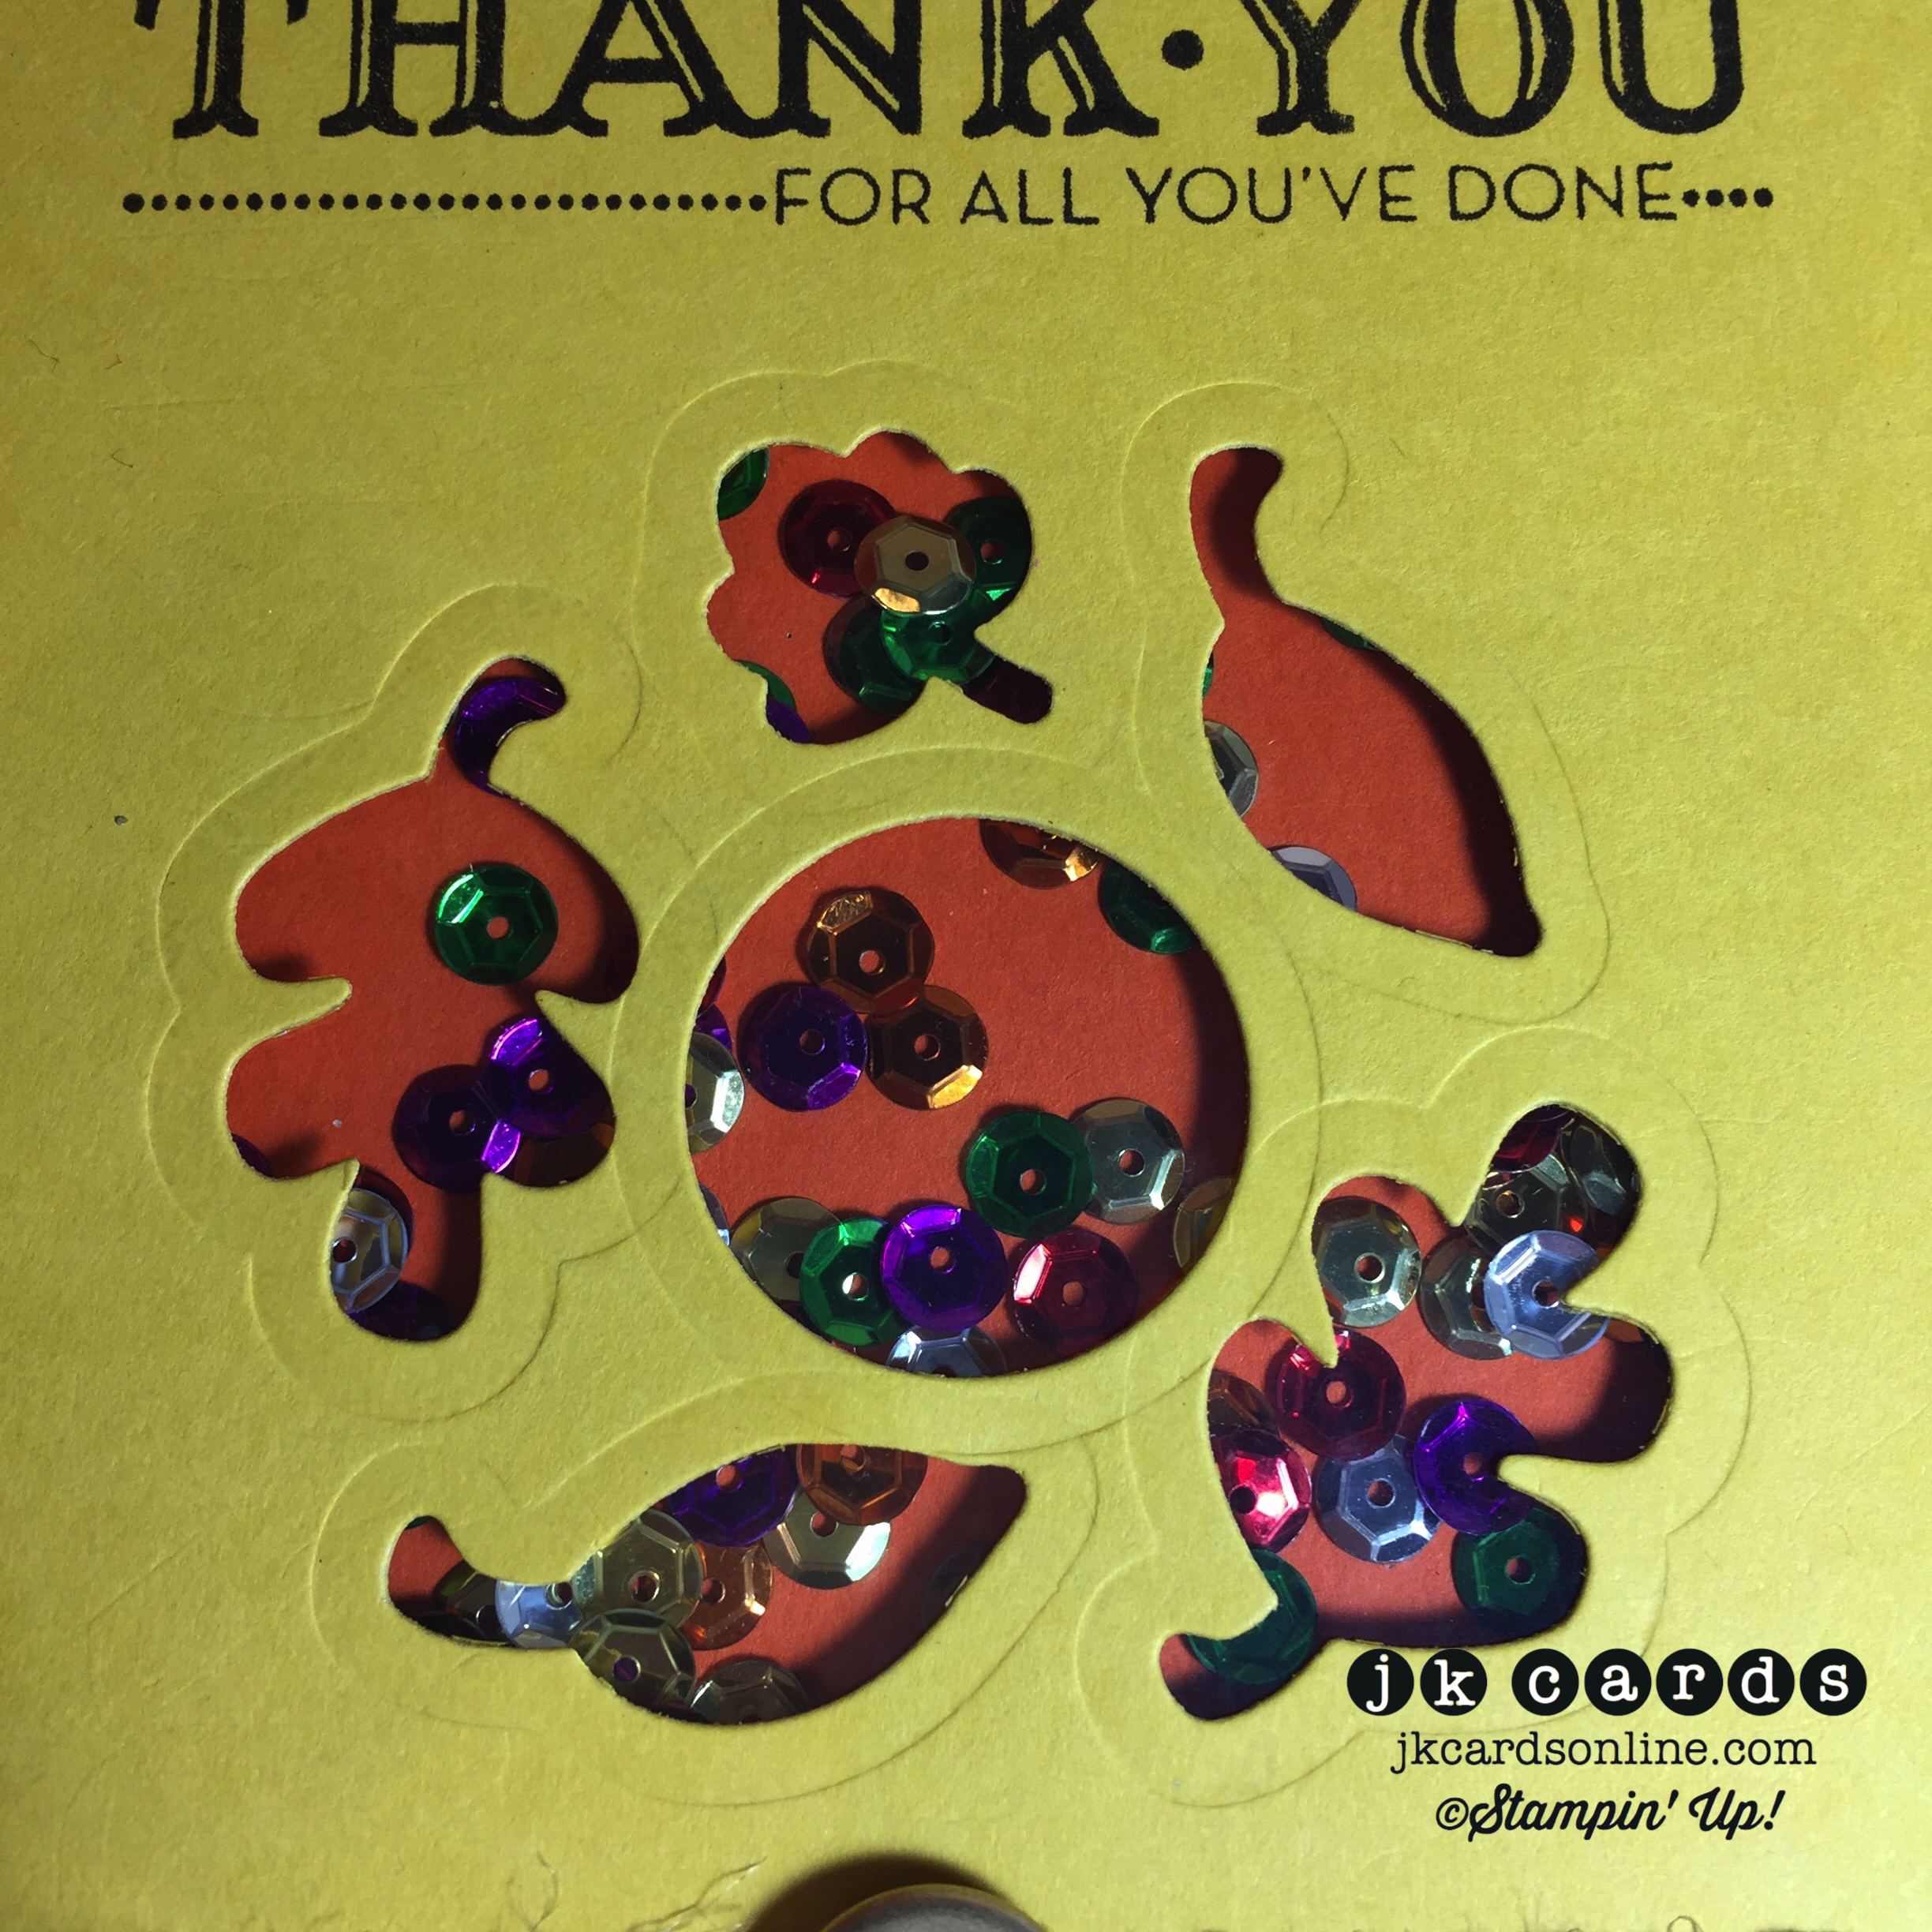
First up is the shaker card. I have been having so much fun making this type of card and they are very trendy right now! For the card base I used a piece of Tangelo Twist Card Stock. The top panel is a piece of Hello Honey. I used the Fun Fall Framelits and the Circles Collection Framelits to cut out my leaves and circle. A piece of Window Sheet is adhered to the back with Multi-Purpose Glue. The greeting is from the Let Your Hair Down Host Stamp Set and is stamped in Early Espresso. A double layer of Stampin’ Dimensionals is adhered to the back and some multicolored sequins are put on the base before I adhered the panel and enclosed the sequins. Along the bottom I cut off some of a piece 1 1/4″ Burlap Ribbon and adhered it to the card with Fast Fuse Adhesive. On top of that is a piece of the Tangelo Twist Sequin Trim from the September Paper Pumpkin Kit. To finish it off I adhered one of the Gold Basic Metal Buttons with some Glue Dots on top if the burlap and sequin trim. I like to keep the rest of the card simple when it’s a shaker so as not to take away from the fun of whats inside!

Control Freaks October 2014 Blog Tour Shaker Card-WM

Control Freaks October 2014 Blog Tour Shaker Card Close-WM

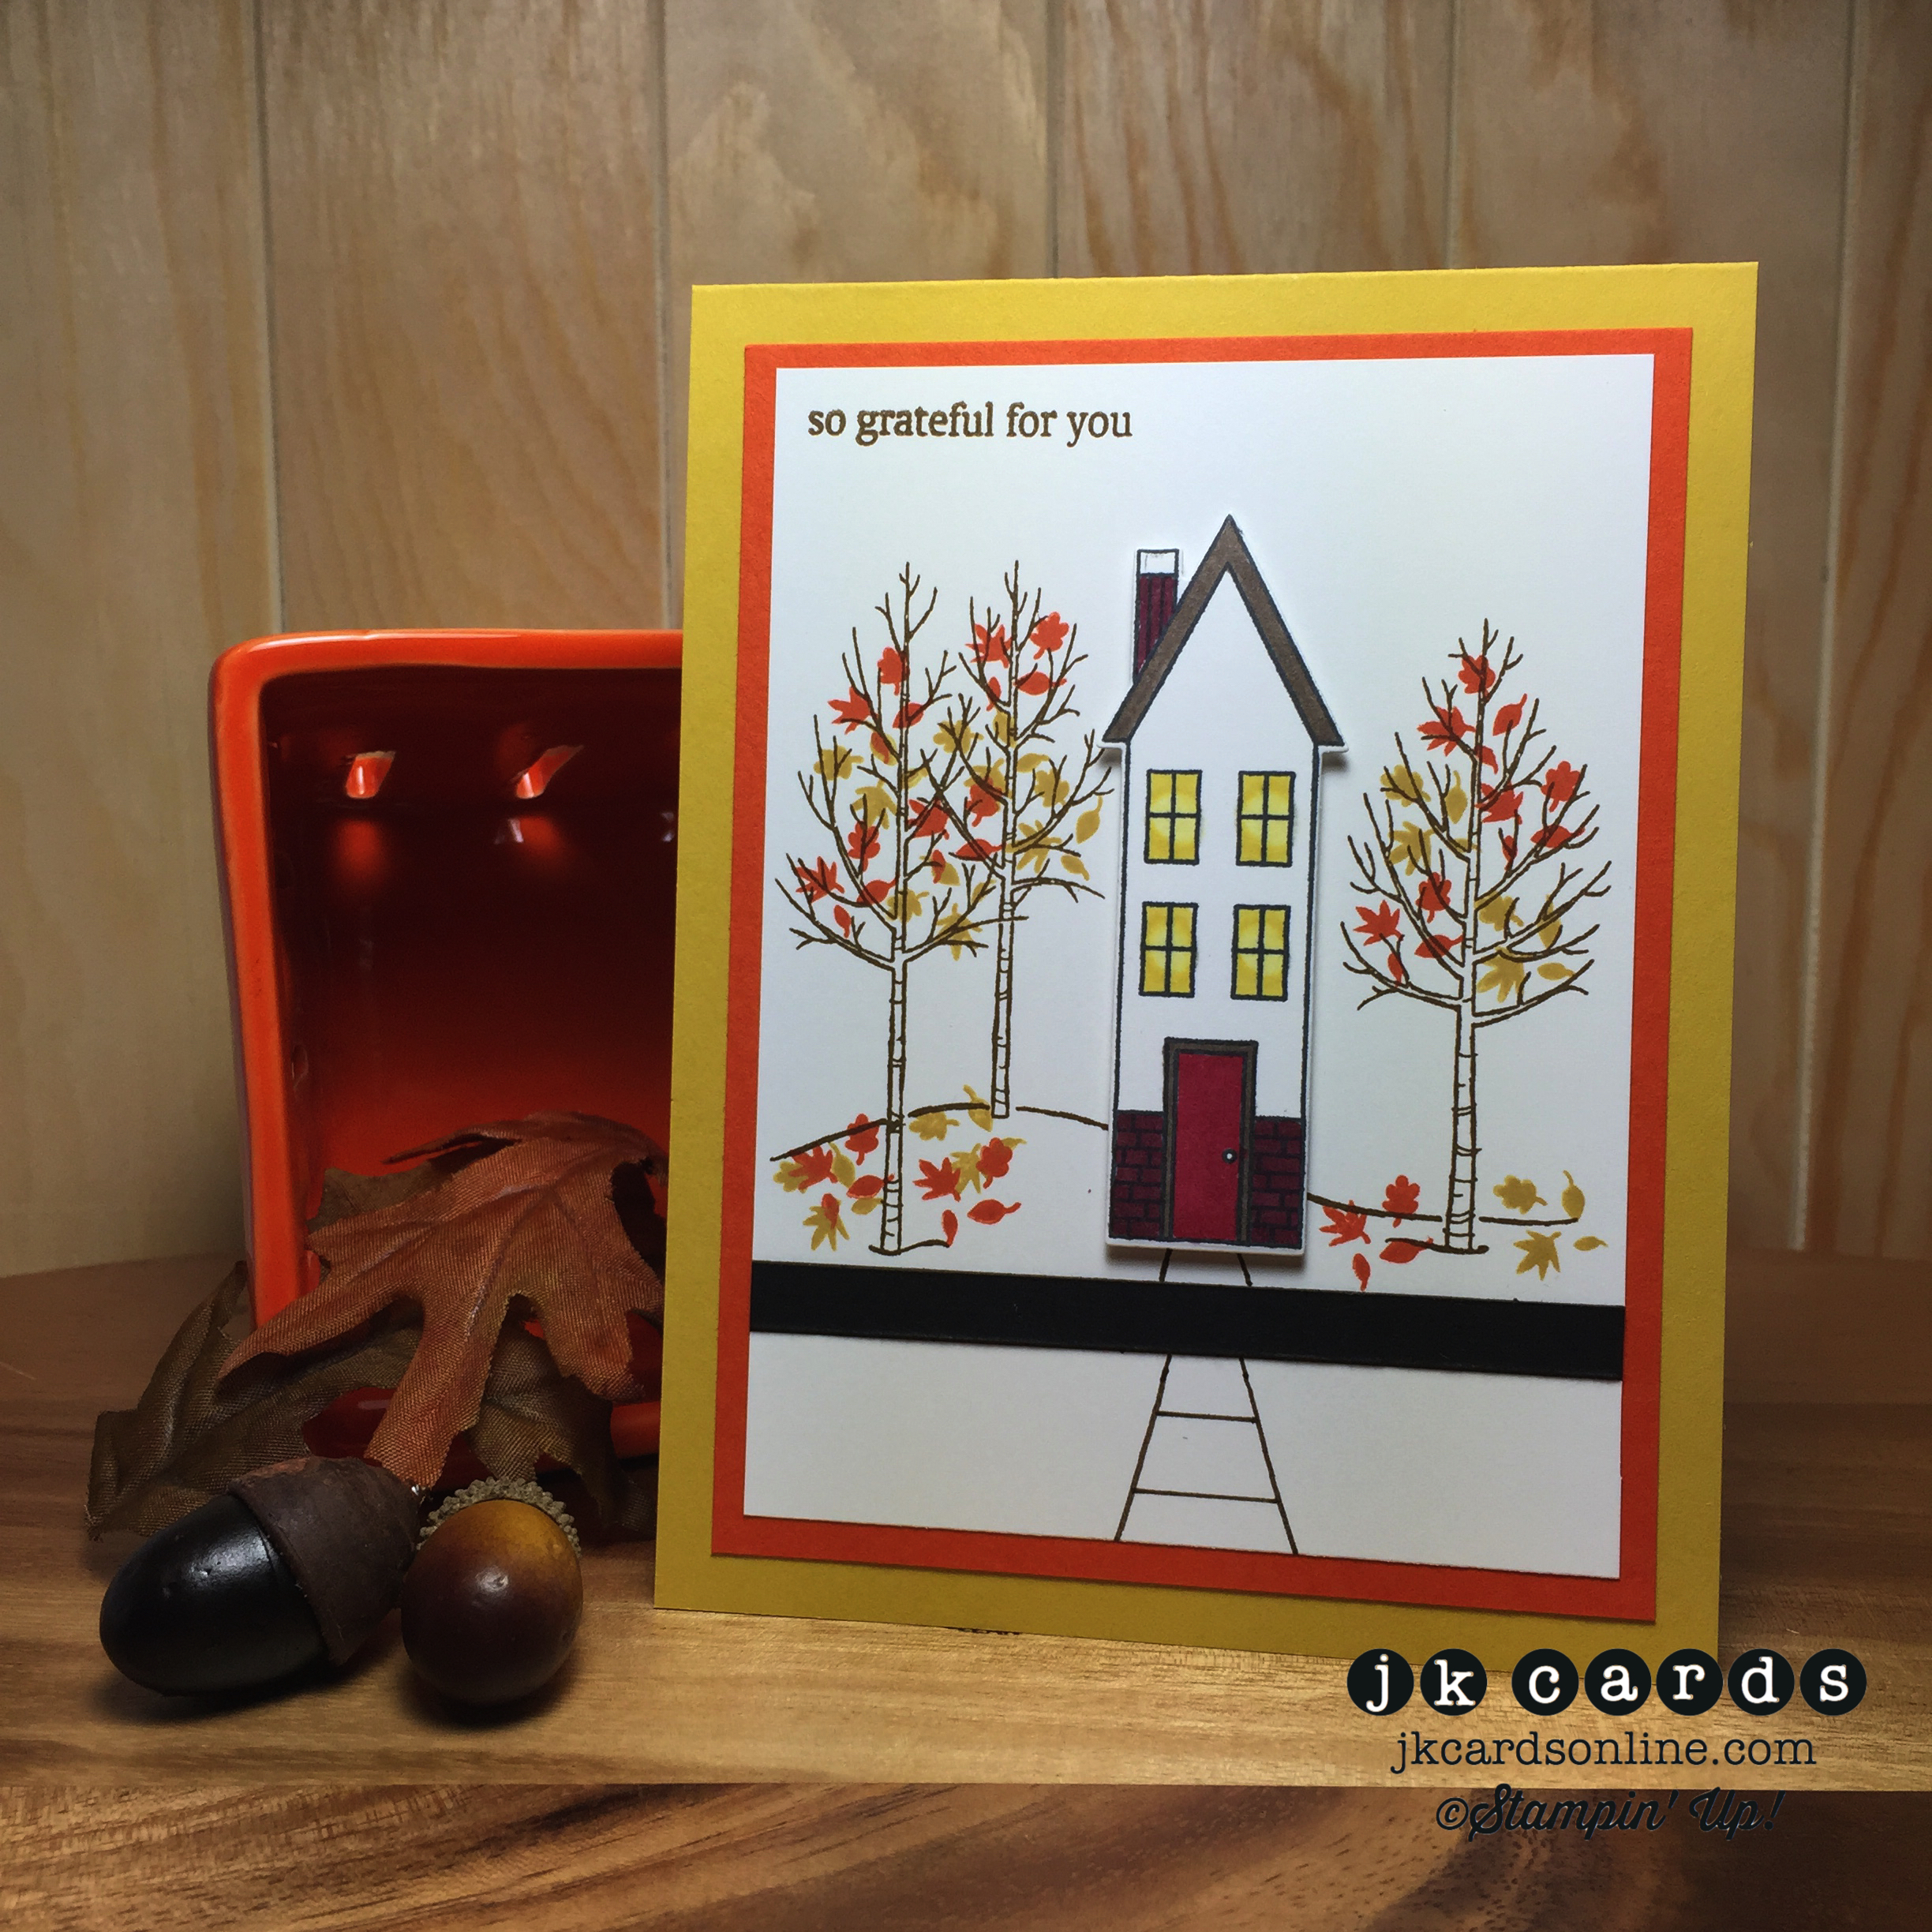
Next up is a simple thank you card. The card starts off with a base of Hello Honey Card Stock and on top of that is a piece of Tangelo Twist. My background is a piece of Whisper White and I stamped the trees in Soft Suede from the White Christmas Photopolymer Stamp Set. My leaves, House and Greeting are form the Holiday Home Photopolymer Stamp Set. The leaves are stamped in Tangelo Twist and Hello Honey and the greeting in Soft Suede. I stamped the house in Memento Tuxedo Black and colored it in with my Crumb Cake, Cherry Cobbler and Daffodil Delight Stampin’ Blendabilities Markers. The Homemade Holiday Framelits cut out my house and then a few Stampin’ Dimensionals adhere it to the card. A piece of basic Black serves as a walkway some lines drawn in with my Early Espresso Stampin’ Write Markers gives it a little depth. I love the Holiday Home Set and the matching Homemade Holiday Framelits, they are just so neat!

Control Freaks October 2014 Blog Tour House Card-WM

So there you have my two cards for the October Control Freaks Blog Tour. I hope that you enjoyed them and if you haven’t tried making a shaker card hopefully you will, they are a lot of fun! Next up we have the talented LeAnn Greff! I’m sure that you will enjoy her projects, they are always great! Thank so much for coming by to see mine! Have a great day! 🙂

clickhere2013

Stampin’ Up! products used:

Shaker Card:

Stamp Set: Let Your Hair Down (Host) Clear Mount

Ink: Early Espresso Classic Stampin’ Ink

Card Stock: Tangelo Twist and Hello Honey

Specialty: Window Sheet

Framelits: Fun Fall and Circles Collection

Embellishments: Gold Basic Metal Buttons, 1 1/4″ Burlap Ribbon and Tangelo Twist Sequin Trim (September Paper Pumpkin Kit)

Tools: Big Shot, Multi-Purpose Glue, Glue Dots, Stampin’ Dimensionals and SNAIL
Home Card:

Stamp Sets: Holiday Home and White Christmas Photopolymer

Ink: Soft Suede, Tangelo Twist and Hello Honey Classic Stampin’ Ink

Stampin’ Write Marker: Early Espresso

Stampin’ Blendabilities Markers: Crumb Cake, Cherry Cobbler and Daffodil Delight

Card Stock: Hello Honey, Tangelo Twist, Whisper White and Basic Black

Framelits: Homemade Holiday

Tools: Big Shot, Stampin’ Dimensionals and SNAIL
Control Freaks September Blog Tour

freakwelcome2013

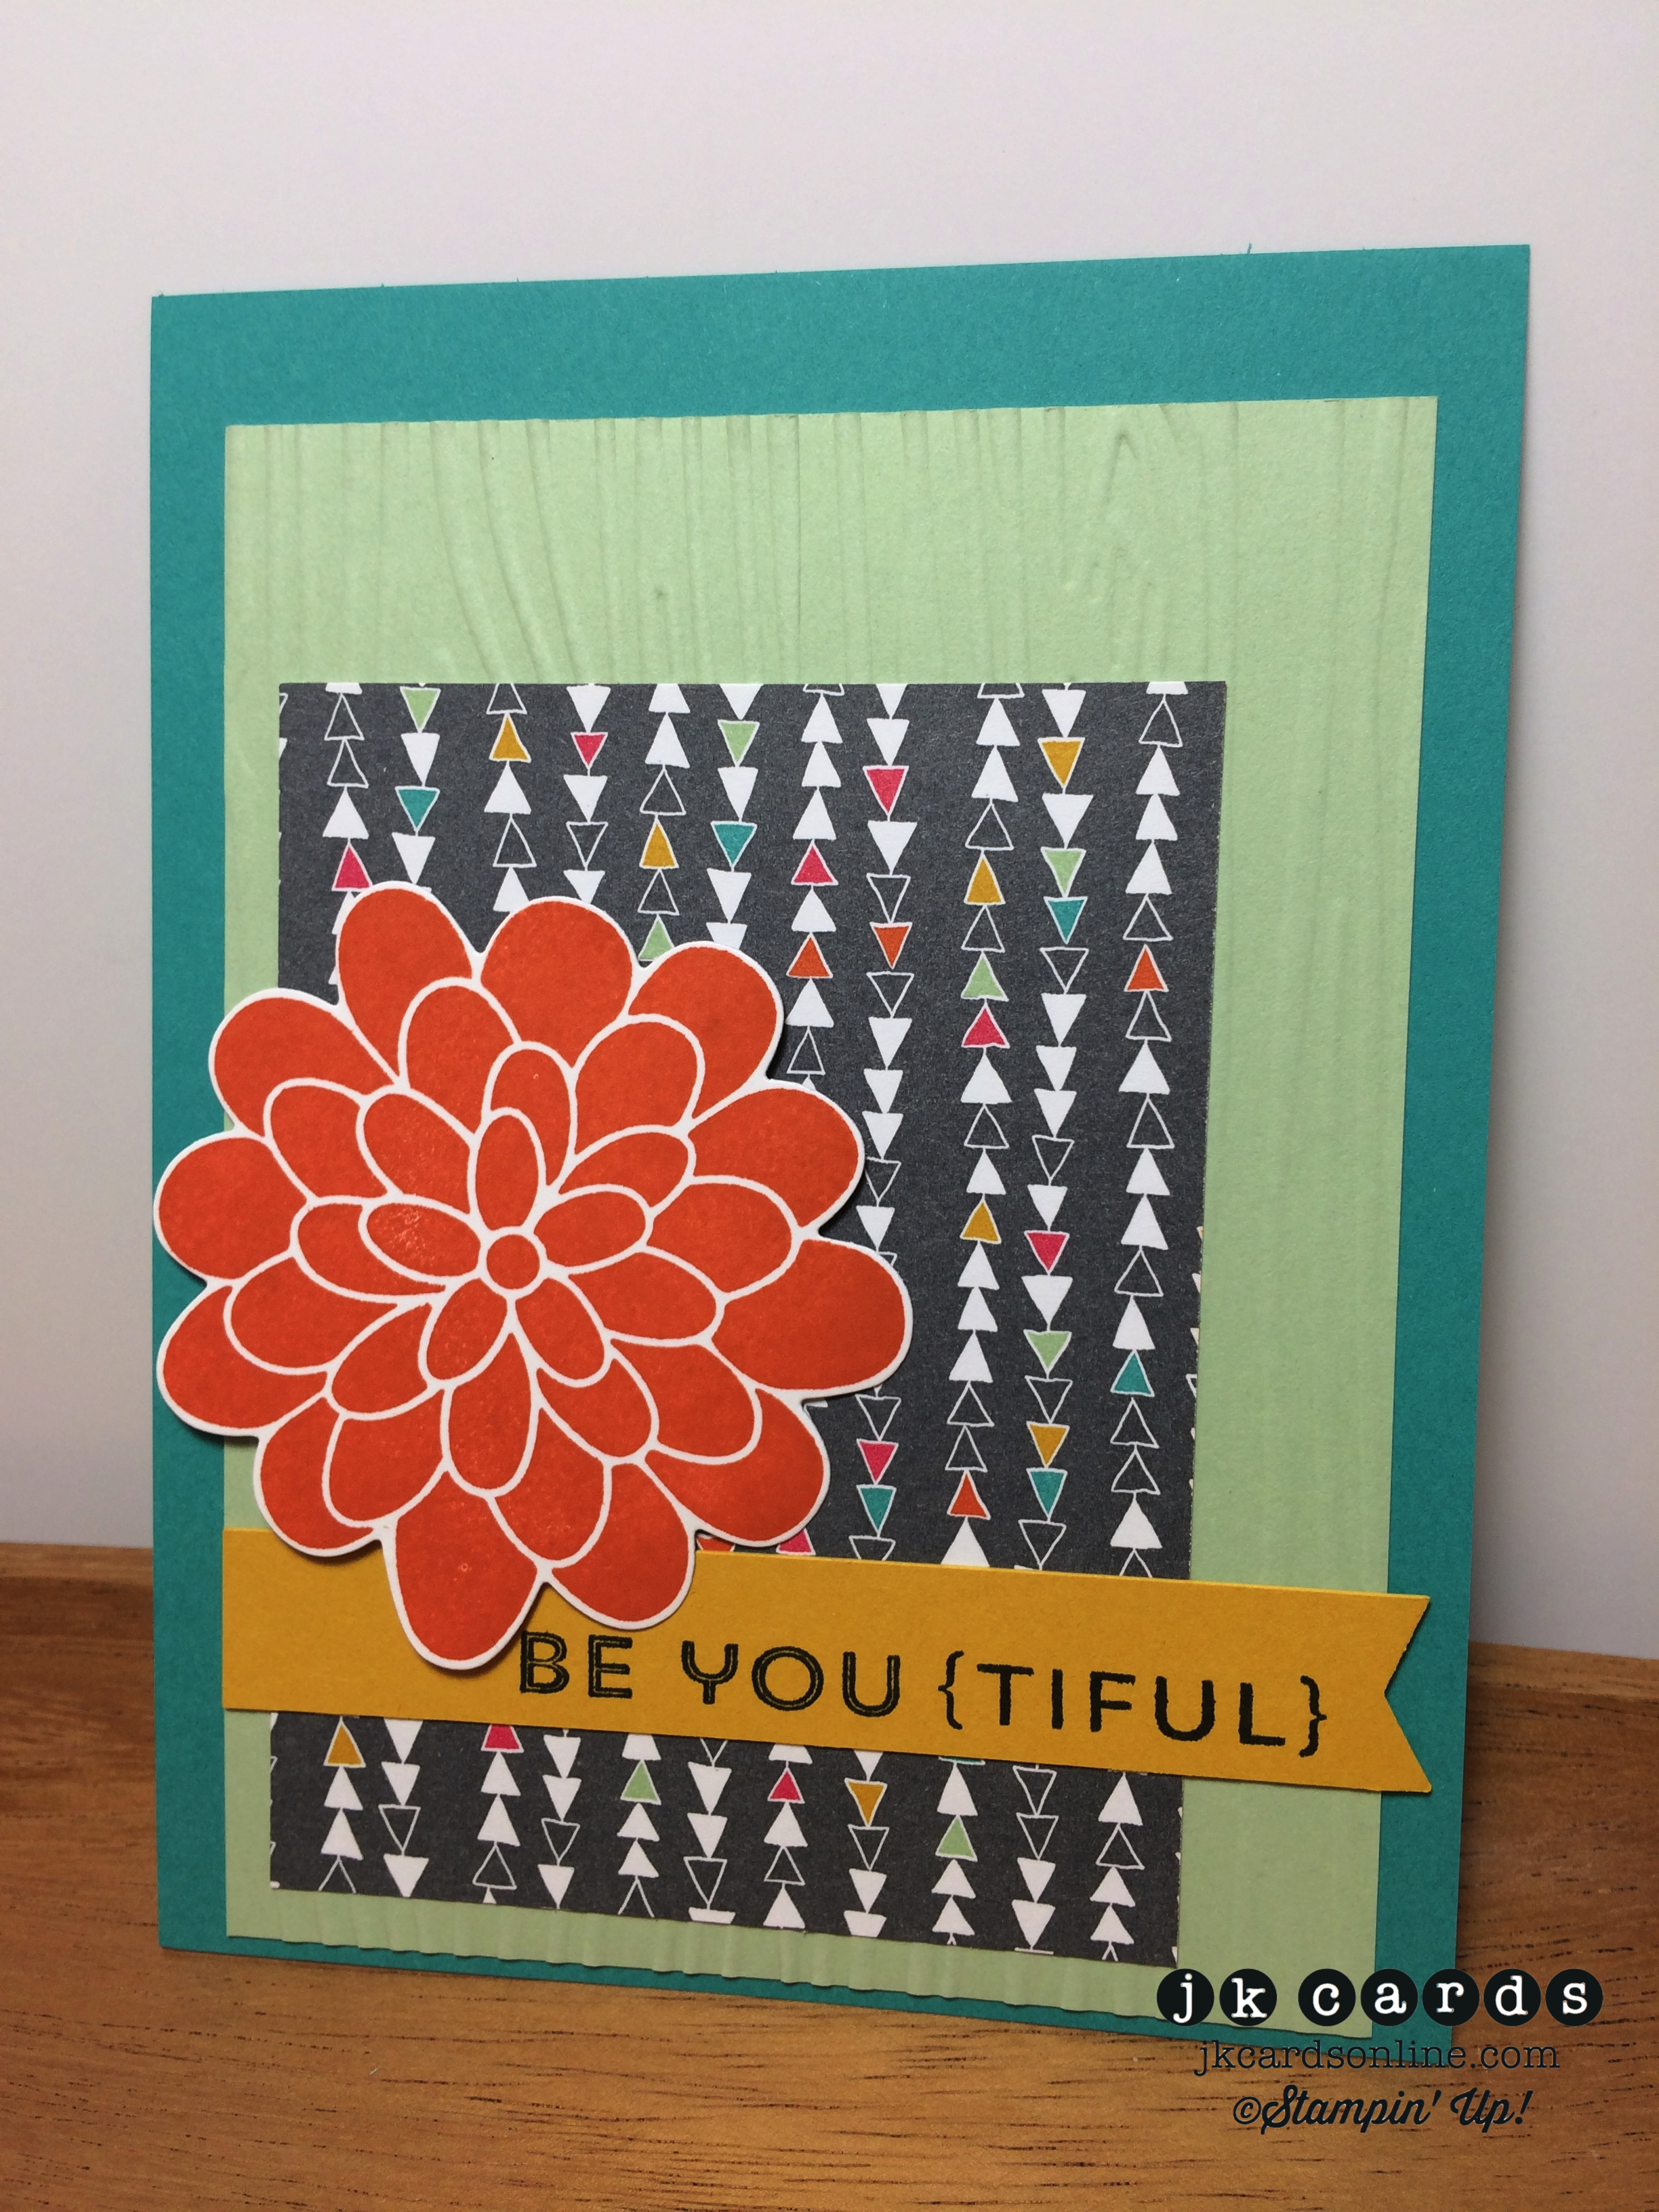
Hello there and welcome to this month’s Control Freaks Blog Tour! This time around the theme is Halloween! If you are following along on the tour that means that you have arrived here from the talented Julie Davison’s blog! Super projects don’t you think?!! I have two projects for you, a fun banner and a simple card!I’m loving all of the fun goodies in the Holiday Catalog, how about you?!

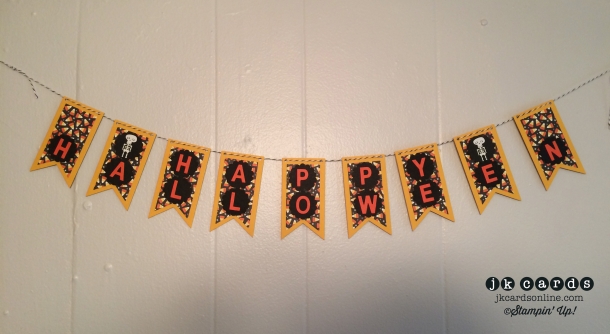
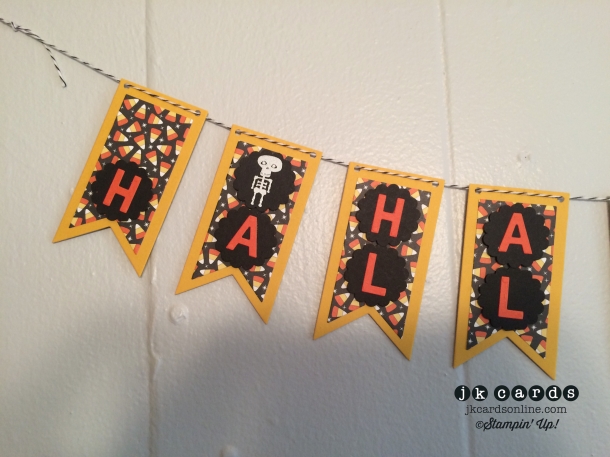
First up is my Halloween Banner. The bases of the banners are Crushed Curry Card Stock and the backgrounds are piece of paper from the Motley Monsters Designer Series Paper pack. I used the Banners Framelits to cut them out and then punched holes in the top corners with the 1/16″ Circle Punch. The letters are all cut out from Tangerine Tango with the Little Letters Thinlits. I used the 1 1/4″ Scallop Circle Punch to punch out the pieces of Basic Black that back each one. They are all adhered to the banners with Stampin’ Dimensionals. I stamped two skeletons from the Freaky Friends Stamp Set in Versa-Mark and heat embossed them with White Stampin’ Emboss Powder. Some Basic Black Baker’s Twine threaded through the banners and it’s ready to hung up. Lots of trips through the Big Shot but pretty simple to put together. A fun little Halloween decoration for any room in the house!

Control Freaks Sept. Blog Tour Halloween Banner-WM

Control Freaks Sept. Blog Tour Halloween Banner Close-WM

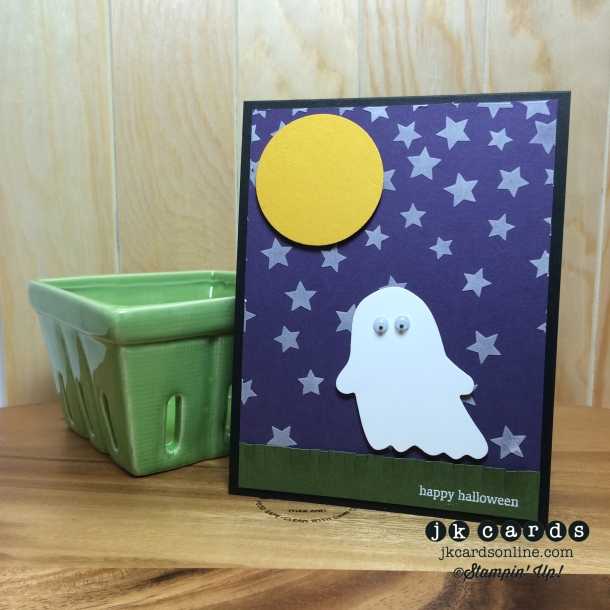
The second project I have for you is a simple card. The base of it is Basic Black Card Stock. I created the background with a piece of Elegant Eggplant and the stars mask from the Hearts and Stars Decorative Masks using embossing paste and a pallet knife. Along the bottom is a piece of Mossy Meadow and I used my Fringe Scissors to create some grass and heat embossed the sentiment from the Holiday Home Photopolymer Stamp Set in White Stampin’ Emboss Powder. I adhere it along the bottom and trimmed off the excess before adhering it to the card base. My moon is a piece of Crushed Curry that I punched out with the 1 3/4″ Circle Punch. The ghost is a piece of Wisper White that I cut out with the Fun Fall Framelits and adhered two googlie eye to. The moon and the ghost are adhered to the card with Stampin’ Dimensionals. A fun card for the special little person for Halloween!

Control Freaks Sept. Blog Tour Halloween Card-WM

Next up is the clever Margaret Raburn! Enjoy the rest of the tour and if you started here with me make sure that you go all the way around! Thank you so much for coming by and enjoy the rest of your day! 🙂

clickhere2013

Stampin’ Up! products used:

Halloween Banner:

Stamp Set: Freaky Friends Clear Mount

Specialty Ink: Versa-Mark

Stampin’ Emboss Powder: White

Card Stock: Crushed Curry, Basic Black and Tangerine Tango

Designer Series Paper: Motley Monsters

Framelits: Banners

Punch: 1 1/4″ Scallop Circle

Embellishment: Basic Black Baker’s Twine

Tools: Big Shot, Heat Tool, Stampin’ Dimensionals and SNAIL
Card:

Stamp Set: Holiday Home Photopolymer

Specialty Ink: Versa-Mark

Stampin’ Emboss Powder: White

Card Stock: Basic Black, Elegant Eggplant, Crushed Curry, Mossy Meadow and Whisper White

Framelits: Fun Fall

Punch: 1 3/4″ Circle

Mask: Hearts & Stars

Tools: Big Shot, Heat Tool, Fringe Scissors, Stampin’ Dimensionals and SNAIL

NON Stampin’ Up!: Embossing Paste and Pallet Knife

Control Freaks August Blog Tour!

freakwelcome2013

Hello there and welcome to this month’s Control Freaks Blog Tour! This time around the theme is simple and elegant! If you are following along on the tour that means that you have arrived here from the fabulous Debbie Henderson’s blog! Always a treat to see what she has for us! I have two cards for you both of which you would have no trouble mailing! Let’s get to them shall we?!

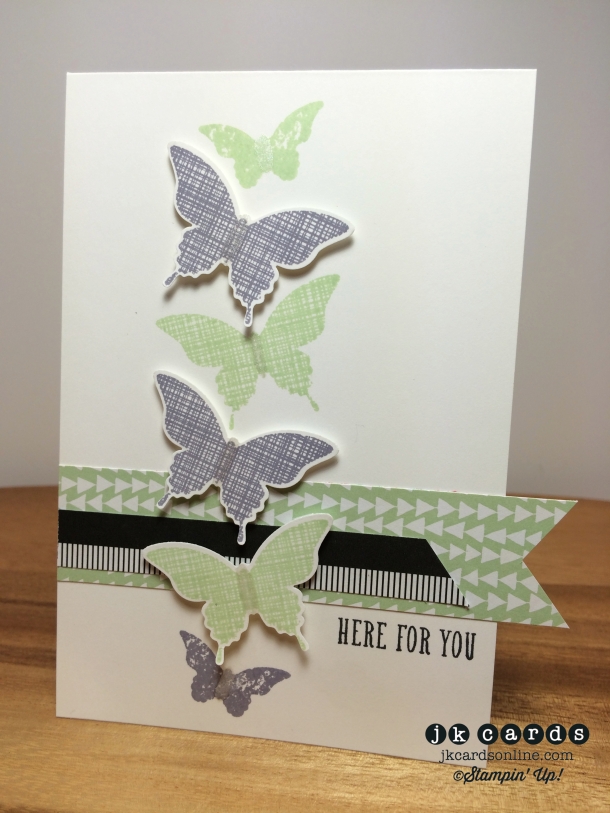
Up first is a simple card that uses a fun color combo. The base of the card is Whisper White Card Stock, cut to 3 3/4″ wide, and I used the Kinda Eclectic Stamp Set to stamp three of the butterflies, two in Pistachio Pudding and one in Wisteria Wonder at the bottom. A strip of Confetti Celebration Designer Series Paper goes across the lower half and is flagged on the right. A strip of Back to Black Designer Series Paper goes on top of that to the left. Three more butterflies are stamped, two in Wisteria Wonder and one in Pistachio Pudding. They are punched out with Elegant Butterfly Punch and adhered to the card with Stampin’ Dimensionals. My greeting is from the And Many More Stamp Set and is stamped in Memento Tuxedo Black just under the banner. A simple elegant card that would make a nice sympathy or encouragement card.

Control Freaks August Tour Card 2-WM

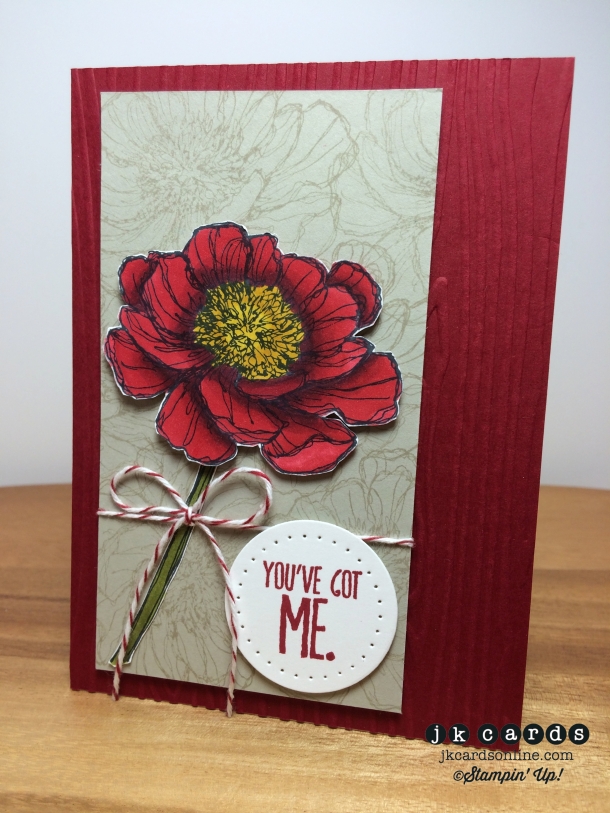
The second card uses one of my favorite embossing folders but on a color I don’t think I have used it on before. My card base is Whisper White Card Stock. The background is a piece of Cherry Cobbler that I embossed with the Woodgrain Textured Impressions Embossing Folder to cover the whole card front. I took a piece of Sahara Sand and stamped the flower from the Bloom With Hope Host Stamp Set in Sahara Sand randomly to create a subtle background. Next I stamped the same flower in Memento Tuxedo Black and colored it in with my Cherry Cobbler Stampin’ Blendabilities Markers. Some Paper Snips cut it and the stem out which is colored in with my Old Olive Stampin’ Blendabilities Markers. The stem is adhered with Multi-Purpose Glue and the flower with Stampin’ Dimensionals. Next up I tied a piece of Cherry Cobbler Baker’s Twine in a bow around the background and over the stem. My greeting is from the Something to Say Stamp Set and is stamped in Cherry Cobbler and cut out with the Circles Collection Framelits. I used the Essentials Paper-Piercing Pack and Paper-Piercing Tool to pierce the circle and them mounted it to the background with Stampin’ Dimensionals and the base to the card with some more Stampin’ Dimensionals. I love the depth that the Stampin’ Blendabilities Markers give the flower, it almost looks 3D, and the wood embossed Cherry Cobbler is pretty neat!

Control Freaks August Tour Card 1-WM

And there my two simple and elegant card for this month’s Control Freaks Tour! I really hope that you enjoyed and are inspired by them! Next up for your viewing pleasure is Dawn Olchefske! Enjoy the rest of the tour and if you started here with me make sure that you go all the way around! Thank you so much for coming by and enjoy the rest of your day! 🙂

clickhere2013

Stampin’ Up! products used:

Card 1:

Stamp Sets: Kinda Eclectic and And Many More Clear Mount

Ink: Wisteria Wonder and Pistachio Pudding Classic Stampin’ Ink and Memento Tuxedo Black

Card Stock: Whisper White

Designer Series Paper: Confetti Celebration and Back To Black

Punch: Elegant Butterfly

Tools: Stamp-a-ma-jig, Stampin’ Dimensionals and SNAIL

Card 2:

Stamp Sets: Bloom With Hope (Host) and Something To Say

Ink: Sahara Sand Classic Stampin’ Ink and Memento Tuxedo Black

Stampin’ Blendabilities Markers: Cherry Cobbler and Old Olive

Card Stock: Whisper White, Cherry Cobbler and Sahara Sand

Framelits: Circles Collection

Embossing Folder: Woodgrain

Embellishment: Cherry Cobbler Baker’s Twine

Tools: Big Shot, Paper Snips, Muti-Purpose Glue, Stampin’ Dimensionals and SNAIL
Control Freaks Convention Swap Blog Tour

freakwelcome2013

Welcome to this month’s Control Freaks Blog Tour Featuring our Convention swaps! I had the best time at Convention and it was amazing to see everyone in person for the swap!! If you are following the tour you have arrived here from the clever Mary Brown’s blog, now those were some great cards and that cute memo pad, WOW! This month I have two fun cards for you so let’s get to them!

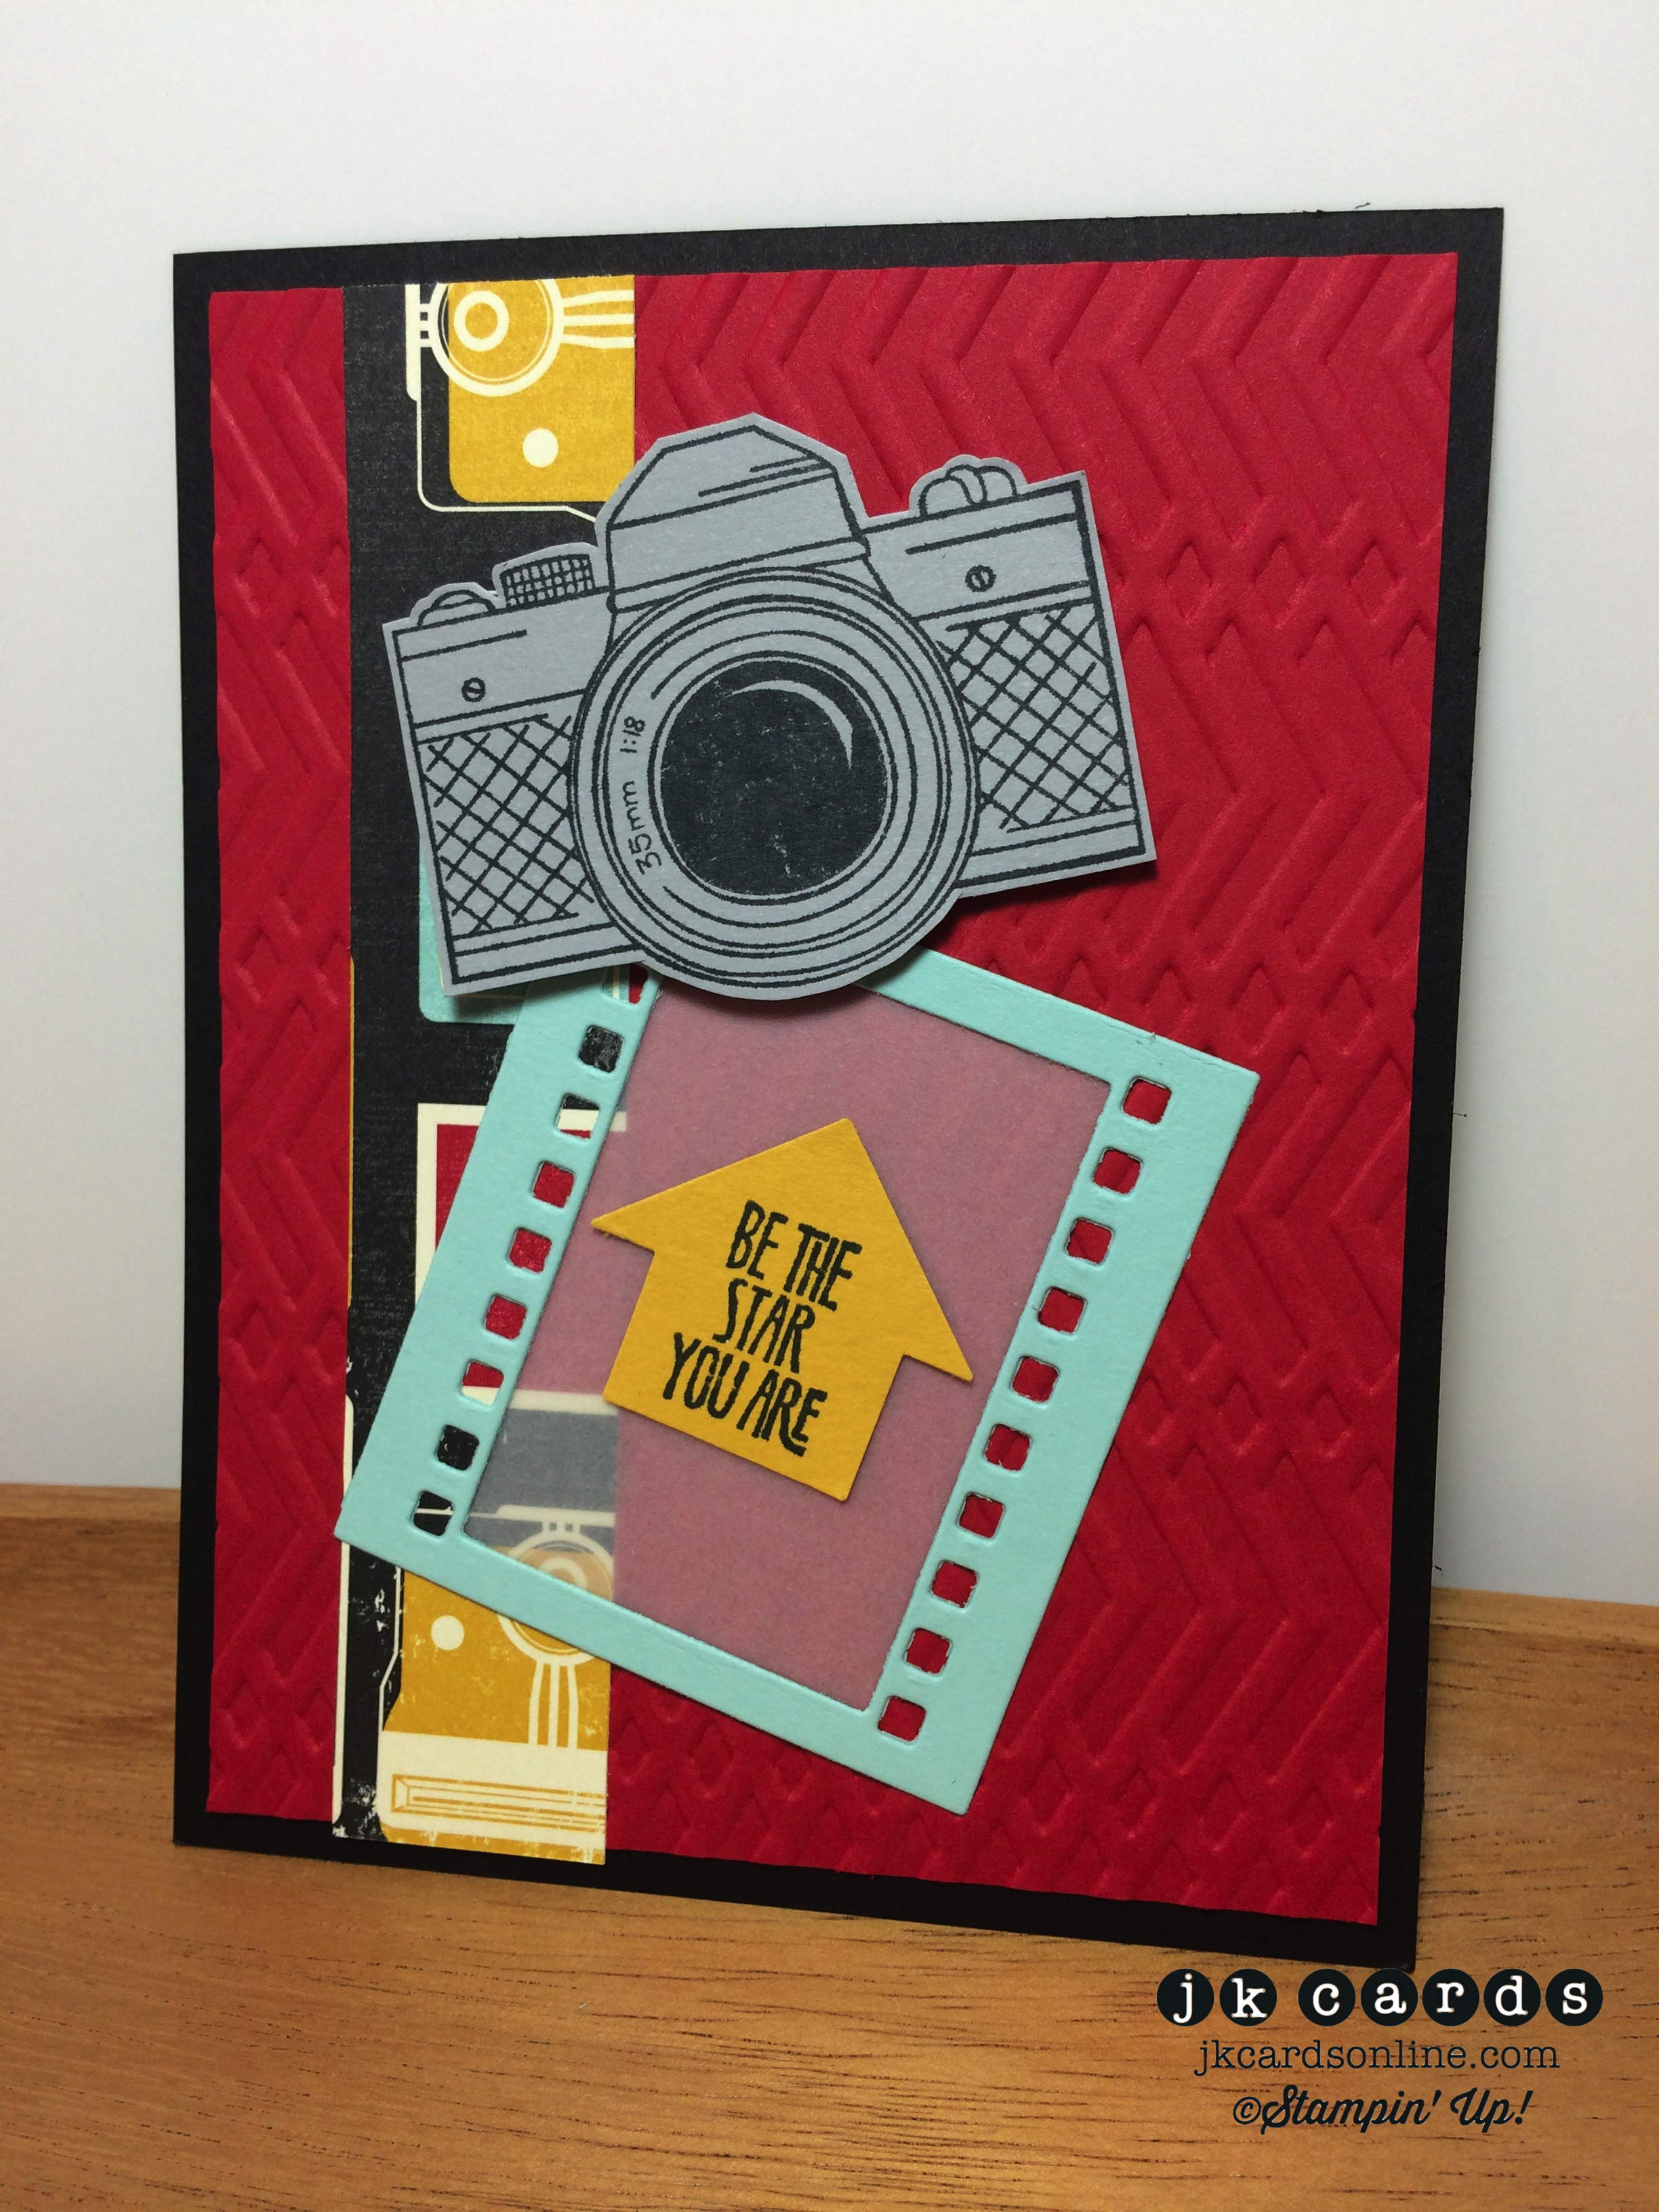
My first card starts off with a base of Basic Black Card Stock. For the background I used the Zig Zag Textured Impressions Embossing Folder on a piece of Real Red. A strip of Flashback Designer Series Paper goes down the left side. I used the On Film Framelits to cut out a piece of Pool Party and adhered a piece of Vellum to the back side. The greeting is from the Be the Star Stamp Set and is stamped in Basic Black and punched out with the What’s Up Punch. Finally I stamped the Snapshot Stamp in Memento Tuxedo Black on Smoky Slate and used my Paper Snips to cut it out. A few Stampin’ Dimensionals adhere it to the card. A fun bright card that would make a great birthday or just because card for anyone!

CF Conv Swap 1-WM

My second card uses the fun Flower Patch Photopolymer Stamp Set and the Flower Fair Framelits. Isn’t it great when you have a matching Stamp Set and Framelits?! I started my card off with a base of Bermuda Bay Card Stock and for the background I used a piece of Pistachio Pudding that I embossed with the Woodgrain Textured Impressions Embossing Folder. Next up is a piece of the Confetti Celebration Designer Series Paper. The flower is stamped in Tangelo Twist and cut out with the Framelits, a Stampin’ Dimensional holds it in place. The greeting is also from the Flower Fair Stamp Set and is stamped in Memento Tuxedo Black on Crushed Curry. I used the Banner Punch to create my flag on the right. I love the fun colors in the Confetti Celebration DSP and like I said the Stamp Set and Framelits together make everything better!

CF Conv Swap 2-WM

So, what did you think of my Control Freaks Convention 2014 Swaps?! I hope that you enjoyed them! Now you are off to see what the clever Heidi Boos has in store for you! Enjoy the rest of the tour and thanks for stopping by! 🙂

clickhere2013

Stampin’ Up! products used:

Card 1:

Stamp Sets: Be the Star Clear Mount and Snapshot Wood Mount

Ink: Memento Tuxedo Black

Card Stock: Basic Black, Real Red, Smoky Slate, Pool Party and Crushed Curry

Specialty Card Stock: Vellum

Designer Series Paper: Flashback

Framelits: On Film

Embossing Folder: Zig Zag

Punch: What’s Up

Tools: Big Shot, Paper Snips, Stampin’ Dimensionals and SNAIL
Card 2:

Stamp Set: Flower Patch Photopolymer

Ink: Tangelo Twist Classic Stampin’ Ink and Memento Tuxedo Black

Card Stock: Bermuda Bay, Whisper White and Crushed Curry

Designer Series Paper: Confetti Celebration

Framelits: Flower Fair

Embossing Folder: Woodgrain

Punch: Banner

Tools: Big Shot, Stampin’ Dimensionals and SNAIL