Control Freaks November Blog Tour

freakwelcome2013

Hello everyone and welcome to the November Control Freaks Blog Tour! Our theme for this month’s tour is Christmas! If you are following the tour then you have arrived here from Cindy Elam’s blog. She had some great stuff, didn’t she?! I have two home decor projects for you. Who couldn’t use a little inspiration to help with the decorating around your house this time of year?

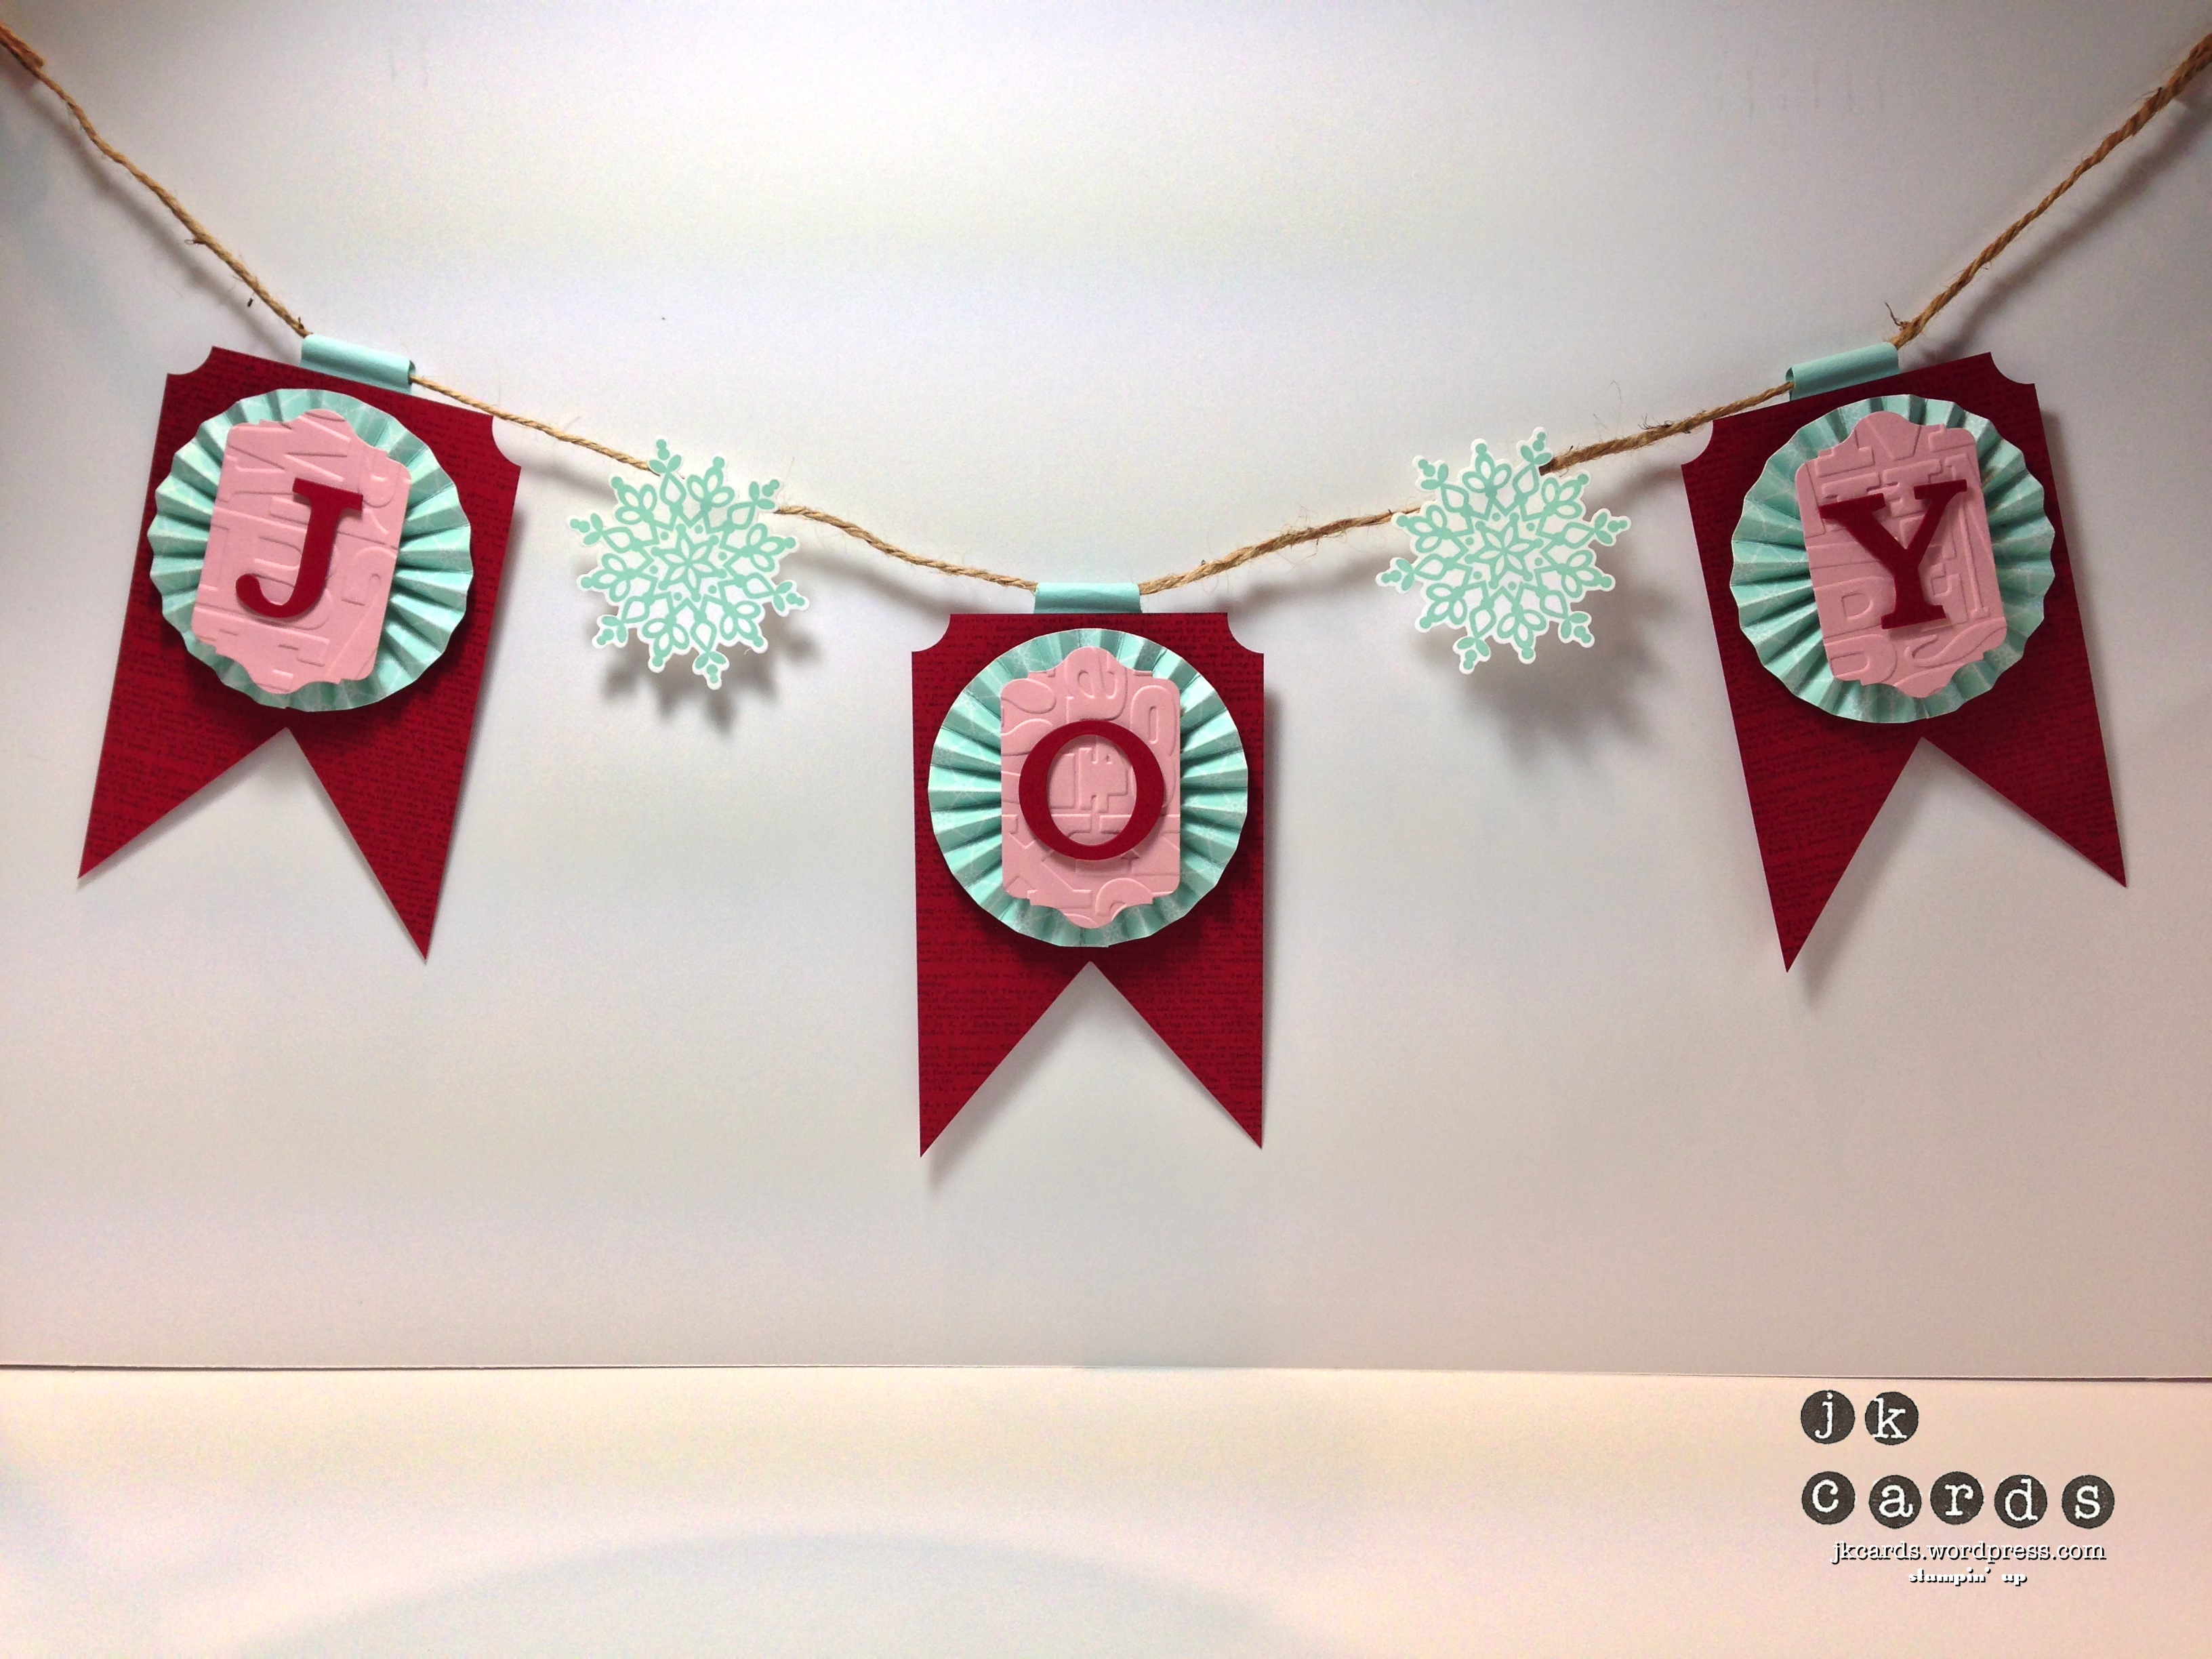
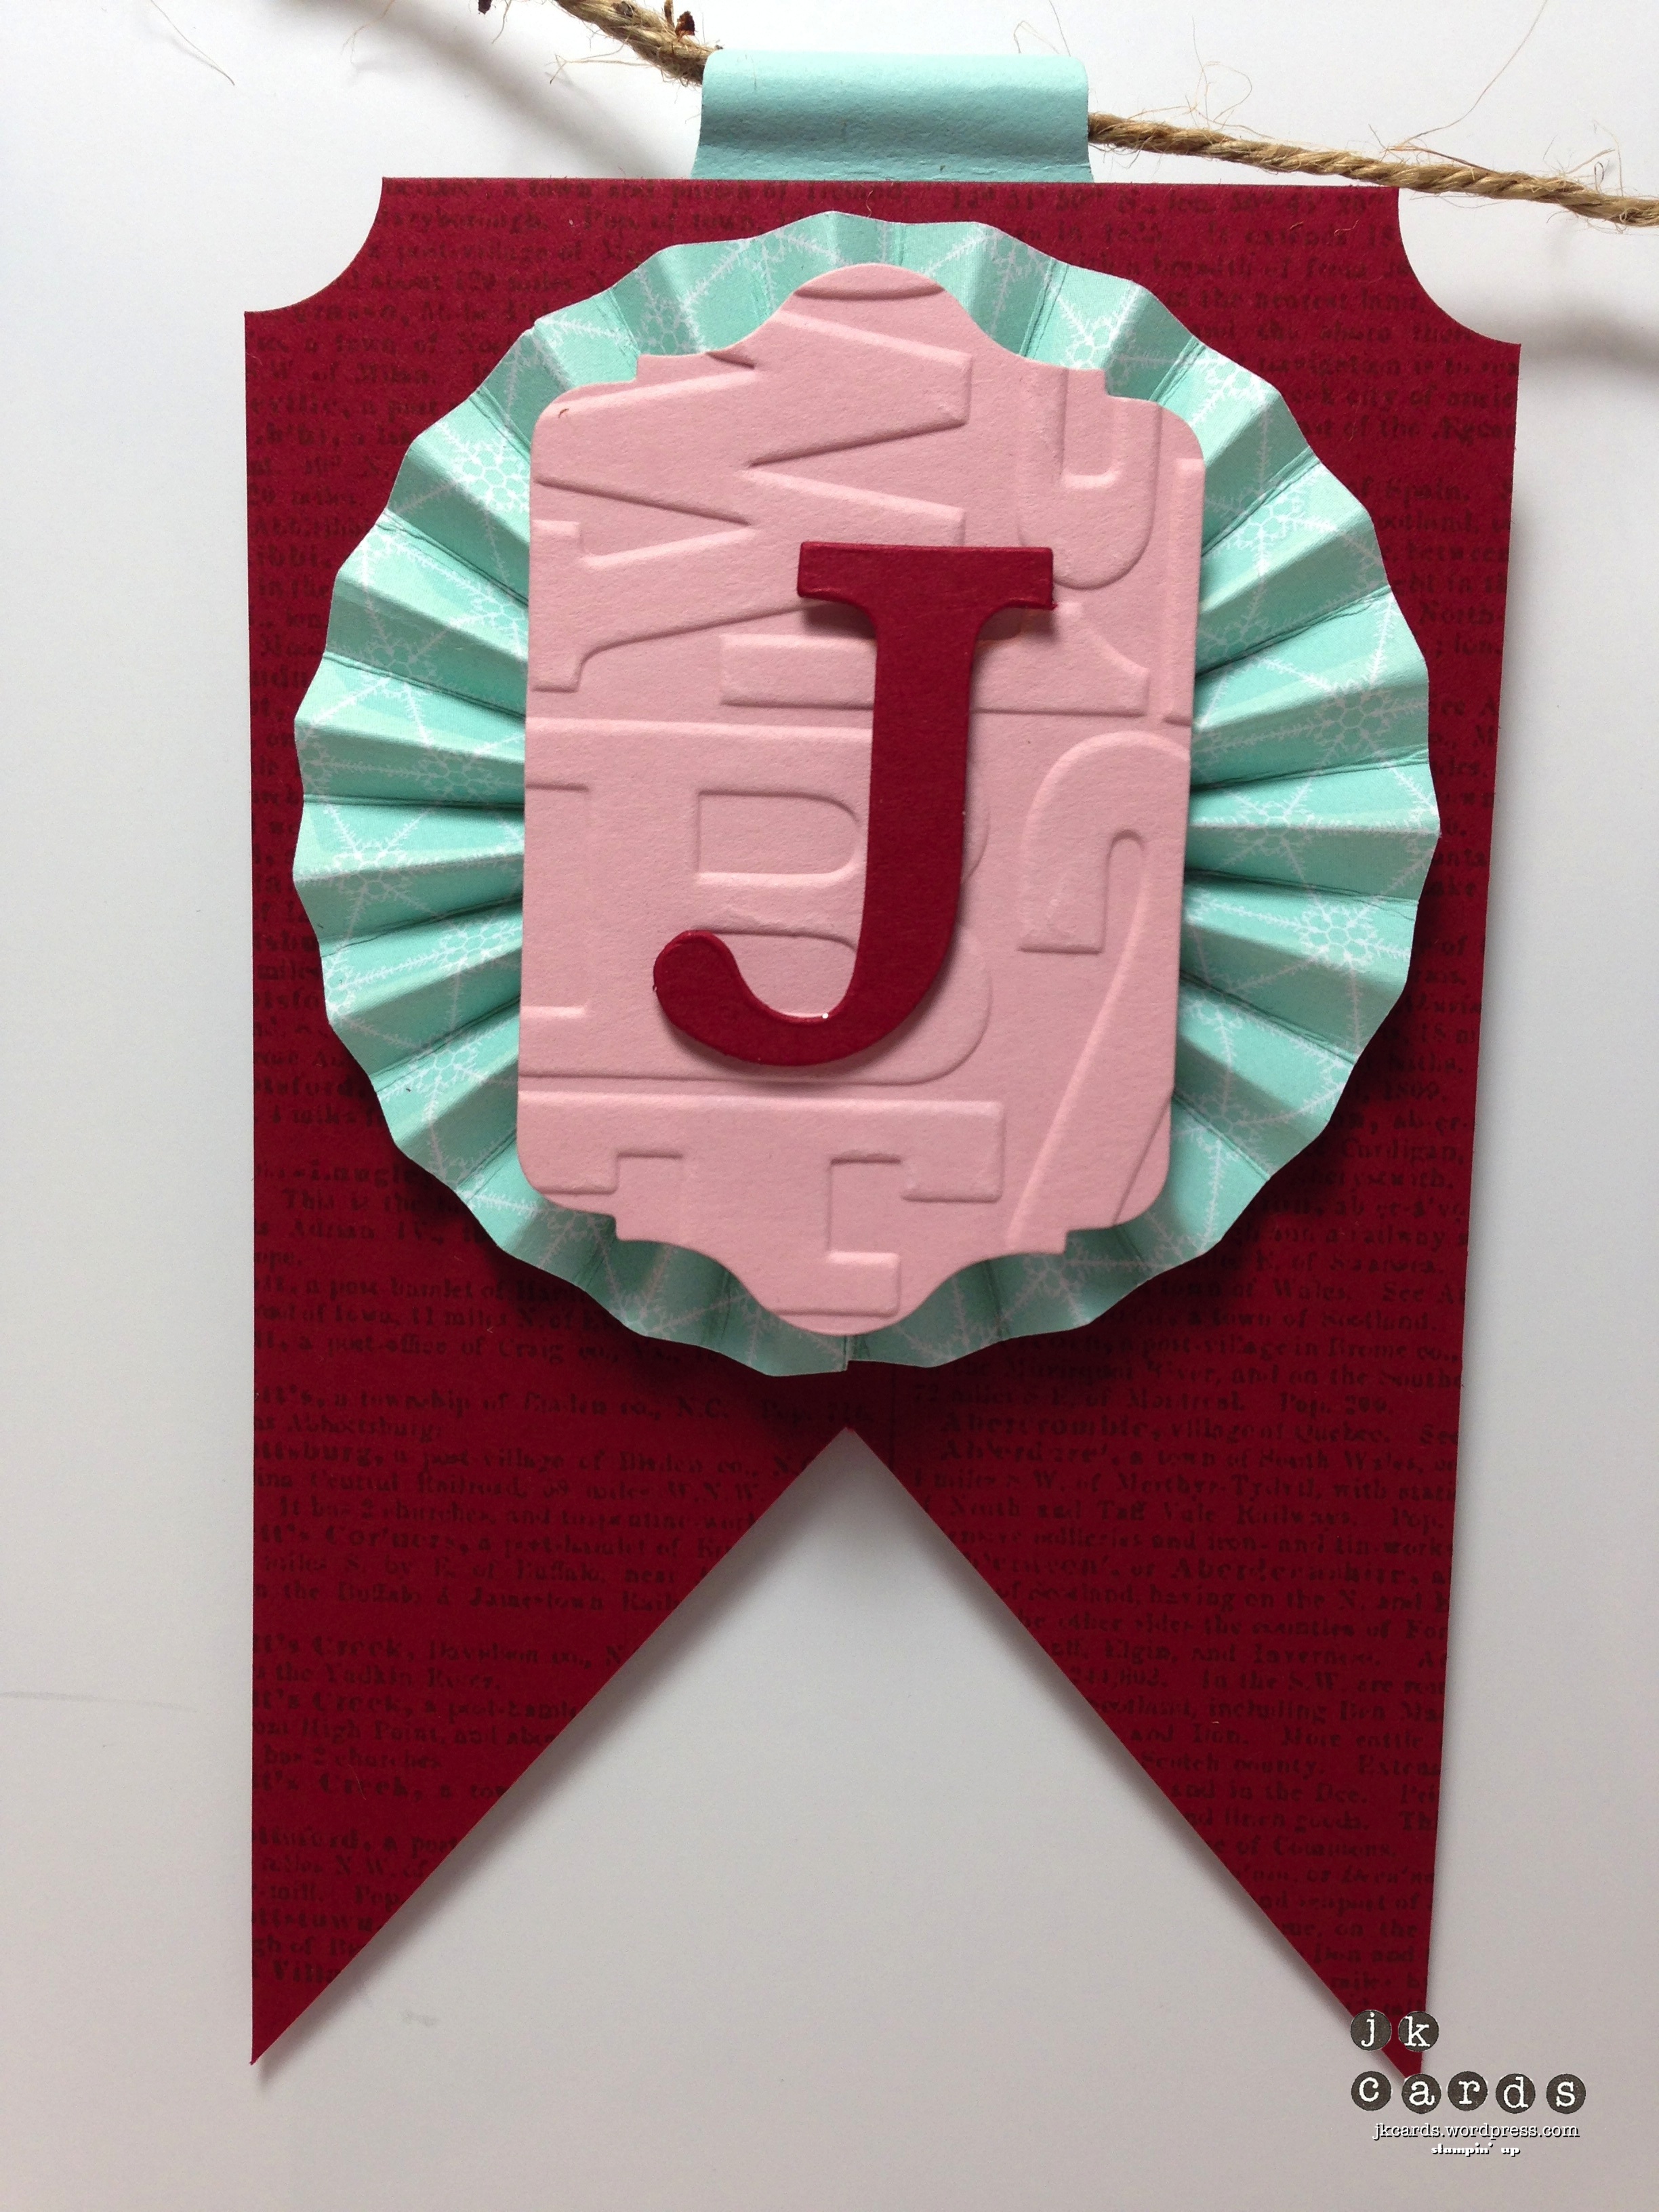
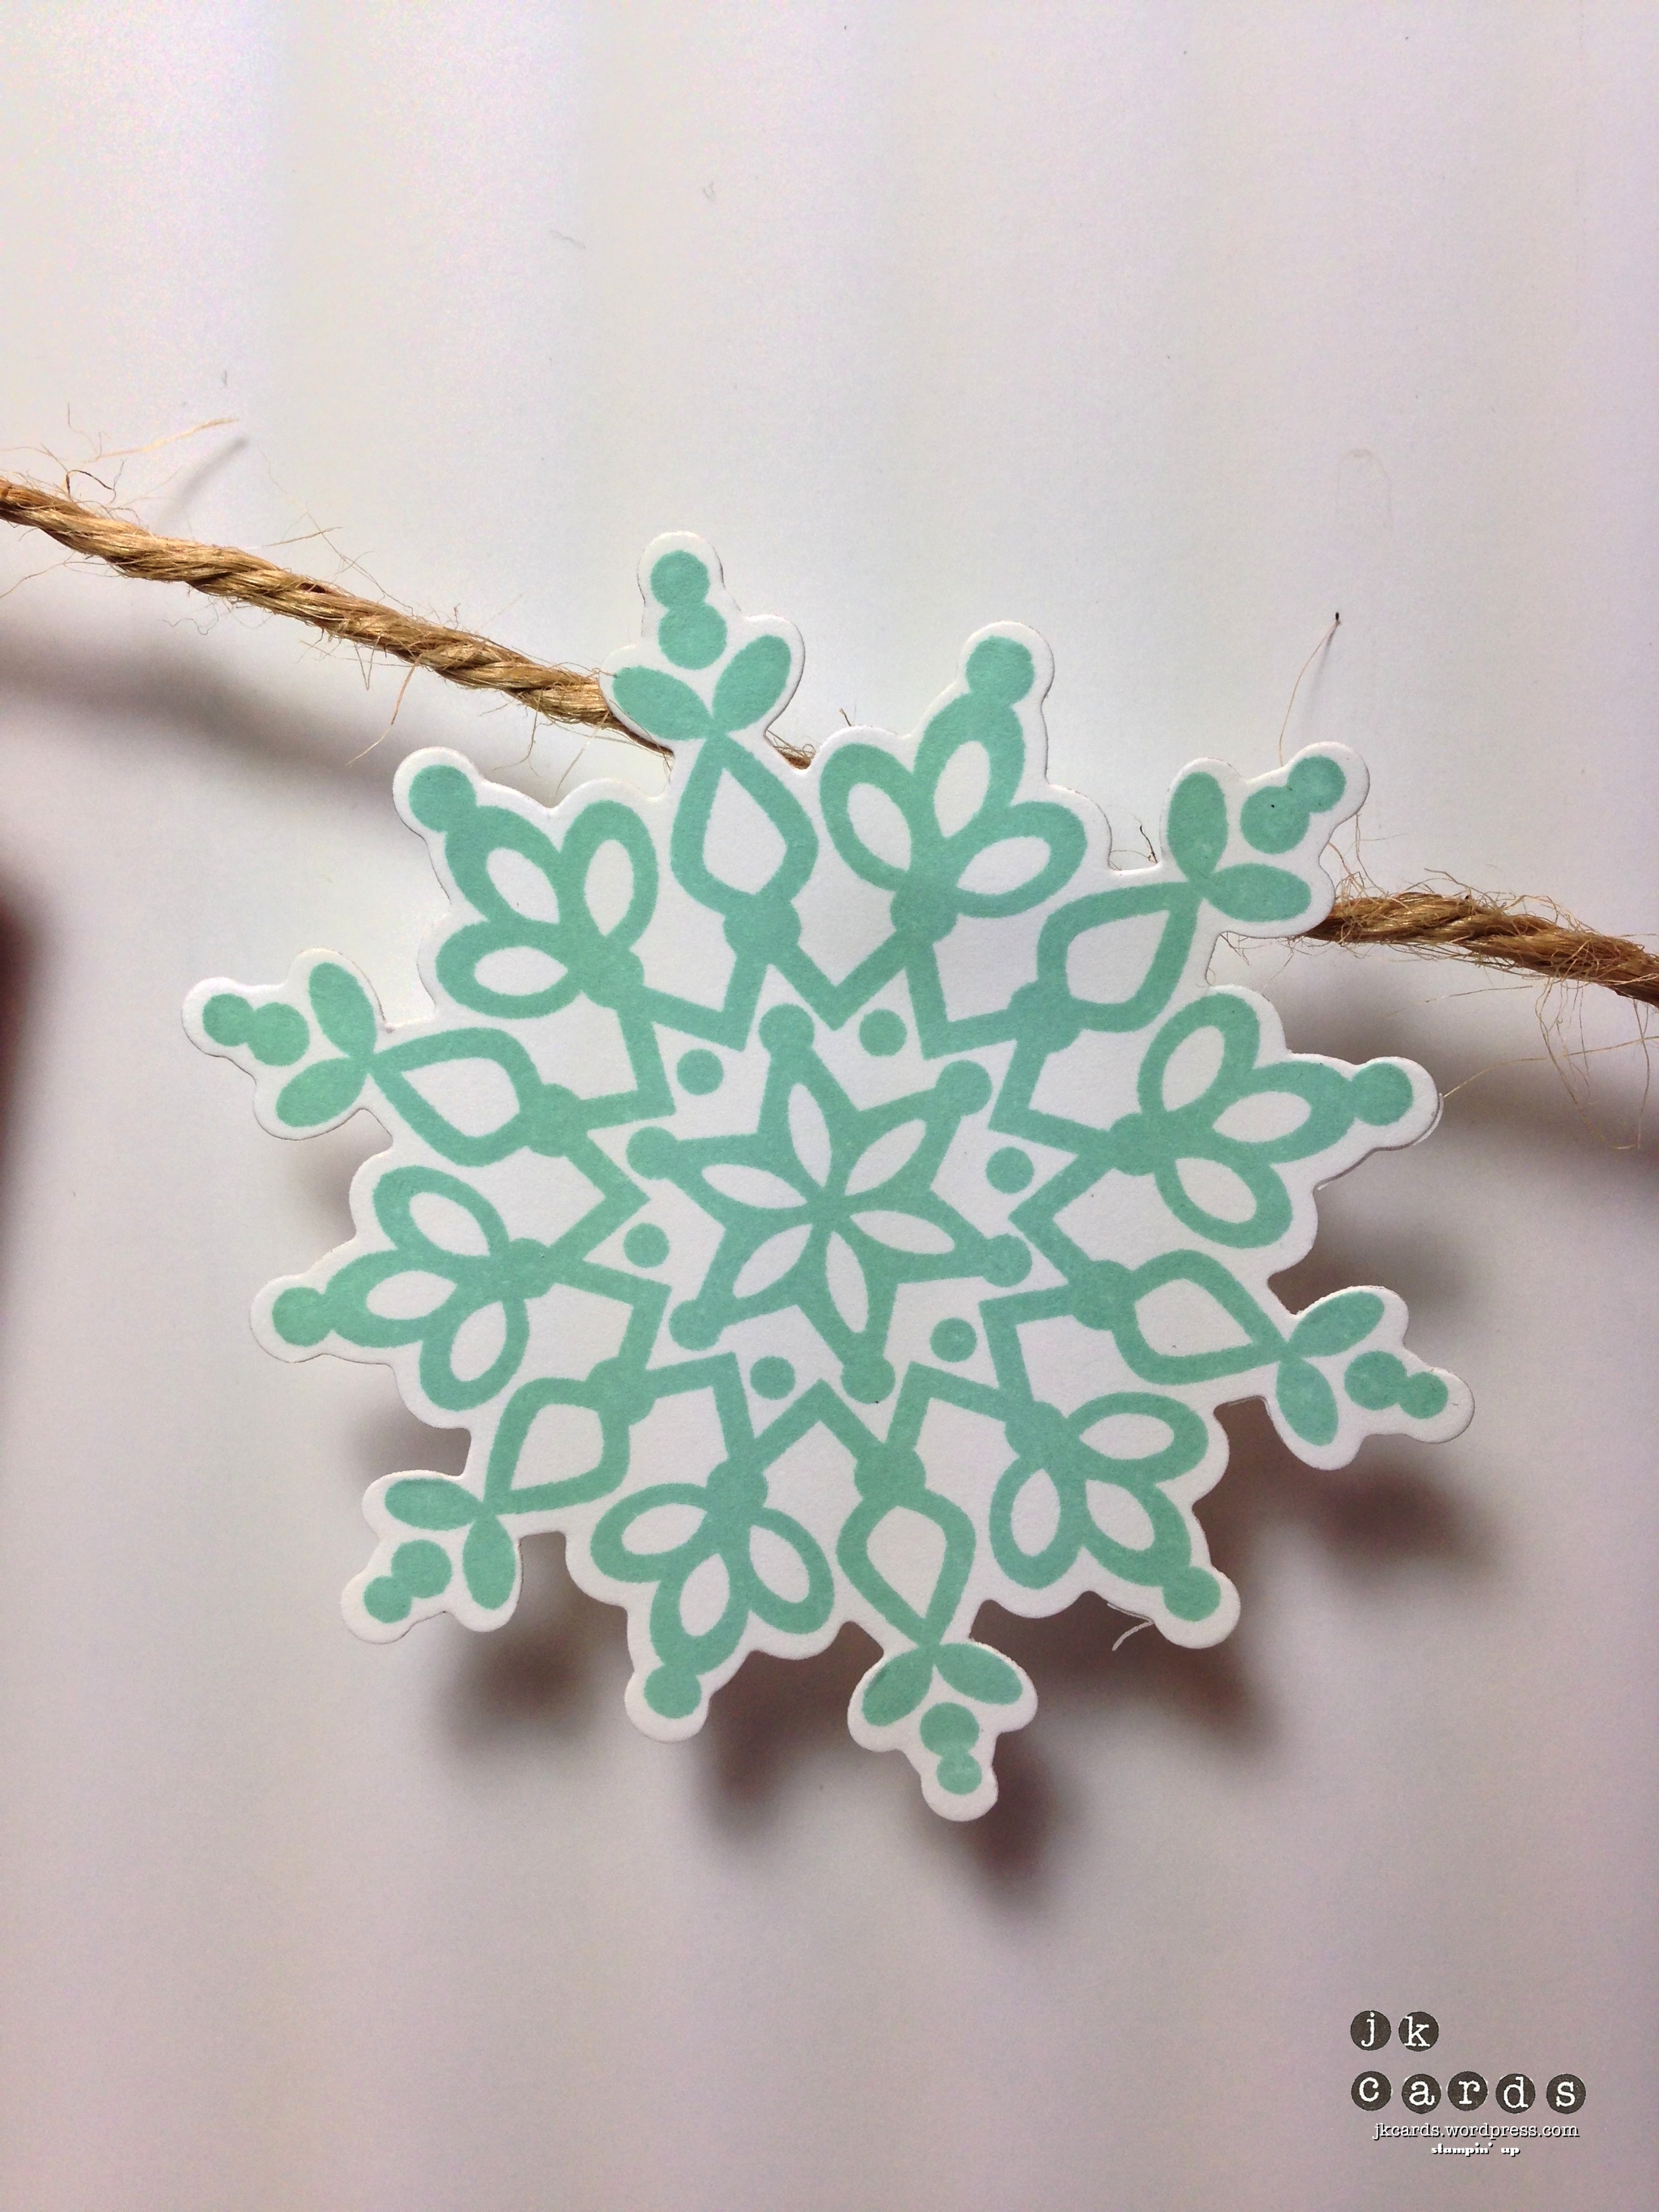
The first of the two projects I have for you today is a banner. I’m a big fan of nontraditional holiday colors and this banner is no exception. The bases for the banner are Cherry Cobbler Card Stock that I stamped in Cherry Cobbler with the Dictionary Background Stamp. I flagged the bottoms and used the 1″ Circle Punch to create the ticket corners on the top. The rosettes are made from Winter Frost Specialty Designer Series Paper using my Simply Scored Scoring Tool. My next layer is a piece of Blushing Bride that I cut out with the Chalk Talk Framelits Dies and embossed with the Alphabet Press Textured Impressions Embossing Folder. The letters that spell out JOY are cut out using the Typeset Alphabet Bigz Dies from Cherry Cobbler. To add a little interest I stamped some snowflakes from the Festive Flurry Stamp Set in Pool Party and cut them out with the Festive Flurry Framelits Dies. The flags are held on to the jute twine with some Pool Party that is punched out with the “Vintage” Tab Punch. The snowflakes are held on with Card Stock that is punched out with the Word Window Punch. It’s a fun and relatively simple banner to make, but it’s sure to dress up any home for the holidays!

Control Freaks Nov. Tour Banner

Control Freaks Nov. Tour Banner Close

Control Freaks Nov. Tour Banner Snowflake

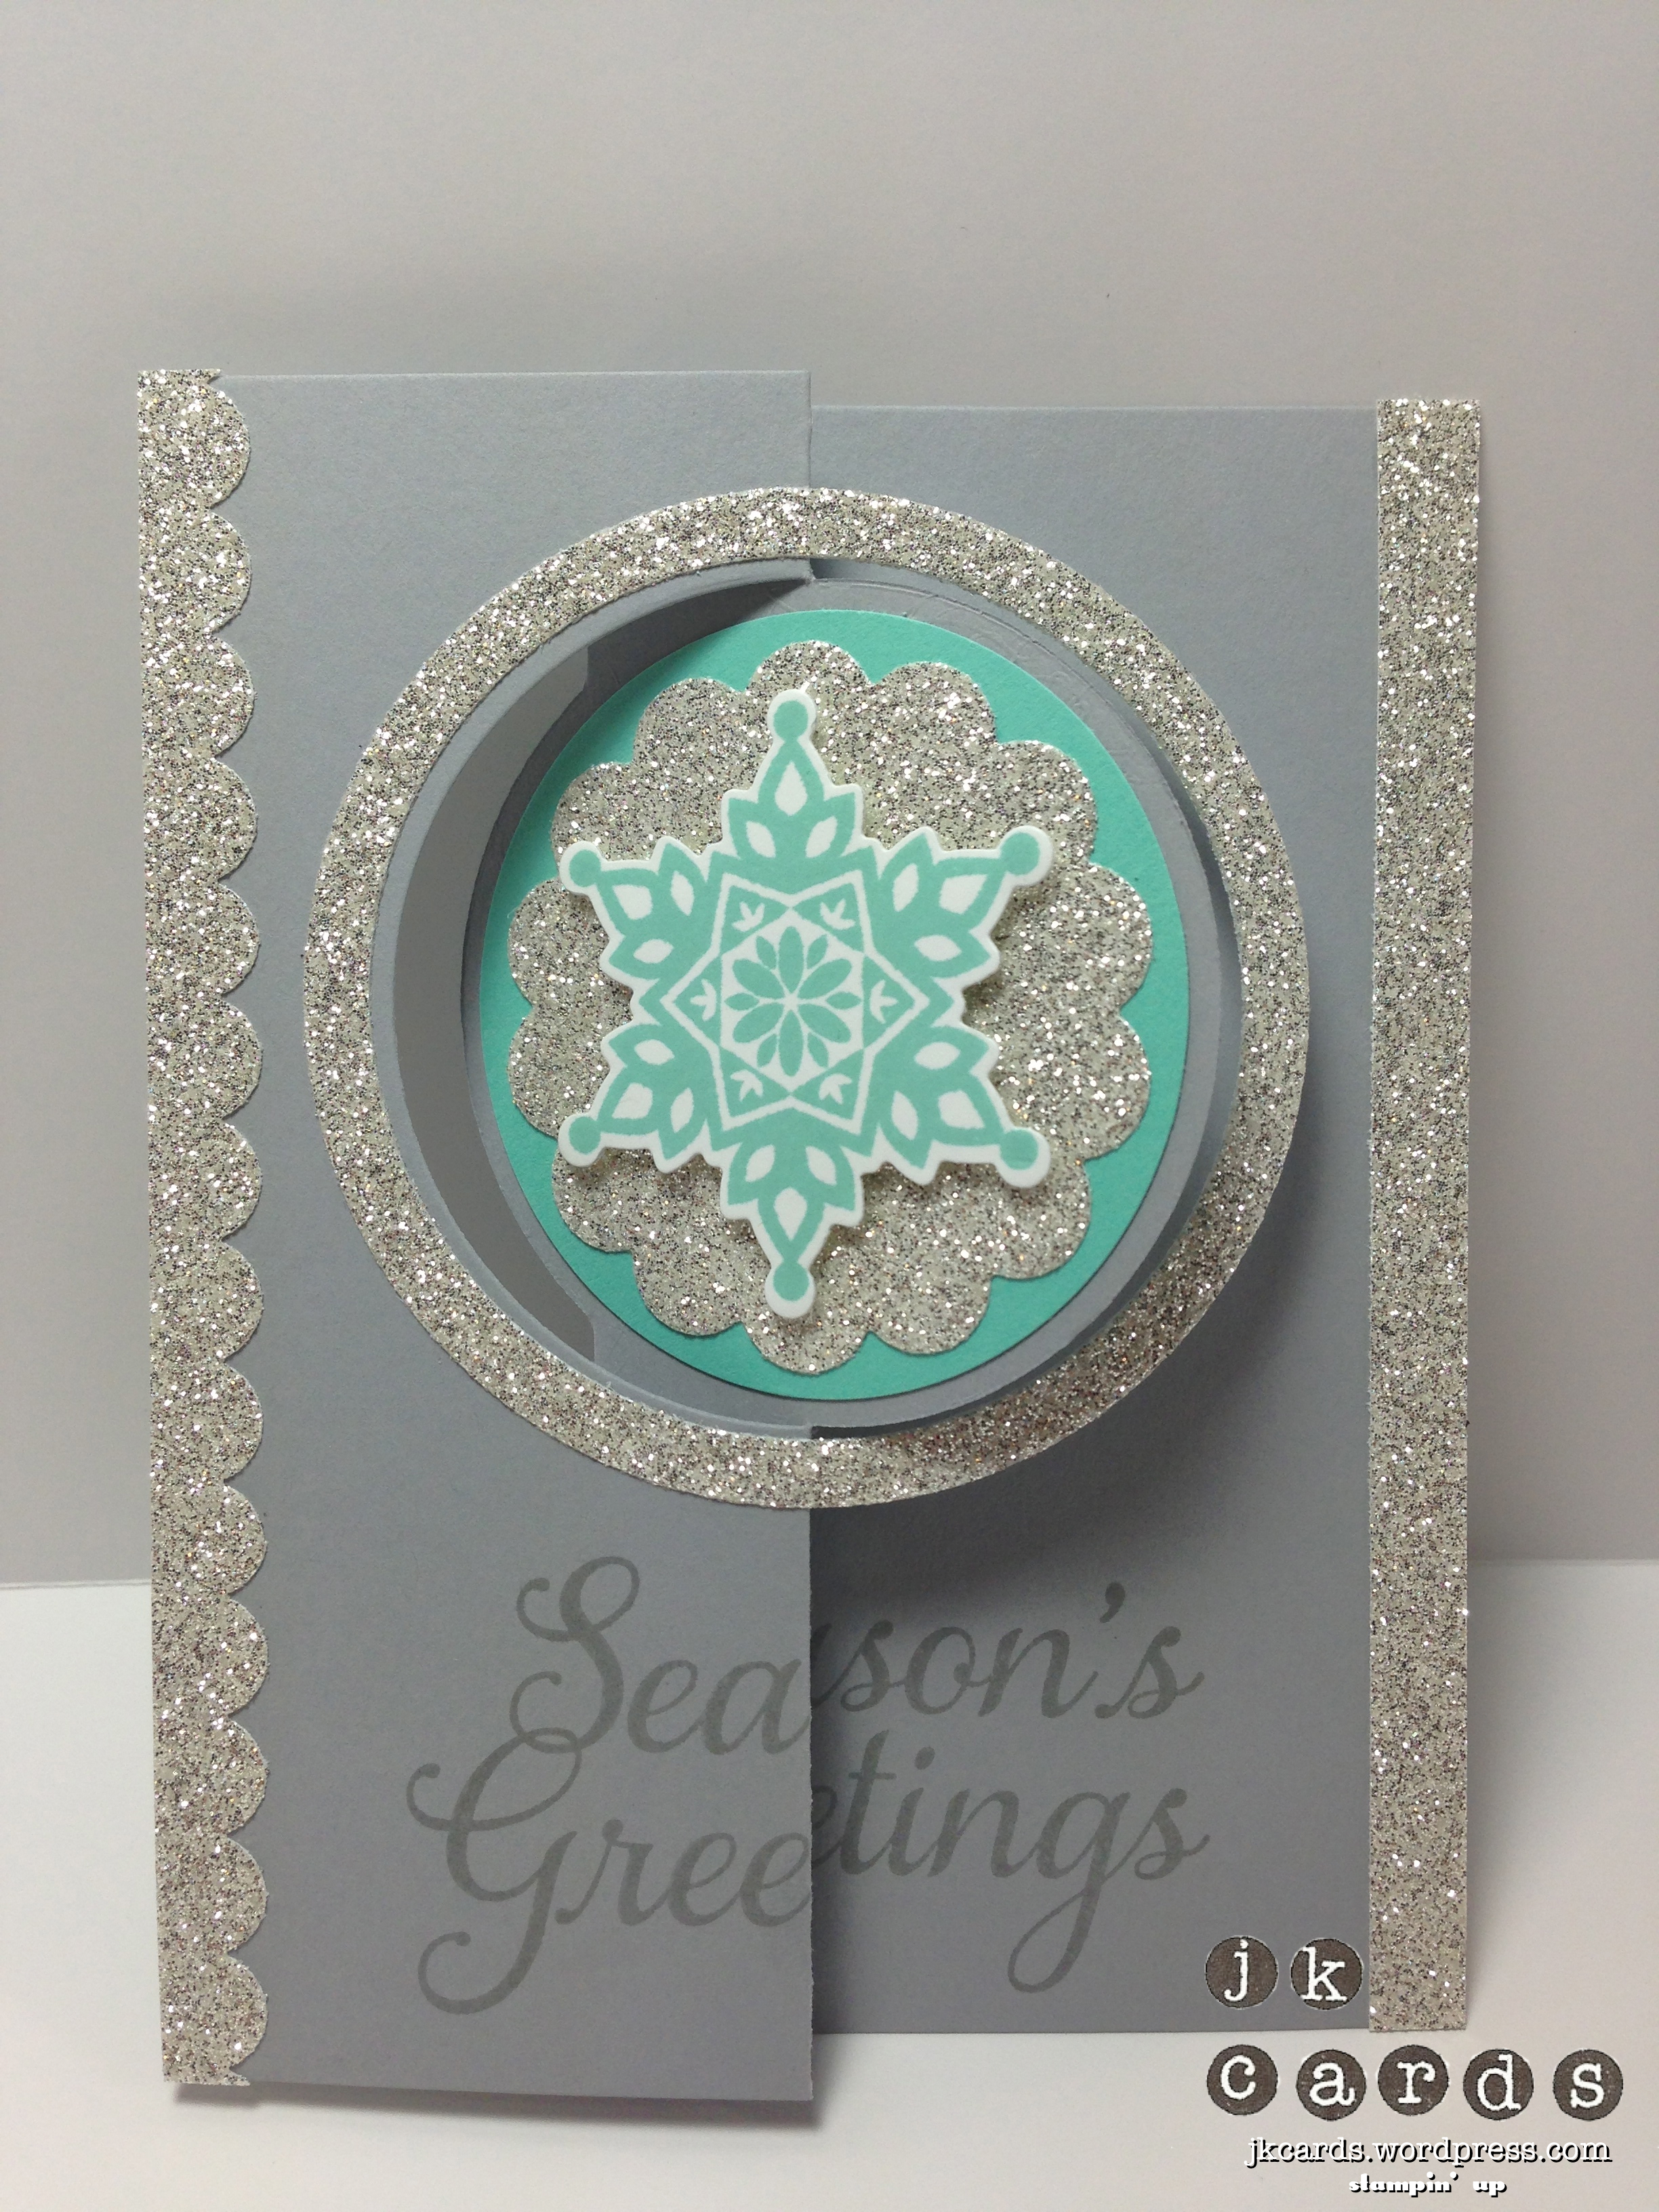
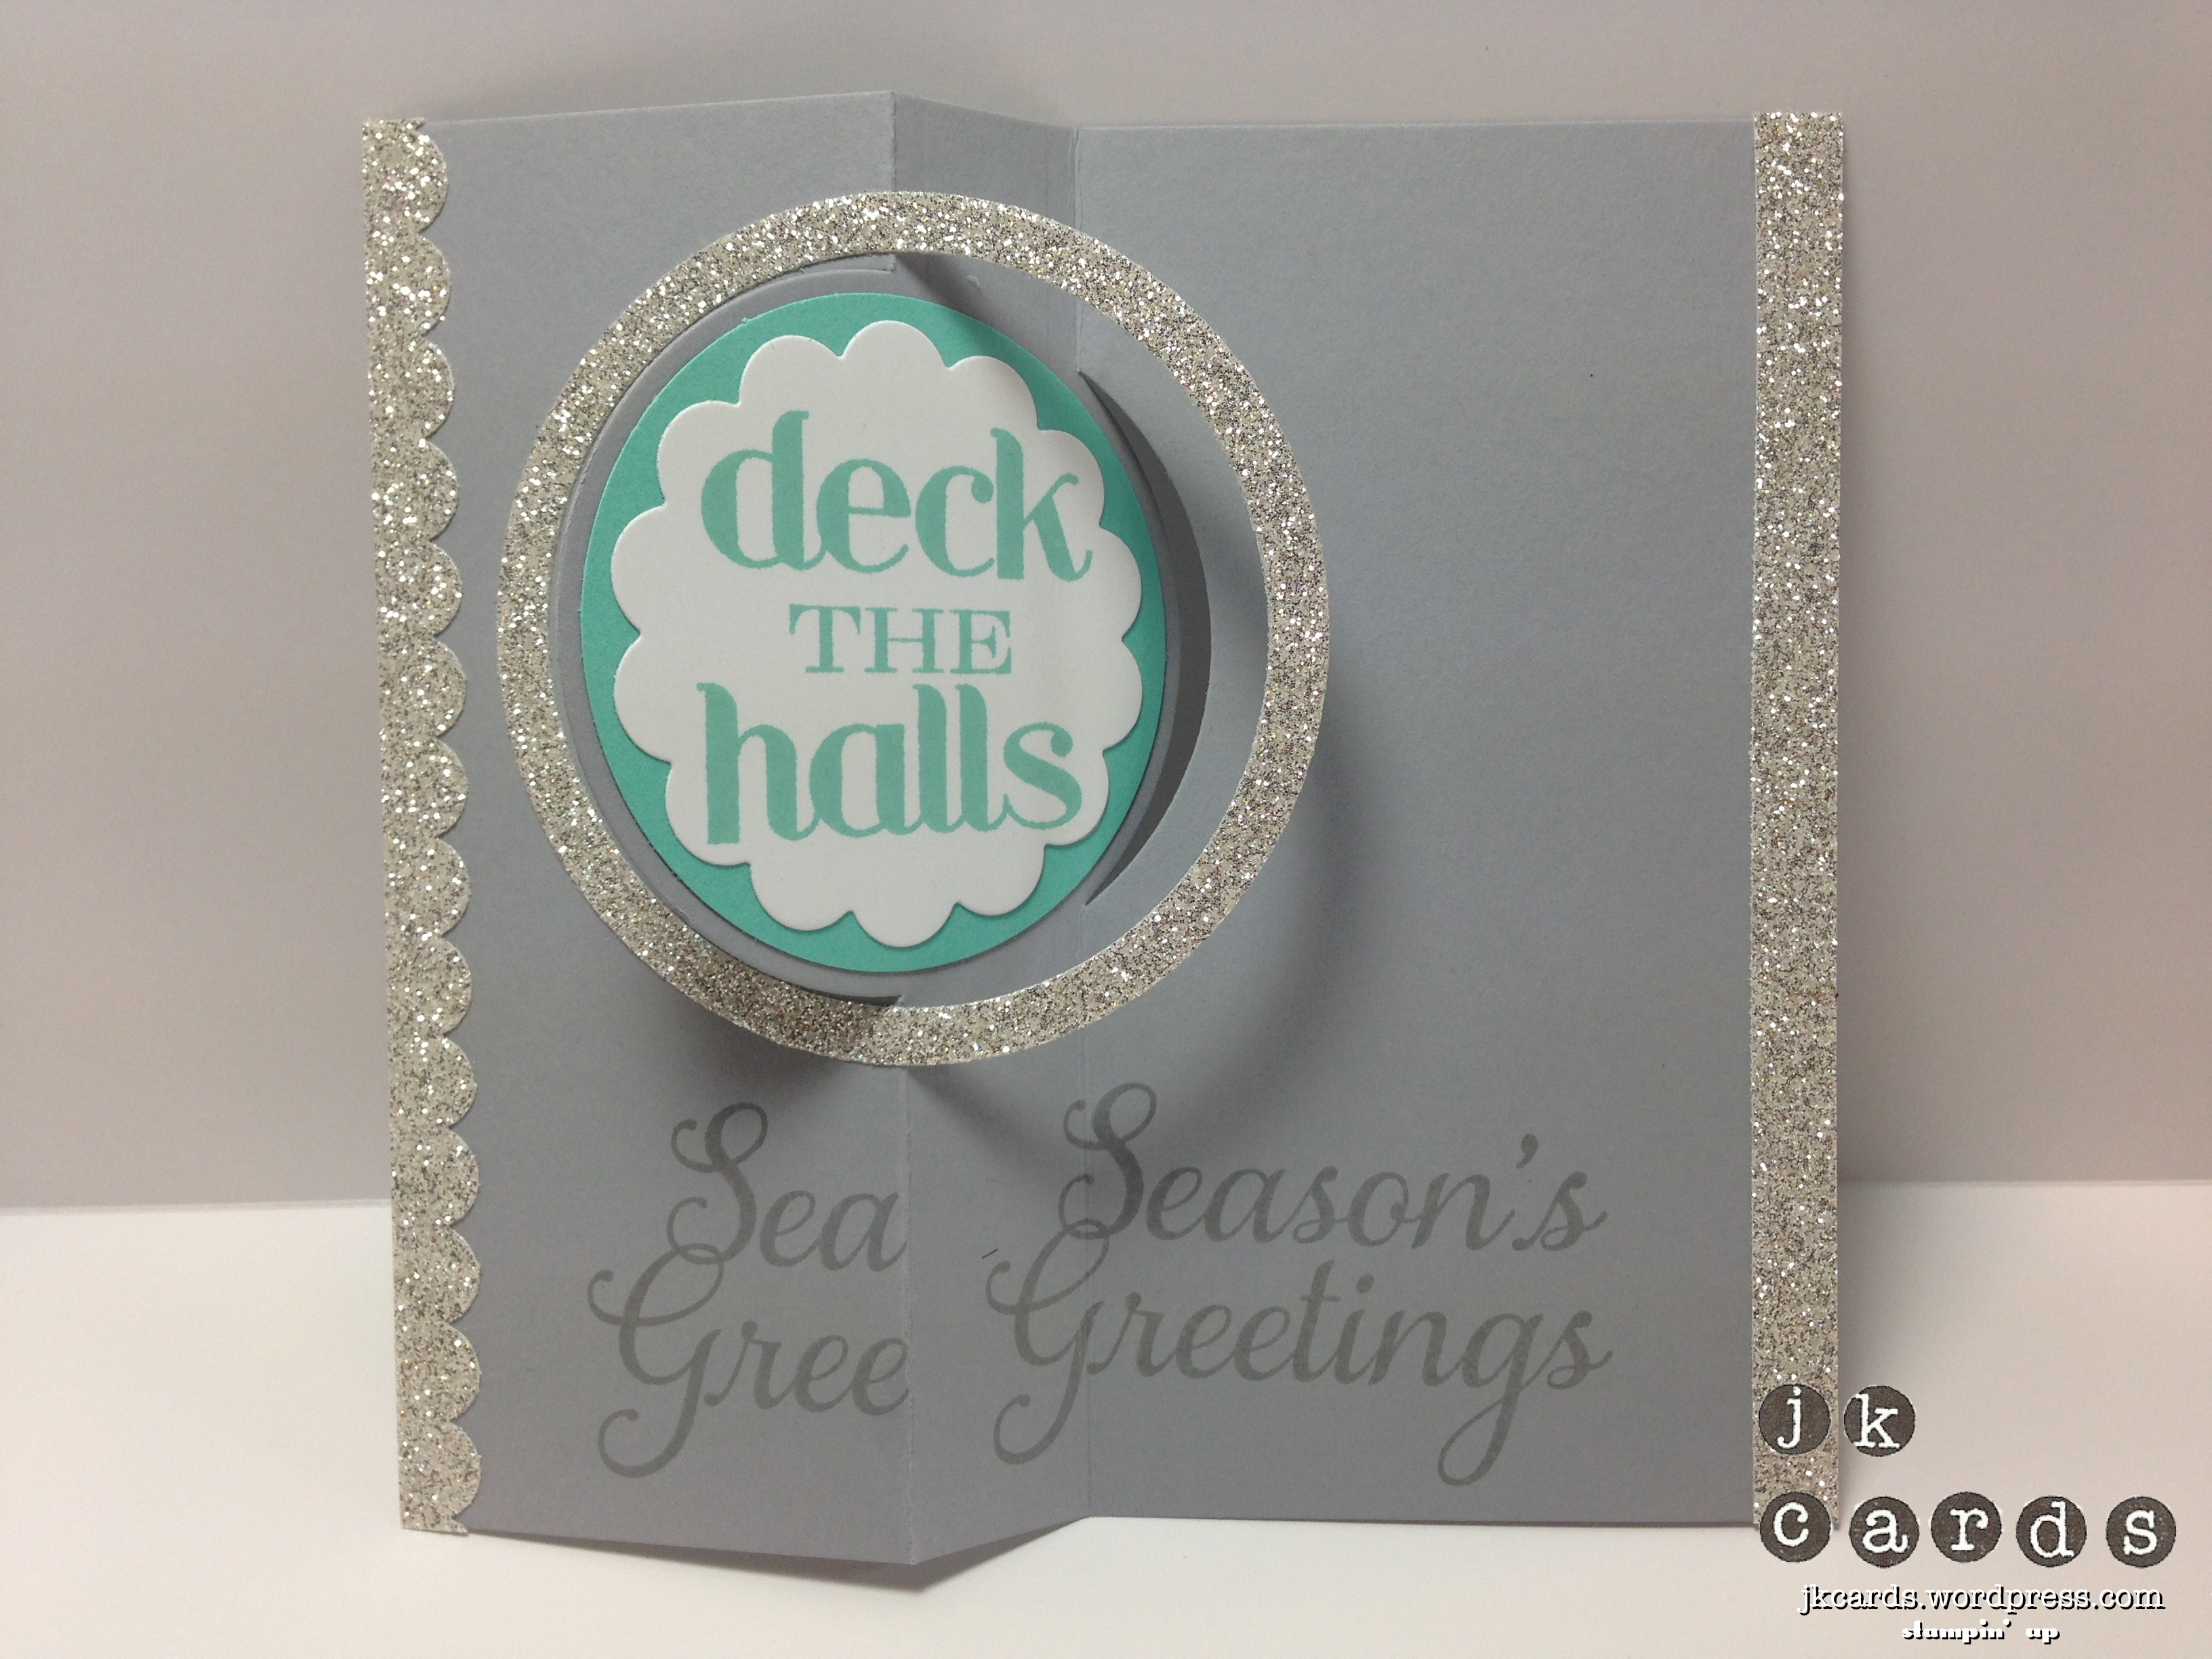
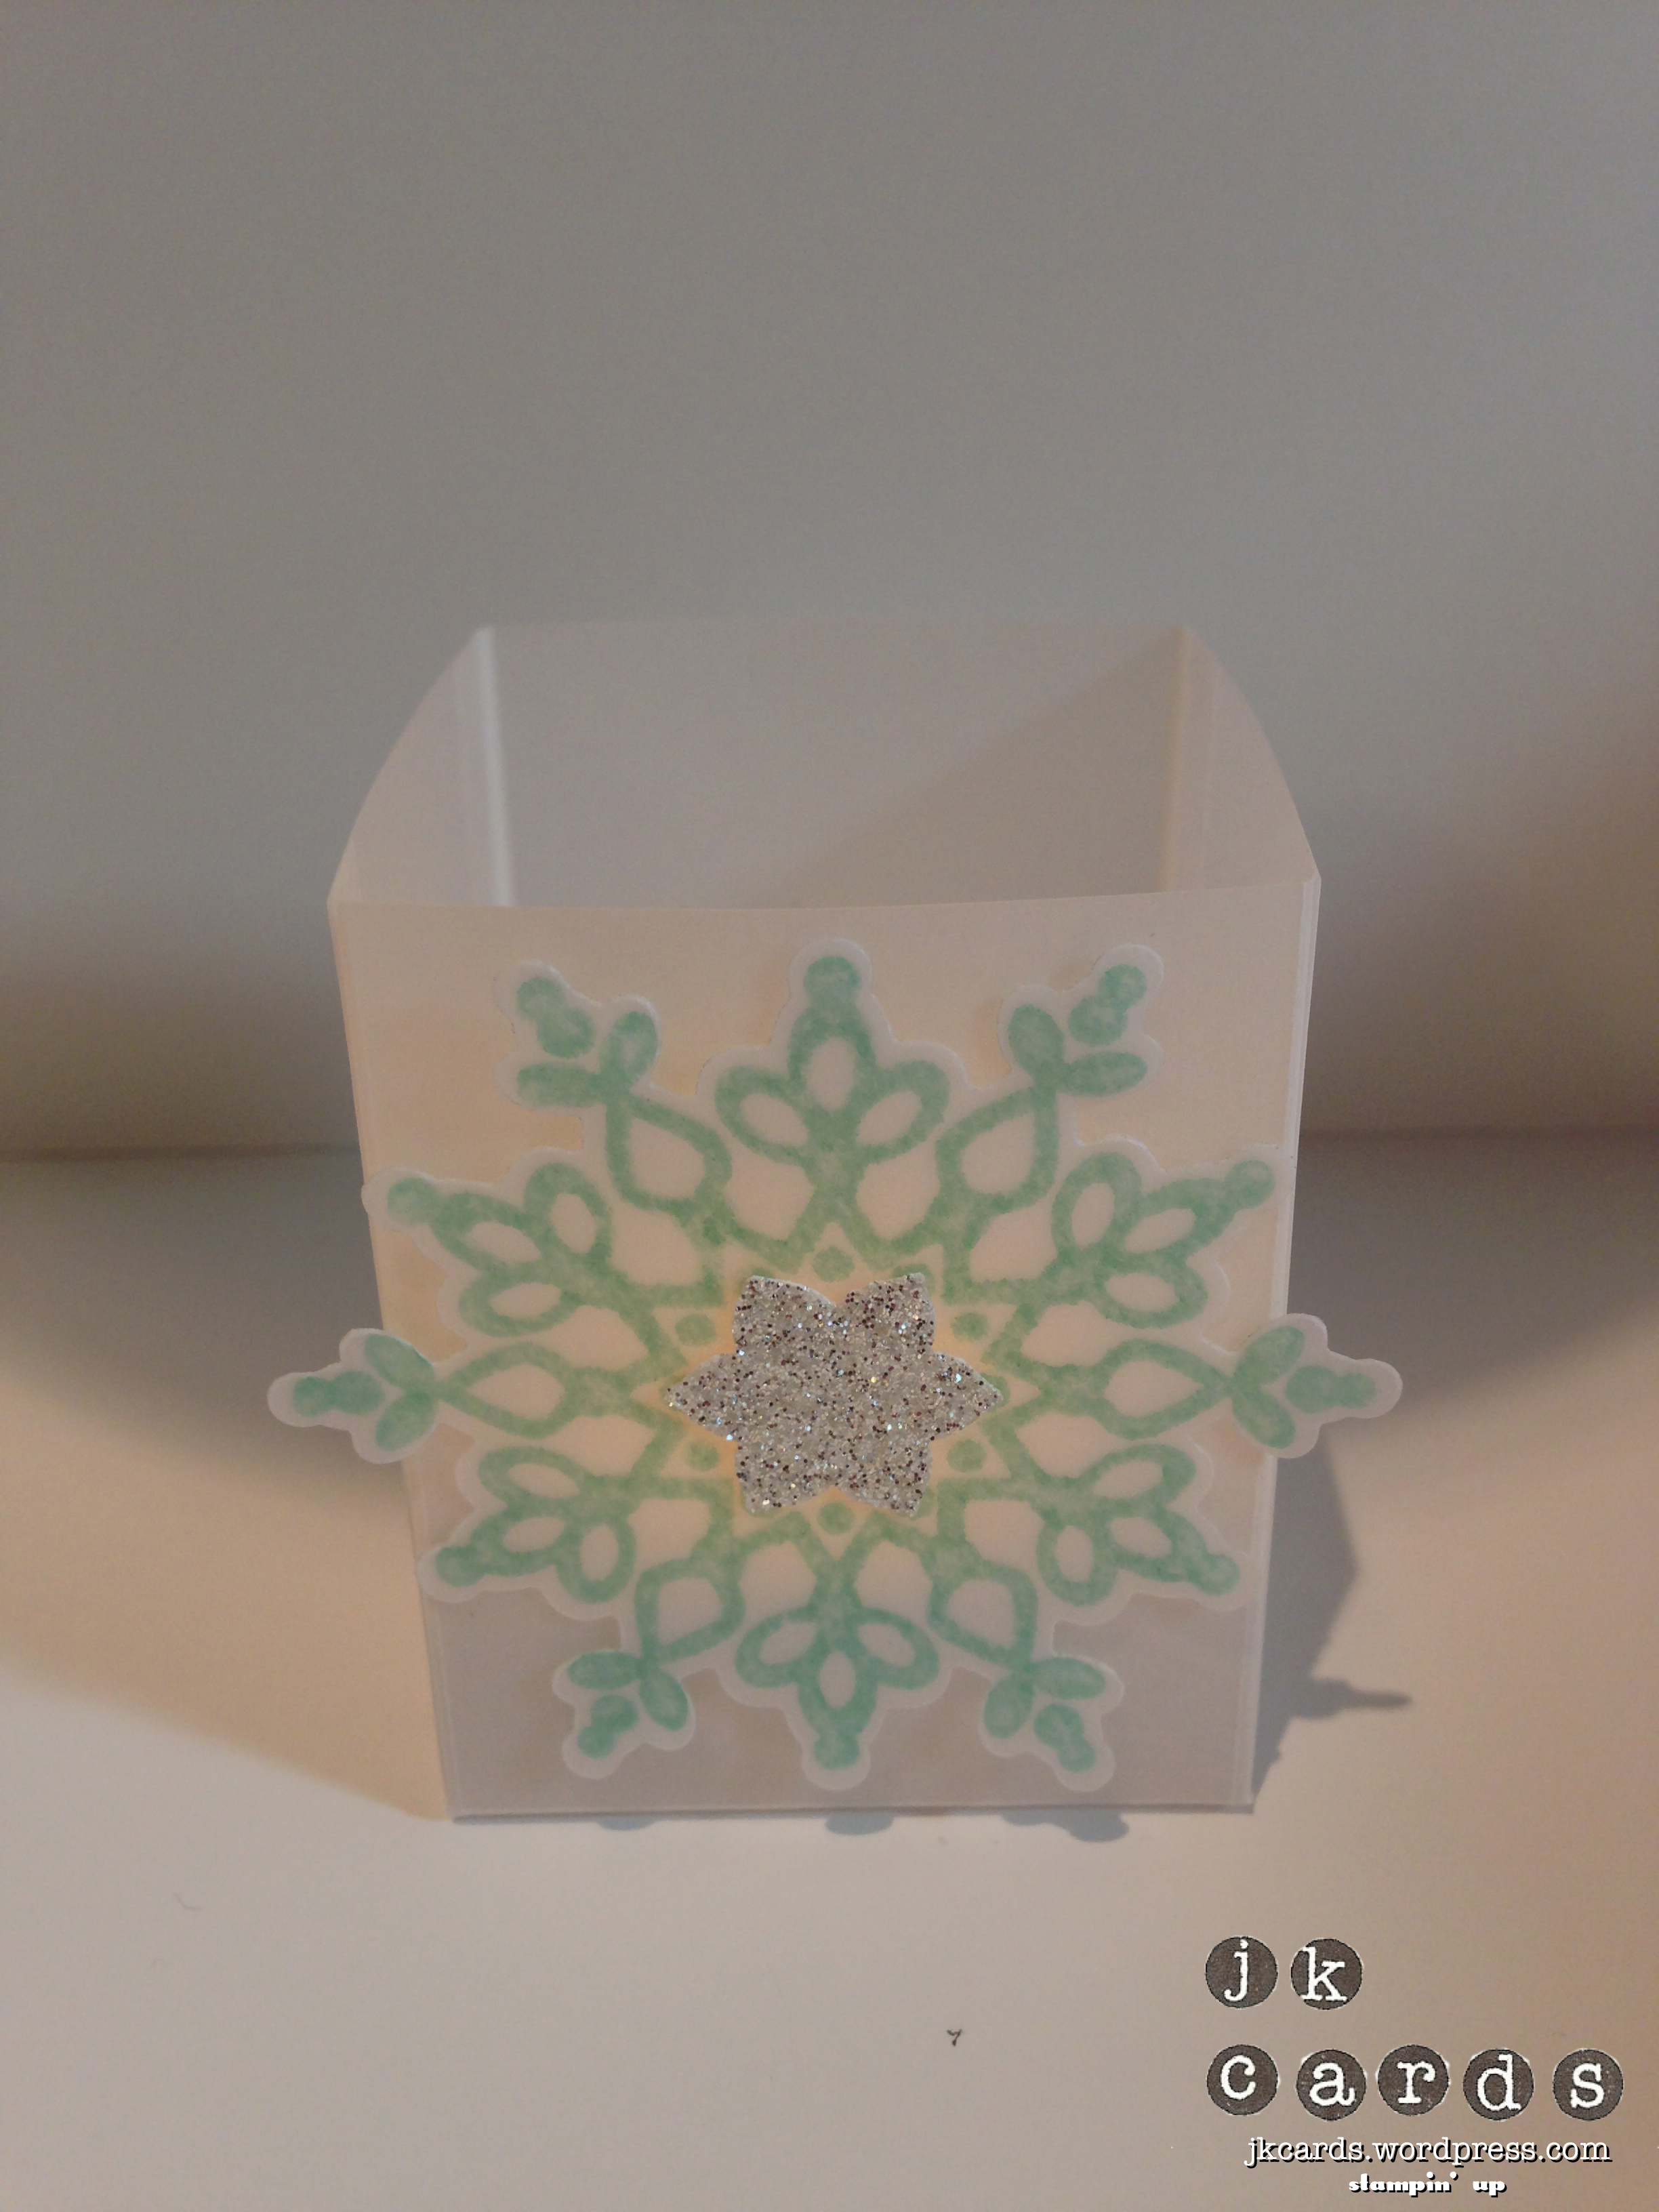
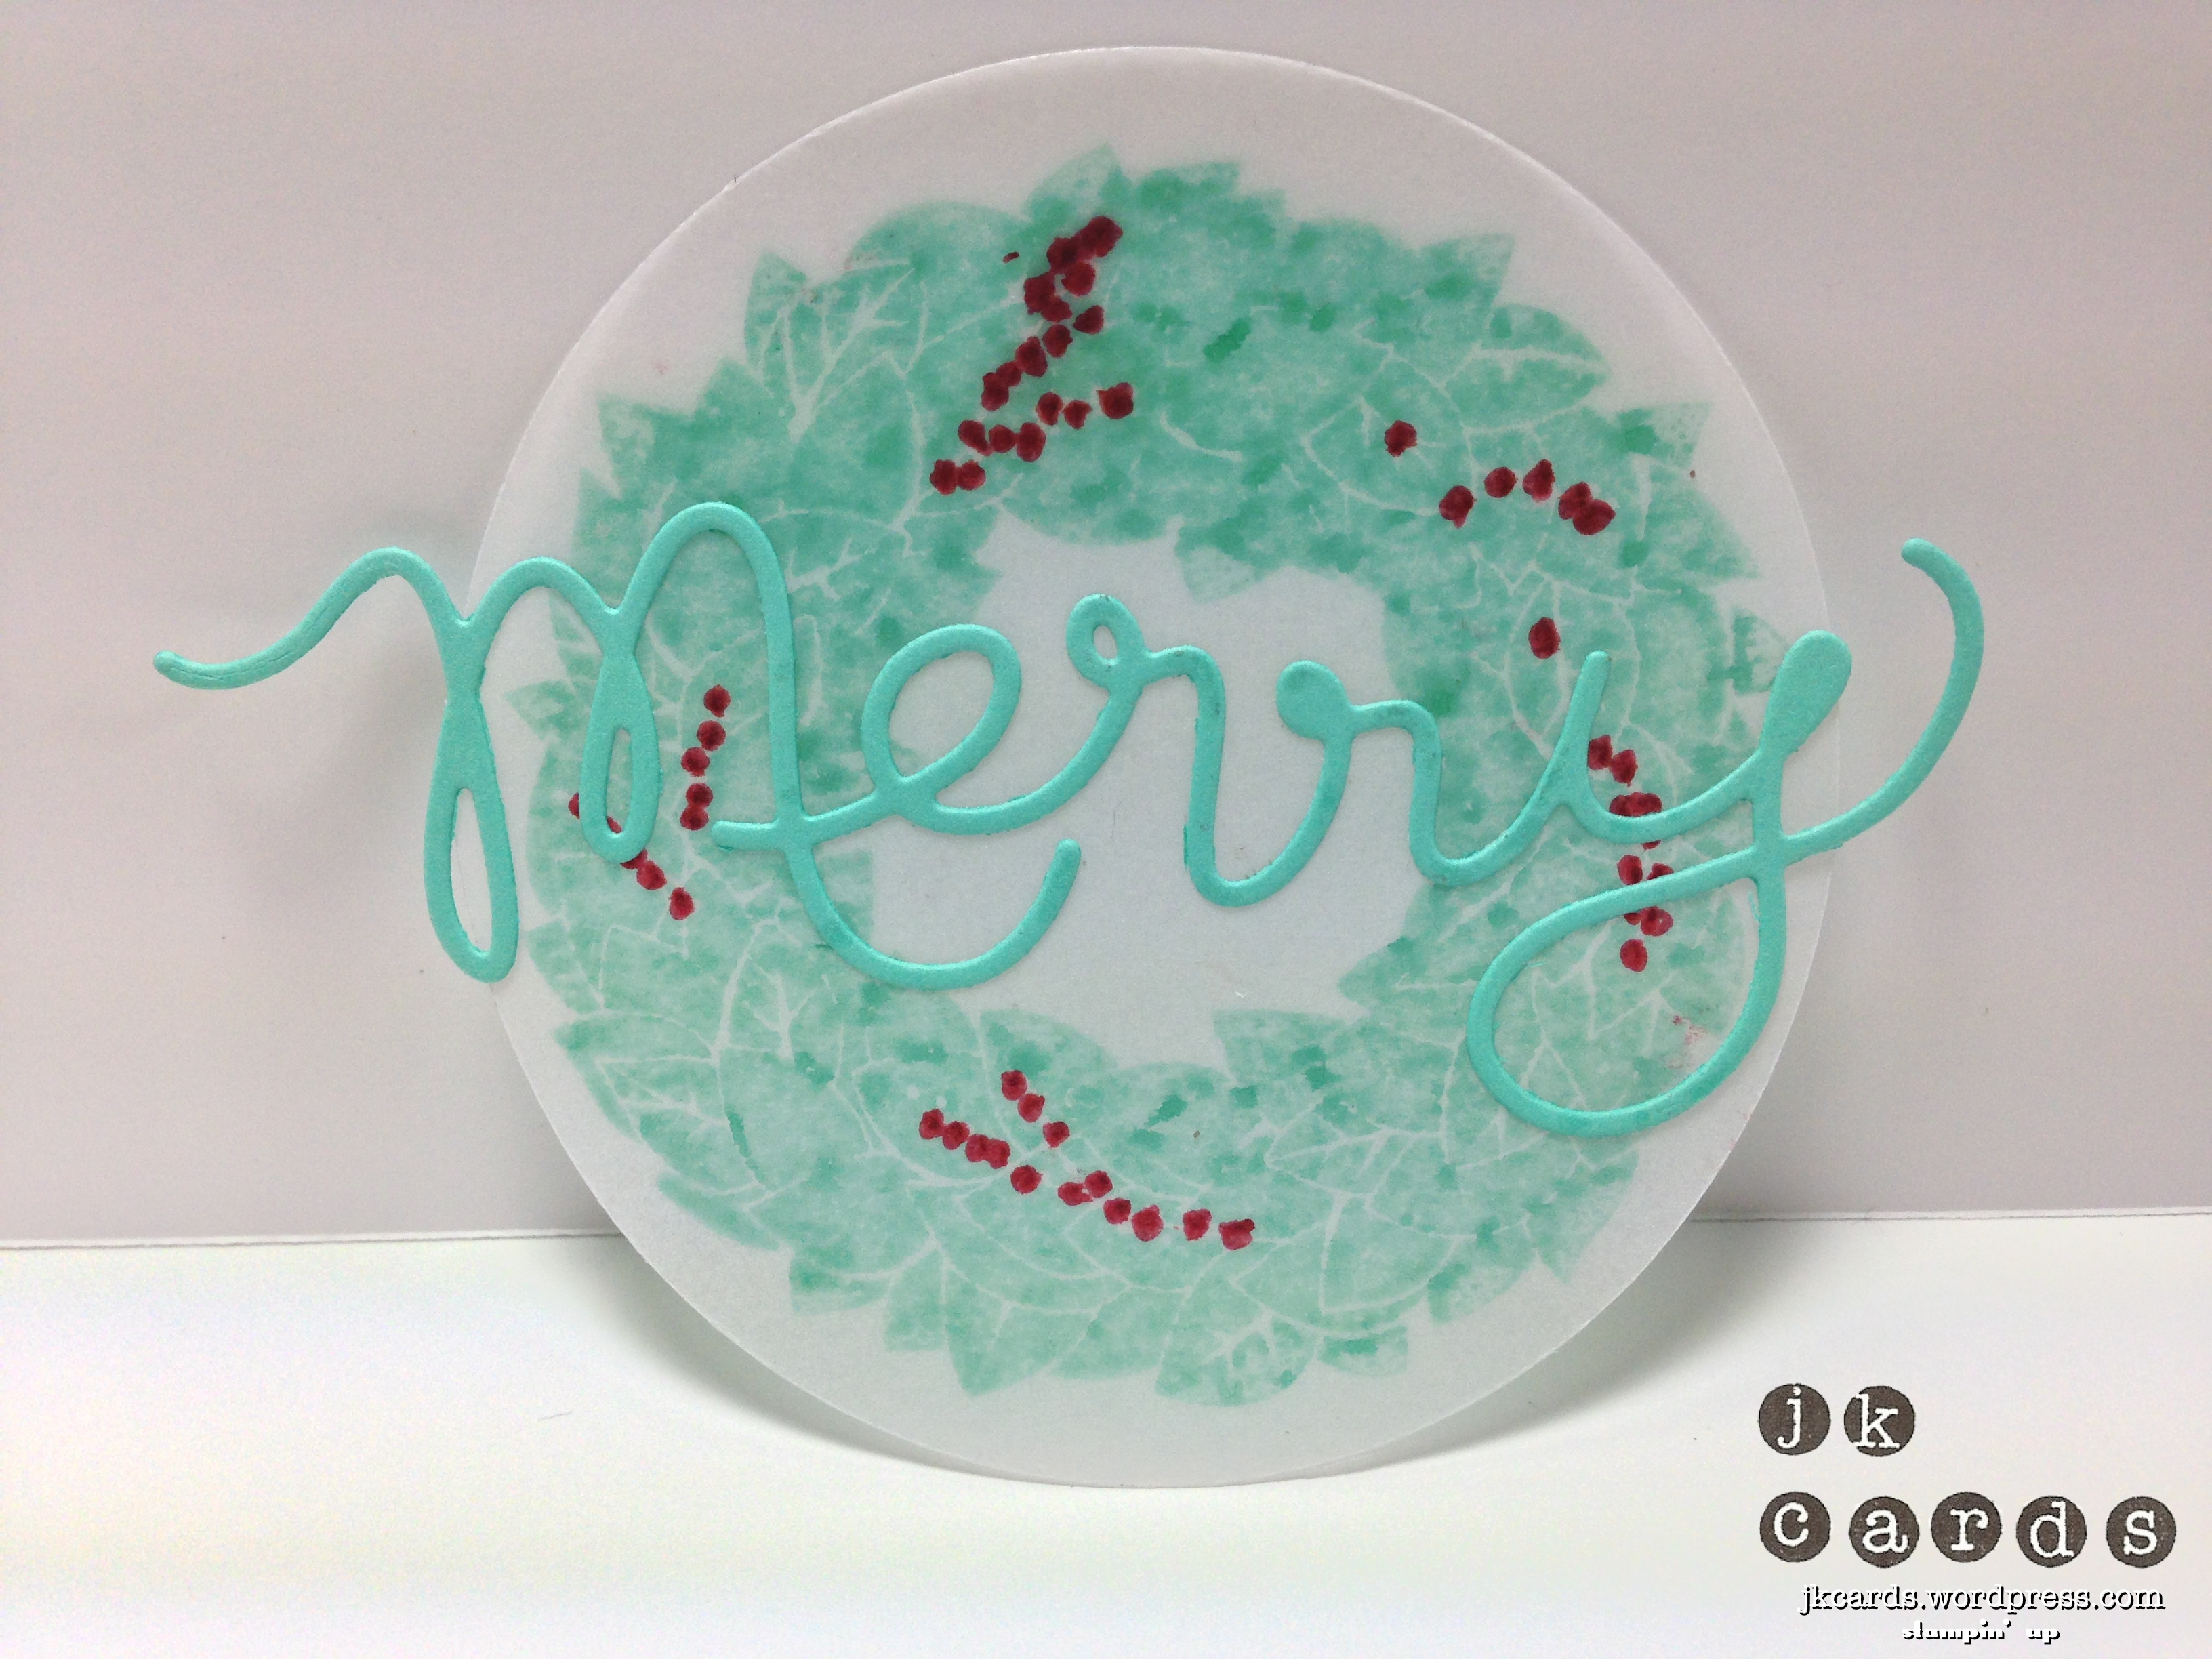
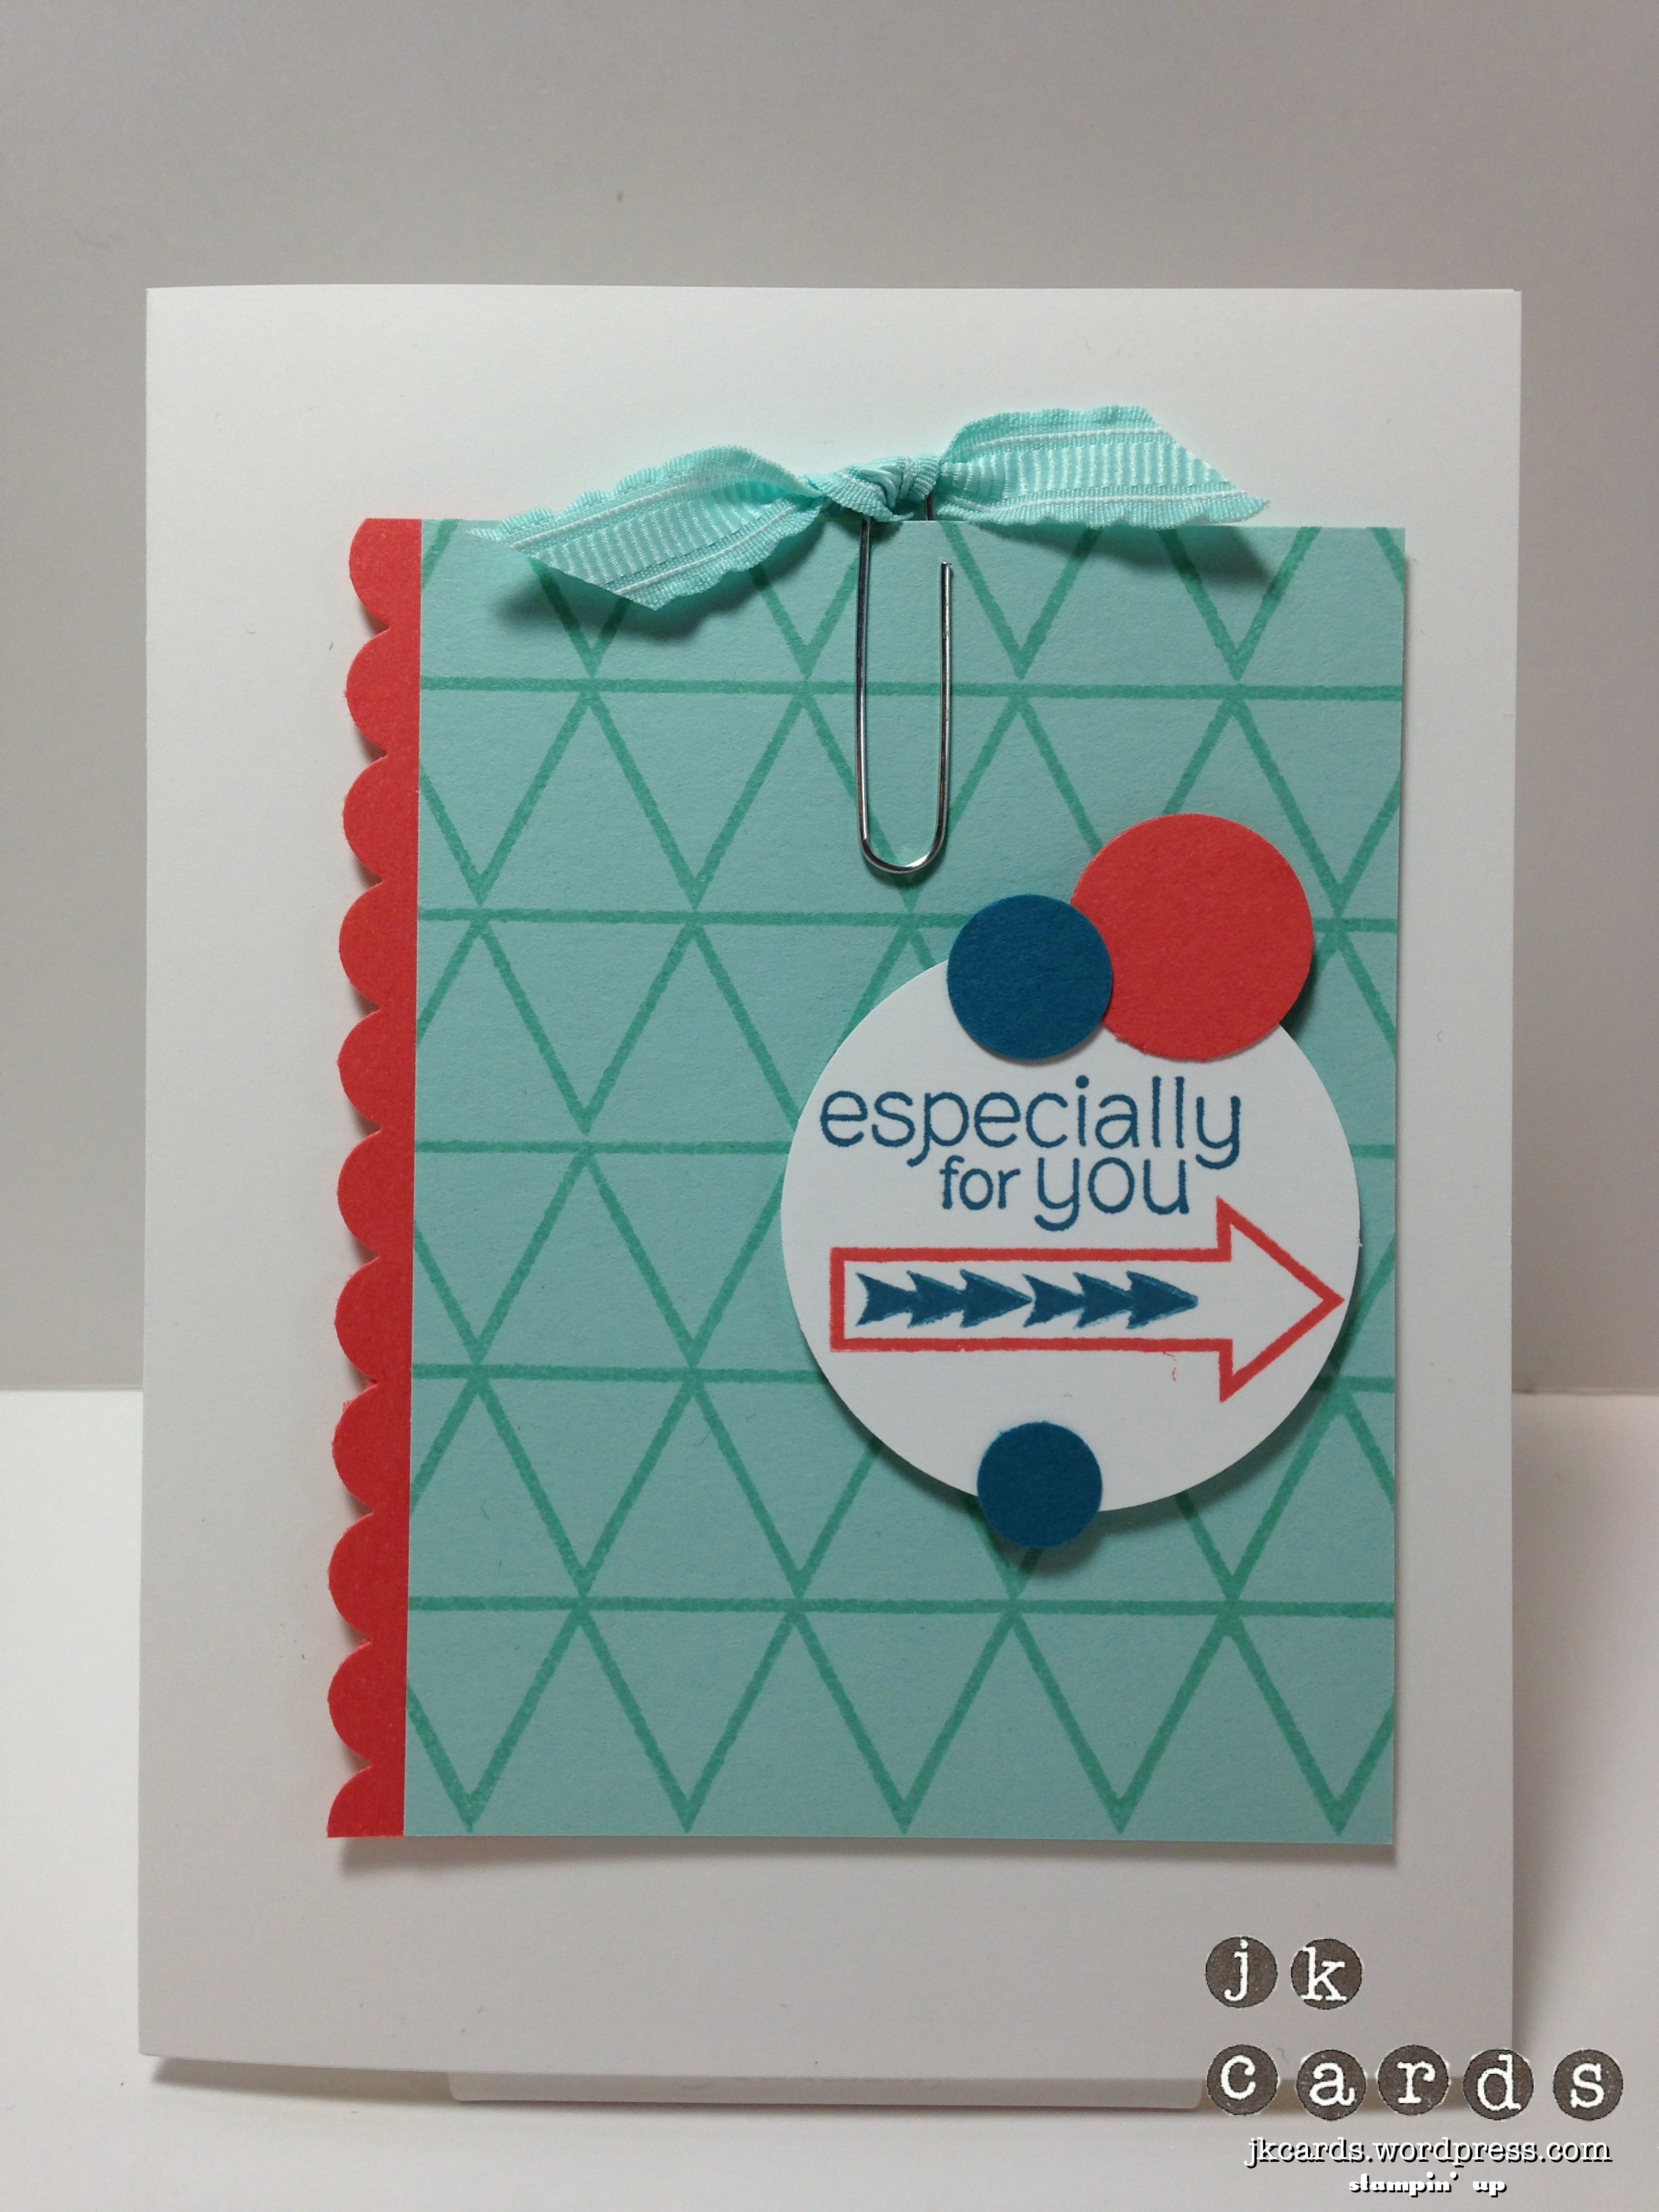
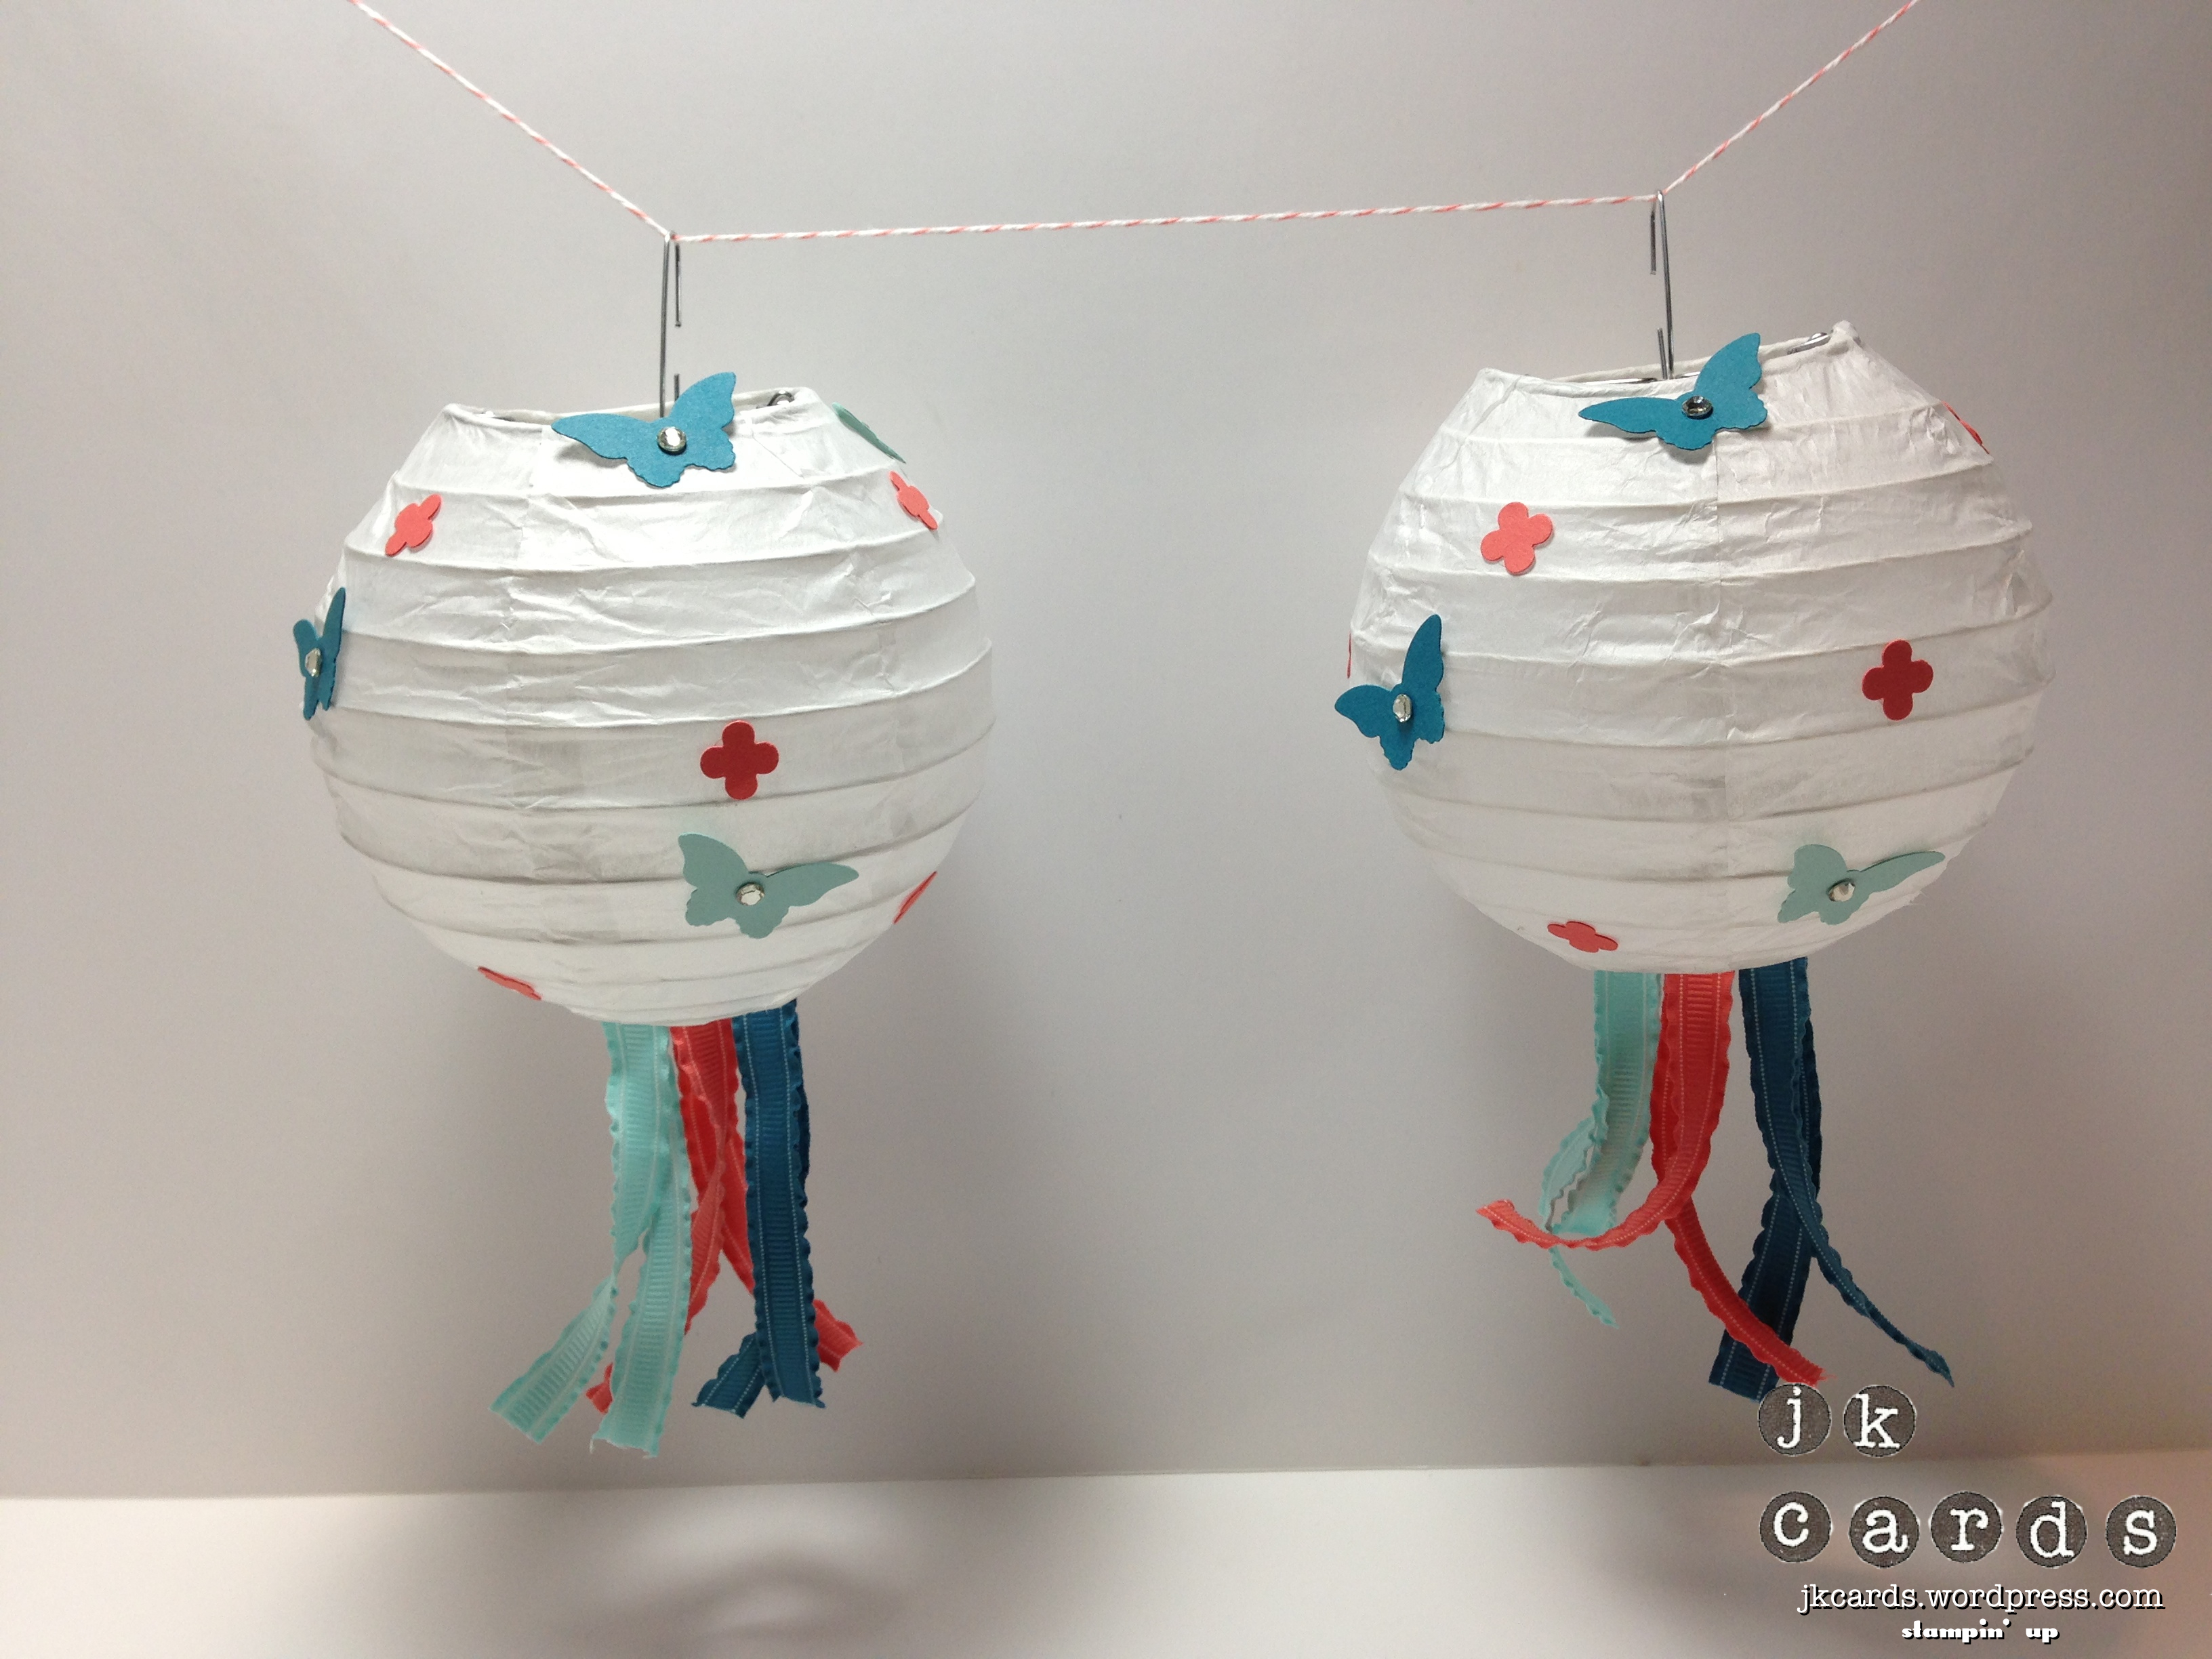
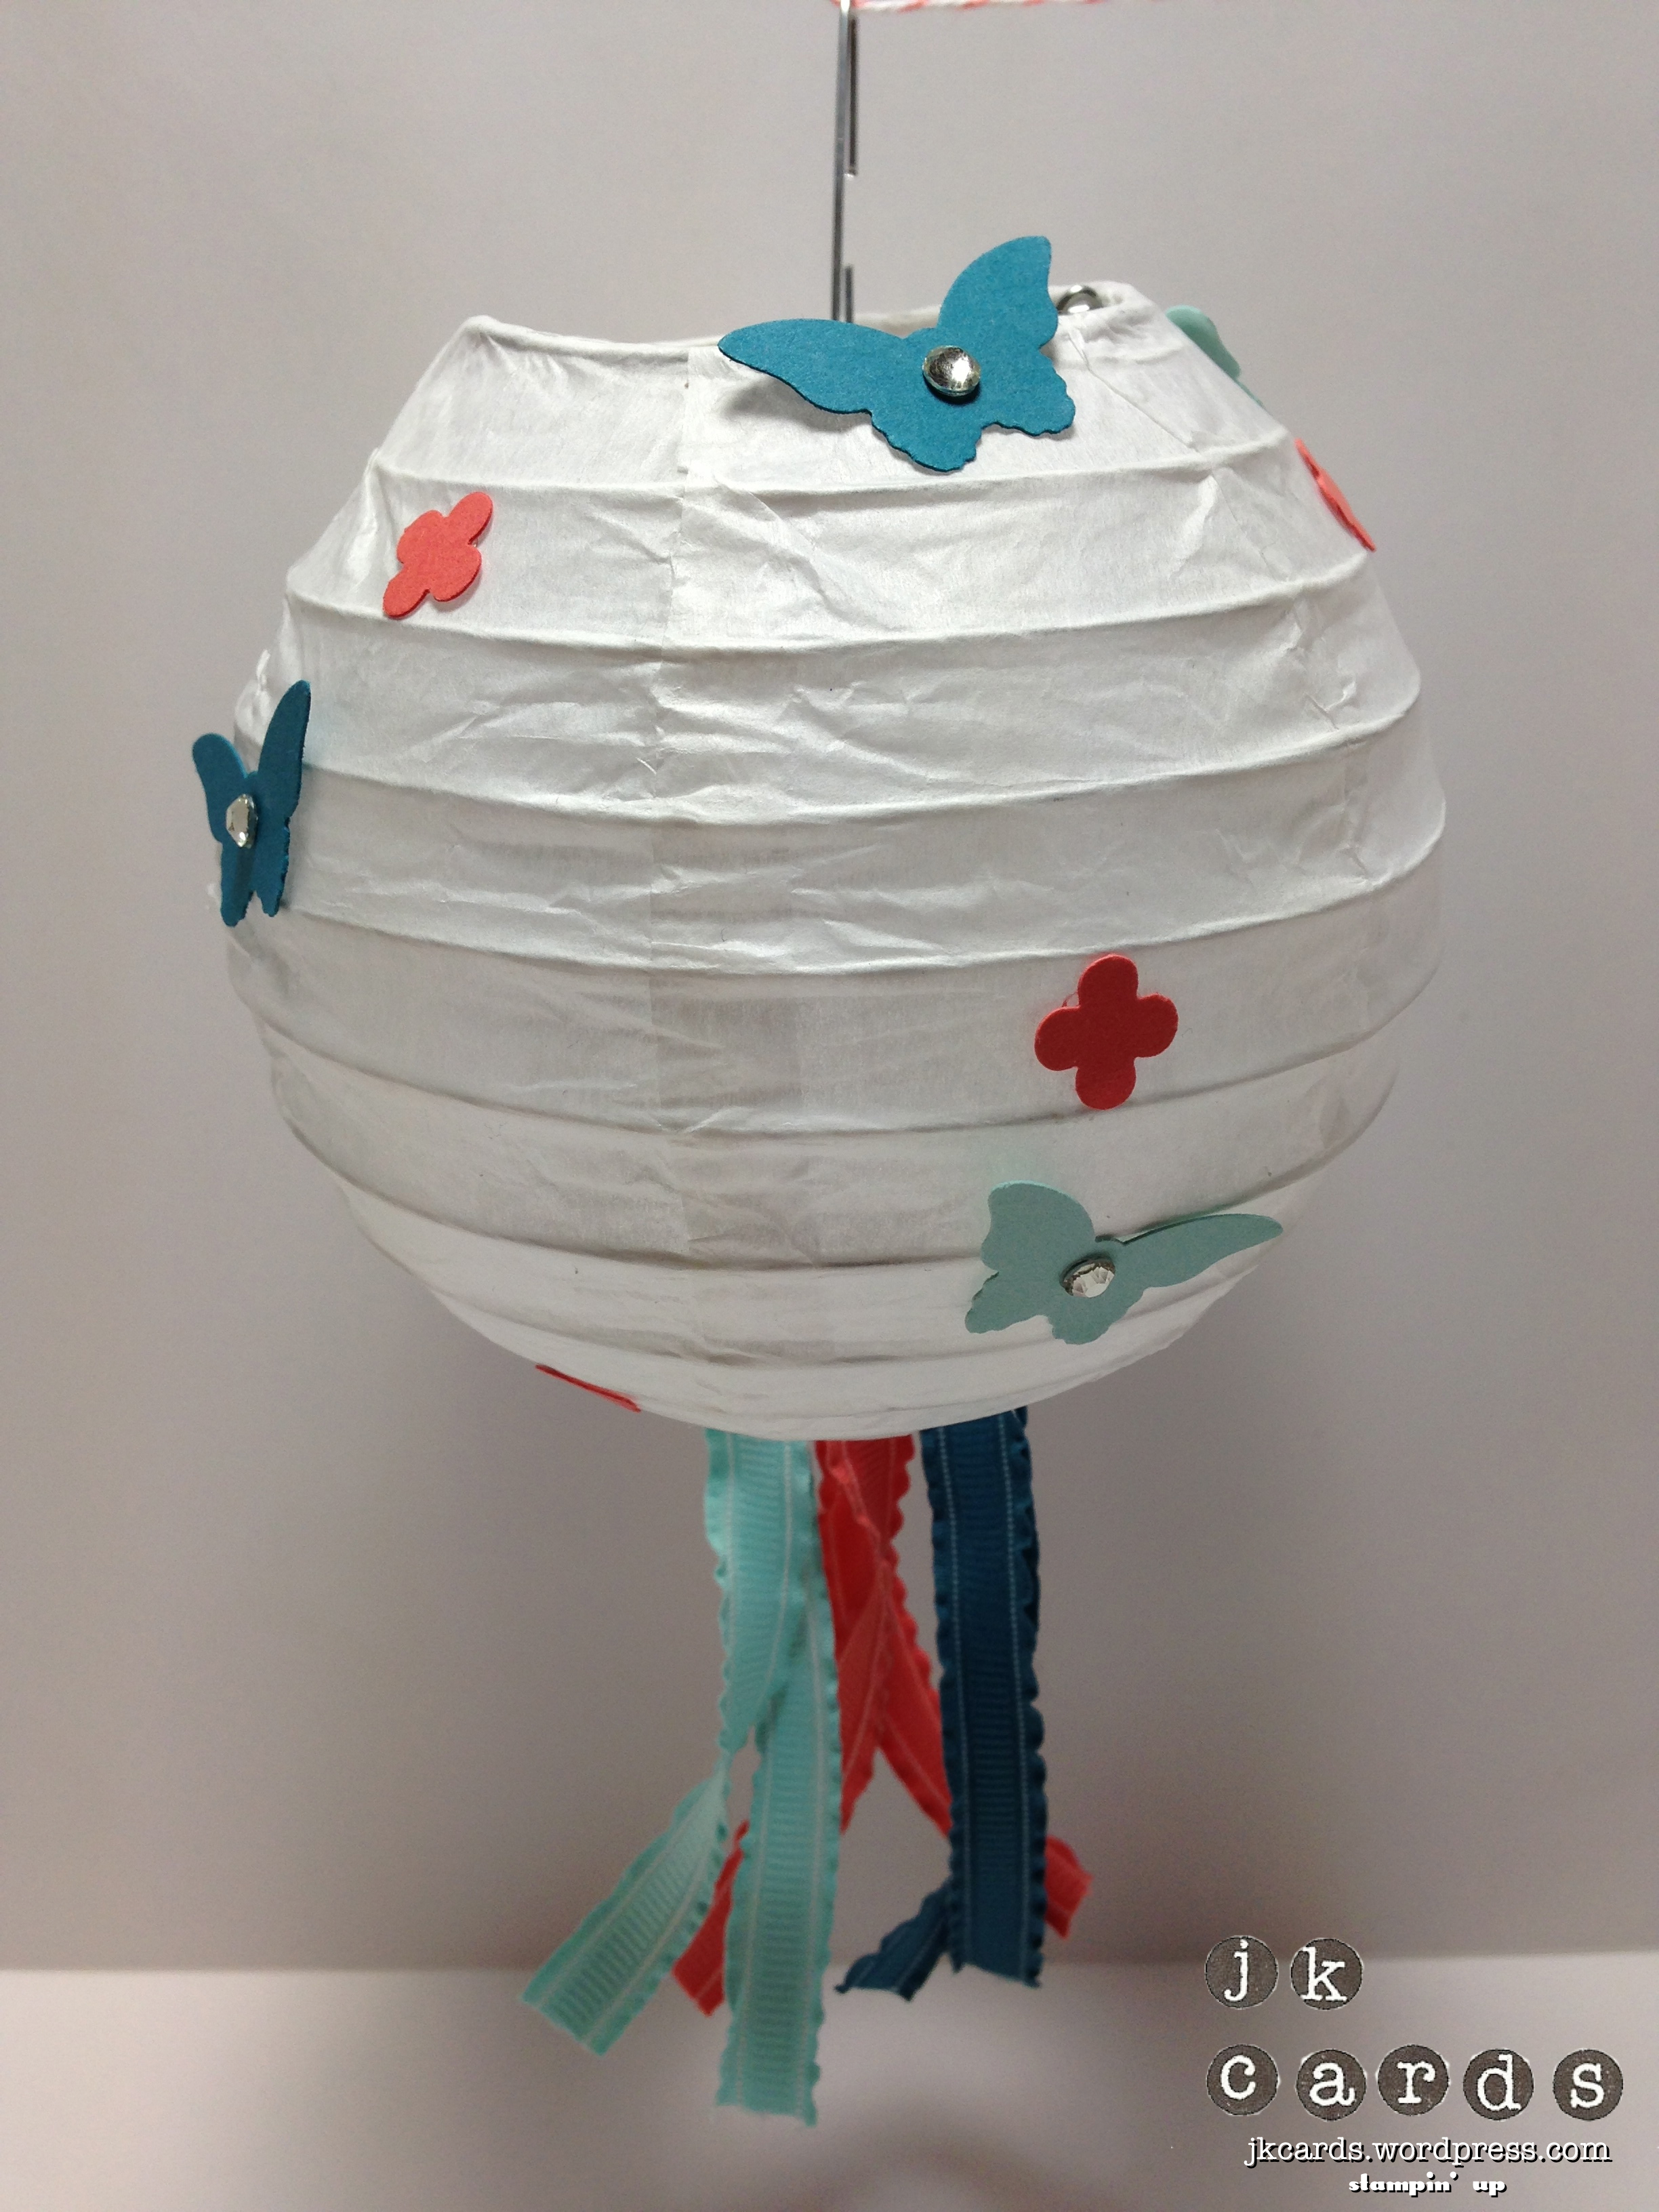
My second project for today I’m going to use as a tree topper, but you could also use it as an ornament on a bigger tree or it could be hung on a door. The base for my project is a piece of Soft Sky Card Stock that I cut out with the Circles Collections Framelits Dies. The background is a piece of Very Vanilla that I stamped with the World Map Background Stamp in Old Olive and that is also cut out with the Circles Framelits. I used the Christmas Star Single Stamp heat embossed with Gold Stampin’ Emboss Powder, cut out with my Paper Snips and scored with my Simply Scored Scoring Tool. Some stacked Stampin’ Dimensionals adhere it to the background. The greeting is from the Greetings of the Season Stamp Set, stamped in Cherry Cobbler and punched out with the 1 3/4″ Scallop Circle Punch. It is backed with a piece of Cherry Cobbler that I cut out with the Deco Labels Collection Framelits Dies. Two flagged pieces of Brushed Gold Card Stock are adhered behind it. On the back of it is a tube of Soft Sky that I will use to place it on top of my tree.

Control Freaks Nov. Tour Tree Topper

I hope that you enjoyed my projects for this month’s Control Freaks Blog Tour. Now on to your next stop, up next is Lisa Martz, enjoy! Thanks so much for stopping by here and have a great day!

clickhere2013

Stampin’ Up! products used:

Banner:

Card Stock: Cherry Cobbler, Blushing Bride, Pool Party and Whisper White

Designer Series Paper: Winter Frost Specialty

Ink: Cherry Cobbler and Pool Party Classic Stampin’ Ink

Stamp Sets: Festive Flurry and Dictionary Background Stamp Clear Mount

Framelits: Festive Flurry and Chalk Talk

Embossing Folder: Alphabet Press

Punch: 1″ Circle

Bigz Dies: Typeset Alphabet

Tools: Big Shot, Simply Scored Scoring Tool, Paper Snips, Stampin’ Dimensionals and SNAIL

Tree Topper:

Card Stock: Soft Sky, Very Vanilla and Cherry Cobbler

Specialty Card Stock: Brushed Gold

Ink: Cherry Cobbler and Old Olive

Specialty Ink: Versa-Mark

Stampin’ Emboss Powder: Gold

Stamp Sets: Christmas Star Single and Greetings of the Season Clear Mount

Framelits: Circles Collection and Deco Labels

Punch: 1 3/4″ Scallop Circle

Tools: Big Shot, Heat Tool, Simply Scored Scoring Tool, Paper Snips, Stampin’ Dimensionals and SNAIL

Control Freaks October Blog Tour

freakwelcome2013

Hello everyone and welcome to the October Control Freaks Blog Tour! Our theme for this month’s tour is Gratitude. A very fitting theme seeing as the time of year we are coming up on there are so many things that we all have to be grateful for. The holiday’s help us to stop and remember that. If you are following the tour then you have arrived here from LeeAnne Greff’s blog. When I think of grateful I think of thank you cards so I made a box of thank you cards that are great to have handy or they would make a fun gift for someone.

I saw a tutorial on Pinterest where someone had used the Envelope Punch Board to make a box to hold four cards with envelopes, well, I had to give that a try! The box for the cards is made from Crumb Cake Card Stock that is cut to 9″ x 9″ and then using the Envelope Punch Board it’s scored and punched at 3 1/2″ and 4 1/2″. You then flip it and do the same on the opposite side. For the two remaining sides you follow the score lines from the previous sides and when you are finished you have your box. Some Sticky Strip holds it together and a piece of 1 1/4″ Burlap Ribbon is wrapped around it to hold it closed. I used the Snow Day Stamp Set to stamp my snow man in Whisper White Craft Ink on Soft Sky and cut him out with my Paper Snips. His buttons and face are Basic Black and his nose is Pumpkin Pie. A piece of Sahara Sand and a piece of Soft Sky are cut out with the Deco Labels Collection Framelits Dies. The Soft Sky piece has his arms stamped in Soft Suede on it and its all adhered to the Burlap with Sticky Strip. A little piece of Burlap is also used for his scarf. I did the same process for the four snowmen on the cards. The greeting along the bottom and snowflakes are stamped in Soft Sky on Sahara Sand. The main greeting is from the Lots of Thanks Stamp Set and is stamped in Soft Suede on Soft Sky and punched out with the Label Bracket Punch. Some Crumb Cake Envelopes complete the set. I’m going to use mine as a gift for someone this holiday season. Who couldn’t use a nice set of handmade thank you’s to send out?! I hope that you enjoyed my project for this month’s Control Freaks Blog Tour. Now on to your next stop, up next is Jan Tinklenberg, enjoy! Thanks so much for stopping by here and have a great day! 🙂

Control Freaks Blog Tour October 2013

Control Freaks Blog Tour October 2013

Control Freaks Blog Tour October 2013

Control Freaks Blog Tour October 2013


clickhere2013

Stampin’ Up! products used:

Card Stock: Crumb Cake, Sahara Sand and Soft Sky

Ink: Soft Suede, Basic Black and Pumpkin Pie Classic Stampin’ Ink

Craft Ink: Whisper White

Stamp Sets: Snow Day and Lots of Thanks Clear Mount

Framelits: Deco Labels

Punch: Label Bracket

Embellishments: 1 1/4″ Burlap Ribbon

Tools: Big Shot, Envelope Punch Board, Stamp-a-ma-jig, Paper Snips, Sticky Strip, Stampin’ Dimensionals and SNAIL

Control Freaks September Blog Tour

freakwelcome2013

Hello everyone and welcome to the September Control Freaks Blog Tour Featuring Halloween Projects! I’m on a plane at the moment on my way to see a very good friend. Nothing like posting from 30,000 feet! If you are following the tour you should have arrived here from my good friend and very talented stamper Sandy Mathis’ blog. Her projects were just amazing weren’t they?!?! I have two fun and different projects for you this month. A nifty Halloween Wreath and a fun Halloween clock! Yes… a clock!

First up I have my Wreath. I was in a store the other day and I saw this pre-packaged halloween wreath and I thought well I can make that with my Stampin’ Up! goodies so that’s exactly what I did! For the backing of the wreath I cut out a piece of Basic Black Card Stock with my Circles Collection Framelits Dies. The cones are made from 12 sheets of Witches’ Brew Designer Series Paper cut in 4″ x 4″ squares. Out came the hot glue gun and after about two full sticks my cones were assembled and glued to the base. The center of the wreath is a piece of Basic Gray, again cut out with the Circles Framelits, and a rosette made from some more Witches’ Brew DSP. A piece of Summer Starfruit cut out with the Labels Collection Framelits Dies and pierced with the Festive Paper-Piercing Pack is the backing for the stamps. Both of the stamps are from the Halloween Bash Stamp Set, the Pumpkin Pie one is cut out with the Decorative Label Punch and the Basic Black one with the Scallop Oval Punch. They are all adhered to one another with Stampin’ Dimensionals. A pretty neat take on a wreath that you can make larger just by changing the dimensions of your squares!

Control Freaks Sept Blog Tour

My second project is a really fun one. I was inspired when I was meandering through one of the local craft stores and happened down the clock aisle. I thought wouldn’t it be fun to make a Halloween clock?! For the base of the clock I used my Circles Collection Framelits to cut out a piece of Coaster Board and a piece of Witches’ Brew Designer Series Paper. I glued them to each other using Multi-Purpose glue and used my Paper Snips to make the hole in the middle for the movement to go through. The numbers are from the ABC-123 Sketch Alphabet & Numbers Stamp Set and are stamped in Pumpkin Pie and punched out with the 7/8″ Scallop Circle Punch. All of the other stamped images and greeting are from the Halloween Hello Stamp Set and are stamped in Pumpkin Pie too. I used my Pumpkin Pie and Daffodil Delight Stampin’ Write Markers to color in the candy corn and adhered everything to the clock face with Stampin’ Dimensionals. I really love the way the greeting spins around the center and the candy makes it’s way around the clock face too!

Control Freaks Sept Blog Tour

So what do you think?!?! A little different and fun huh?! I really hope that you enjoyed my projects for this month’s Control Freaks Blog Tour featuring Halloween Projects. Now you are off to see the talented Connie Babbert’s projects. She always has some fun ideas! Thank you for stopping by and enjoy the rest of the tour! 🙂

clickhere2013

Stampin’ Up! products used:

Wreath:

Card Stock: Basic Black, Basic Gray, Summer Starfruit and Very Vanilla

Designer Series Paper: Witches’ Brew

Ink: Pumpkin Pie and Basic Black Classic Stampin’ Ink

Stamp Set: Halloween Bash Clear Mount

Framelits: Circles Collection and Labels Collection

Punches: Decorative Label and Scallop Oval

Tools: Big Shot, Simply Scored, Festive Paper-Piercing Pack, Paper-Piercing Tool, Hot Glue Gun, Stampin’ Dimensionals and SNAIL

Clock:

Card Stock: Very Vanilla

Specialty: Coaster Board

Designer Series Paper: Witches’ Brew

Ink: Pumpkin Pie Classic Stampin’ Ink

Stampin’ Write Markers: Pumpkin Pie and Daffodil Delight

Stamp Set: Halloween Hello and ABC-123 Sketch Alphabet & Numbers Clear Mount

Framelits: Circles Collection

Punches: 7/8″ Scallop Circle and 1 1/4″ Scallop Circle

Tools: Big Shot, Paper Snips, Multi-Purpose Glue, Stampin’ Dimensionals and SNAIL

Control Freaks August Blog Tour

freakwelcome2013

Hello there and welcome to the Control Freaks August Blog Tour! We are so glad to have you along. This month we are featuring products from the 2013 Holiday Catalog. If you are following the tour then you have arrived here from the amazing Julie Davidson’s blog. She has cool stuff didn’t she? I have been having lots of fun playing with all of the goodies in the Holiday Catalog and I have also been having lots of fun with the new Thinlits Dies. I have a card for you today that uses the Thinlits and two fun projects that use Vellum.

First up we have the card. When they introduced the Thinlits at Convention I knew that I was going to love them and I was right! They are so much fun to play with and not just to make the cards. The elements they come with are great too! The base of my card is Smoky Slate Card Stock and I used the Circle Card Thinlits Die to cut it out. The circle in the middle starts off with a piece of Costal Cabana that I punched out with the 2 1/2″ Circle Punch. I used the scallop circle from the Thinlits set to cut out a piece of Silver Glimmer Paper. The snowflake is from the Festive Flurry Stamp Set and is cut out with the Festive Flurry Framelits Dies. The circle of Glimmer paper is cut out using the Circles Collection Framelits Dies. I adhered only the left side so that when you flip the card it circles the greeting which is from the Christmas Messages Stamp Set and is stamped in Costal Cabana. The greeting is from the Joy to the World Stamp Set and is stamped in Smoky Slate. A strip of Silver Glimmer Paper, the one on the left is punched with the Scallop Edge Punch, finish the card off with some more sparkle. I love the way the circle flips around to surround the greeting too!

Control Freaks August Blog Tour Card Closed

Control Freaks August Blog Tour Card Open

Next up I have a simple Votive Holder that I made with some Vellum Card Stock and my Simply Scored Scoring Tool. Another one of the snowflakes from the Festive Flurry Stamp set is stamped in Costal Cabana on Vellum and cut out with the Festive Flurry Framelits Dies. I used the Boho Blossom Punch to punch out the piece of Silver Glimmer Paper in the center, it fits just perfectly! A nice simple way to dress up a table or mantle for the Holidays!

Control Freaks August Blog Tour Votive

Finally I have a quick project that you could use as an ornament or to hang in a window. I stamped the Wonderful Wreath in Costal Cabana on more Vellum Card Stock and cut it out with the Circles Collection Framelits Dies. The berries are colored in with my Cherry Cobbler Stampin’ Write Marker. I used the Expressions Thinlits Dies to cut out Merry from some more Costal Cabana and adhered it to the wreath with 2-Way Glue. It looks really neat with some light behind it and could also easily be used on a card front or a gift package.

Control Freaks August Blog Tour Window Hanging

I hope that you enjoyed my card and projects for this month’s Control Freaks Blog Tour and that you are inspired to go and play with some goodies from the Holiday Catalog! Next up for you crafty pleasure we have the talented LeeAnn Greff. I’ll bet you can’t wait to see what she has in store for you! Thanks for hopping by and enjoy the rest of the tour! 🙂

clickhere2013


Stampin’ Up! products used:

Card:

Card Stock: Smoky Slate and Costal Cabana

Specialty Paper: Silver Glimmer

Ink: Costal Cabana and Smoky Slate Classic Stampin’ Ink

Stamp Sets: Festive Flurry, Joy to the World and Christmas Messages Clear Mount

Thinlits: Circle Card

Framelits: Festive Flurry

Punches: 2 1/2″ Circle and Scallop Border

Tools: Big Shot, 2-Way Glue, Stampin’ Dimensionals and SNAIL

Votive Holder:

Specialty Card Stock: Vellum

Specialty Paper: Silver Glimmer

Ink: Costal Cabana Classic Stampin’ Ink

Stamp Set: Festive Flurry

Framelits: Festive Flurry

Punch: Boho Blossom

Tools: Big Shot, Simply Scored and SNAIL

Wreath:

Card Stock: Costal Cabana

Specialty Card Stock: Vellum

Stamp Set: Wonderful Wreath

Ink: Costal Cabana Classic Stampin’ Ink

Marker: Cherry Cobbler Stampin’ Write

Framelits: Circles Collection

Thinlits: Expressions

Tools: Big Shot and 2-Way Glue

Control Freak Convention Card Swap/Holiday Catalog Tour

freakwelcome2013

Hello everyone and welcome to the Control Freaks Convention Swap/Holiday Catalog Tour. If you are going along the tour you have arrived here from the talented LeAnn Greff, she always has some amazing projects! I’m doing a little something different this time around. One of my favorite features in the Stampin’ Success Magazine that Stampin’ Up! Demonstrators get every other month is the Stepped Up article. I have two cards to share with you today and two versions of each card. The first card will appeal to you clean and simple side while the second card adds some extra for a little oomph.

My first card is actually one of my favorites. It starts off with a base of Whisper White Card Stock and I stamped the “skid marks” from the Gorgeous Grunge Stamp Set in Pear Pizzaz three times in the middle. The tag is made from a piece of Wisteria Wonder that I stamped the ampersand from the Hello, Lovely Stamp Set in Wisteria Wonder. Two butterflies are punched out from a piece of Pear Pizzaz that I stamped with the Travel Journal Builder Wheel in Pear Pizzaz and punched out with the Bitty Butterfly Punch. The greeting is from the Bitty Banners Stamp Set and is stamped in Wisteria Wonder and cut out with the Bitty Banners Framelits Dies.

CF Conv Swap Card 1

The Stepped Up version of the card adds a piece of Whisper White 1/4″ Stitched Grosgrain Ribbon to the tag and some Basic Jewels Rhinestones randomly placed. To make the whole card pop I mounted it to a base of Wisteria Wonder Card Stock. I like both versions of the card but a little bling and a base goes a long way! It’s also a great way to combine some sets you may already have with some new goodies!

CF Blog Tour Card 1 SU

The second card I have for you uses one of my favorite card stock. The base of the card is Naturals White Card Stock. I used the Tape It! Stamp Set to stamp the Washi Tape in Bermuda Bay, Baked Brown Sugar and Strawberry Slush. Up at the top is the greeting from the Label Something Stamp Set stamped in Baked Brown Sugar and punched out with the Ticket Duo Builder Punch and stapled to a piece of Bermuda Bay that was punched out with the 2 1/2″ Circle Punch and cut in half. The hexagon, from the Six Sided Sampler Stamp Set punched out with the Hexagon Punch, flower from the Flower Shop Stamp Set punched out with the Pansy Punch and the button from the Notable Notions Stamp Set punched out with the 1 1/4″ Circle Punch are all adhered to the card with Stampin’ Dimensionals. All of the images are stamped on Naturals White.

CF Conv Swap 2

The Stepped Up version includes some Basic Jewels Pearls in the center of the flower and is mounted to a base of Bermuda Bay Card Stock. Again, just a little bling and a base give the card a whole new look. I also love the way that a bunch of completely different stamp sets can have such a cohesive look!

CF Blog Tour Card 2 SU

I hope that you enjoyed my Stepped Up post for the Control Freaks Convention Swap Tour. It was such an honor to meet up with all of the Freaks at Convention in person. I’m so happy to be a part of their fun group! Now on to the your next dose of creativity with the clever Lisa Martz. Have a great time on the tour and thanks for stopping by!

clickhere2013

Stampin’ Up! supplies used

Card 1:

Card Stock: Whisper White, Wisteria Wonder and Pear Pizzaz

Ink: Pear Pizzaz and Wisteria Wonder Classic Stampin’ Ink

Stamp Sets: Bitty Banners, Gorgeous Grunge, Hello, Lovely Clear Mount and Travel Journal Builder Wheel

Framelits: Bitty Banners

Punch: Bitty Butterfly

Embellishments: Whisper White 1/4″ Stitched Grosgrain Ribbon and Basic Jewels Rhinestones

Tools: Big Shot, Stampin’ Dimensionals and SNAIL

Card 2:

Card Stock: Naturals White and Bermuda Bay

Ink: Baked Brown Sugar, Strawberry Slush and Bermuda Bay Classic Stampin’ Ink

Stamp Sets: Tape It!, Six Sided Sampler, Notable Notions, Label Something and Flower Shop Clear Mount

Punches: Ticket Duo Builder, 1 1/4″ Circle, Hexagon, Pansy and 2 1/2″ Circle

Embellishments: Basic Jewels Pearls

Tools: Stampin’ Dimensionals and SNAIL

Control Freaks June Blog Tour

freakwelcome

Hello peeps, how is your day going so far? Mine is going well. I’m very happy that it’s time for the June Control Freaks Blog Tour!! This month we are featuring products from the new 2013-2014 Catalog. If you are following the tour you have arrived here from the very clever LeeAnn Greff’s blog. Now they were some awesome projects! There are so many great new stamps and accessories I didn’t know where to begin! I have two cards and a 3D project to share with you so lets get to them.

The first card uses an eclectic mix of new goodies. The base of the card is Real Red Card Stock and the background and the piece of paper in the frame are from the I Am Me Designer Series Paper Pack. I used the new Filmstrip Stamp, stamped in Basic Gray, on top of the background. In the lower left I used one of the images from the Six Sided Sampler Stamp Set stamped in Calypso Coral. I created the frame from Whisper White and cut out the center of the frame with the Squares Collection Framelits Dies. The greeting on the top is from last month’s Paper Pumpkin Kit and the date stamp is the Epic Day This and That Rotary Stamp. I stamped the bird from the Morning Meadow Host(ess) Stamp Set and cut it out with my Paper Snips. The butterfly is from the Papillion Potpourri Stamp Set and is punched out with the Elegant Butterfly Punch. Some of the new fun Candy Dots are placed randomly on the card to finish it off. A fun trendy card that uses lots of new goodies!

Control Freaks June Tour Card 1

The second card is a newer style of card called Freestyle Collage and I got the idea from Pinterest. The base is Whisper White Card Stock. I cut the tag and the flag from some of the Gingham Garden Designer Series Paper. The frame is made the same way as the first one, using the Squares Collection Framelits and some Pear Pizzaz. The leaves of flower are Creped Filter Paper that I colored with my Sponge Dauber and Melon Mambo Ink. I used my Paper Snips to cut them out and they are adhered behind a Simply Presses Clay Flower that I colored with my Aqua Painter and Night of Navy Ink. In between is some Linen Thread for a little texture. The celebrate is from the Sketched Birthday Stamp Set and is cut out with the Bitty Banners Framelits Dies. The you is from the Fabulous Phrases Stamp Set and is punched out with the Little Labels Punch Pack. A very eclectic mix of styles and texture but I think it works. I love that Stampin’ Up! products lend themselves to so many different styles.

Control Freaks June Tour Card 2

The last project I have for you is made with one of the new Tag a Bag Gift Boxes. The tag is made from Very Vanilla Card Stock and is flagged on the bottom and the top is rounded with the 2 1/2″ Circle Punch. I stamped the & from the Hello, Lovely Stamp Set and the For You is form the Bitty Banners Stamp Set and is cut out with the Bitty Banners Framelits Dies. For the flower I used the 7/8″ Scallop Circle Punch with some Crisp Cantaloupe, they are cut halfway up and some hot glue is used to assemble it. A Very Vintage Designer button is in the middle. One of the mini clothespins from the Tag a Bag Accessory Kit holds some 7/16″ Natural Trim and Linen Thread to the tag and box. The belly band is Crisp Cantaloupe and the greeting is also from the Hello, Lovely Stamp Set. I used my Crisp Cantaloupe and Pistachio Pudding Stampin’ Write Markers to color in the stamp and punched it out with the Decorative Label Punch. It’s a perfect box to give some cookies to someone special in. 🙂

Control Freaks June Tour 3D Box

I hope that you enjoyed my projects for this month’s Control Freaks Blog Tour featuring products from the new 2013-2014 Catalog. Thank you for stopping by and you are off to see the very talented Robin Spinner’s projects. Enjoy!

tourclickhere

Stampin’ Up! products used:

Card 1

Card Stock: Real Red, Whisper White and Pool Party

Designer Series Paper: I Am Me

Ink: Calypso Coral, Pool Party and Basic Gray Classic Stampin’ Ink

Stamp Sets: Paper Pumpkin Kit, Six Sided Sampler, Morning Meadow and Papillon Potpourri Clear Mount, Filmstrip Wood Mount and Epic Day This and That Rotary Stamp

Framelits: Squares Collection

Punches: Hexagon and Elegant Butterfly

Embellishments: Subtles Candy Dots

Tools: Big Shot, Paper Snips, Stampin’ Dimensionals and SNAIL

Card 2

Card Stock: Whisper White and Pear Pizzaz

Specialty paper: Creped Filter

Designer Series Paper: Gingham Garden

Ink: Melon Mambo and Night of Navy Classic Stampin’ Ink

Framelits: Bitty Banners and Squares Collection

Punch: Little Labels Punch Pack

Embellishments: Simply Pressed Clay, Buttons & Blossoms Simply Pressed Clay Moulds and Linen Thread

Tools: Big Shot, Paper Snips, Sponge Dauber, Aqua Painter, Mini Glue Dots, Stampin’ Dimensionals and SNAIL

3D Box

Card Stock: Very Vanilla, Crisp Cantaloupe and Pistachio Pudding

Ink: Pistachio Pudding and Crisp Cantaloupe Classic Stampin’ Ink

Markers: Pistachio Pudding and Crisp Cantaloup Stampin’ Write Markers

Stamp Sets: Hello, Lovely and Itty Bitty Banners Clear Mount

Framelits: Bitty Banners

Punches: 7/8″ Scallop Circle, 2 1/2″ Circle, Decorative Label and 1 1/4″ Circle

Embellishments: 7/8″ Natural Trim, Linen Thread, Mini Clothes Pins and Very Vintage Designer Buttons

Tools: Silicone Craft Sheet, Sticky Strip, Stampin’ Dimensionals and SNAIL

Control Freaks May Blog Tour!

freakwelcome

Hello everyone and welcome to the Control Freaks Blog Tour for May 2013. The focus this month is on the goodies from the new 2013-2014 Catalog! I’m really liking the new stuff that I have had the chance to play with and my wish list is growing every time I look through the catalog again, and again! If you are following the tour you have arrived here form the incredibly talented Connie Babbert’s blog. She always has such amazing projects! Today I have two cards and a 3D project for you so let’s get to them!

First up is a card that is basically a one layer card. I used the Wildflower Meadow Background Stamp and my Stampin’ Write Markers to color it in. The colors are Gumball Green, Calypso Coral, Pool Party and Primrose Petals. After I stamped the image I used the coordinating Wildflower Meadow Textured Impressions Embossing Folder to perfectly emboss the entire stamped image, how cool is that?! The only thing left to do is to stamp the greeting from the Really Good Greetings Stamp Set in Pool Party and mount it to a piece of Pool Party Card Stock. It’s a great stamp/embossing folder combo and markered it has big impact!

Control Freaks May Blog Tour Gee Thanks Card

My second card uses the new Mosaic Madness Stamp Set with the coordinating Punch and Designer Series Paper. The main panel of the card has the border form the Mosaic Madness Stamp Set stamped in Strawberry Slush. The Quatrefancy Specialty Designer Series Paper is punched out on the top and bottom with the Mosaic Punch along with the ones on either side which were embossed with the Modern Mosaic Textured Impressions Embossing Folder and then stamped. The greeting is from the Really Good Greetings Stamp Set and has the ends flagged. There are some Basic Jewels Rhinestones on the greeting and the mosaics. Everything is stamped in Strawberry Slush which is a new In-Color. I love the monochromatic look of the card and the greeting is one of my favorites form the set.

Control Freaks May Blog Tour Strawberry Mosaic

My last project is a 3D one. I wanted to show off the new In-Colors and I thought that a vase full of flowers would be a good way to do it. All of the flowers are punched out with the Fancy Flower Punch. I used my hot glue gun to assemble them and also to fix the Vintage Faceted Designer Buttons in their center. The tag on the vase also includes the two brand new colors that are added to the color families, Smokey Slate and Soft Sky. The friends is from the You’re Amazing Stamp Set, which is also in the new catalog. I really like the new In-Colors, Costal Cabana, Baked Brown Sugar, Pistachio Pudding, Crisp Cantaloupe and Strawberry Slush and Smoky Slate is fast becoming a favorite too.

Control Freaks May Blog Tour In-Color Flowers

Control Freaks May Blog Tour In-Color Flowers Close

I hope that you enjoyed my Control Freaks Catalog Peek projects for this month’s blog tour. Now you are off to the amazing Mary Brown, hey, I think I’m a Create with Connie and Mary sandwich! LOL! She always has great projects for you! Enjoy the tour and the rest of your day! 🙂

tourclickhere

Stampin’ Up! products used:

Card 1

Card Stock: Whisper White and Pool Party

Ink: Pool Party Classic Stampin Ink

Markers: Gumball Green, Calypso Coral, Pool Party and Primrose Petals

Stamp Sets: Wildflower Meadow Background and Really Good Greetings Clear Mount

Tools: Big Shot, Stamp-a-ma-jig and SNAIL

Card 2

Card Stock: Whisper White

Designer Series Paper: Quatrefancy Specialty

Ink: Strawberry Slush Classic Stampin’ Ink

Stamp Sets: Mosaic Madness and Really Good Greeting

Embossing Folder: Modern Mosaic

Punch: Mosaic

Embellishment: Basic Jewels Rhinestones

Tools: Big Shot, Stamp-a-ma-jig, Stampin’ Dimensionals and SNAIL

3D Project:

Card Stock: Baked Brown Sugar, Crisp Cantaloupe, Pistachio Pudding, Strawberry Slush, Costal Cabana, Soft Sky, Smokey Slate and Whisper White

Framelits: Window Frames Collection

Punch: Fancy Flower

Embellishments: Vintage Faceted Designer Buttons

Tools: Paper Snips, Hot Glue Gun, Floral Stems and Glass Vase

Control Freaks April Blog Tour!

freakwelcome

Hello and welcome to the April Edition of the Control Freaks Blog Tour! How awesome is it that it’s a Friday too! Our theme for this month’s tour is birthday’s! Definitely one of my favorite types of projects to make! If you are following the tour that means that you have arrived here for the fabulous LeeAnn Greff’s blog. She always has some pretty great projects to share with you doesn’t she?!?!

For this month’s tour I have three projects to share with you, two cards and a 3D project. I also kept the colors the same on all three projects so that even though they are different the still have a cohesive style. So without further ado lets get started!

My first card is created with our new Designer Typeset Photopolymer Stamps. I got the cool idea for the background from a video on the Demonstrator site. The base of the card is Whisper White. My piece of Pool Party get it’s cool triangle pattern from the flags stamp in the set and because it’s clear it made stamping the pattern super easy. Down the left side is some Calypso Coral punched with the Scallop Border Punch. The arrows are also form the Designer Typeset Stamp Set and the circles are made with some circle punches. A regular little paper clip with some Pool Party Ruffled Ribbon tied around it gives it a much better look than the clip alone. A nice simple geometric card that without the ribbon would work great for anyone!
rxxbuynoprescriptiononline.net
rxxbuynoprescriptiononline.net/clomid.html
rxxbuynoprescriptiononline.net/prednisone.html
rxxbuynoprescriptiononline.net/propecia.html

Control Freaks PP Card

My second card is something new that I have been experimenting with lately. I printed out the embellishments from My Digital Studio and cut them out. I used the Sent with Love Digital Kit which is also one of my favorite actual stamp sets and DSP. The background is adhered with SNAIL and the tag and plane are adhered with Stampin’ Dimensionals. The silver “sequins” are something that I found in a drawer, they weren’t in a package so I don’t know where they came from but I thought they were a neat addition. MDS can be a fun way to make a quick card.

Control Freaks MDS Hybrid Card

For my last project I made some paper lanterns. They would look quite nice hung up for a little birthday celebration. The lanterns are simple paper ones that I picked up from a local craft store. I used the Bitty Butterfly punch and the Itty Bitty Punch Pack to embellish them. Some Basic Jewels Rhinestones give them some bling. I used some of the In-Color Ruffled Ribbon hung from the bottom to make them extra festive! You can also use Christmas lights to light them up.

Control Freaks Laterns

Control Freaks Lantern

I hope that you enjoyed my cards and lanterns for the April Control Freaks Blog Tour. Up next is the super talented Dawn Olchefske. I’ll bet you can’t wait to see what neat goodies she has for you! Thank you so much for stopping on the tour with me and I hope that you enjoy the rest of the tour!

tourclickhere

Card 1 Stampin’ Up ! products used:

Card Stock: Whisper White, Pool Party and Calypso Coral

Ink: Pool Party and Calypso Coral Classic Stampin’ Ink

Stamp Sets: Designer Typeset Photopolymer and Made for You Clear Mount

Punches: 1 3/4″ Circle, 3/4″ Circle, 1/2″ Circle and Scallop Border

Embellishments: Pool Party 3/8″ Ruffled Ribbon

Tools: Stampin’ Dimensionals and SNAIL

Card 2 Stampin’ Up! products used:

Card Stock: Crumb Cake

My Digital Studio: Sent with Love Digital Kit

Tools: Stampin’ Dimensionals and SNAIL

3D Stampin’ Up! products used:

Card Stock: Pool Party, Island Indigo and Calypso Coral

Embellishments: Pool Party, Island Indigo and Calypso Coral 3/8″ Ruffled Ribbon and Basic Jewels Rhinestones

Tools: Mini Glue Dots and Sticky Strip

Control Freaks March Blog Tour!

freakwelcome

Hello and welcome to the March Control Freaks Blog Tour. This time around the theme is Spring! Boy could I use some spring right about now! Tomorrow is the first day of Spring but we had snow here on Long Island yesterday. Like I said… so ready for Spring!

If you are following the tour you have arrived here from the super creative Lisa Martz’s blog. She always has some fantastic stuff to share doesn’t she?! This month I have three projects for you, two cards and a candy jar.

The first of my cards is simple but I love the way it looks. I often need cards that can make the long journey over to England where most of my family is. A one layer card always fits the bill. The base of the card is Pool Party Card Stock. I cut a piece of Very Vanilla to 3 3/4″ x 5″ and stamped all of my images on it. The jar is from the Perfectly Preserved Stamp Set that was carried over from the 2012 Holiday Catalog and it is stamped in Pool Party. The greeting is from the Make a Wish Stamp Set and is stamped in Calypso Coral. I stamped the hearts from the Oh, Whale! Stamp Set in Pool Party and Calypso Coral, stamping off some of them. I love the random hearts and the jar, they remind me of fireflies! Stamping off is a nice simple yet fun way to give a one dimensional card a little depth.

Control Freak Blog Tour Jar Card

For my second card I wanted to showcase the new Photopolymer Stamp Set. The base of this card is Primrose Petals Card Stock. I stamped some images from the Make a Cake Stamp Set in Primrose Petals, using the cake that I stamped in Raspberry Ripple to line up the little banner. The Happy Birthday banner is from the Designer Typeset Photopolymer Stamp Set. The banner stamp itself is straight but you can bend it when you mount them to your clear block and that’s what I did. It’s stamped in Raspberry Ripple and the letters in Primrose Petals. I used my Paper Snips to cut them out and they are mounted to the card with leftover Stampin’ Dimensional pieces. The cake is also mounted to the card with Stampin’ Dimensionals. The best part about the Photopolymer Set is that you can see exactly where you are going to stamp making it great for alphabets, easy to line up every time!

Control Freaks Blog Tour Poly Cake Card

My last project is a little jar with some jellybeans inside. I wrapped some Tea for Two Designer Series Fabric around the middle of the jar and adhered it with some Sticky Strip. A piece of Tea Lace Paper Doily was adhered to the fabric with some SNAIL before I attached it. The little chick is from the Everybunny Stamp Set and is stamped in Basic Black and colored in with Daffodil Delight and Calypso Coral Stampin’ Write Markers. A Stampin’ Dimensional holds it in place. On the top of the jar I punched a piece of Whisper White with the 1 1/4″ Scallop Circle Punch and adhered it to the jar with some Mini Glue Dots. The rolled rose is made by punching a piece of Calypso Coral with the 2 1/2″ Circle Punch and cutting in a spiral with my Paper Snips. After you roll it up some hot glue keeps it from unwinding. I punched some Lucky Limeade with the 1″ Circle Punch for the leaves and some more Mini Glue Dots hold it all on top. The flag is a piece of Whisper White and I used the Designer Typeset Photopolymer Stamp Set for Taylor, stamped in Calypso Coral. The Happy Easter is from the Teeny Tiny Wishes Stamp Set and is also stamped in Calypso Coral. For the egg I used the Itty Bitties Stamp Set and stamped it in Chocolate Chip. The flag is wrapped around a skewer and held closed with Sticky Strip. The butterfly is cut out with the Beautiful Wings Embosslit from Calypso Coral. A little fabric, card stock and some stamps make a fun way to dress up a plain glass container.

Control Freaks Blog Tour Candy Jar Front

Control Freaks Blog Tour Candy Jar Top

I hope that you enjoyed my Control Freaks March Blog Tour projects. I thank you very much for stopping here on the tour. Click below to go on to the clever and crafty Cindy Elam’s blog. I know that she will have some great projects to share with you! Enjoy!

tourclickhere
Buy Plavix online
Buy Prednisone online
Buy Premarin online


Card 1 Stampin’ Up! products used:

Card Stock: Pool Party and Very Vanilla

Ink: Pool Party and Calypso Coral

Stamp Sets: Perfectly Preserved, Make a Wish and Oh, Whale! Clear Mount

Tools: SNAIL


Card 2 Stampin’ Up! products used:

Card Stock: Primrose Petals and Whisper White

Ink: Raspberry Ripple and Primrose Petals Classic Stampin’ Ink

Stamp Sets: Designer Typeset Photopolymer and Make a Cake Clear Mount

Tools: Paper Snips, Stampin’ Dimensionals and SNAIL


Jar Stampin’ Up! products used:

Card Stock: Whisper White, Calypso Coral and Lucky Limeade

Fabric: Tea for Two

Ink: Basic Black, Calypso Coral and Chocolate Chip Classic Stampin’ Ink

Markers: Daffodil Delight and Calypso Coral Stampin’ Write Markers

Stamp Sets: Designer Typeset Photopolymer, Everybunny Clear Mount and Teeny Tiny Wishes and Itty Bitties Wood Mount

Embosslit: Beautiful Wings

Embellishments: Tea Lace paper Doily

Punches: 1″ Circle, 1 1/4″ Scallop Circle and 2 1/2″ Circle

Tools: Paper Snips, Sticky Strip, Mini Glue Dots, Stampin’ Dimensionals and SNAIL

Control Freaks February Blog Tour!

freakwelcome

Hello everyone and welcome to the February Control Freaks Blog Tour! This month’s tour features projects from the 2013 Spring Catalog. If you are following the tour you have arrived here form the very talented Connie Babbert’s blog. She always has such awesome projects doesn’t she?! I have two projects to share with you today. The first one is a journal an the second one is an album with a matching box.

First up is the journal. I found these white journals in Target in the dollar section a few months ago and I thought it would be perfect to decorate with some Stampin’ Up! goodies! The background is created using some So Saffron Card Stock and the Honeycomb Textured Impressions Embossing Folder. On top of that is one of the Tea Lace Doilies with a piece of Early Espresso that I cut out with the Delicate Doilies Large Sizzlit. The pinwheels are made from Tea for Two Designer Series Paper. I cut out the squares from the paper and then cut down from the corner and used my Bone Folder to curl them a little. A quick punch with the 1/16″ Circle Punch and a Metallic Brad and they are done. They are held in place with Some Stampin’ Dimensionals. The greeting is from the Made for You Stamp Set and is stamped in Early Espresso, punched out with the Large Oval Punch and backed with a piece of Island Indigo that is punched out with the Scallop Oval Punch. A nice fun spring journal that you could use to jot down thoughts or give as a nice gift to a friend.

Control Freaks Feb Blog Tour Journal

Next up is the album and matching box. The box is made with the Simply Scored Scoring Tool using Not Quite Navy and Daffodil Delight. The top of the box is decorated with a background of Daffodil Delight that I stamped with the Netting Background Stamp in Daffodil Delight. A piece of Crumb Cake is cut out with the Oval Collection Framelits Dies. On top of that is a piece of paper from the Parker’s Patterns Designer Series Paper that I flagged on both ends. A piece of Very Vanilla is stamped with the Basic Label Single Stamp in Cajun Craze and cut out with the Apothecary Accents Framelits Die. The year is stamped in Island Indigo using the Memorable Moments Stamp Set and backed with a piece of Marina Mist. Two Neutrals Brads are on either side. The SF is stamped in Not Quite Navy from the Morning Post Alphabet Stamp Set and adhered with Stampin’ Dimensionals.

Control Freaks Feb Blog Tour Box

The cover also uses Parker’s Prints Designer Series Paper and the Basic Label Stamp. A piece of Very Vanilla is stamped with the image from the Oh, Hello! Stamp Set in Crumb Cake and cut out with the Ovals Collection Framelits Dies. The California is stamped in Not Quite Navy with the Simply Serif Mini Alphabet. A Silver Basic Designer with some Very Vanilla 1/8″ Taffeta Ribbon Ribbon threaded and  is adhered with some Mini Glue Dots in the upper left. Some Natural 7/16″ Ribbon Trim holds it together.

Control Freaks Feb Blog Tour Album

All of the pages inside use Parker’s Prints Designer Series Paper too. On the first page I stamped the tickets from the That’s the Ticket Stamp Set in Not Quite Navy and punched them out with Ticket Duo Builder Punch. On the second page the sister is from the Amazing Family Stamp Set and is stamped in Cajun Craze. On page three I used images from the By the Tide Stamp Set and they are stamped in Early Espresso and Cherry Cobbler. All of the pictures are of my friends Kim and Angie on their vacation to San Francisco.

Control Freaks Feb Blog Tour Album Pg 1

Control Freaks Feb Blog Tour Album Pg 2

Control Freaks Feb Blog Tour Album Pg 3

Control Freaks Feb Blog Your Album & Box

I hope that you enjoyed my projects and that you have gotten some inspiration from them. The Spring Catalog has some great and varied products in it you are sure to find something for any project you need to make.

Now you are off to see what clever Dawn Olchefske has in store for you. She always has some inspiring projects so enjoy your stop and thanks for checking in with me!

tourclickhere


Stampin’ Up! products used:

Card Stock: Very Vanilla, So Saffron, Island Indigo, Early Espresso, Not Quite Navy, Daffodil Delight, Cajun Craze, Marina Mist and Cherry Cobbler

Designer Series Paper: Tea for Two and Parker’s Patterns

Ink: Early Espresso, Not Quite Navy, Cajun Craze, Early Espresso and Cherry Cobbler Classic Stampin’ Ink

Stamp Sets: Made for You, Simply Serif Mini Alphabet, Morning Post Alphabet, Basic Label Single, That’s the Ticket, Amazing Family, By The Tide and Oh, Hello! Clear Mount and Netting Background

Framelits: Ovals Collection, Apothecary Accents

Embossing Folder: Honeycomb

Punches: Large Oval, Scallop Oval, 1/2″ Circle and Ticket Duo Builder

Sizzlits: Delicate Doilies Large

Embellishments: Tea Lace Paper Doilies, Metallic Brads, Very Vanilla 1/8″ Taffeta Ribbon, Silver Designer Buttons and Natural 7/16″ Ribbon Trim

Tools: Big Shot, Paper Snips, Mini Glues Dots, Stampin’ Dimensionals and SNAIL