Creation Station – Sheltering Tree

creation station header

Hello! It’s been a while since we have had a Creation Station Blog Tour but we are back! This time around we are featuring the Sheltering Tree Photopolymer Stamp Set and the Irresistibly Yours Designer Series Paper from Sale-A-Bration! If you are following the tour you have arrived here from the talented Deborah Smart’s blog. I have two projects for you today, a one layer card and another card with a little watercoloring! Let’s get to them!

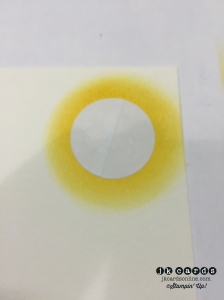
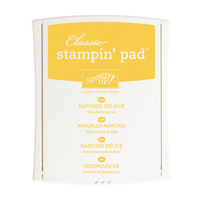
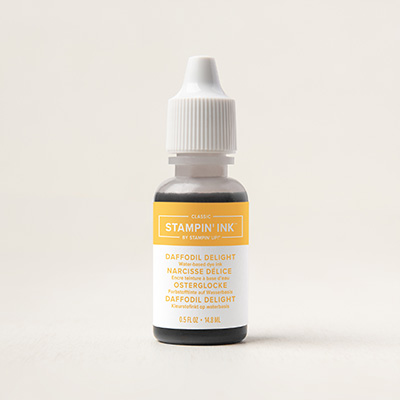
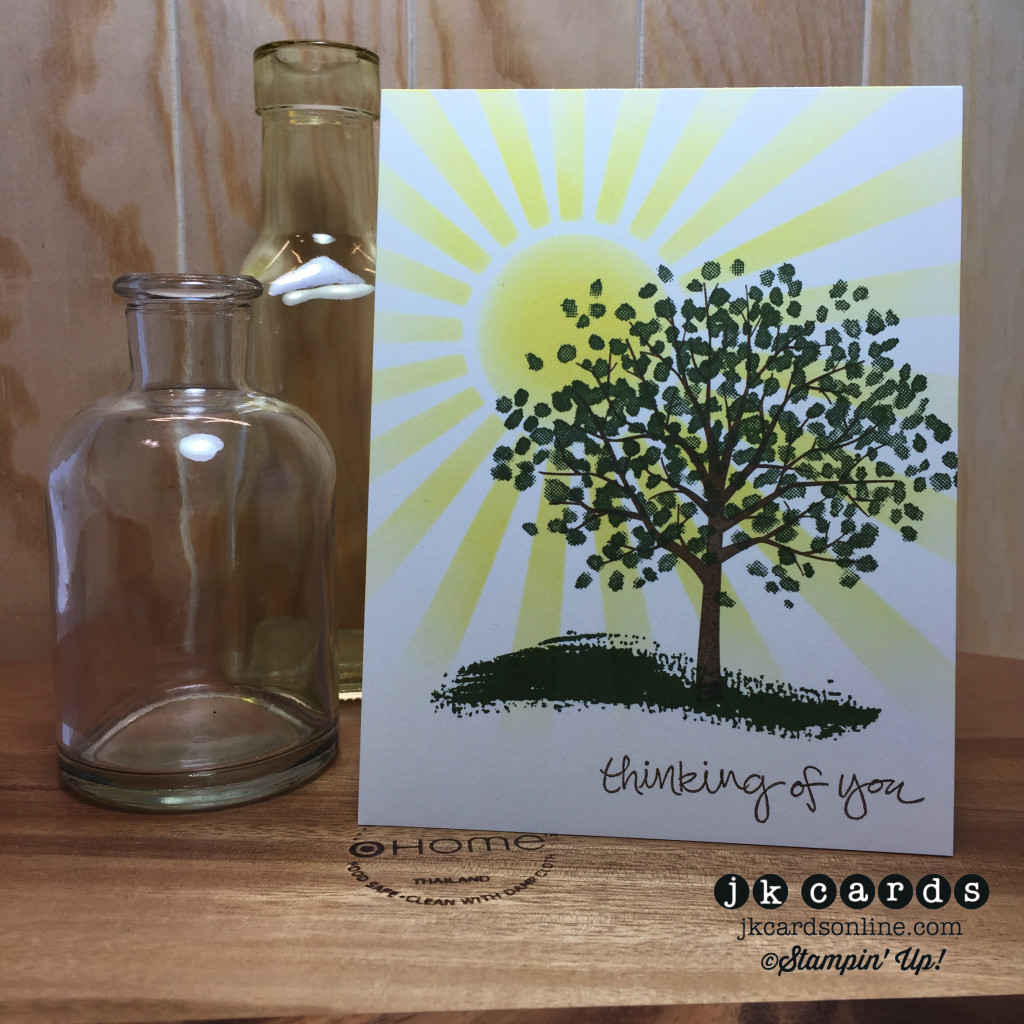
My first card is a the one layer card. I took a piece of Very Vanilla Card Stock and used the stencil from the Hooray it’s Your Day Project Kit and a Sponge Dauber with some Daffodil Delight Ink to create my sunburst. All of the images and greeting are from the Sheltering Tree Photopolymer Stamp Set. My tree and greeting are stamped in Soft Suede and the leaves and ground are stamped in Mossy Meadow. I mounted it to a Whisper White card base with some SNAIL. That’s it! A nice simple card that you could make it a few minutes! We need some of those from time to time, wouldn’t you agree?!

Creation Station Tour 16 - Card 2-WM

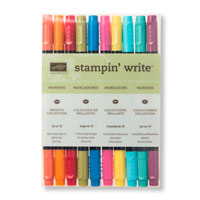
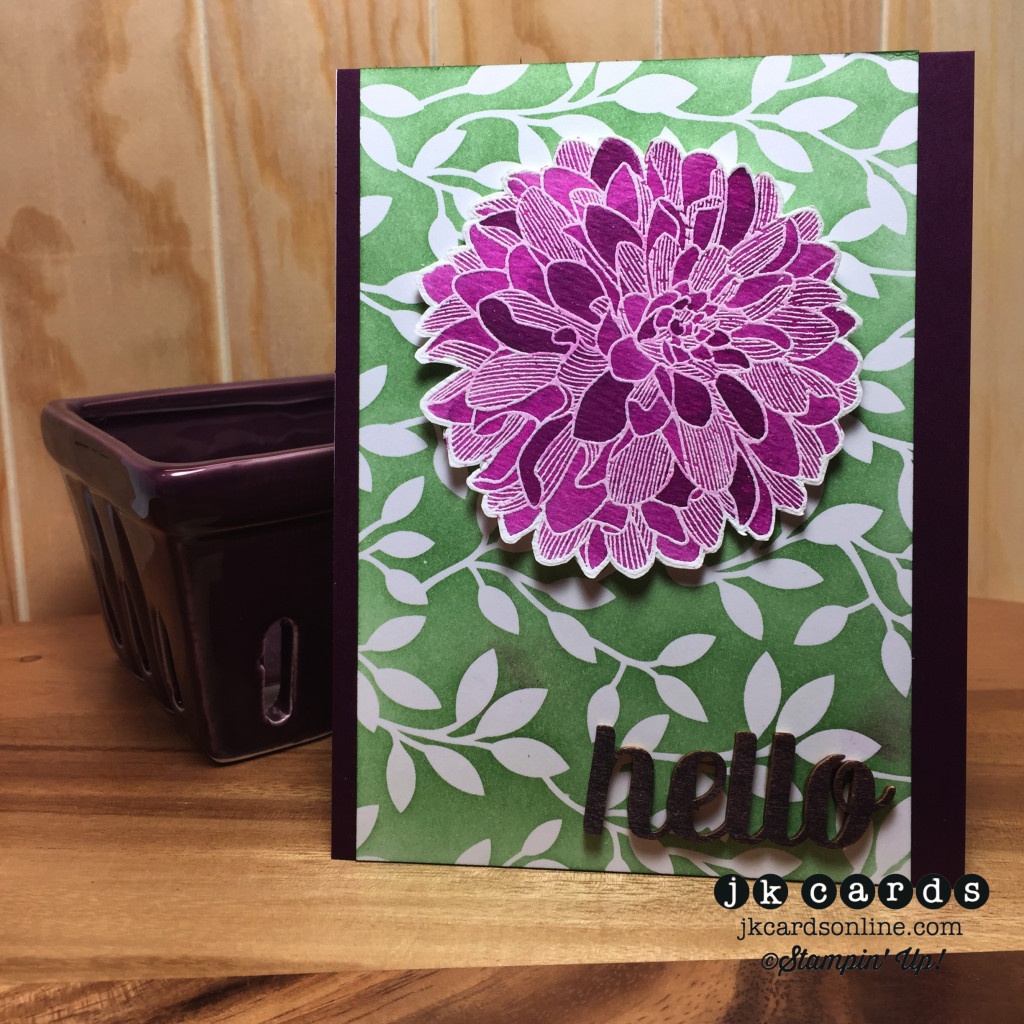
My second card uses the Irresistibly Yours Designer Series Paper. I used one of the pieces and some Garden Green Ink with one of my Ranger Mini Ink Blending tools to create the background. I inked the entire piece and then took a slightly damp paper towel to wipe off the ink from the embossed part of the paper. That is mounted to a piece of Blackberry Bliss that is then adhered to a base of Whisper White. The flower is from the Regarding Dahlias Stamp Set and is heat embossed in White Stampin’ Emboss Powder on a piece of Watercolor Paper. I used the Blackberry Bliss Ink and watercolored the image and then cut it out with my Paper Snips. A few Stampin’ Dimensionals adhere it to the card. The hello is from the Hooray it’s Your Day Project Kit, I used my Blackberry Bliss Stampin’ Write Markers to color it and then some Multi-Purpose Glue adheres it to the card. When I look at this card I think of Spring and it can’t get here fast enough!

Creation Station Tour 16 - Card 1-WM

And there are my two projects for the Creation Station Blog Tour. I hope that you enjoyed them both! Now you are off to the start of the tour the clever Jen Arkfeld! Enjoy and thanks for stopping by here today! Enjoy your Sunday! 🙂

creation station backcreation station next

Stampin’ Up! products used:

Card 1:

Stamp Set: Sheltering Tree Photopolymer

Ink: Daffodil Delight, Mossy Meadow and Soft Suede Classic Stampin’ Ink

Card Stock: Whisper White and Very Vanilla

Kit: Hooray it’s Your Day Project

Tools: Sponge Dauber and SNAIL

Card 2:

Stamp Set: Regarding Dahlias Clear Mount

Ink: Garden Green and Blackberry Bliss Classic Stampin’ Ink

Specialty Ink: Versa-Mark

Stampin’ Write Marker: Blackberry Bliss

Stampin’ Emboss Powder: White

Card Stock: Whisper White and Blackberry Bliss

Designer Series Paper: Irresistibly Yours

Kit: Hooray it’s Your Day Project

Tools: Heat Tool, Paper Snips, Multi-Purpose Glue, Stampin’ Dimensionals and SNAIL


Current Promotions:

With our personalized stamps you can create a cool address label or even use it for everything from marking your territory on books or other belongings to having a fun way to give a personal touch to gifts and goodies. Click HERE for a PDF of the flyer.

It’s here! The 2015 Occasions Catalog is ready for you to place your order! It’s packed with fun trendy products and quick kits! Click on the image in the sidebar and place your order today!

Need some cards quicky? Stampin’ Up! has a brand new kit that allows you to create 20 cards, all you need is some adhesive and you’re all set. Click here for the Everyday Occasion Card Kit!

Make your own stamp! New Undefined stamp carving kit. Available now! Click here for the PDF.

Check out all of the Photopolymer Stamp Sets! The newest set is You’re Wonderful. It’s a completely clear stamping option you are going to love!

Piglet MAT

Creation Station – Seasonally Scattered

creation station header

It was a rainy and dreary day here yesterday and I was in Trenton, New Jersey for a rubber stamp show with some friends, more on that tomorrow. Today it’s time for another Creation Station Blog Tour! This time we are featuring the Seasonally Scattered Stamp Set and Gift Card Holders. If you are following along on the tour you have arrived here from Jennifer Frost’s Blog. Always a treat to see what she has! I have two projects for today’s tour, a card and a gift card holder so lets get to them.

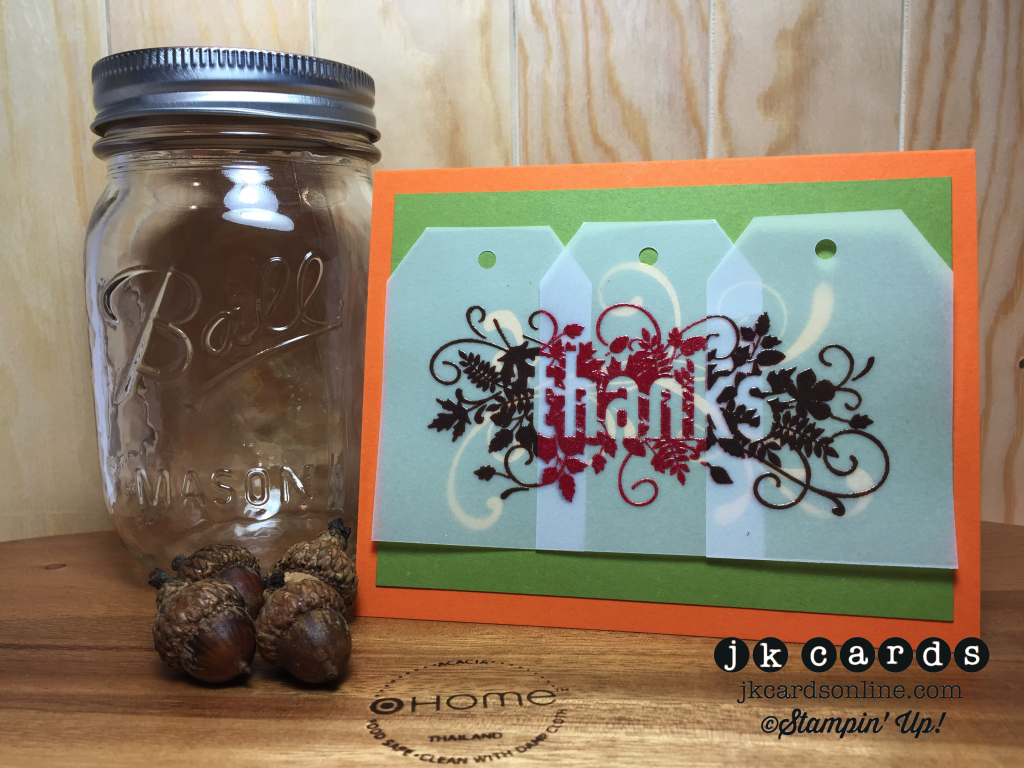
My card features the Seasonally Scattered Stamp Set and two of my favorite things, Vellum and Heat Embossing! The base of the card is Pumpkin Pie Card Stock and my background is a piece of Old Olive that I embossed one of the stamps from the Everything Eleanor Stamp Set in Crushed Curry Stampin’ Emboss Powder. I used the Angled Tag Topper Punch and some Vellum to create my three tags. My Grid Paper helps to line up the tags and image from the Seasonally Scattered Stamp Set. I stamped the two outside ones first and then the center one with Versa-Mark. The two outside ones are heat embossed in Early Espresso Stampin’ Emboss Powder and the inside one in Cherry Cobbler Stampin’ Emboss Powder. Some strategically placed 2-Way Glue adheres them to the card. Love the vellum and the way it lets the swirl peek through form the back!

Creation Station Tour 13 Card-WM

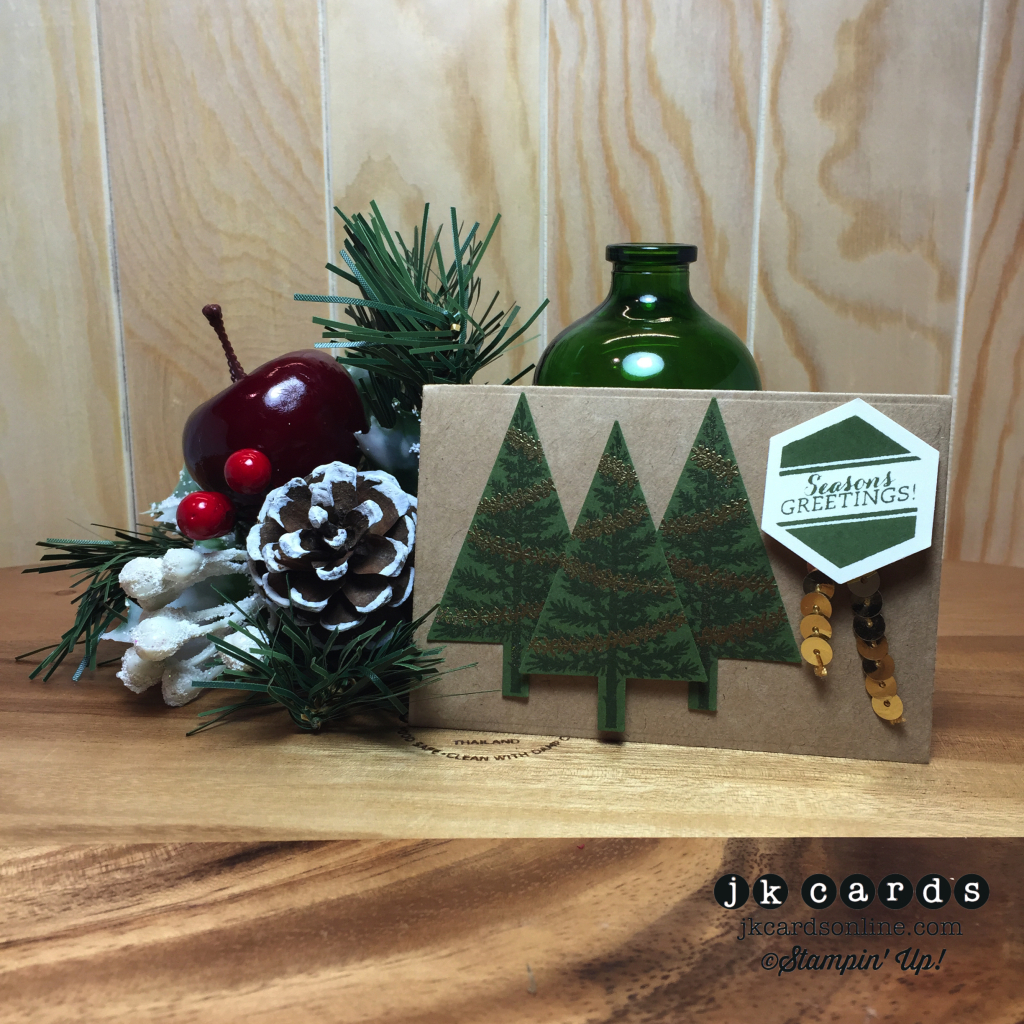
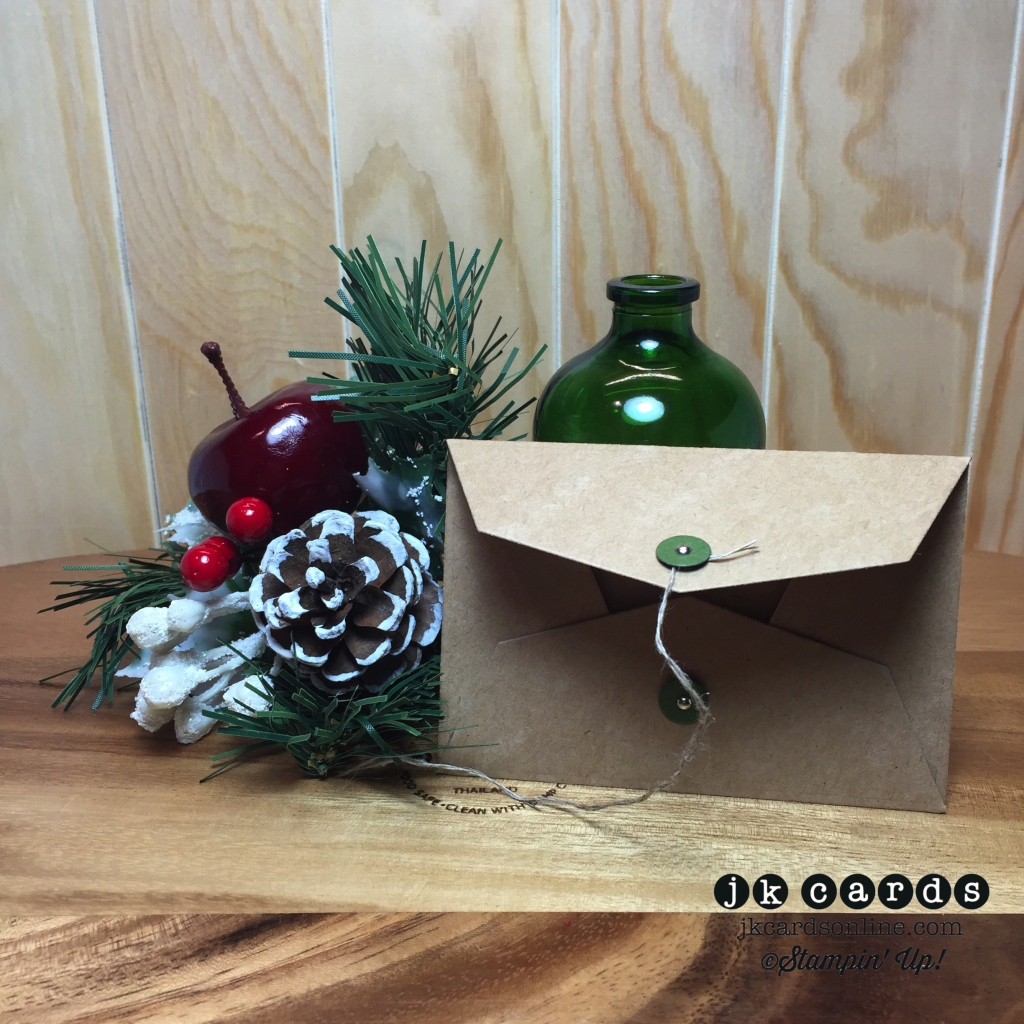
The gift card holder is next. I used the Gift Card Envelope and Trims Thinlit to cut out a piece of Kraft Card Stock for the card and Mossy Meadow for the ties. A few pieces of Sticky Strip and the holder is assembled. The three tress are from the Festival of Trees Photopolymer Stamp Set and are stamped in Mossy Meadow on Mossy Meadow. The garland is heat embossed in Gold Stampin’ Emboss Powder. My greeting is from the Christmas Tagables Photopolymer Stamp Set and is stamped in Mossy Meadow on Very Vanilla and punched out with the Hexagon Punch. A piece of Gold Sequin Trim is tucked under it and adhered to the holder with a Stampin’ Dimensional. I used a Mini Brad to secure the ties in place and some Linen Thread holds it closed. I love the rustic feel of the Kraft with the Mossy Meadow and the gold just gives it enough shine!

Creation Station Tour 13 Gift Card-WM

Creation Station Tour 13 Gift Card Back-WM

And those are my projects for the Creation Station Blog Tour. I hope that you enjoyed them and that you are inspired to make some projects with the Seasonally Scattered Stamp Set and Gift Card Envelope and Trims Thinlit! Your next stop on the tour is the talented Jen Arkfeld! Thank you for stopping by today, enjoy your Sunday! 🙂

creation station backcreation station next

Stampin’ Up! products used:

Card:

Stamp Sets: Seasonally Scattered and Everything Eleanor Clear Mount

Specialty Ink: Versa-Mark

Stampin’ Emboss Powder: Crushed Curry, Early Espresso and Cherry Cobbler

Card Stock: Pumpkin Pie and Old Olive

Specialty Card Stock: Vellum

Punch: Angled Tag Topper

Tools: Heat Tool, 2-Way Glue and SNAIL


Gift Card Holder:

Stamp Sets: Festival of Trees and Christmas Tagables Photopolymer

Ink: Mossy Meadow Classic Stampin’ Ink

Specialty Ink: Versa-Mark

Stampin’ Emboss Powder: Gold

Thinlit: Gift Card Envelope and Trims

Punch: Tree and Hexagon

Embellishment: Gold Sequin Trim and Linen Thread

Tools: Big Shot, Heat Tool, Stampin’ Dimensionals and SNAIL


Creation Station Tour – Wondrous Wreath

creation station header

Hi there and happy Sunday! I had a very busy day yesterday. I woke up and crafted for a bit and then I had to get ready for Erika to come over and make Daniel’s birthday decorations. Before that Andrew, my brother, Erika and I went to Croxley’s Ale House for lunch. We met two of my brother’s friends there and had a very nice lunch. They have 10 Cent wings and really good burgers and a very large selection of beer! After lunch we came back to my house and Erika and I worked on Daniel’s party decorations and Andrew worked on moving the rest of my blog over. The decorations are mostly finished and there is only one more piece to do for the blog. I have already reassigned the jkcardsonline.com web address to the new one, I just have to move the subscribers over and then I will be able to take down this one and only use the new one. For now I will be posting on both blogs, hopefully only until Monday! As I said I will also send out a test post to make sure that all of you are getting the emails. Thanks for you patience during the transition!

It’s time for another Creation Station Blog Tour and this month we are featuring the Wondrous Wreath Photopolymer Stamp Set and the Wonderful Wreath Framelits. Well, it’s generally an all around wreath theme! If you are following along with the tour you have arrived here from the talented Deborah Smart’s blog. Such great projects!! I have a card and a home decor project for you today so let’s get to them!

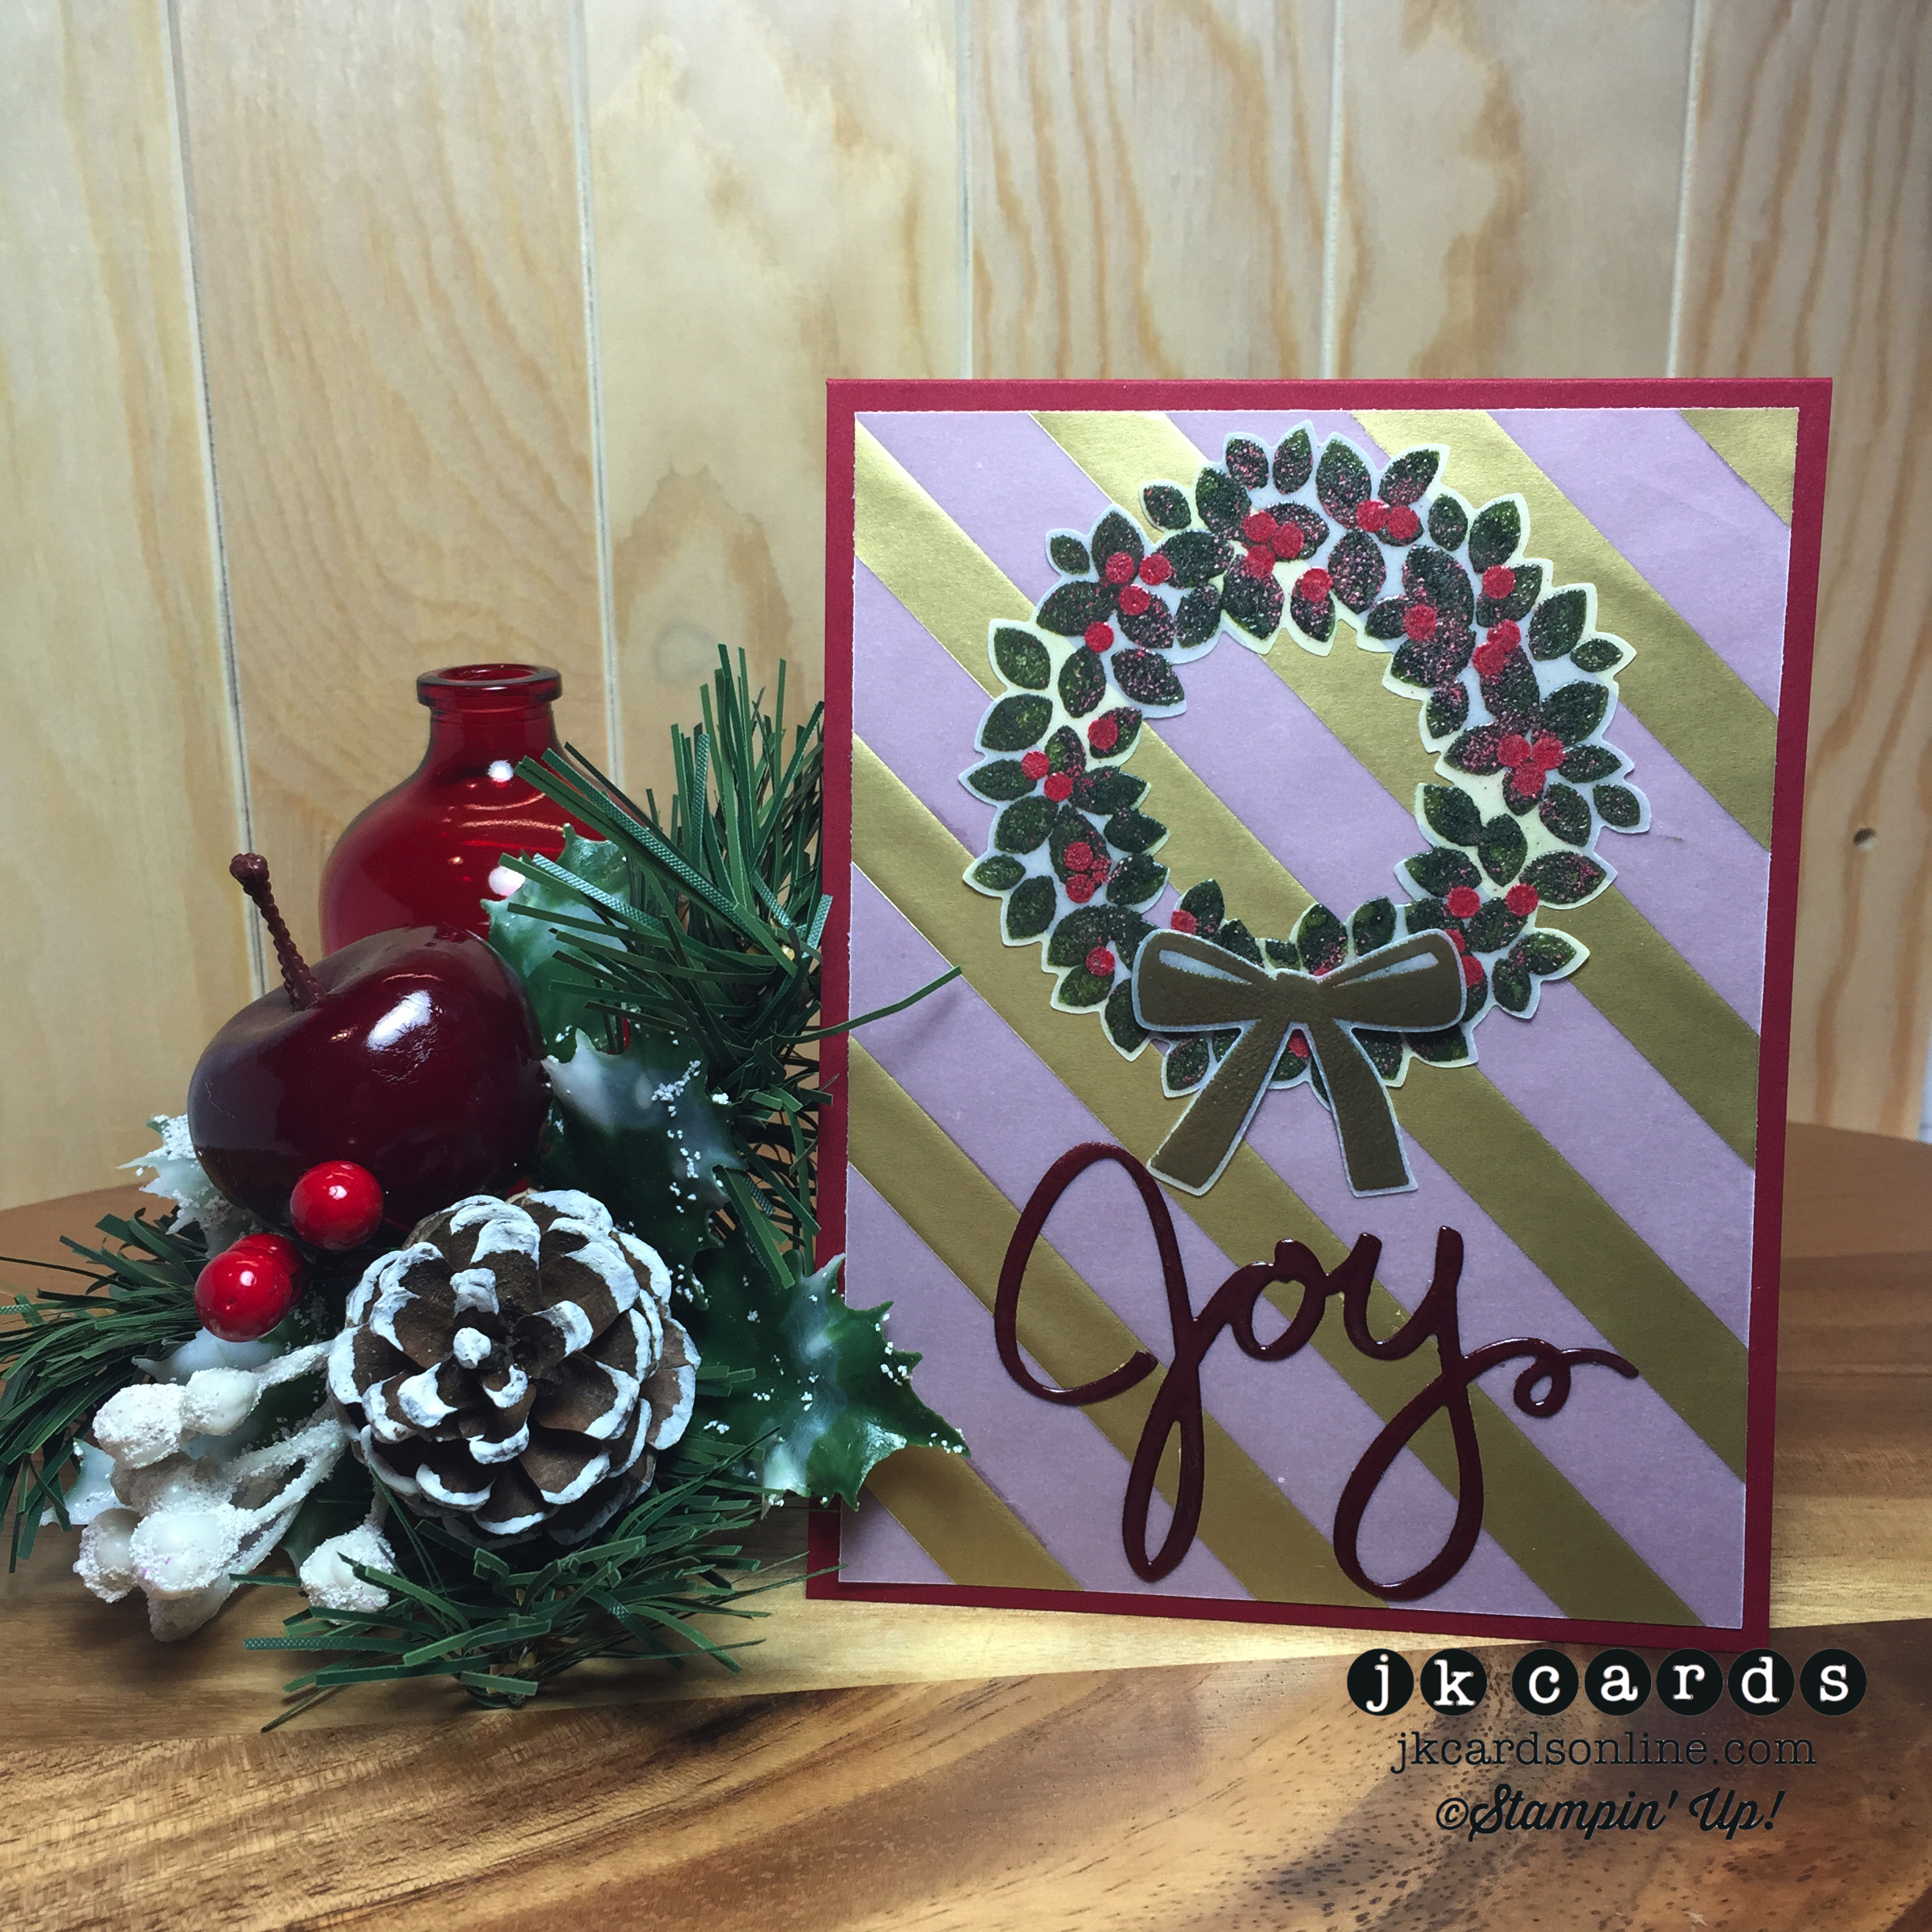
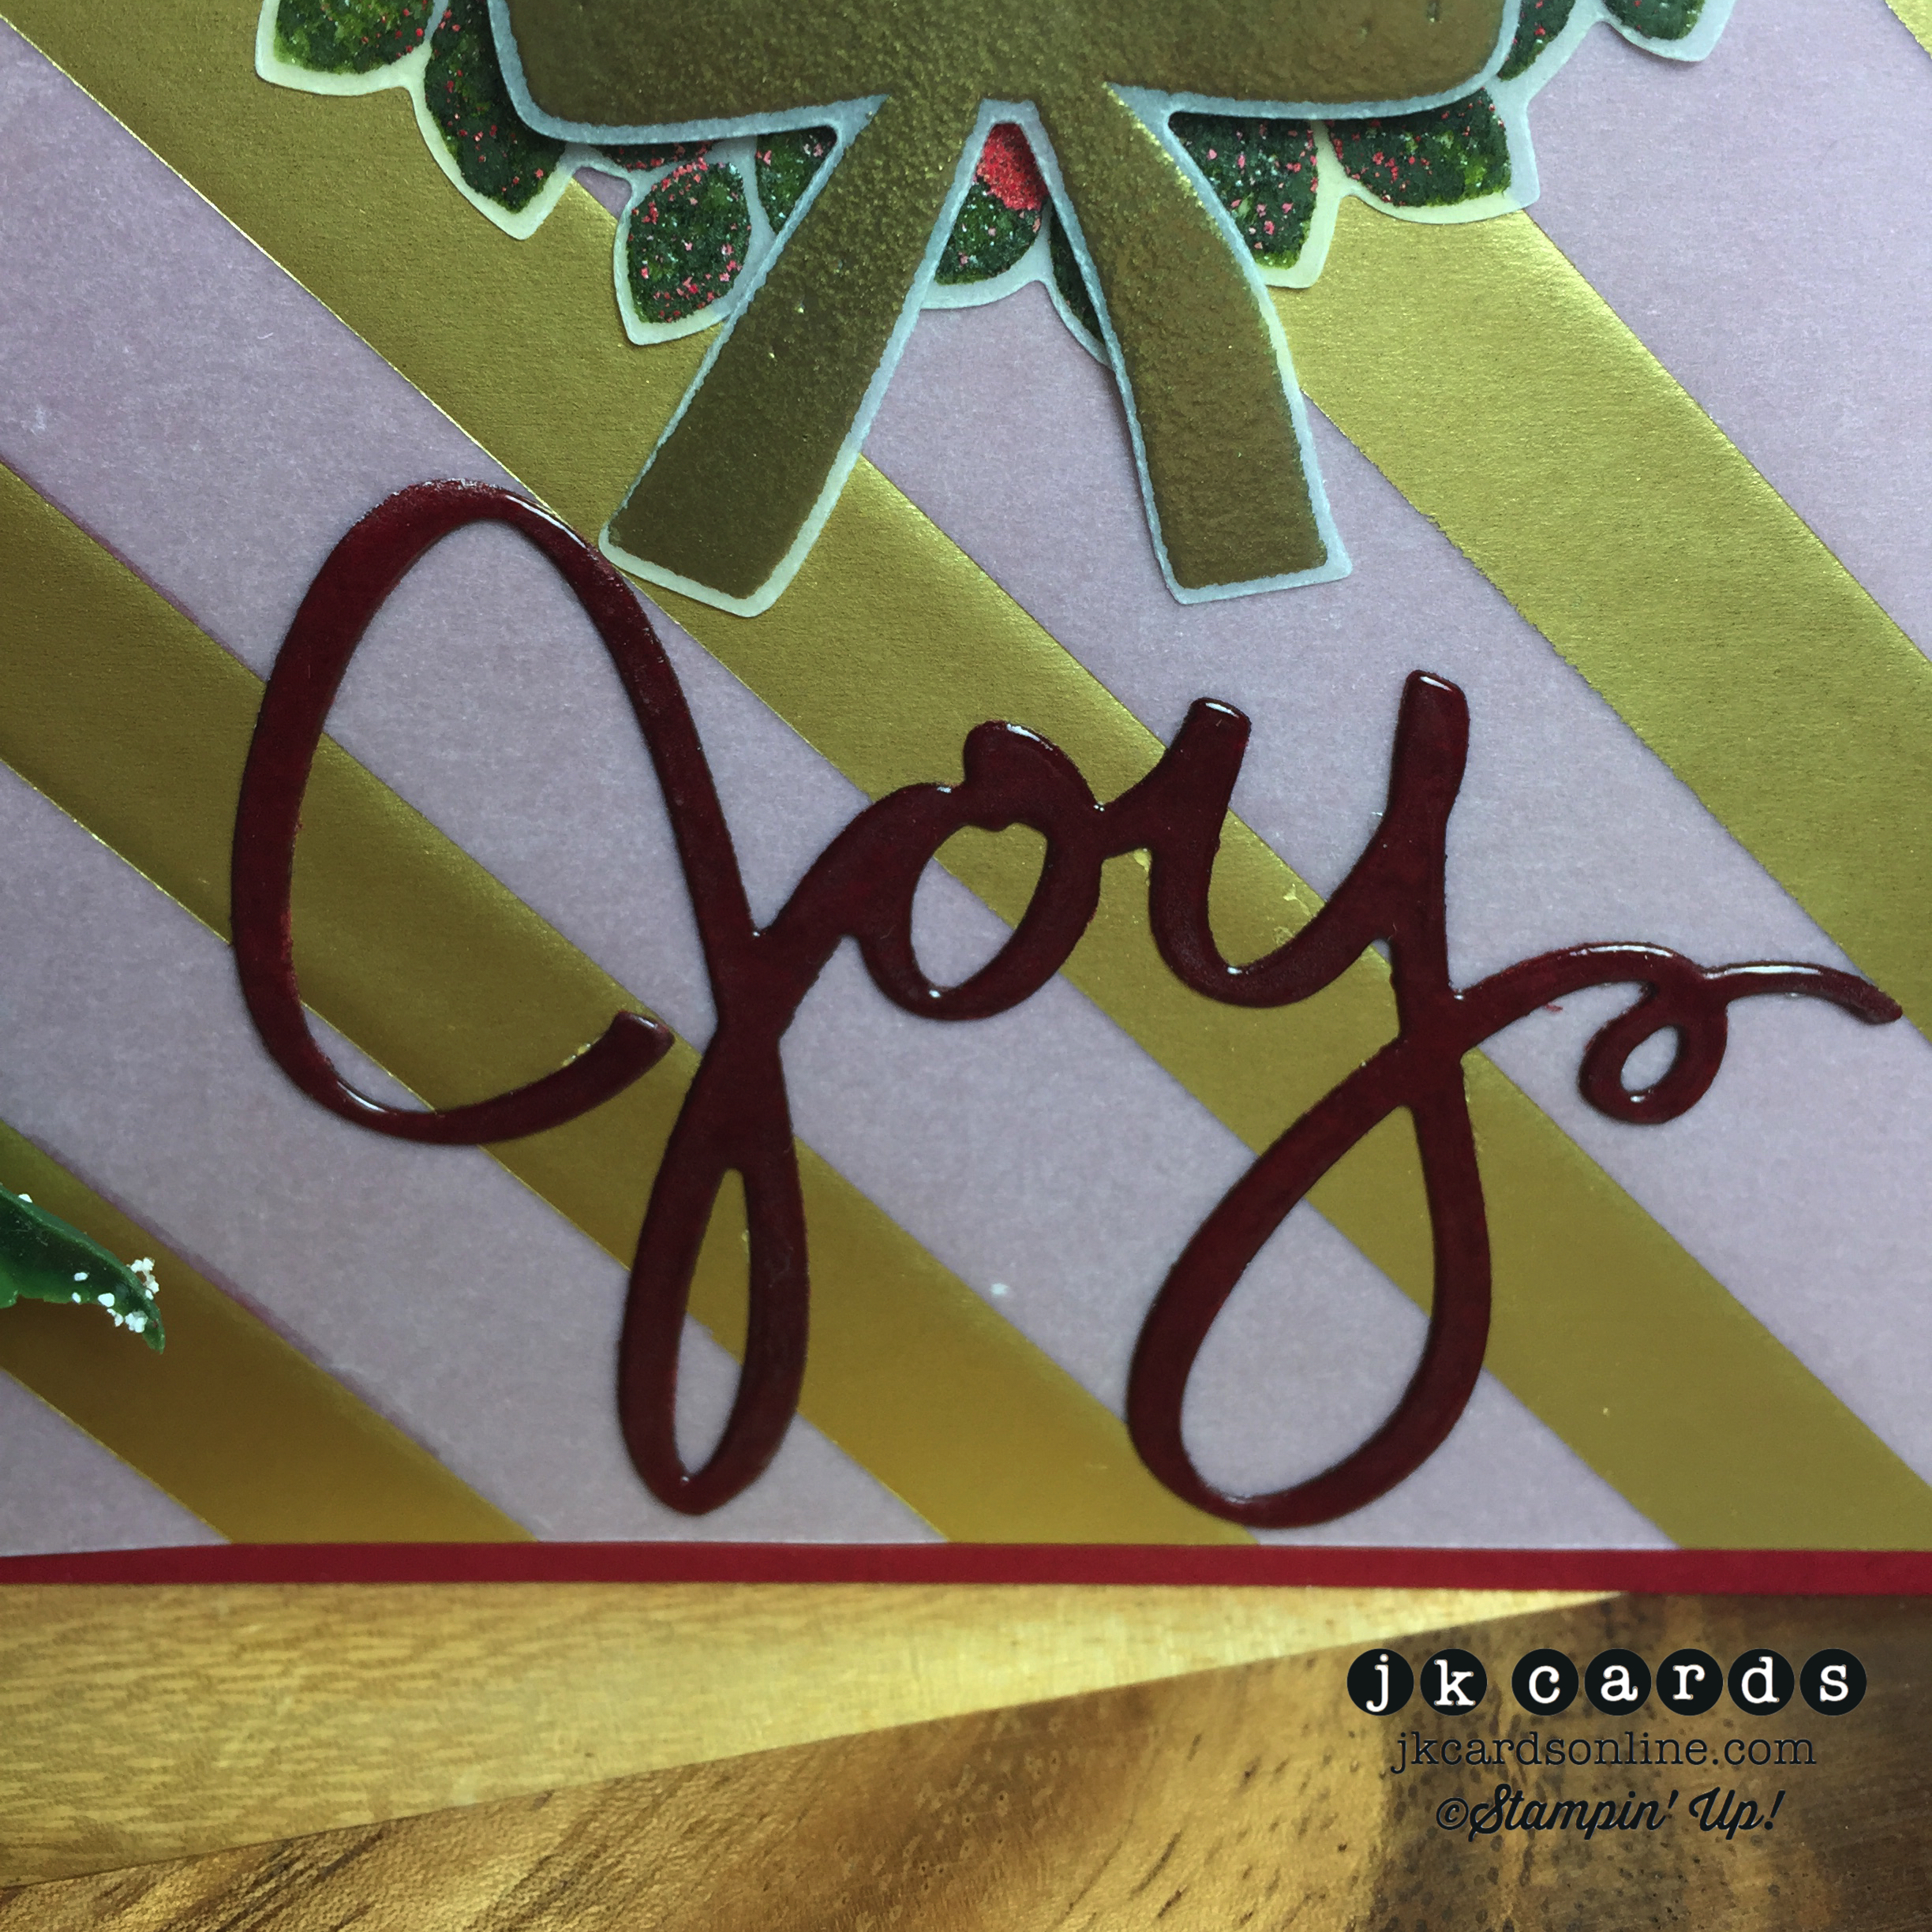
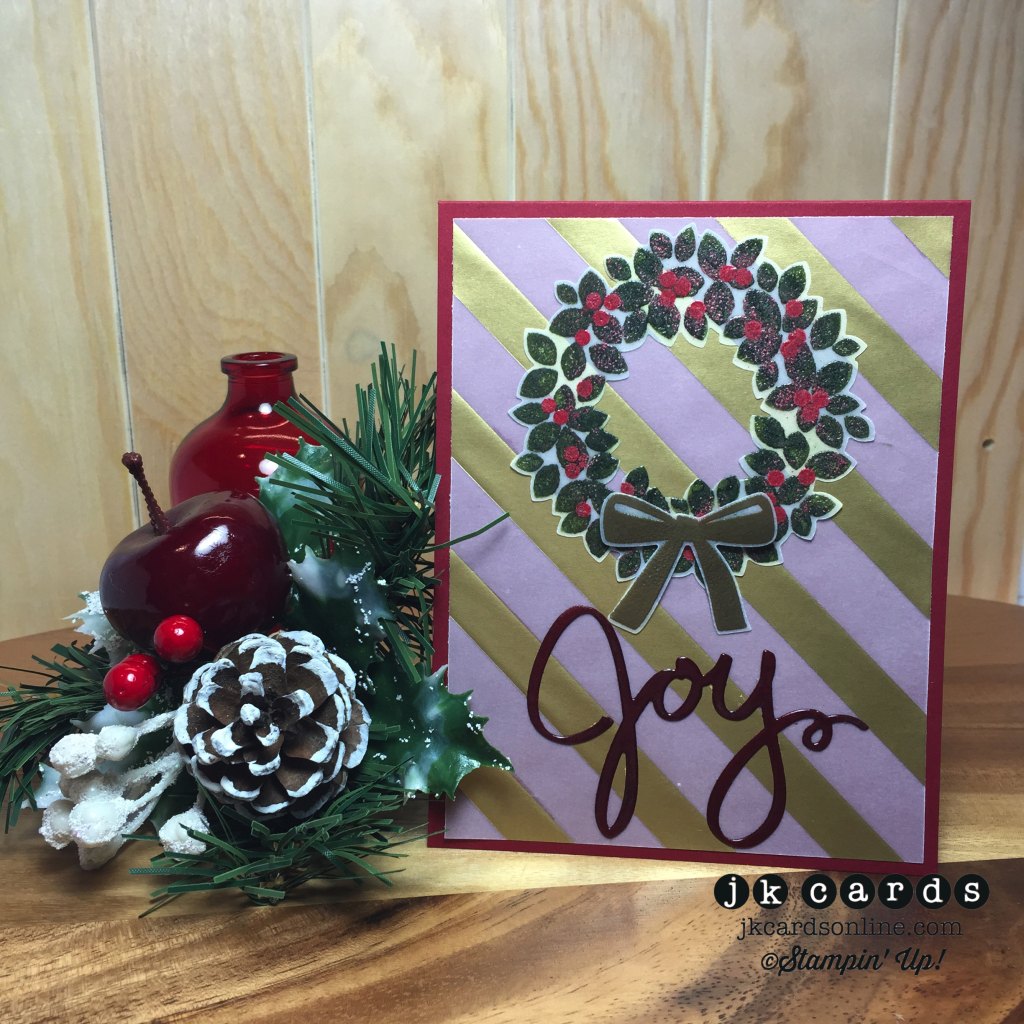
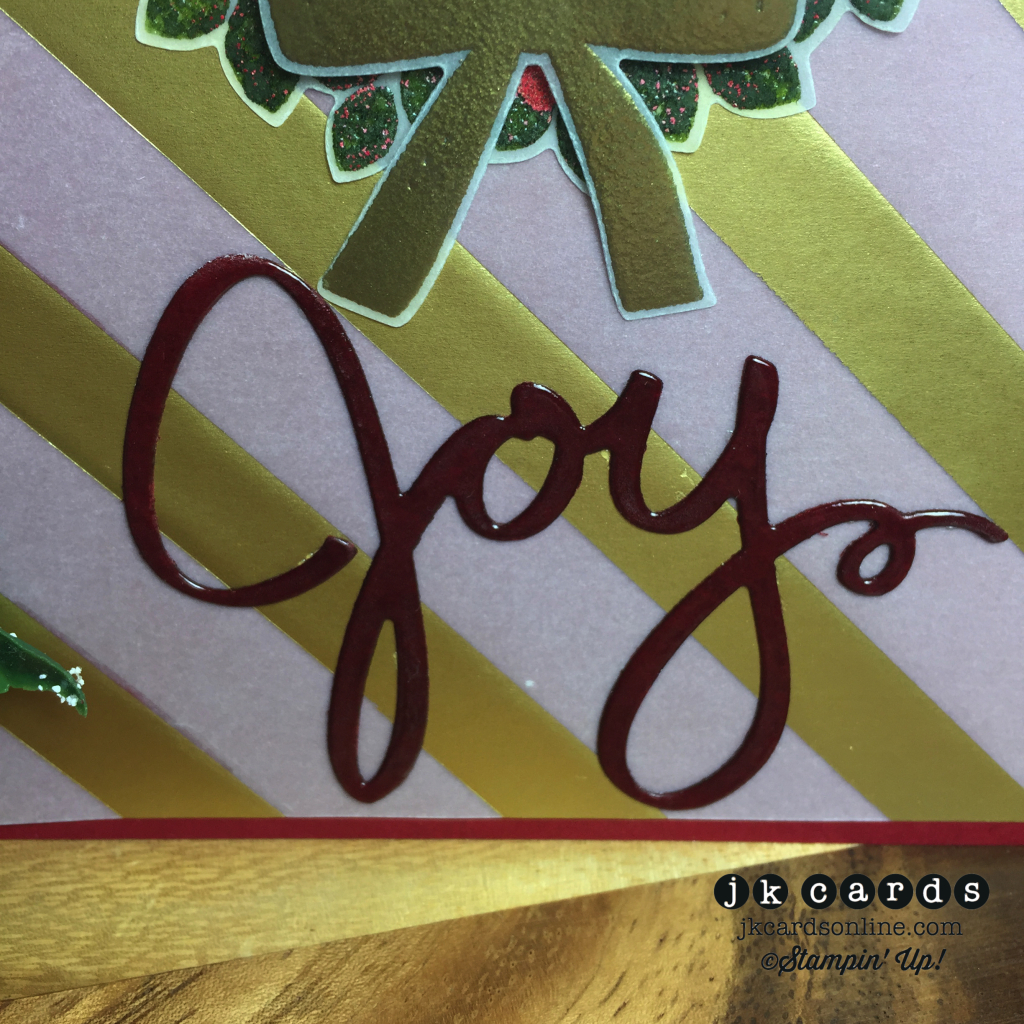
First up is a neat Christmas card. For the base I used a piece of Cherry Cobbler Card Stock and the background is a piece of the Gold Fancy Foil Designer Vellum. My wreath is from the Wondrous Wreath Photopolymer Stamp Set and is stamped in Mossy Meadow on Vellum Card Stock. I sprinkled some Clear Stampin’ Emboss Powder over the image and used my Heat Tool to set it. When you stamp on Vellum the ink takes a while to dry so it the perfect excuse to heat emboss it! I stamped it again with the berries from the set and used Cherry Cobbler Stampin’ Emboss Powder for those. The Wondrous Wreath Framelits cut it out and some Multi-Purpose Glue adheres it to the card. The bow is from the same set and is heat embossed in Gold Stampin’ Emboss Powder and also cut out with the Framelits. A little bit of Stampin’ Dimensional holds it to the wreath. I cut the Joy out from the Wonderful Wreath Framelits from a piece of Cherry Cobbler and heat embossed it with Clear Stampin’ Emboss Powder twice. I think that it gives it a very cool look, almost like patent leather. Some more Multi-Purpose Glue adheres that to the card. I love the simple elegance of the card and especially the shine on the Joy!

Creation Station Tour 12 - Card-WM

Creation Station Tour 12 - Card Close-WM

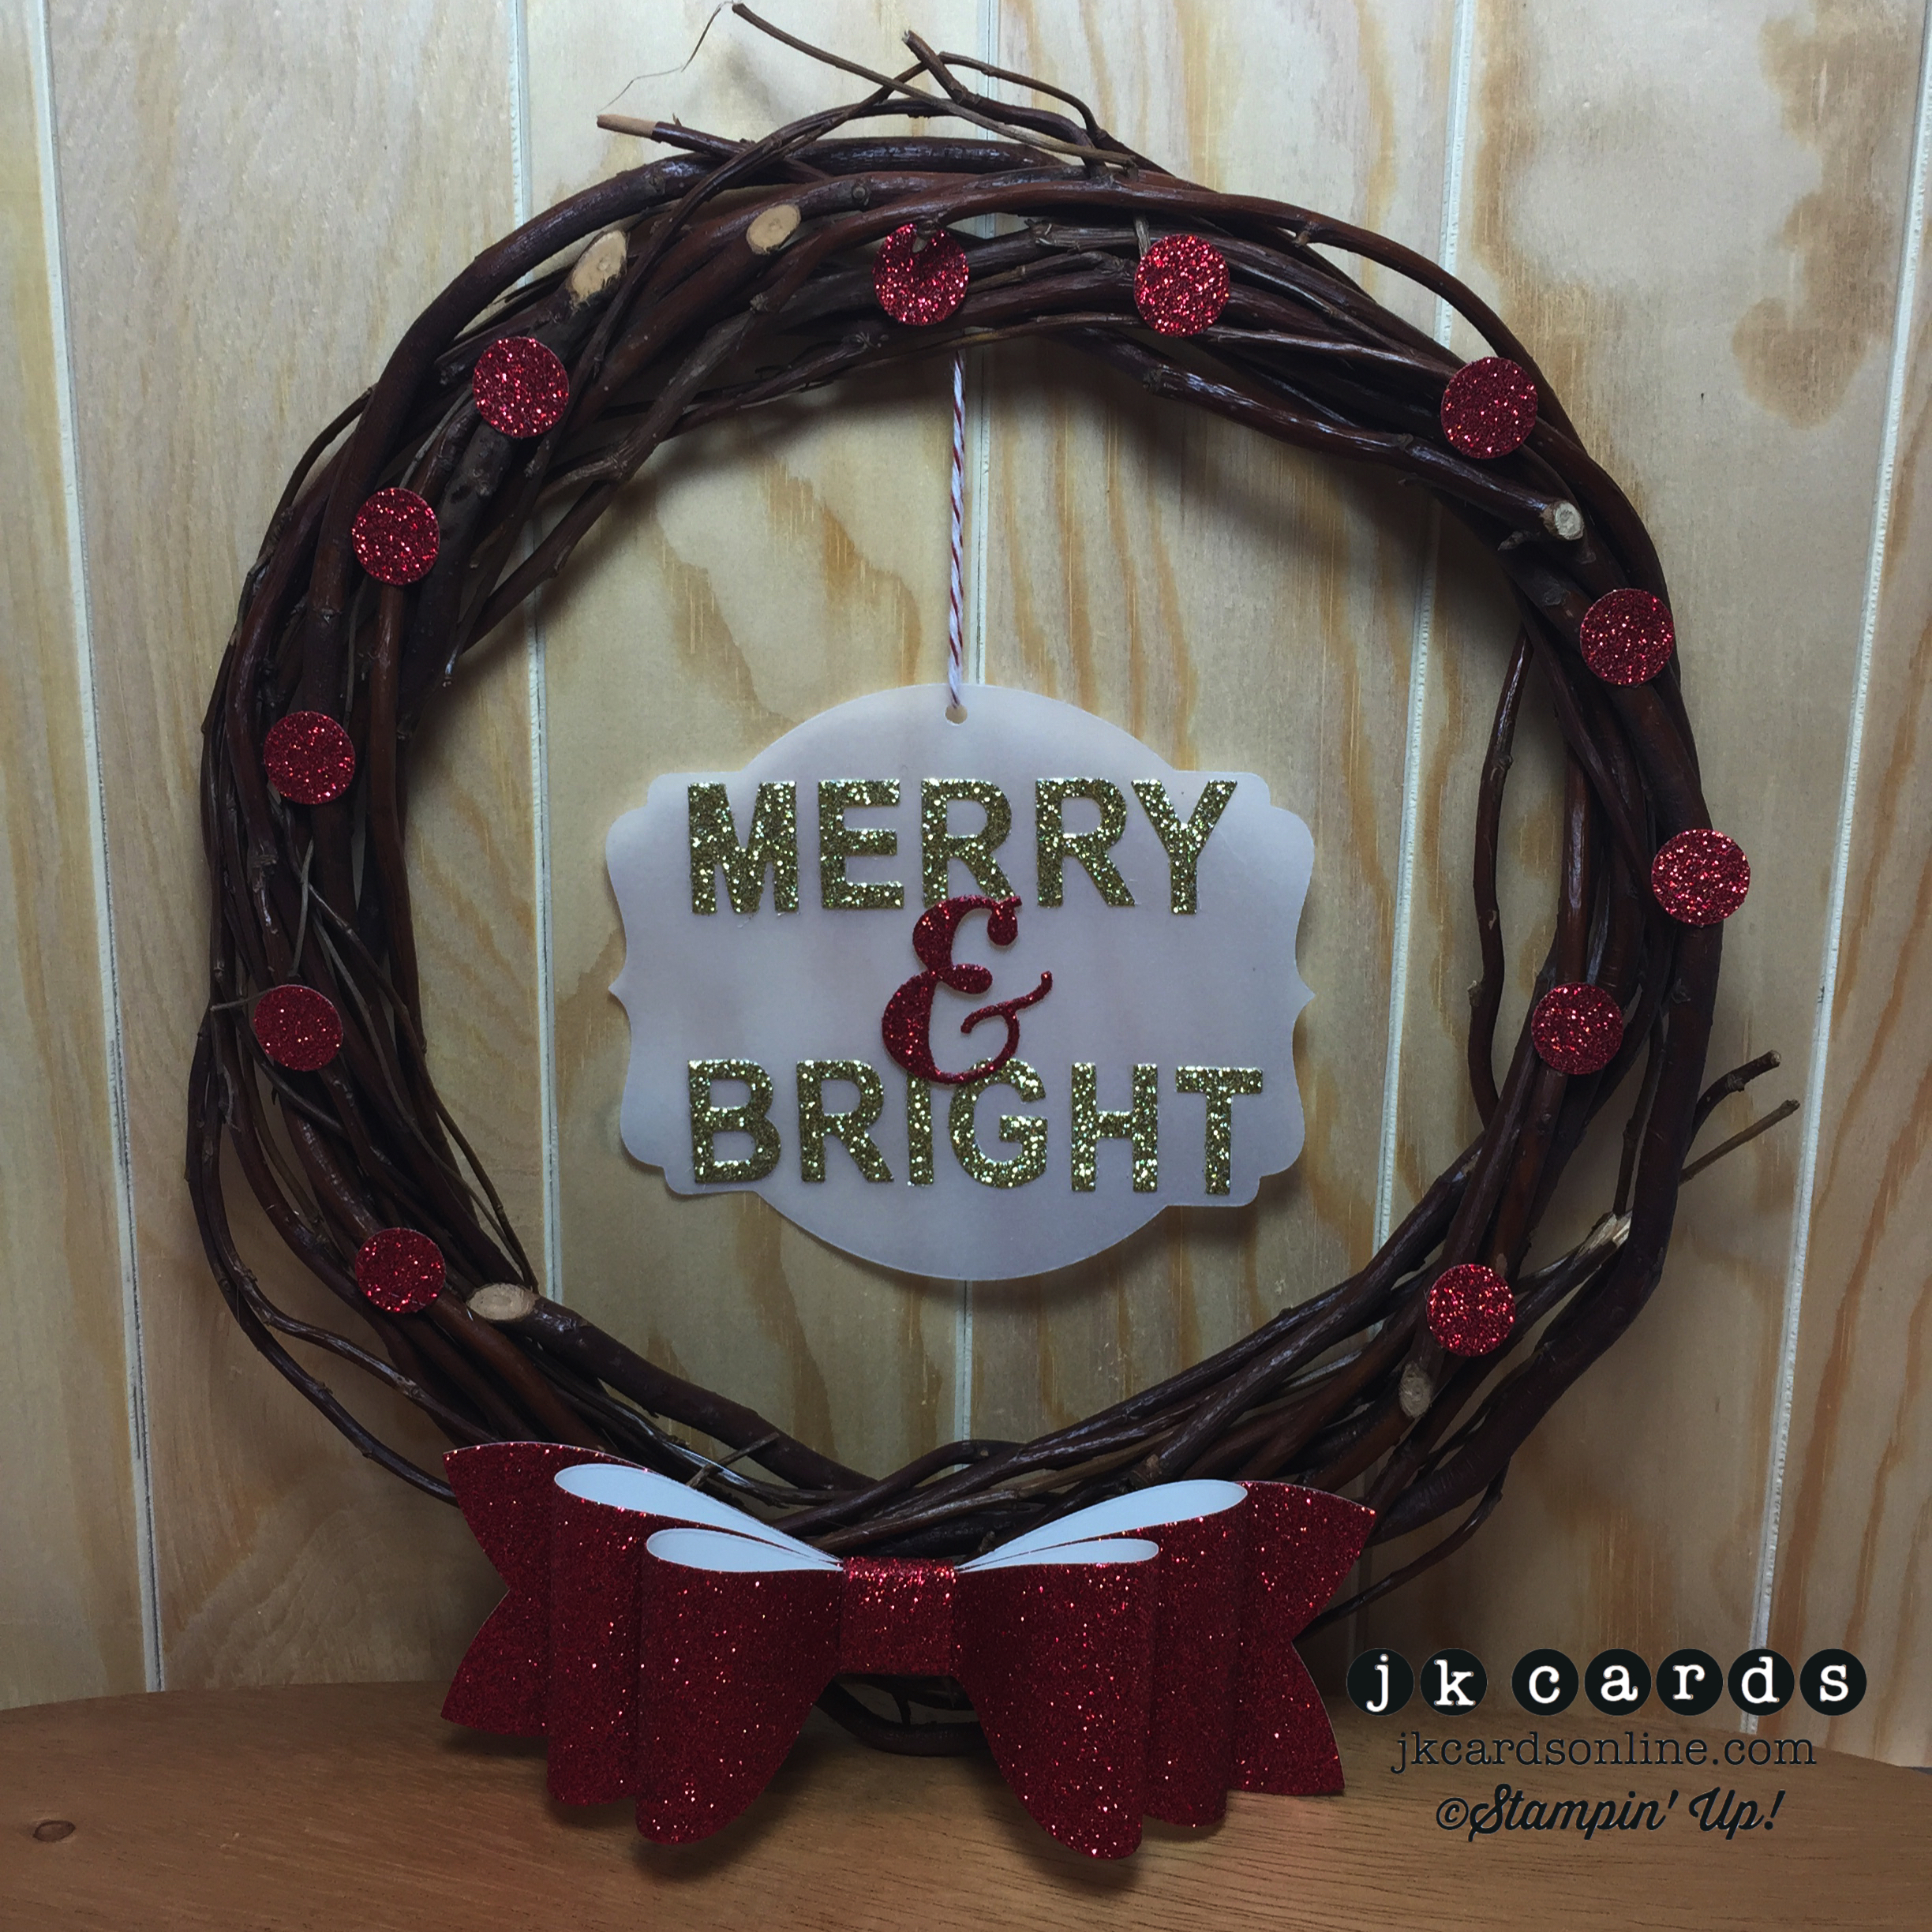
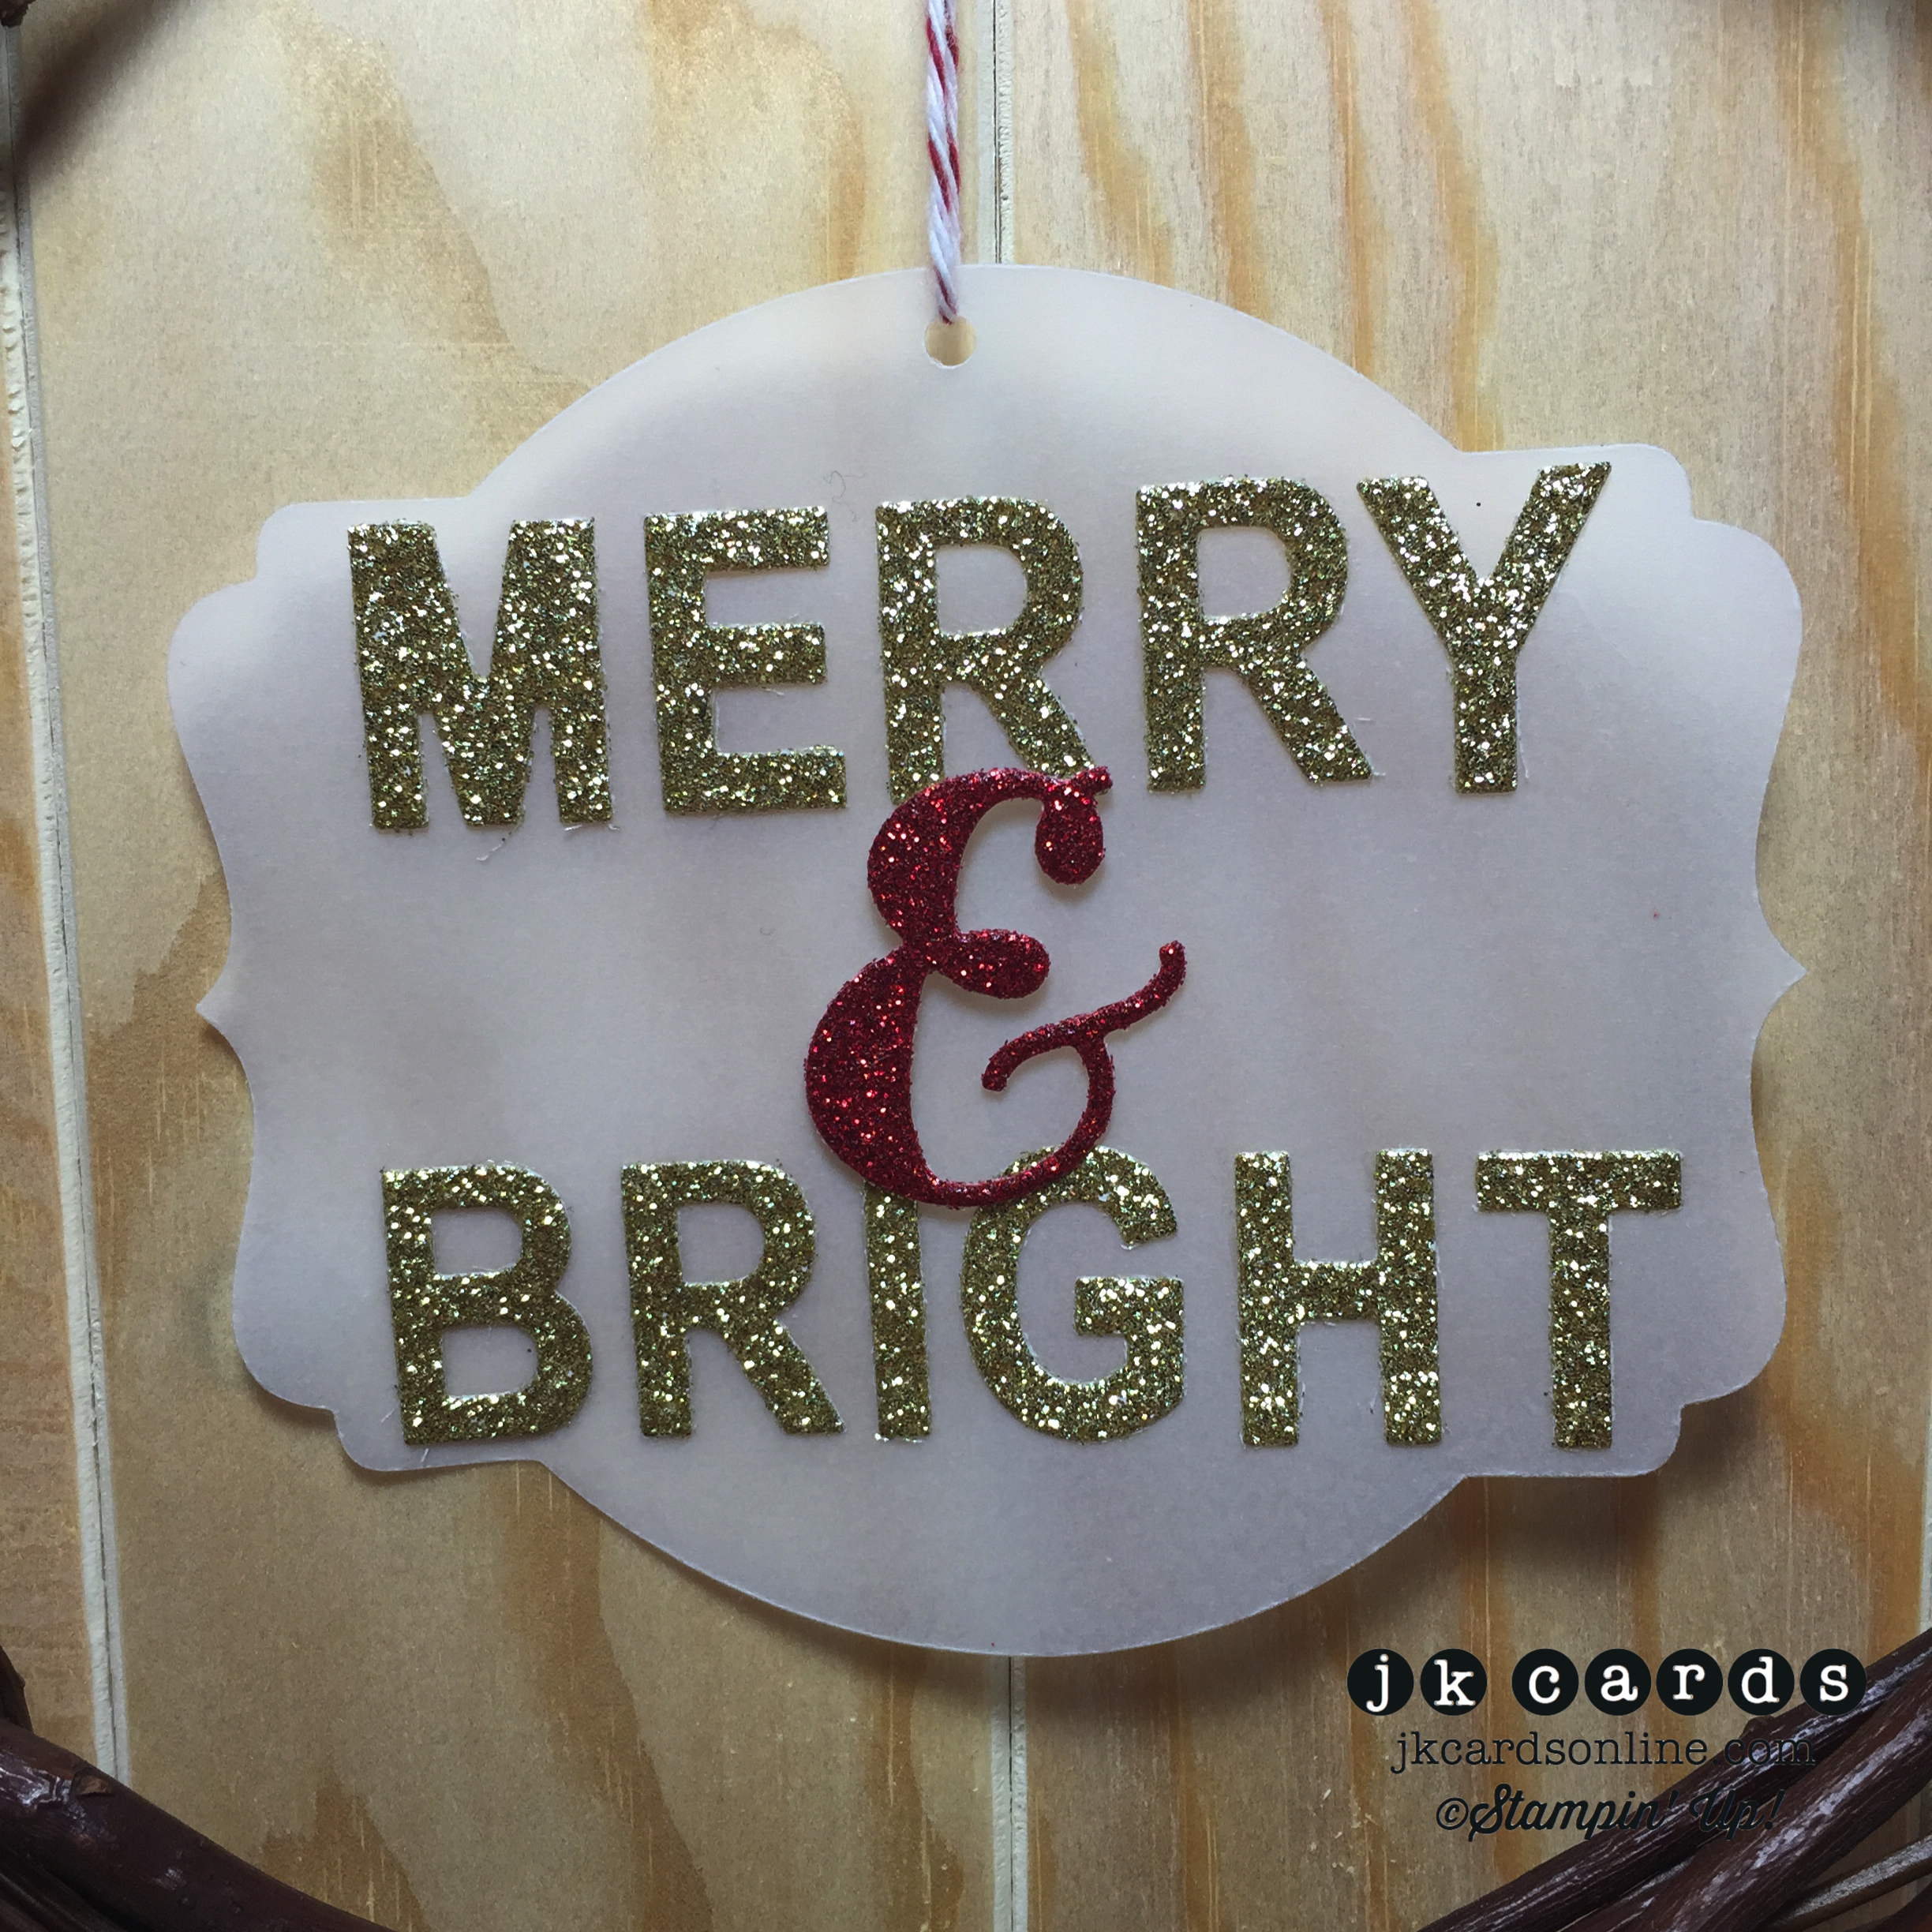
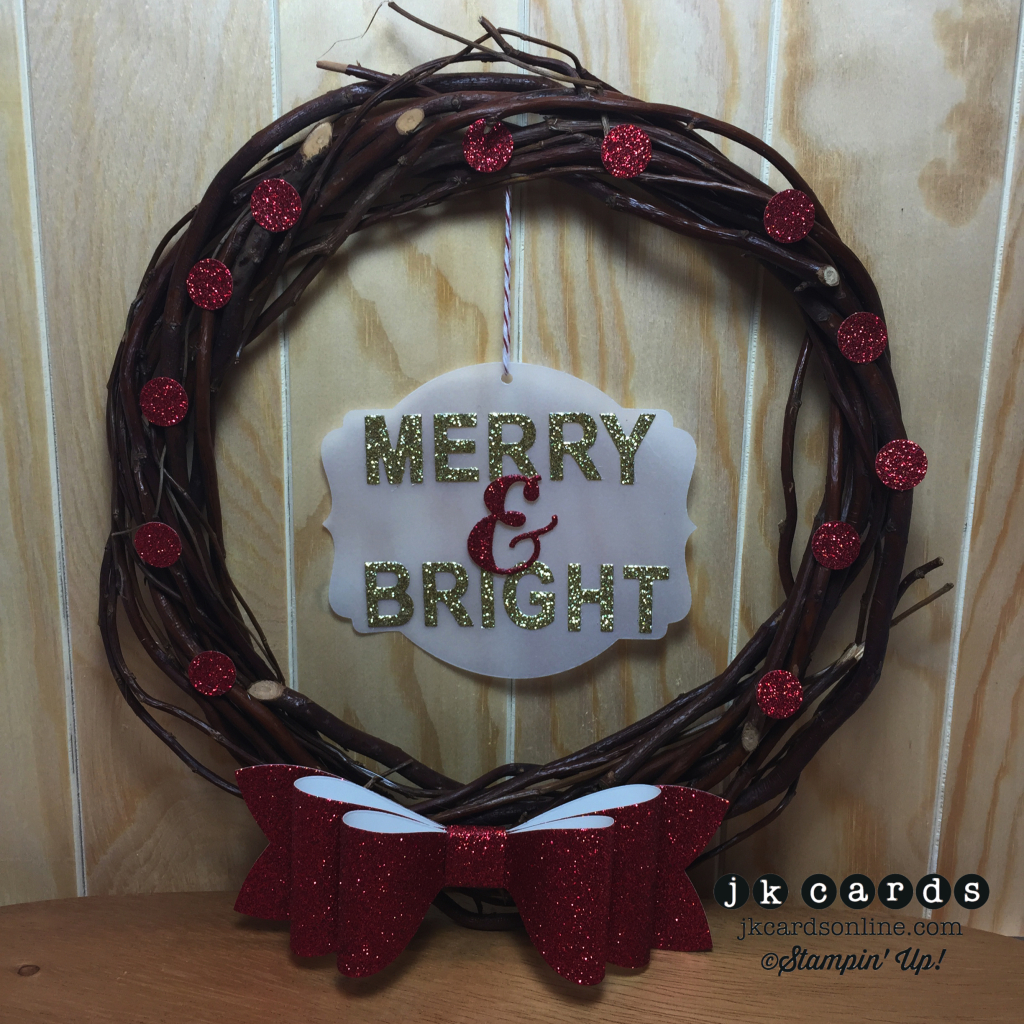
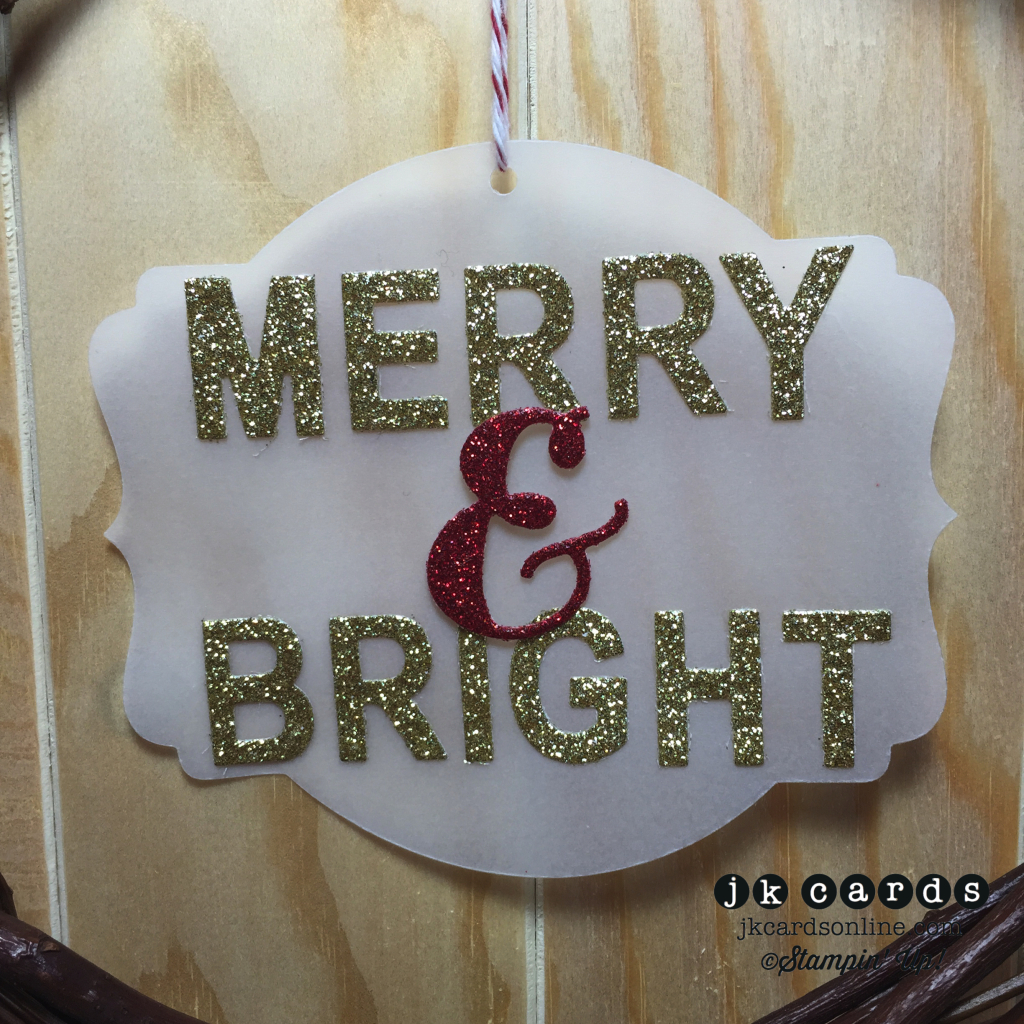
My next project is a fun wreath that will go on my wall somewhere in the house. I used a simple twig wreath that I had laying around in the Stampin Galley for my base. To create the bow I used the Gift Bow Bigz L Die and some Red Glimmer Paper. The berries around the wreath are also Red Glimmer Paper that I punched out with the 1/2″ Circle Punch. In the center hanging from apiece of Cherry Cobbler Baker’s Twine is a piece of Vellum Card Stock that I cut out with the Deco Labels Collection Framelits. My letters are Gold Glimmer Paper and I used the Little Letters Thinlits to cut them out and I adhered them with Multi-Purpose Glue. The ampersand is Red Glimmer Paper and is cut out with one of the dies from the Label Card Thinlits. I used some Stampin’ Dimensionals pieces to adhere that then tied it to the wreath. The bow and all the “berries” are adhered with hot glue to make sure that they stay in place! I love the sparkle of all of the Glimmer Paper and the unexpected hanging greeting in the middle!

Creation Station Tour 12 - Wreath-WM

Creation Station Tour 12 - Wreath Close-WM

I really hope that you enjoyed my two projects for the Creation Station Blog Tour featuring the Wondrous Wreath Photopolymer Stamp Set. I had a great time making the projects as I always do! Now you are off to see what clever Ilina Crouse has come up with. I love to inspire you to try new things and have you come by and see what I’m up to! Enjoy the rest of your Sunday! 🙂

creation station backcreation station next

Creation Station Blog Tour list:

Ilina Crouse

Kathy Kartak

Cindy Beach

Teneale Williams

Heidi Boos

Jennifer Downey

Deborah Smart

Justin Krieger (That’s Me!)


Stampin’ Up! products used:

Card:

Stamp Set: Wondrous Wreath Photopolymer

Ink: Mossy Meadow Classic Stampin’ Ink

Specialty Ink: Versa-Mark

Stampin’ Emboss Powder: Clear, Gold and Cherry Cobbler

Card Stock: Cherry Cobbler

Specialty Card Stock: Vellum and Gold Fancy Foil Designer Vellum

Framelits: Wonderful Wreath

Tools: Bog Shot, Heat Tool, Multi-Purpose Glue, Stampin’ Dimensionals and SNAIL


Wreath:

Specialty Paper: Red and Gold Glimmer

Specialty Card Stock: Vellum

Framelits: Deco Labels Collection

Thinlits: Little Letters

Big Shot Die: Gift Bow Bigz L

Punch: 1/2″ Circle

Tools: Big Shot, Sticky Strip, Multi-Purpose Glue, Stampin’ Dimensionals and SNAIL


Current Promotions:

With our personalized stamps you can create a cool address label or even use it for everything from marking your territory on books or other belongings to having a fun way to give a personal touch to gifts and goodies. Click HERE for a PDF of the flyer.

It’s here! The 2014 Holiday Catalog is ready for you to place your order! It’s packed with fun trendy products and quick kits! Click on the image in the sidebar and place your order today!

Need some cards quicky? Stampin’ Up! has a brand new kit that allows you to create 20 cards, all you need is some adhesive and you’re all set. Click here for the Everyday Occasion Card Kit!

Make your own stamp! New Undefined stamp carving kit. Available now! Click here for the PDF.

Check out all of the Photopolymer Stamp Sets! The newest set is You’re Wonderful. It’s a completely clear stamping option you are going to love!
Creation Station Tour – Wondrous Wreath

creation station header

Hi there and happy Sunday! I had a very busy day yesterday. I woke up and crafted for a bit and then I had to get ready for Erika to come over and make Daniel’s birthday decorations. Before that Andrew, my brother, Erika and I went to Croxley’s Ale House for lunch. We met two of my brother’s friends there and had a very nice lunch. They have 10 Cent wings and really good burgers and a very large selection of beer! After lunch we came back to my house and Erika and I worked on Daniel’s party decorations and Andrew worked on moving the rest of my blog over. The decorations are mostly finished and there is only one more piece to do for the blog. I have already reassigned the jkcardsonline.com web address to the new one, I just have to move the subscribers over and then I will be able to take down this one and only use the new one. For now I will be posting on both blogs, hopefully only until Monday! As I said I will also send out a test post to make sure that all of you are getting the emails. Thanks for you patience during the transition!

It’s time for another Creation Station Blog Tour and this month we are featuring the Wondrous Wreath Photopolymer Stamp Set and the Wonderful Wreath Framelits. Well, it’s generally an all around wreath theme! If you are following along with the tour you have arrived here from the talented Deborah Smart’s blog. Such great projects!! I have a card and a home decor project for you today so let’s get to them!

First up is a neat Christmas card. For the base I used a piece of Cherry Cobbler Card Stock and the background is a piece of the Gold Fancy Foil Designer Vellum. My wreath is from the Wondrous Wreath Photopolymer Stamp Set and is stamped in Mossy Meadow on Vellum Card Stock. I sprinkled some Clear Stampin’ Emboss Powder over the image and used my Heat Tool to set it. When you stamp on Vellum the ink takes a while to dry so it the perfect excuse to heat emboss it! I stamped it again with the berries from the set and used Cherry Cobbler Stampin’ Emboss Powder for those. The Wondrous Wreath Framelits cut it out and some Multi-Purpose Glue adheres it to the card. The bow is from the same set and is heat embossed in Gold Stampin’ Emboss Powder and also cut out with the Framelits. A little bit of Stampin’ Dimensional holds it to the wreath. I cut the Joy out from the Wonderful Wreath Framelits from a piece of Cherry Cobbler and heat embossed it with Clear Stampin’ Emboss Powder twice. I think that it gives it a very cool look, almost like patent leather. Some more Multi-Purpose Glue adheres that to the card. I love the simple elegance of the card and especially the shine on the Joy!

Creation Station Tour 12 - Card-WM

Creation Station Tour 12 - Card Close-WM

My next project is a fun wreath that will go on my wall somewhere in the house. I used a simple twig wreath that I had laying around in the Stampin Galley for my base. To create the bow I used the Gift Bow Bigz L Die and some Red Glimmer Paper. The berries around the wreath are also Red Glimmer Paper that I punched out with the 1/2″ Circle Punch. In the center hanging from apiece of Cherry Cobbler Baker’s Twine is a piece of Vellum Card Stock that I cut out with the Deco Labels Collection Framelits. My letters are Gold Glimmer Paper and I used the Little Letters Thinlits to cut them out and I adhered them with Multi-Purpose Glue. The ampersand is Red Glimmer Paper and is cut out with one of the dies from the Label Card Thinlits. I used some Stampin’ Dimensionals pieces to adhere that then tied it to the wreath. The bow and all the “berries” are adhered with hot glue to make sure that they stay in place! I love the sparkle of all of the Glimmer Paper and the unexpected hanging greeting in the middle!

Creation Station Tour 12 - Wreath-WM

Creation Station Tour 12 - Wreath Close-WM

I really hope that you enjoyed my two projects for the Creation Station Blog Tour featuring the Wondrous Wreath Photopolymer Stamp Set. I had a great time making the projects as I always do! Now you are off to see what clever Ilina Crouse has come up with. I love to inspire you to try new things and have you come by and see what I’m up to! Enjoy the rest of your Sunday! 🙂

creation station backcreation station next

Creation Station Blog Tour list:

Ilina Crouse

Kathy Kartak

Cindy Beach

Teneale Williams

Heidi Boos

Jennifer Downey

Deborah Smart

Justin Krieger (That’s Me!)


Stampin’ Up! products used:

Card:

Stamp Set: Wondrous Wreath Photopolymer

Ink: Mossy Meadow Classic Stampin’ Ink

Specialty Ink: Versa-Mark

Stampin’ Emboss Powder: Clear, Gold and Cherry Cobbler

Card Stock: Cherry Cobbler

Specialty Card Stock: Vellum and Gold Fancy Foil Designer Vellum

Framelits: Wonderful Wreath

Tools: Bog Shot, Heat Tool, Multi-Purpose Glue, Stampin’ Dimensionals and SNAIL


Wreath:

Specialty Paper: Red and Gold Glimmer

Specialty Card Stock: Vellum

Framelits: Deco Labels Collection

Thinlits: Little Letters

Big Shot Die: Gift Bow Bigz L

Punch: 1/2″ Circle

Tools: Big Shot, Sticky Strip, Multi-Purpose Glue, Stampin’ Dimensionals and SNAIL


Current Promotions:

With our personalized stamps you can create a cool address label or even use it for everything from marking your territory on books or other belongings to having a fun way to give a personal touch to gifts and goodies. Click HERE for a PDF of the flyer.

It’s here! The 2014 Holiday Catalog is ready for you to place your order! It’s packed with fun trendy products and quick kits! Click on the image in the sidebar and place your order today!

Need some cards quicky? Stampin’ Up! has a brand new kit that allows you to create 20 cards, all you need is some adhesive and you’re all set. Click here for the Everyday Occasion Card Kit!

Make your own stamp! New Undefined stamp carving kit. Available now! Click here for the PDF.

Check out all of the Photopolymer Stamp Sets! The newest set is You’re Wonderful. It’s a completely clear stamping option you are going to love!
Creation Station Tour – Fall Fest

creation station header

Hello peeps! How is your weekend going so far? Mine is going well! I was in Manhattan most of the day yesterday and despite it being dreary and rainy I had a nice time seeing my friend Isabella! After I took the subway down to the Ink Pad and made a new friend. Michael is another crafty person and I had a nice chat with him. Hopefully I will see him again soon! After I came home I made a card, I had to it was World Card Making Day after all! Did you get to make a card or two yesterday?!

Sometimes Sunday’s mean it’s time for another Creation Station Blog Tour! Today is one of those Sundays! This time around we are doing a Harvest theme focusing on the Fall Fest Photopolymer Stamp Set and the Tiny Treat Boxes. If you are following the tour then you have arrived here from the very talented Jennifer Downey’s Blog. I have three projects for you today, two cards and a little box. Lets get to them shall we?!

My first card uses the night sky technique that I did a little while ago. I really loved the way it looked and had to do it again! The base of the card is Night of Navy Card Stock. I used a piece of Watercolor Paper and the Tim Holtz Mini Ink Blending Tool with some Daffodil Delight first to create the moon. I then took some Post-it Tape and used the 1 1/4″ Punch to punch out a piece to mask over the moon.

Creation Station Tour 11 6-WM

Night of Navy and Blackberry Bliss are used to create the rest of the sky. The stars are Perfect Pearls mixed with a little water and dotted on with a paintbrush.

Creation Station Tour 11 7-WM

To make my ghost I took my Smoky Slate Stampin’ Write Marker and colored around just the edge of the ghost stamp and stamped it on some more Watercolor Paper.

Creation Station Tour 11 2-WM

I then used a paintbrush and water to pull the ink into the middle of the ghost.

Creation Station Tour 11 3-WMCreation Station Tour 11 4-WM

A quick trip through the Big Shot with the Fun Fall Framelits and some black eyes that are punched out with the 1/8″ Circle Punch and he’s ready to go on the card.

Creation Station Tour 11 5-WM

But first I heat embossed one of the greetings from the September Paper Pumpkin Kit in White Stampin’ Emboss Powder. A simple mailable card that uses two fun techniques!

Creation Station Tour 11 Boo Night Sky-WM

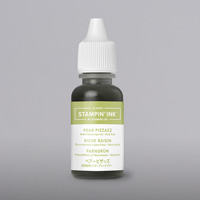
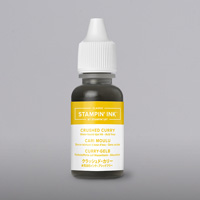
Next up is another neat card. The base of this one is Basic Black Card Stock and the background is a piece of paper from the Motley Monsters Designer Series Paper Pack. The panel is Sahara Sand and I used the Project Life Corner Rounder to round the corners. My partial circle is cut out with the Circles Collection Framelits. The greeting is from the For All Things Stamp Set and is stamped in Memento Tuxedo Black. For a little extra detail I used the Essentials Paper-Piercing Pack to pierce all around the edges before adhering the panel to the base with Stampin’ Dimensionals. The pumpkin and leaves are all from the Fall Fest Photopolymer Stamp Set and are stamped in Tangerine Tango, Crushed Curry and Pear Pizzaz. I cut them out with the Fun Fall Framelits and adhered the to the card with more Stampin’ Dimensionals. Another simple card but I love the piercing detail and the circle cut out!

Creation Station Tour 11 Hello Fall Pierced-WM

My last project is a box that I made using the Tiny Treat Boxes. They are 25 in a pack for $6.95! How can you go wrong?! To make my box I first separated it at the seam by prying the two pieces apart. I did this so I could cut out the pumpkins using the Fun Fall Framelits from the opposite sides of the box.

Creation Station Tour 11 1-WM

I then took some Vellum Card Stock and glued it to the inside of the box before using some Sticky Strip to adhere it back together. The embellishment on the top of the box is a piece of 1 1/4″ Burlap Ribbon that I trimmed the sides off of and pulled some threads out. I adhered it to the box top with some more Sticky Strip. Next up is some of the Tangelo Twist Sequin Trim from the September Paper Pumpkin Kit adhered with some Glue Dots. My pumpkin is from the Fall Fest Set and is cut out with the Fun Fall Framelits. I cut out one of the leaves stamped in Pear Pizzaz and used one of the Autumn Wooden Elements along with some of the black twine from the Paper Pumpkin Kit. A Stampin’ Dimensionals holds it in place.  Again, I have forgotten to pick up some of the tea lights! When I do get some I will take pictures of the place card holder and this box! LOL! I love all of the elements and simplicity of the box!

Creation Station Tour 11 Tiny Harvest Box Side-WM


Creation Station Tour 11 Tiny Harvest Box Top-WM

Creation Station Tour 11 Tiny Harvest Box Side-WM

And there you have my three projects for the Creation Station Blog Tour for our Fall Fest theme. I really hope that you enjoyed the projects and are inspired to make some of your own. Now continuing on with the tour your next stop is our fearless leader Jen Arkfeld. She’s a clever one isn’t she?! Thank you for coming by to see my projects! I appreciate your visit and hope you have an amazing Sunday! 🙂

creation station backcreation station next


Jen Arkfeld

Ilina Crouse


Stampin’ Up! products used:


Boo Night Sky Card:

Stamp Sets: Fall Fest and September Paper Pumpkin Photopolymer

Ink: Blackberry Bliss, Night of Navy and Daffodil Delight Classic Stampin’ Ink

Specialty Ink: Versa-Mark

Stampin’ Emboss Powder: White

Stampin’ Write Marker: Smoky Slate

Card Stock: Night of Navy

Specialty Paper: Watercolor

Framelits: Fun Fall

Punch: 1 1/4″ Circle

Tools: Big Shot, Heat Tool, SNAIL

NON-Stampin’ Up!: Tim Holtz Mini Ink Blending Tool, Perfect Pearls


Hello Fall Pierced Card:

Stamp Sets: Fall Fest Photopolymer and For All Things Clear Mount

Ink: Tangerine Tango, Crushed Curry, Pear Pizzaz Classic Stampin’ Ink and Memento Tuxedo Black

Card Stock: Basic Black, Sahara Sand and Whisper White

Designer Series Paper: Motley Monsters

Framelits: Circles Collection and Fun Fall

Punch: Project Life Corner Rounder

Tools: Big Shot, Essentials Paper-Piercing Pack, Paper-Piercing Tool, Stampin’ Dimensionals and SNAIL


Tiny Harvest Box:

Stamp Set: Fall Fest Photopolymer

Ink: Tangelo Twist and Pear pizzaz Classic Stampin’ Ink

Card Stock: Whisper White

Specialty Card Stock: Vellum

Accessories: Tiny Treat Boxes and September Paper Pumpkin Kit

Framelits: Fun Fall

Embellishments: 1 1/4″ Burlap Ribbon and Autumn Wooden Elements

Tools: Big Shot, Sticky Strip, Glue Dots, Multi-Purpose Glue, Stampin’ Dimensionals and SNAIL


Creation Station Tour – Harvest

creation station header


A very good Sunday to you my friends! I had a nice day yesterday, I did some crafting, ran some errands and straightened up the apartment a bit. Love a productive day. I had dinner with Anthony and Bill, they took me to Friday’s for a belated birthday meal. After that I ran up to Hofstra and picked up Andrew and took him home. They had a carnival/music festival and he was there from 10:45 in the morning. He said they have it every year and he felt he needed to go to it and he had fun so all in all a win!. In other news it’s time for another Creation Station Blog Tour! This time around we are doing a Harvest theme focusing on the For All Things Stamp Set and Fall themed projects. If you are following the tour then you have arrived here from the very talented Deborah Smart’s Blog. I have three projects for you today, two cards and a place card holder. Lets get to them shall we?!

Up first is a sort of one layer card. All of the elements on the background are stamped onto a piece of Very Vanilla Card Stock. The leaves, acorns and greeting are all from the For All Things Stamp Set. The leaves are stamped in Hello Honey, Tangelo Twist, Mossy Meadow and Blackberry Bliss. I masked off the area for the greeting with a piece of printer paper that I cut out with the Word Bubbles Framelits. The acorns and greeting along with the border from the Project Life Point & Click Photopolymer Stamp Set are all heat embossed with Gold Stampin’ Emboss Powder. I mounted the finished panel to a piece of Brushed Gold Metallic Card Stock and then adhered that to a Very Vanilla card base. I love all of the leaves and the heat embossed acorns and greeting give the card a little extra shine.

Creation Station Tour 10 Leaves Card-WM

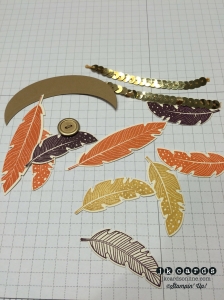
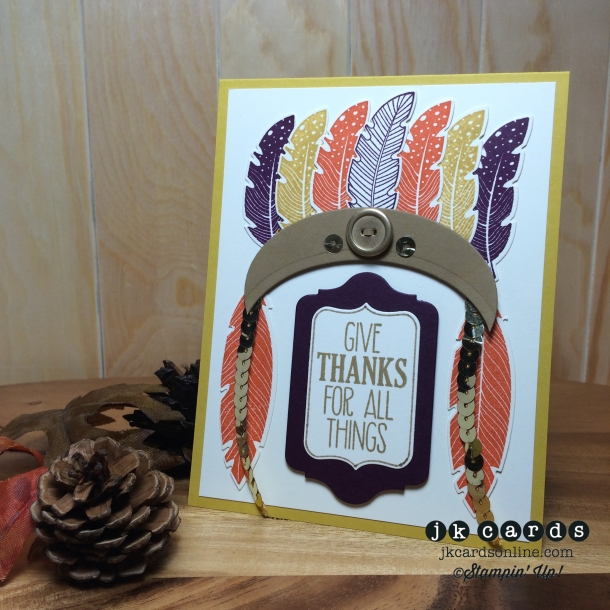
My next card is somewhat related to the Dreamcatcher that I did a little while ago. I’m my own worst critic but I love the way this card turned out, exactly as I had pictured it in my little brain! We begin with a piece of Hello Honey Card Stock for the base. My background is a simple piece of Very Vanilla. All of the feathers are from the Four Feathers Stamp Set and are stamped in Tangelo Twist, Blackberry Bliss and Hello Honey and are cut out with the Feathers Framelits.

Creation Station Tour 10 Pic 1-WM

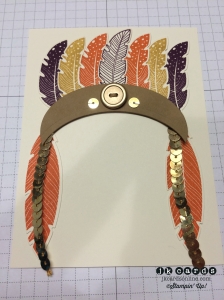
I cut the headband out of a piece of Baked Brown Sugar with the Ovals Collection Framelits. I held the headband in place while I adhered the feathers to the card. Once the feathers were adhered I used some Stampin’ Dimensionals to adhere the headband. On either side I tucked some strands of Gold Sequin Trim underneath and adhered them in place with Glue Dots. In the middle of the headband is a Gold Basic Metal Button with a piece of Baked Brown Sugar threaded through the holes and on either side are two gold sequins.

Creation Station Tour 10 Pic 2-WM

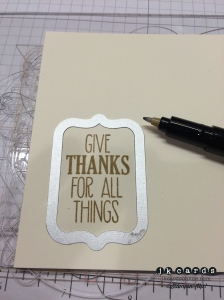
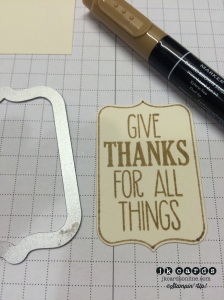
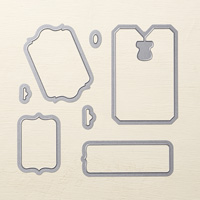
My greeting is from the For All Things Stamp Set and is stamped in Baked Brown Sugar. I used the Chalk Talk Framelits to cut it out and before I removed it from the cutting plate I used my Baked Brown Sugar Stampin’ Write Markers to trace inside the Framelit.

Creation Station Tour 10 Pic 3-WMCreation Station Tour 10 Pic 5-WMCreation Station Tour 10 Pic 4-WM

I backed it with a piece of Blackberry Bliss, also cut out with the Chalk Talk Framelits and adhered them to the card with Stampin’ Dimensionals. A really fun and I think quite realistic looking headdress!

Creation Station Tour 10 Headdress Card-WM

My last project is a fun place card holder. I used the Curvy Keepsake Box to cut out some Vellum Card Stock. I adhered the two pieces together with some Fast Fuse Adhesive. The image is from the For All Things Stamp Set and is heat embossed with Gold Stampin’ Emboss Powder. My name plate is created by cutting out some Blackberry Bliss with the Little Letters Thinlits and adhering them to a piece of Tangelo Twist backed with some Hello Honey. One of the feathers from the Four Feathers Stamp Set is stamped in Blackberry Bliss and cut out with the Feathers Framelits and tucked in behind the main panel. On the back is a Mini Clothes Pin to hold it to the ornament. I would have liked to have put a tea light inside but I could’t find any on the house! A neat place card holder that lets you change out the names whenever you want!

Creation Station Tour 10 Place Card-WM

So there are my three projects for the Creation Station Blog Tour featuring a Fall theme. I really hope that you enjoyed the projects and are inspired to make some Fall cards and decor. Now continuing on with the tour your next stop is our talented leader Jen Arkfeld. Love all of the cool things that she comes up with! Thank you for coming by to see my projects! I appreciate your visit and hope you have an excellent Sunday! 🙂

creation station back  creation station next

Jen Arkfeld

Ilina Crouse

Stampin’ Up! products used:

Leaves Card:

Stamp Sets: For All Things Clear Mount and Project Life Point & Click Photopolymer

Ink: Hello Honey, Tangelo Twist, Mossy Meadow and Blackberry Bliss Classic Stampin’ Ink

Specialty Ink: Versa-Mark

Stampin’ Emboss Powder: Gold

Card Stock: Very Vanilla

Specialty Card Stock: Brushed Gold Metallic

Framelits: Word Bubbles

Tools: Big Shot, Heat Tool, Fast Fuse and SNAIL

Headdress Card:

Stamp Sets: Four Feathers and For All Things Clear Mount

Ink: Tangelo Twist, Blackberry Bliss, Hello Honey and Baked Brown Sugar Classic Stampin’ Ink

Stampin’ Write Marker: Baked Brown Sugar

Card Stock: Hello Honey, Very Vanilla, Blackberry Bliss and Baked Brown Sugar

Framelits: Feathers, Chalk Talk and Ovals Collection

Embellishments: Gold Basic Metal Buttons and Gold Sequin Trim

Tools: Big Shot, Multipurpose Glue, Glue Dots, Stampin’ Dimensionals and SNAIL

Place Card Holder:

Stamp Set: For All Things Clear Mount

Specialty Ink: Versa-Mark

Stampin’ Emboss Powder: Gold

Card Stock: Hello Honey, Tangelo Twist and Blackberry Bliss

Specialty Card Stock: Vellum

Framelits: Feathers and Chalk Talk

Thinlits: Curvy Keepsake Box and Little Letters

Embellishments: Mini Clothes Pins

Tools: Big Shot, Heat Tool, Multipurpose Glue, Glue Dots, Stampin’ Dimensionals and SNAIL

Current Promotions:

For the entire month of August buy a Big Shot and get a FREE Stamp & Framelit Bundle!! Click HERE for more details!

The 2014-2015 Annual Catalog is here!! Get your lists ready and place your orders!!

With our personalized stamps you can create a cool address label or even use it for everything from marking your territory on books or other belongings to having a fun way to give a personal touch to gifts and goodies. Click HERE for a PDF of the flyer.

It’s here! The 2014 Occasions Catalog is ready for you to place your order! It’s packed with fun trendy products and quick kits! Click on the image in the sidebar and place your order today!

Need some cards quicky? Stampin’ Up! has a brand new kit that allows you to create 20 cards, all you need is some adhesive and you’re all set. Click here for the Everyday Occasion Card Kit!

Make your own stamp! New Undefined stamp carving kit. Available now! Click here for the PDF.

Check out all of the Photopolymer Stamp Sets! The newest set Yee Haw. It’s a completely clear stamping option you are going to love!
Creation Station Tour – Tags and Letters

creation station header

Hello everyone! The Unite and Excite event was lots of fun! I got to see some of my friends and make new ones, too! We went to Bertucci’s for lunch afterwards and had a great time. When I got home, Andrew came by and we ran to the Apple Store to get his phone fixed. Spent some time at the house and then had Panera for dinner. Aside from the muggy and rainy weather, I’d say yesterday was a pretty good day! Here is a picture of me and Donna from the event!

Donna and Justin 9-2014

Today it’s time for the Creation Station Blog Tour! I’m hoping that you have been along for our previous ones! If this is your first time here, welcome and I hope that you find inspiration in the projects. This time around we are featuring the alphabet stamps and tags. If you are following the tour you have arrived here from Deborah Smart’s blog, clever projects, don’t you think?! I have three cards for you today. Without further ado…

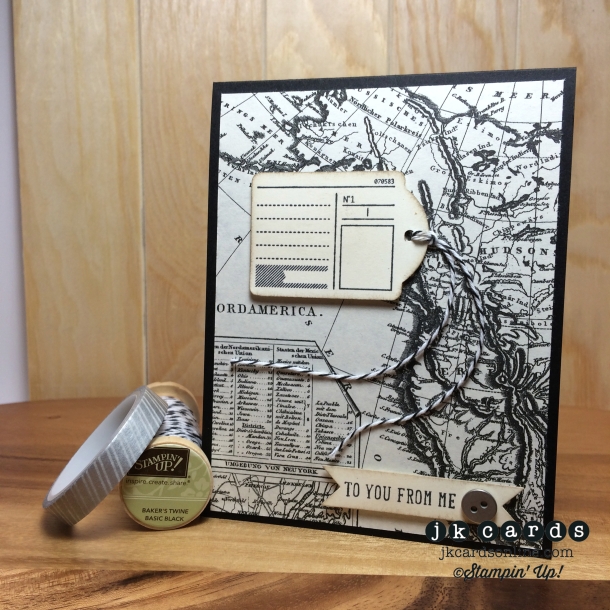
My first card is a very simple and quite masculine card. It begins with a base of Basic Black Card Stock and my background is a piece of paper from the Typeset Specialty Designer Series Paper Pack. I was pleasantly surprised when I realized that the “tag” stamp from the Bits and Pieces Stamp Set fit perfectly inside the Note Tag Punch. It is stamped in Memento Tuxedo Black Ink on Very Vanilla. I sponged some Crumb Cake on the edges and punched a hole in the top with the 1/8″ Circle Punch. A piece of Basic Black Baker’s Twine goes through the hole and some Crystal Effects hold it exactly where I want it. My greeting is from the And Many More Stamp Set and is stamped in Memento Tuxedo Black and cut out with the Bitty Banners Framelits. Some more sponging and a Silver Basic Metal Button is adhered with a Mini Glue Dot. Stampin’ Dimensionals hold the tag and the greeting to the card. A very monochromatic and masculine card.

Creation Station Blog Tour 9 - Card 1-WM

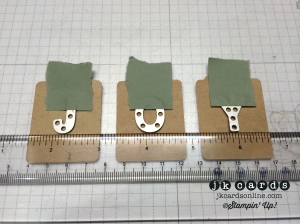
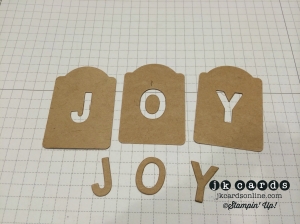
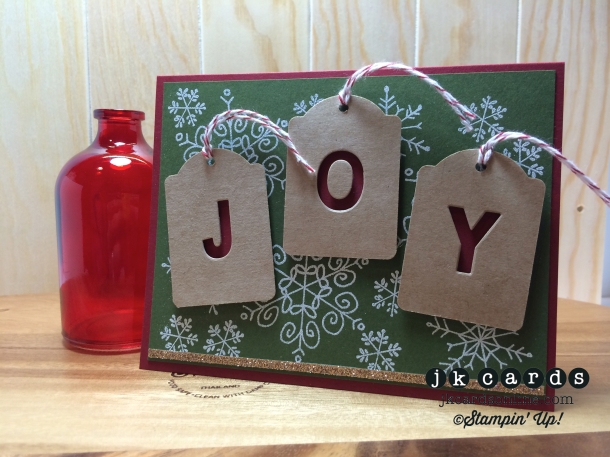
For my second card I did a holiday card. The card begins with a base of Cherry Cobbler Card Stock. For the background I stamped the snowflakes from the Endless Wishes Photopolymer Set in Versa-Mark and heat embossed them with White Stampin’ Emboss Powder on Mossy Meadow Card Stock. My tags are punched out with the Note Tag Punch from Kraft Card Stock. I used the Little Letters Thinlits to cut out the word “JOY” from the tags and backed them with Cherry Cobbler with Stampin’ Dimensionals in between.

Creation Station Blog Tour 9 - Pic 1-WMCreation Station Blog Tour 9 - Pic 2-WM

Some Cherry Cobbler Baker’s Twine is thread through the tops of the tags and they are adhered to the card with SNAIL. A thin strip of Champagne Glimmer Paper goes across the bottom and finishes off the card with a little sparkle. I know it’s unlike me to make a holiday card using traditional holiday colors, but I figured once in a while, I must conform to the norm. LOL!

Creation Station Blog Tour 9 - Card 2-WM

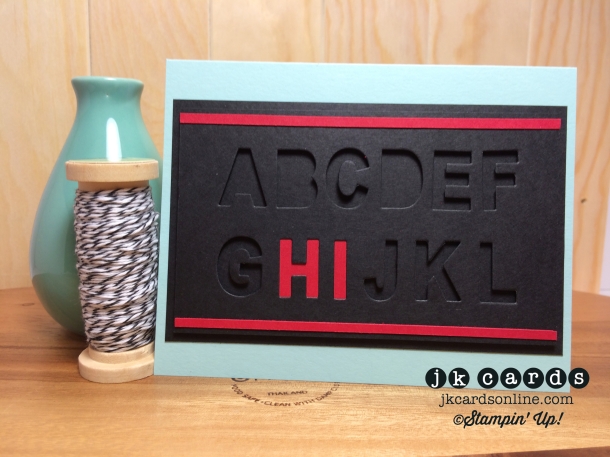
My last card is a card I have been wanting to make for a while. It starts off with a base of Pool Party Card Stock. I used the Little Letters Thinlits to cut out two rows of letters, A-F and G-L, from a piece of Basic Black and backed the “H” and “I” with Real Red Card Stock. That panel is mounted to another panel of Basic Black using Stampin’ Dimensionals and is then adhered to the card with SNAIL. Two 1/8″ strips of Real Red go across the top and bottom and are adhered with 2-Way Glue. I like the color combination and I think the pop of red makes the “HI” really stand in the spotlight among the other letters. LOL!

Creation Station Blog Tour 9 - Card 3-WM

It makes me feel very creative when I use the same theme for three projects, and they all come out looking so different! I had fun making my cards for the Creation Station Blog Tour this time around and I hope that you enjoyed them. I’m the last stop on the tour, but if you began here, head over to Jen Arkfeld’s blog to start from the beginning! I promise, you won’t be disappointed. Thanks for coming by and have a super Sunday! 🙂

creation station backcreation station next
Creation Station Blog Tour:

Jen Arkfeld

Ilina Crouse

Kathy Kartak

Sara Levin

Heidi Boos

Jennifer Downey

Justin Krieger (that’s me)


Stampin’ Up! products used:

Card 1:

Stamp Sets: And Many More and Bits and Pieces Clear Mount

Ink: Memento Tuxedo Black and Crumb Cake Classic Stampin’ Ink

Card Stock: Basic Black and Very Vanilla

Designer Series Paper: Typeset Specialty

Framelits: Bitty Banners

Punch: Note Tag and 1/8″ Circle

Embellishments: Basic Black Baker’s Twine and Silver Basic Metal Buttons

Tools: Big Shot, Stamping Sponge, Crystal Effects, Mini Glue Dots, Stampin’ Dimensionals and SNAIL

Card 2:

Stamp Set: Endless Wishes Photopolymer

Specialty Ink: Versa-Mark

Stampin’ Emboss Powder: White

Card Stock: Cherry Cobbler, Mossy Meadow and Kraft

Specialty Paper: Champagne Glimmer

Thinlits: Little Letters

Punch: Note Tag and 1/8″ Circle

Embellishment: Cherry Cobbler Baker’s Twine

Tools: Big Shot, Heat Tool, Multi-Purpose Glue, Stampin’ Dimensionals and SNAIL


Card 3:

Stamp Set: None!

Ink: None!

Card Stock: Pool Party, Basic Black and Real Red

Thinlits: Little Letters

Tools: Big Shot, Multi-Purpose Glue, Stampin’ Dimensionals and SNAIL


Creation Station Tour – Kinda Eclectic

creation station header

Hello everyone! I had a very crafty day yesterday and the weather here was just perfect, cool but sunny! Today it’s time for the Creation Station Blog Tour! I’m hoping that you have been along for our previous ones! If this is your first time here welcome and I hope that you find inspiration in the projects. This time around we are featuring the Kinda Eclectic Stamp Set. If you are following the tour you have arrived here from Jennifer Downey’s blog, pretty awesome projects huh?! I have three projects for you today. I took some pictures of them so you could follow along!

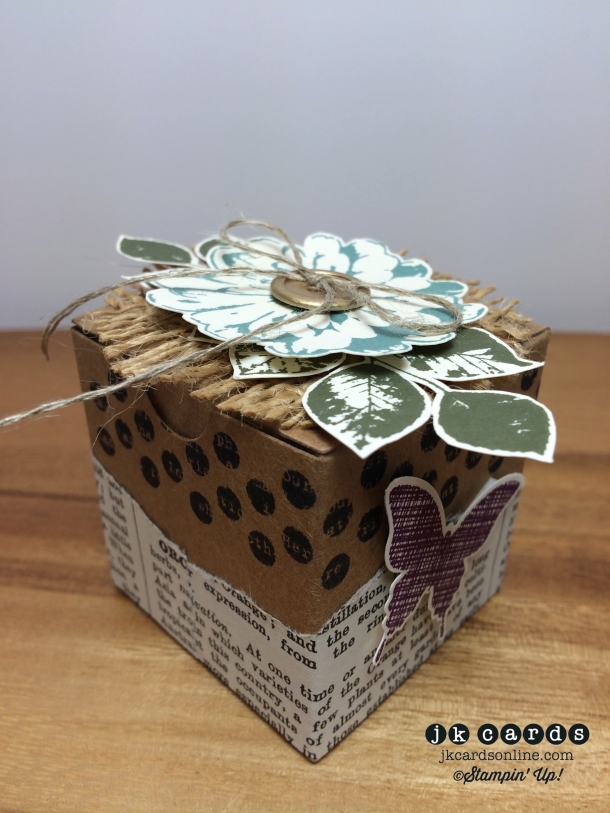
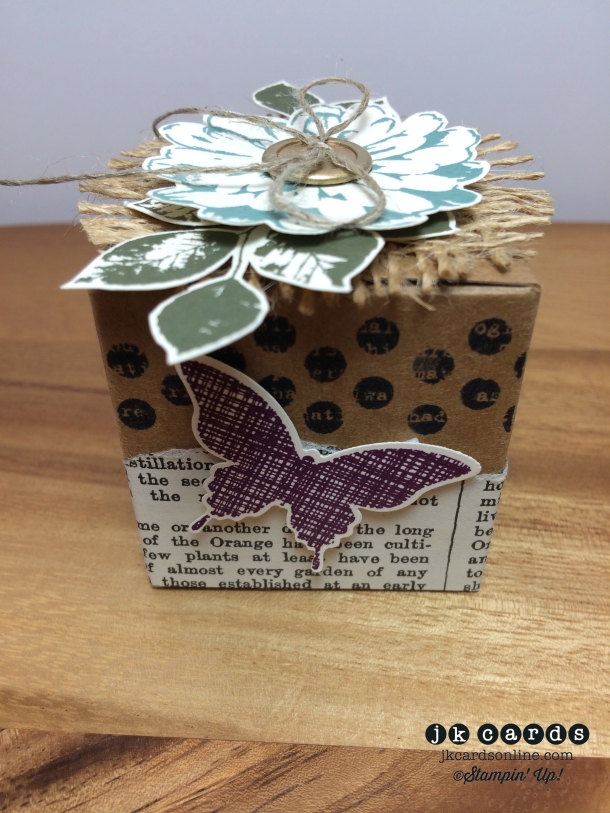
The first project that I have for you today is a relatively quick but really cute tiny gift box. We have new Tiny Treat Boxes in the upcoming Holiday Catalog and they come 25 to a pack, they are about 2″ square. I used the featured stamp set Kinda Eclectic to stamp the dots around the top on the sides in Night of Navy. Along the bottom is some Typeset Specialty Designer Series Paper that I tore (I have a difficult time doing that! LOL!) and adhered with some Fast Fuze Adhesive.

Creation Station Tour 8 - Pic 1

I adhered two of the butterflies stamped in Blackberry Bliss and punched out with the Elegant Butterfly Punch on opposite sides. On top is a piece of burlap that I had from long ago, I cut it out with the “Vintage” Circles #2 Bigz Die and frayed the edges. Two of the leaves are stamped in Always Artichoke and cut out with my Paper Snips. On top of that is a flower from the Choose Happiness Stamp Set stamped in Lost Lagoon and cut out with my Paper Snips too. I adhered the burlap with Sticky Strip, the leaves with Glue Dots and the flower with Stampin’ Dimensionals. In the middle is one of the new Gold Basic Metallic Buttons threaded with some Linen Thread and adhered to the middle of the flower with a Glue Dot. A fun little box that would be perfect for a little piece of candy or maybe some bling!

Creation Station Tour 8 - Box 1

Creation Station Tour 8 - Box 3

Creation Station Tour 8 - Box 2

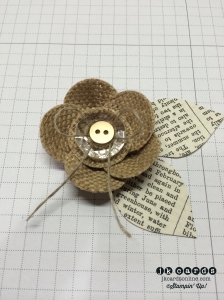
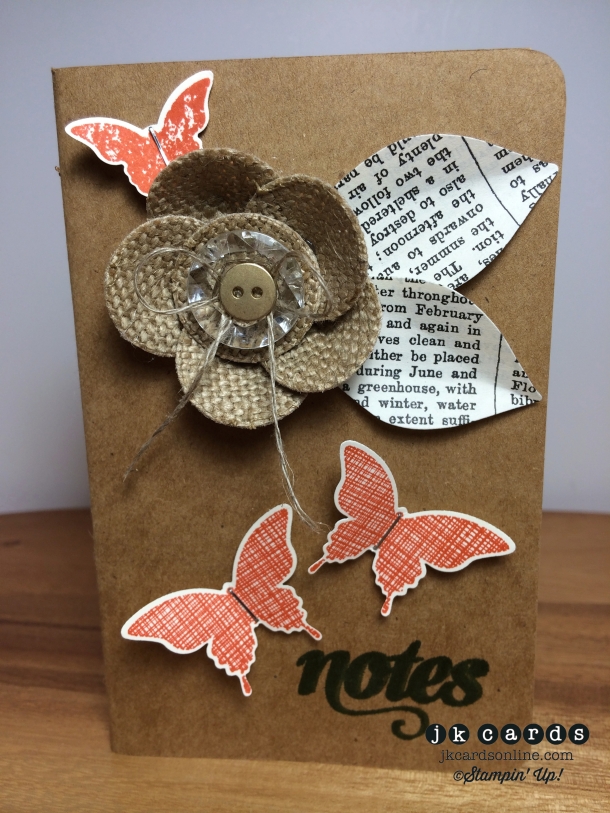
Next up is one of our Kraft Grid Journals that I decorated with some fun stuff! I saw a flower in this month’s Stampin’ Success (our Demonstrator Magazine) and had to make one! The flower is made by coating one side of the 1 1/4″ Burlap Ribbon with Mod-Podge and letting it dry completely. When it’s dry you use one of the Circles Collection Framelits to cut them out. I found that they didn’t cut all the way through but my Paper Snips finished the job. I love the way they stay nice and crisp along the edges thanks to the Mod-Podge!.

Creation Station Tour 8 - Pic 2

I put a slit halfway up the ones that go around and the hot glued them all together. In the middle I took a Vintage Faceted Button and tied some Linen Thread in a bow and adhered the smallest of the Gold Basic Metallic Buttons in the center with a Glue Dot.

Creation Station Tour 8 - Pic 4

The leaves are cut from the Typeset Specialty Designer Series Paper with the Flower Fair Framelits.

Creation Station Tour 8 - Pic 3

My three butterflies are form the Kinda Eclectic Stamp Set and are stamped in Tangelo Twist, the large ones are punched out with the Elegant Butterfly Punch and the smaller one with Bitty Butterfly Punch. I used the new Handheld Stapler to make the bodies and then adhered them to the journal with Stampin’ Dimensionals. My notes stamp is from a Paper Pumpkin Kit and is stamped in Mossy Meadow.

Creation Station Tour 8 - Pic 5

I love that flower, it’s a fun different embellishment and I think the journal will go in a shadow box and make a nice home decor piece for someone special!

Creation Station Tour 8 - Journal

Creation Station Tour 8 - Burlap Flower

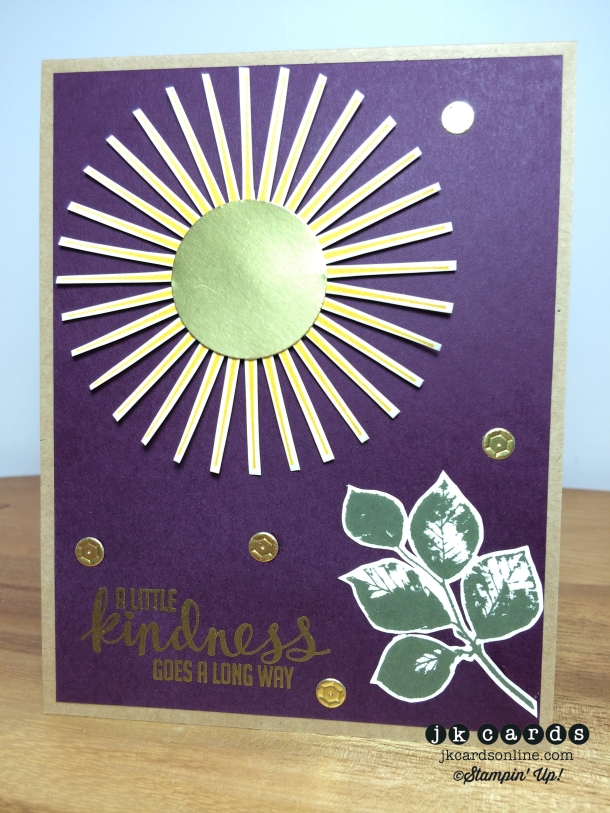
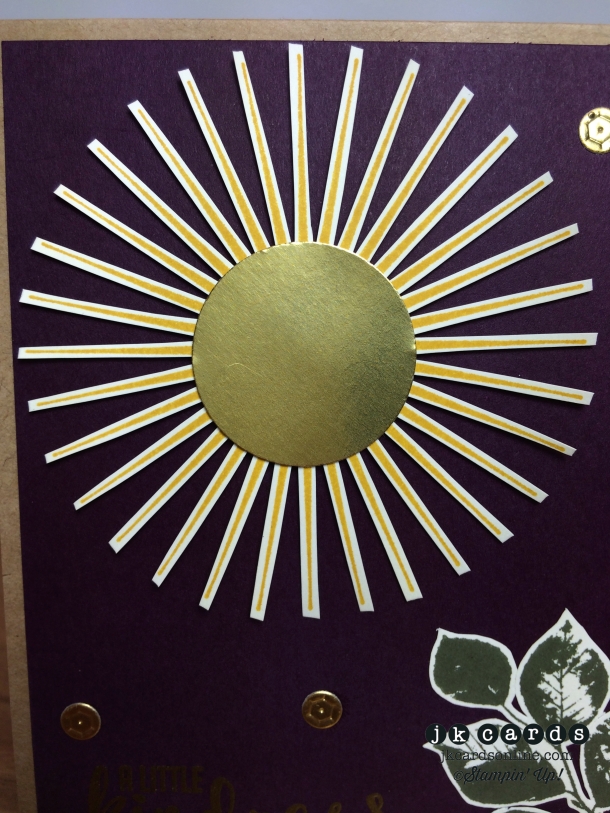
Lastly I have a quick card. The base of it is Kraft Card Stock and the background is a piece of Blackberry Bliss. I heat embossed the greeting from Kinda Eclectic in Gold Stampin’ Emboss Powder and then adhered the background to the base with Fast Fuze, it was a little warped after the heat embossing and I wanted to make sure that it would stay flat! The sunburst and the leaves are from the same set, the leaves are stamped in Always Artichoke and the sunburst in Crushed Curry. I cut them both out with my Paper Snips. In the middle of the sunburst is a piece of Gold Foil Sheet that I punched out with the 1 1/4″ Circle Punch. The sunburst is adhered with Stampin’ Dimensionals and the leaves with Multi-Purpose Glue. My little gold sequins are made using a die from My Favorite Things Die-namics and Gold Foil Sheet, I saw the die and just couldn’t resist, I can make sequins from any card stock now! I love the bold background with the fussy cut sun, makes it stand out nicely!

Creation Station Tour 8 - Eclectic Card

Creation Station Tour 8 - Eclectic Card Close

Three projects for the Creation Station Blog Tour featuring the Kinda Eclectic Stamp Set! It’s one of my favorites sets as I have mentioned just a few times before! LOL! I hope that you are inspired and that you will give making the burlap flower a try. Your next stop on the tour is Jen Arkfeld! Her projects are always fantastic! Thank you for coming by to see my projects and enjoy the rest of the tour and have a wonderful Sunday! 🙂

creation station backcreation station next

Complete Blog Tour

Jen Arkfeld

Ilina Crouse

Kathy Kartak

Cindy Beach

Teneale Williams

Sara Levin

Jennifer Frost

Kallan Quinn

Jennifer Downey

Justin Krieger (that’s me)

Stampin’ Up! products used:

Box:

Stamp Sets: Kinda Eclectic and Choose Happiness Clear Mount

Ink: Night of Navy, Blackberry Bliss, Always Artichoke and Lost Lagoon Classic Stampin’ Ink

Card Stock: Very Vanilla

Designer Series Paper: Typeset Specialty

Punch: Elegant Butterfly

Box: Tiny Treat

Embellishments: Gold Basic Metal Buttons and Linen Thread

Tools: Big Shot, Paper Snips, Stamp-a-ma-jig, Sticky Strip, Glue Dots and Stampin’ Dimensionals


Journal:

Stamp Sets: Kinda Eclectic and Paper Pumpkin Clear Mount

Ink: Tangelo Twist and Mossy Meadow Classic Stampin’ Ink

Card Stock: Very Vanilla

Designer Series Paper: Typeset Specialty

Framelits: Circles Collection and Flower Fair

Punches: Elegant Butterfly and Bitty Butterfly

Embellishments: Vintage Faceted Buttons, Gold Basic Metal Buttons, 1 1’4″ Burlap Ribbon and Linen Thread

Tools: Big Shot, Handheld Stapler, Glue Dots and Stampin’ Dimensionals


Card:

Stamp Set: Kinda Eclectic Clear Mount

Ink: Crushed Curry and Always Artichoke Classic Stampin’ Ink

Specialty Ink: Versa-Mark

Stampin’ Emboss Powder: Gold

Card Stock: Kraft, Blackberry Bliss and Very Vanilla

Punch:  1 1/4″ Circle

Tools: Big Shot, Paper Snips, Stamp-a-ma-jig, Heat Tool, Multi-Purpose Glue, Stampin’ Dimensionals, Fast Fuze and SNAIL


Creation Station Tour – Amazing Birthday

creation station header

Hello everyone! I had a very nice day in Manhattan yesterday! I will have some fun pictures for you tomorrow, but today it’s time for the Creation Station Blog Tour! I’m hoping that you have been along for our previous ones! I missed the last one, I was at Convention. I f this is your first time here welcome and I hope that you find inspiration in the projects. This time around we are featuring the Amazing Birthday Stamp Set and the Tag-A-Bag products. If you are following the tour you have arrived here from Deborah Smart’s blog, she always has such cool stuff! I have three projects for you today. I took some pictures of the first project because it contains a new item and a fun new technique!

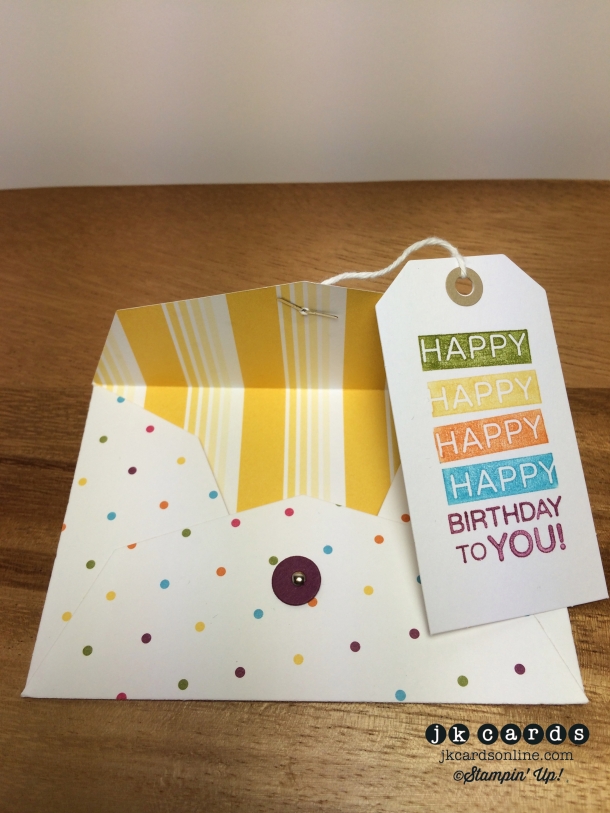
First up I have a simple gift card holder made with the new Gift Card Envelope and Trims Thinlits Die that will be available for purchase on August 28th from the 2014 Holiday Catalog. I used the die to cut out a piece of Sweet Taffy Designer Series Paper.

Creation Station Tour 7 GC 1-WM

The die is great because it cuts and scores the paper for you, all you have to do is fold, adhere and embellish!

Creation Station Tour 7 GC 2 8-03-2014Creation Station Tour 7 GC 3-WM

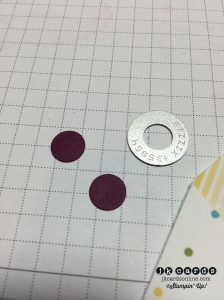
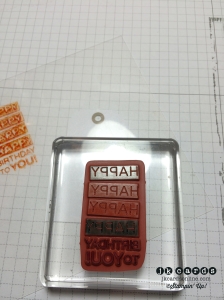
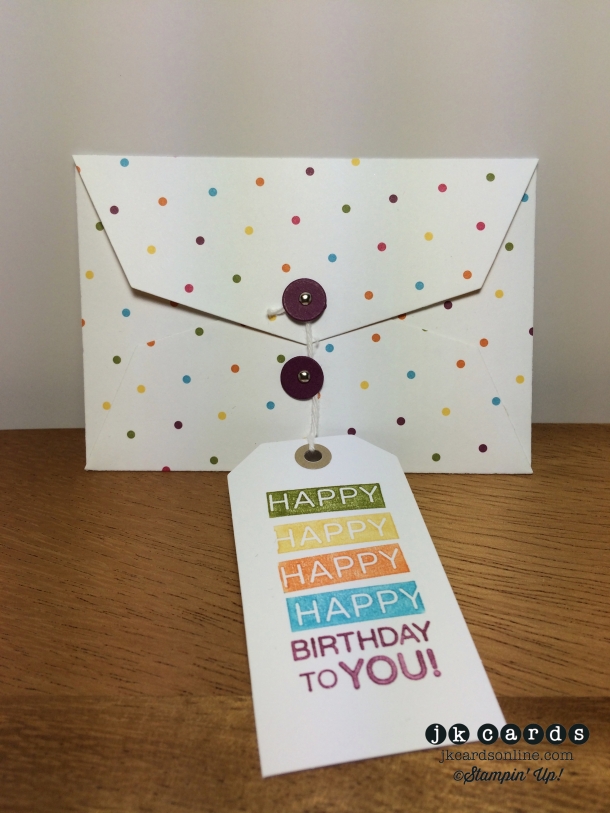
I added the circles and 1/8″ Mini Brads so I would be able to tie on my tag. Speaking of the tag it’s actually a “Vintage” one from the Stamp a Tag Kit. I used the greeting from the Amazing Birthday Stamp Set and marketed it in Old Olive, Daffodil Delight, Pumpkin Pie, Tempting Turquoise and Rich Razzleberry.

Creation Station Tour 7 GC 4-WM

A piece of White Baker’s Twine is wrapped around the brads and holds the tag to the gift card holder. A quick and fun way to give someone a little something for their birthday!

Creation Station Tour 7 GC Tag 1-WM

Creation Station Tour 7 GC Tag 2-WM

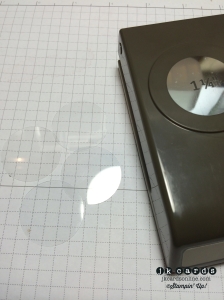
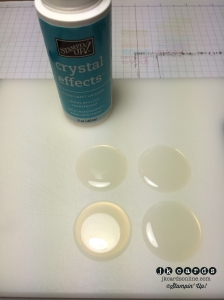
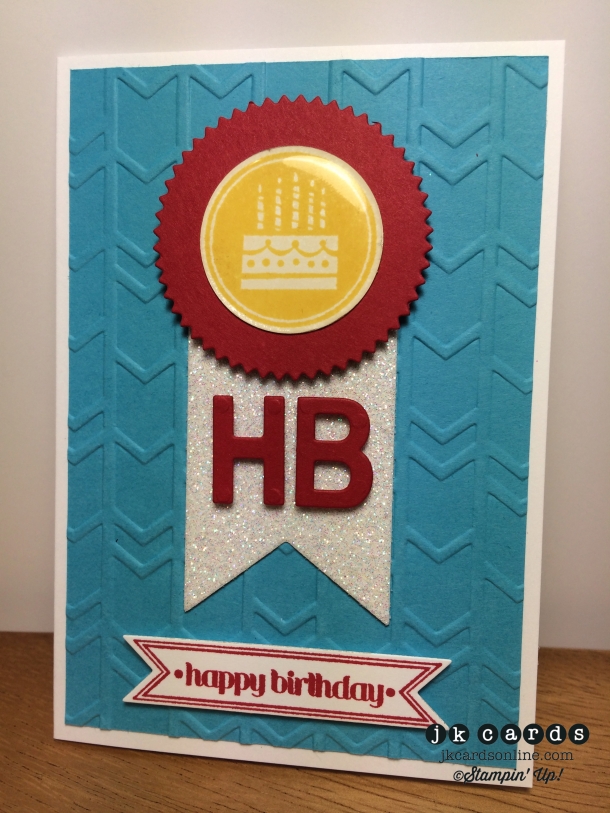
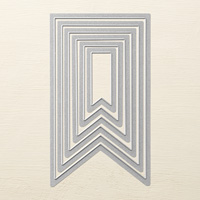
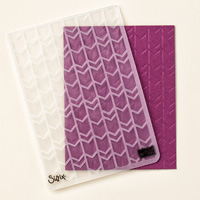
Next up I have a note card. I saw this fun technique to make epoxy embellishments the other day so I thought I would give it a try! The card begins with one of the cards from the Note Cards & Envelopes. I embossed a piece of Tempting Turquoise with the Arrows Textured Impressions Embossing Folder for my background. For the banner I cut out a piece of Dazzling Diamonds Glimmer Paper with the Banners Framelits. A piece of Real Red is cut out with the Starburst Framelits and adhere to the card with Stampin’ Dimensionals. Next up is my epoxy embellishment. I punched out a piece of Window Sheet with the 1 1/4″ Circle Punch and spread some Crystal Effect over the top.

Creation Station Tour 7 GC 5-WMCreation Station Tour 7 GC 6-WM

The neat thing is that as long as you don’t put too much Crystal Effects on it stops at the edge of the Window Sheet. You need to set them aside for at least 24 hours to make sure that they are completely dry. I stamped the cake from the Amazing Birthday Stamp Set in Daffodil Delight and ran it through my Zyron Sticker Maker face down and adhered it to the back of the Window Sheet. Some Fast Fuse makes sure that it will stay in place. Another piece of Real Red is cut out with the Little Letters Thinlits and adhered to the card with more Stampin’ Dimensionals pieces. My greeting is from the Itty Bitty Banners Stamp Set and is cut out with the Bitty Banners Framelits. I loved making the epoxy embellishments, they are so much fun and it’s great to be able to customize them to whatever you need!

Creation Station Tour 7 Card-WM


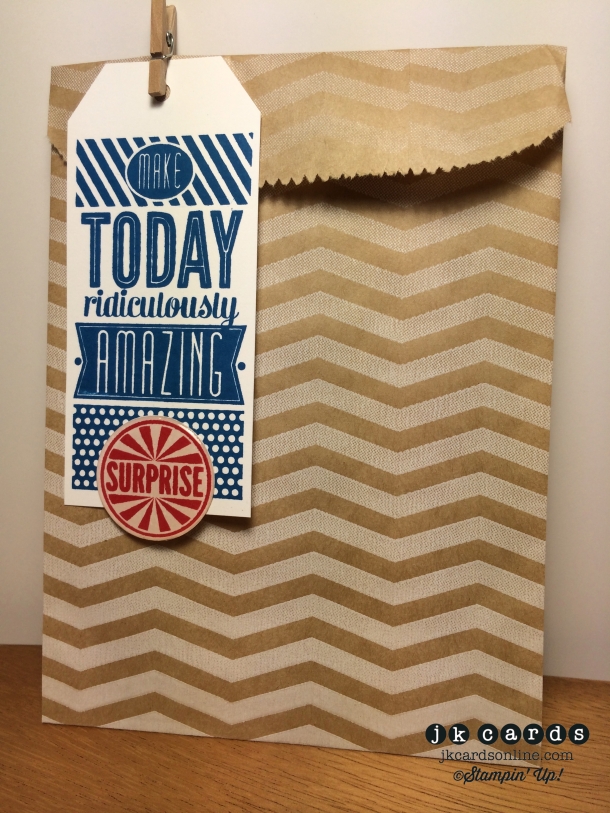
My last project is a simple tag. I stamped the greeting from the Amazing Birthday Stamp Set in Tempting Turquoise and punched the tag with the Angled Tag Topper Punch. Another one of the epoxy embellishments is adhered to the bottom and a Mini Clothes Pin holds it to one if the Chevron Tag a Bag Gift Bags. I always need something quick to make to put on a gift and this definitely fits the bill! I made some extra epoxy embellishments and now can just stamp and adhere what I need to the back of them!

Creation Station Tour 7 Tag Bag-WM

So there are my projects for the Creation Station Blog Tour featuring the Amazing Birthday Stamp Set and Tag a Bag products! I hope that you are inspired and that you will give making the epoxy embellishments a try. Your next stop on the tour is Ilina Crouse! She always has some amazing stuff! Thank you for coming by to see my projects and enjoy the rest of the tour and have a wonderful Sunday! 🙂

creation station backcreation station next


Complete Blog Tour:

Ilina Crouse

Kathy Kartak

Teneale Williams

Sara Levin

Heidi Boos

Jennifer Frost

Kallan Quinn

Jennifer Downey

Deborah Smart

Justin Krieger (that’s me)

Stampin’ Up! products used:

Gift Card Holder:

Stamp Set: Amazing Birthday Clear Mount

Stampin’ Write Markers: Old Olive, Daffodil Delight, Pumpkin Pie, Tempting Turquoise and Rich Razzleberry

Card Stock: Rich Razzleberry

Designer Series Paper: Sweet Taffy

Tag: Stamp a Tag Kit (Vintage)

Thinlit: Gift Card Envelope and Trims

Embellishments: 1/8″ Mini Brads and White Baker’s Twine

Tools: Big Shot, Paper-Piercing Tool, Fast Fuse and SNAIL

Note Card:

Stamp Sets: Amazing Birthday and Itty Bitty Banners Clear Mount

Ink: Daffodil Delight and Real Red Classic Stampin’ Ink

Card Stock: Tempting Turquoise, Real Red and Whisper White

Specialty Paper: Dazzling Diamonds Glimmer and Window Sheet

Framelits: Starburst, Banners and Bitty Banners

Thinlits: Little Letters

Embossing Folder: Arrows

Punch: 1 1/4″ Circle

Embellishments: Crystal Effects

Tools: Big Shot, Stampin’ Dimensionals, Fast Fuse and SNAIL

Tag and Bag:

Stamp Set: Amazing Birthday Clear Mount

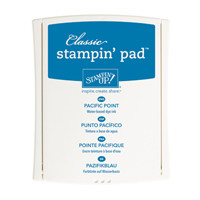
Ink: Pacific Point and Real Red Classic Stampin’ Ink

Punch: Angled Tag Topper and 1 1/4″ Circle

Embellishment: Mini Clothes Pin

Accessory: Chevron Tag a Bag Gift Bags

Tools: Fast Fuse

Current Promotions:

For the entire month of August buy a Big Shot and get a FREE Stamp & Framelit Bundle!! Click HERE for more details!

The 2014-2015 Annual Catalog is here!! Get your lists ready and place your orders!!

With our personalized stamps you can create a cool address label or even use it for everything from marking your territory on books or other belongings to having a fun way to give a personal touch to gifts and goodies. Click HERE for a PDF of the flyer.

It’s here! The 2014 Occasions Catalog is ready for you to place your order! It’s packed with fun trendy products and quick kits! Click on the image in the sidebar and place your order today!

Need some cards quicky? Stampin’ Up! has a brand new kit that allows you to create 20 cards, all you need is some adhesive and you’re all set. Click here for the Everyday Occasion Card Kit!

Make your own stamp! New Undefined stamp carving kit. Available now! Click here for the PDF.

Check out all of the Photopolymer Stamp Sets! The newest sets are Dear Heart and Christmas Bliss. It’s a completely clear stamping option you are going to love!

Creation Station Tour – Confetti

creation station header

Hello everyone! I had a very nice afternoon in Manhattan yesterday! I will fill you in on all of it tomorrow, including some fun pictures, but today it’s time for the Creation Station Blog Tour! I’m hoping that you have been along for our previous ones! I f this is your first time here welcome and I hope that you find inspiration in the projects. This time around we are featuring the Dotty Angles Photopolymer Stamp Set, Confetti and Coaster Board. If you are following the tour you have arrived here from Deborah Smart’s blog, now those were some great projects! I have two projects for you today. Normally I would have taken pictures of the steps to make the projects but with my moving and unpacking distracting me I forgot! I hope that the descriptions are good enough for this time!

First up I have a fun card for you and it starts off with a base of Hello Honey Card Stock. I stamped my greeting from the Hi There Stamp Set, stamped in Bermuda Bay and the stamp from the Dotty Angles Stamp Set stamped across the top in the same color. Before adhering the background I adhered a piece of Bermuda Bay for a nice double border. I used my Stampin’ Trimmer and the Squares Collection Framelits to cut a piece of Whisper White in the form of a Polaroid Frame. I adhered a piece of Window Sheet to the back and used the excess sides from the Stampin’ Dimensionals to pop it up and make a holder for my confetti. The confetti is simply Bermuda Bay and Hello Honey Card Stock that I punched out with the 1/4″ Circle Punch. I adhered the Polaroid to the card to create the shaker frame. A piece of Hello Honey cut out with the Squares Collection Framelits creates the border around the frame and a few extra punched out pieces are adhered next to the greeting. Sometimes when you need some confetti a few simple punched out circles are a good thing to use. A fun card that is sure to brighten anyone’s day!

Creation Station Card Tour 5-WM

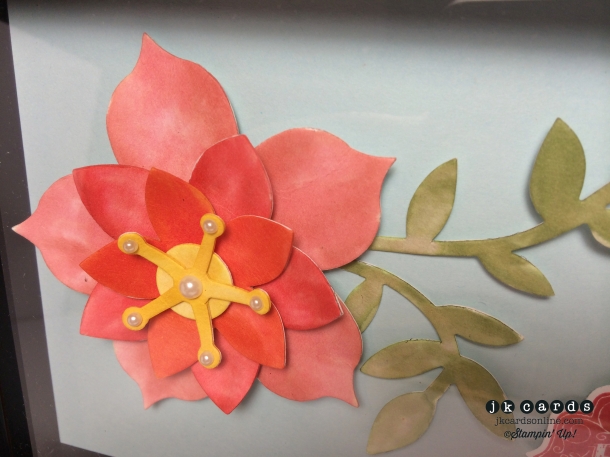
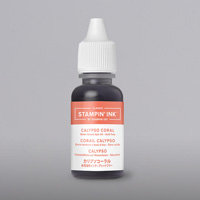
My final project for today uses Coaster Board. I was sitting there wondering what to do when I thought, I wonder if you can watercolor Coaster Board? I got out my Flower Frenzy Bigz L Die and cut out some and went to work with my Aqua Painter. I used Crisp Cantaloupe for the base flower, Calypso Coral for the next layer and Tangerine Tango for the top. My middle uses Crushed Curry and Daffodil Delight. While the Coaster Board was drying I used my fingers to shape the petals a little. The leaves are painted with some Pear Pizzaz and adhered to the Soft Sky Background with Multi-Purpose Glue. The main pieces of the flower are all adhered to each other and the base with Stampin’ Dimensionals . A Mini Glue Dot holds the top piece in place and some Basic Jewels Pearls complete the flower. My greeting is from the Tag Talk Stamp Set and is stamped in Calypso Coral and also adhered with Stampin’ Dimensionals. I decided that a shadow box frame that I picked up from HomeGoods would be a perfect way to display the project. I love the color variation in the Coaster Board when it’s watercolored! Such a cool effect don’t you think?!

Creation Station 3D Tour 5-WM

Creation Station 3D Tour 5 Close-WM

So there are my projects for the Creation Station Blog Tour! Like I said earlier, I hope that you are inspired and that you will give the Coaster Board and watercoloring a try. Your next stop on the tour is Jen Arkfeld! She always has some amazing stuff! Thank you for coming by to see my projects and enjoy the rest of the tour and have a wonderful Sunday! 🙂

creation station backcreation station next


Complete Tour:

Jen Arkfeld

Ilina Crouse

Kathy Kartak

Cindy Beach

Teneale Williams

Sara Levin

Heidi Boos

Jennifer Frost

Kallan Quinn

Jennifer Downey

Justin Krieger (that’s me!)

Stampin’ Up! products used:

Card:

Card Stock: Hello Honey, Bermuda Bay and Whisper White

Specialty: Window Sheet

Ink: Bermuda Bay Classic Stampin’ Ink

Stamp Sets: Dotty Angles Photopolymer and Hi There Clear Mount

Framelits: Squares Collection

Punch: 1/4″ Circle Punch

Tools: Big Shot, Stamp-a-ma-jig, Stampin’ Dimensionals and SNAIL


Frame:

Card Stock: Soft Sky and Whisper White

Ink: Crisp Cantaloupe, Calypso Coral, Tangerine Tango, Crushed Curry and Daffodil Delight

Stamp Set: Tag Talk Clear Mount

Bigz Die: Flower Frenzy Bigz L

Punch: Artisan Label

Embellishments: Basic Jewels Pearls

Tools: Big Shot, Aqua Painter, Stampin’ Dimensionals and SNAIL


Current Promotions:

The 2014-2015 Annual Catalog is here!! Get your lists ready and place your orders!!

With our personalized stamps you can create a cool address label or even use it for everything from marking your territory on books or other belongings to having a fun way to give a personal touch to gifts and goodies. Click HERE for a PDF of the flyer.

It’s here! The 2014 Occasions Catalog is ready for you to place your order! It’s packed with fun trendy products and quick kits! Click on the image in the sidebar and place your order today!

Need some cards quicky? Stampin’ Up! has a brand new kit that allows you to create 20 cards, all you need is some adhesive and you’re all set. Click here for the Everyday Occasion Card Kit!

Make your own stamp! New Undefined stamp carving kit. Available now! Click here for the PDF.

Check out all of the Photopolymer Stamp Sets! The newest set is Endless Birthday Wishes. It’s a completely clear stamping option you are going to love!