Mojo Monday 408 and More Manhattan!

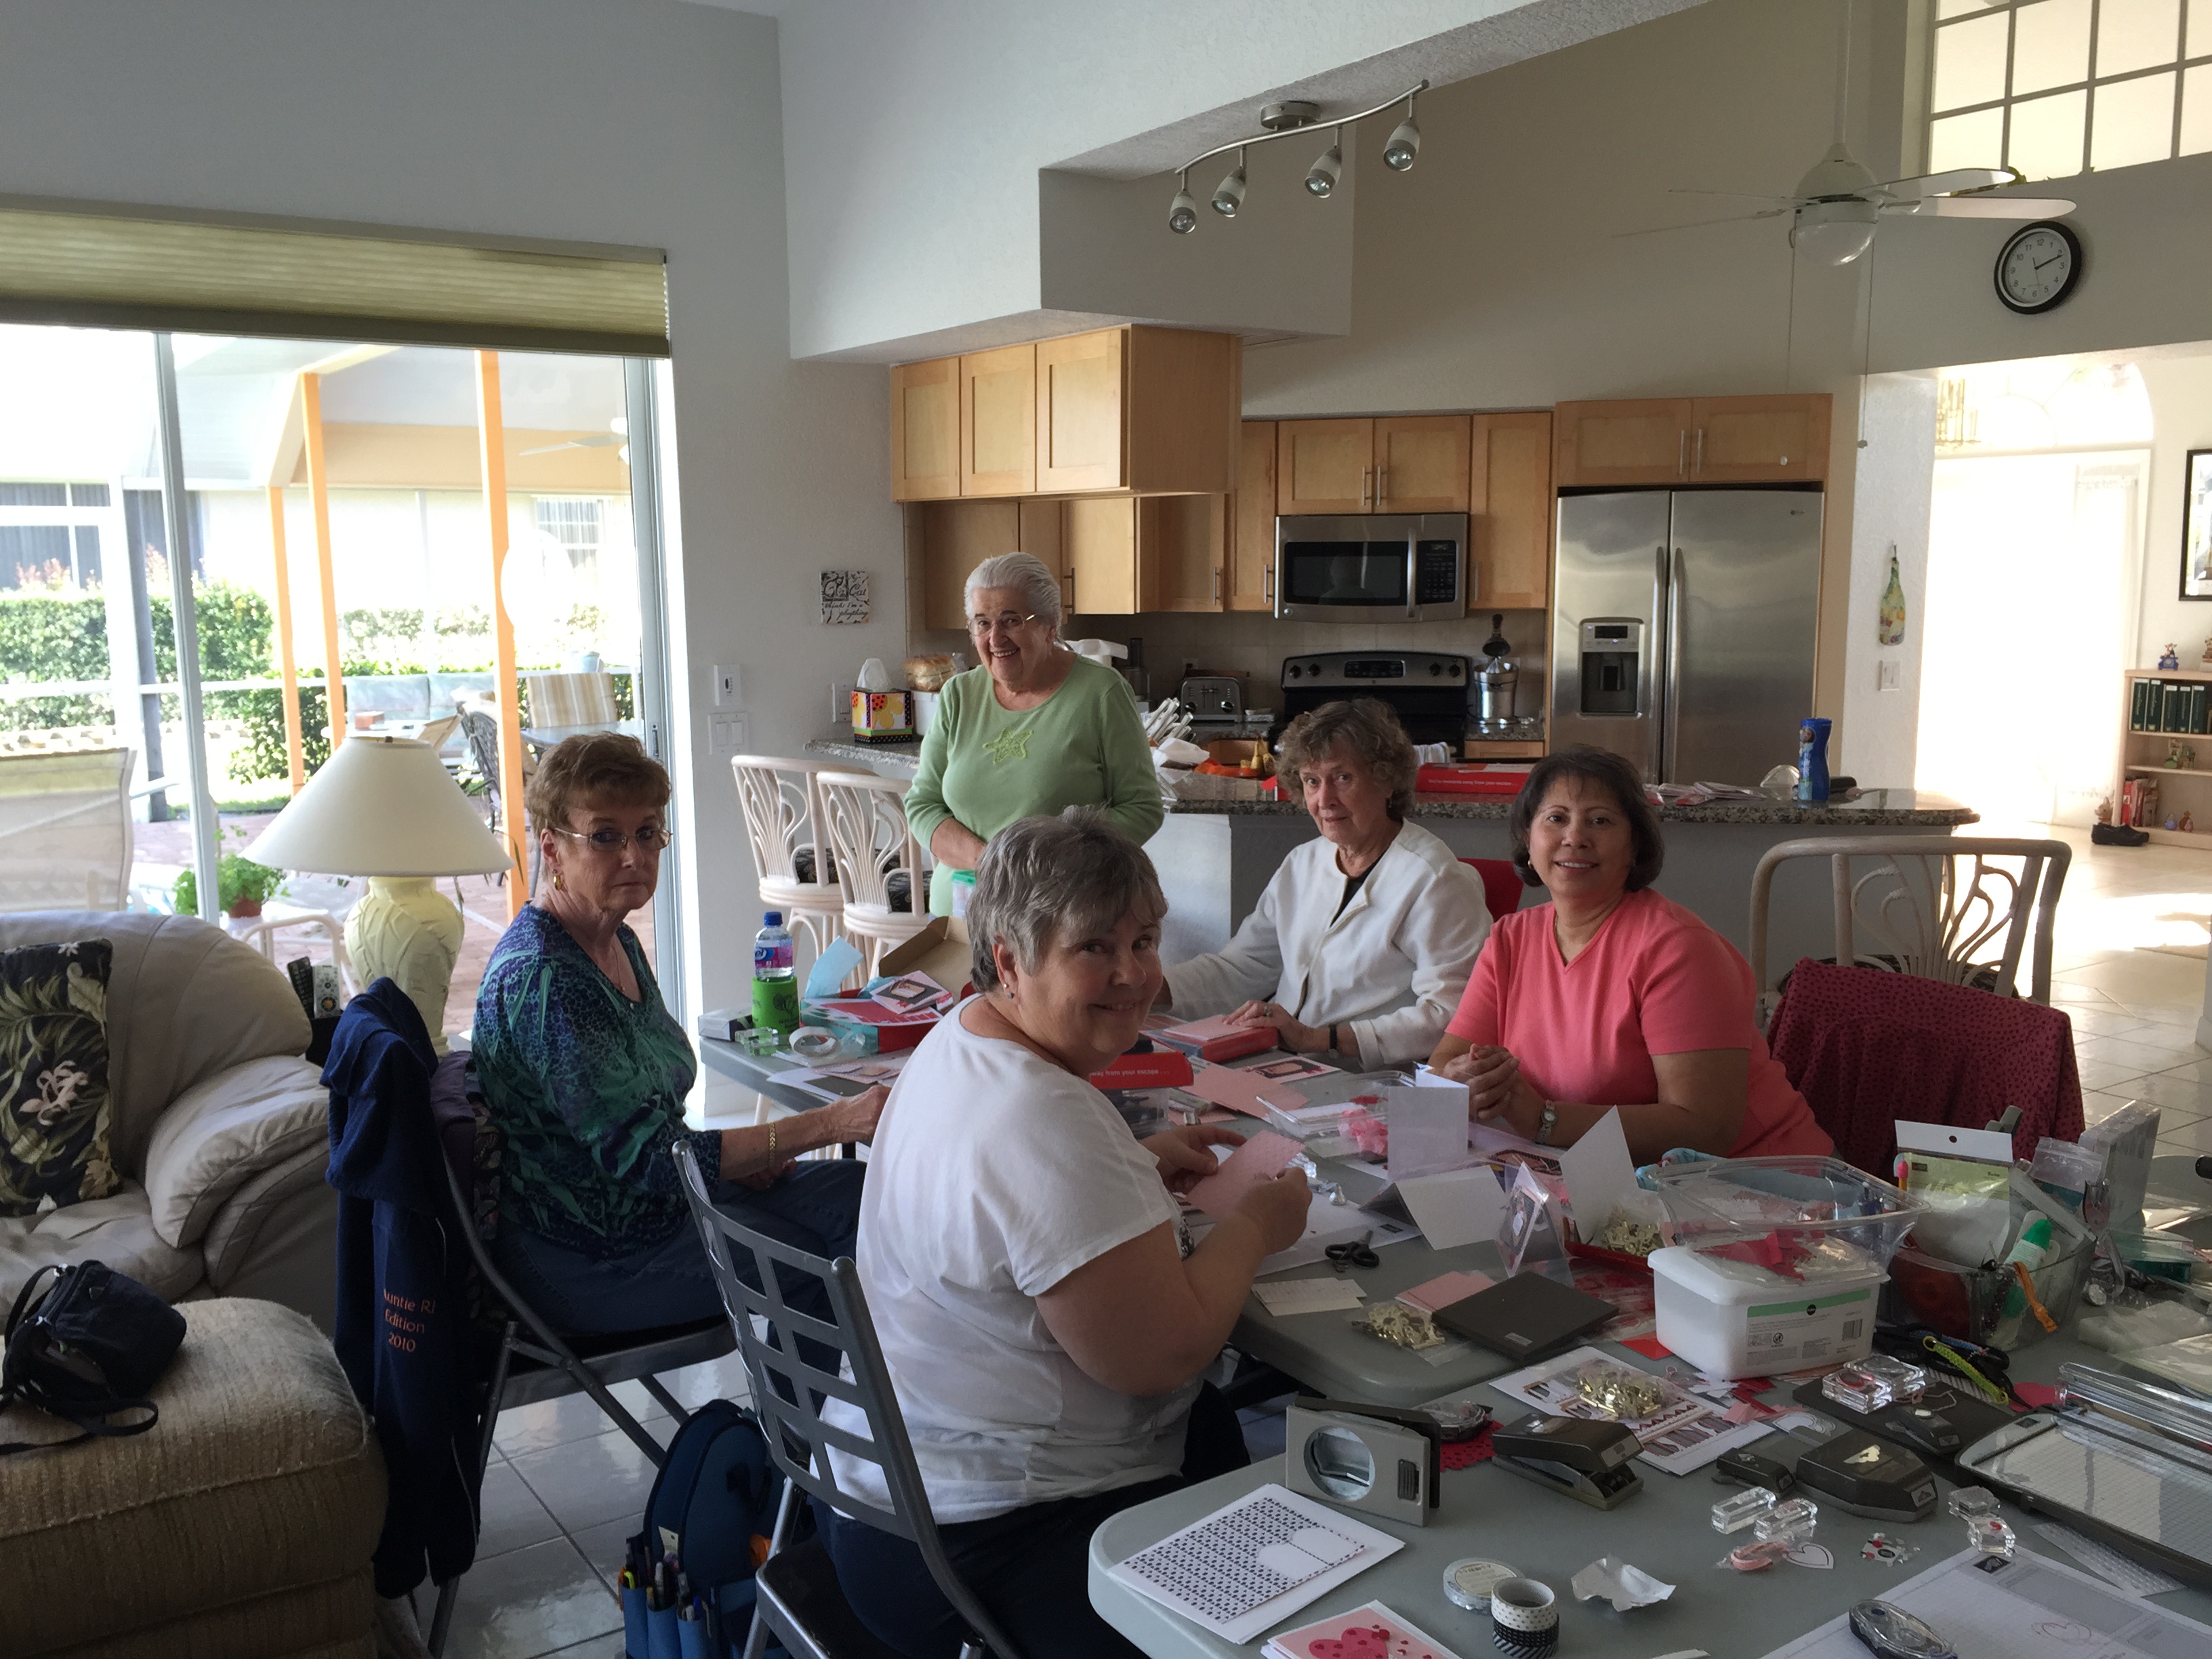
Well, I had THE best 4 days off! My weekend was fantastic! Yesterday morning Maggie said our goodbyes to Kim and Maggie and headed downtown to have breakfast with Michael. Around 12:30 I walked Maggie to the Subway so she could get to JFK for her flight back to Cali. It was so nice to have Maggie here with me, love her to pieces. She is so happy and funny and I’m glad that she got to meet Michael and Kim! I can’t wait for her to come back!! It was also a lot of fun working at The Ink Pad with Michael. So many people from different countries stop in. We met a sweet lady from France who gave us some really cool tags that she used as business cards! After we closed the store we took a nice long walk along the Hudson and watched all of the boats and people. So relaxing and it was a gorgeous evening. I dropped Michael off in Midtown and then headed home. I really didn’t want to weekend to end! As promised here are some pictures that I took from the High-Line yesterday. It was an amazing sunset!

Albert High-Line

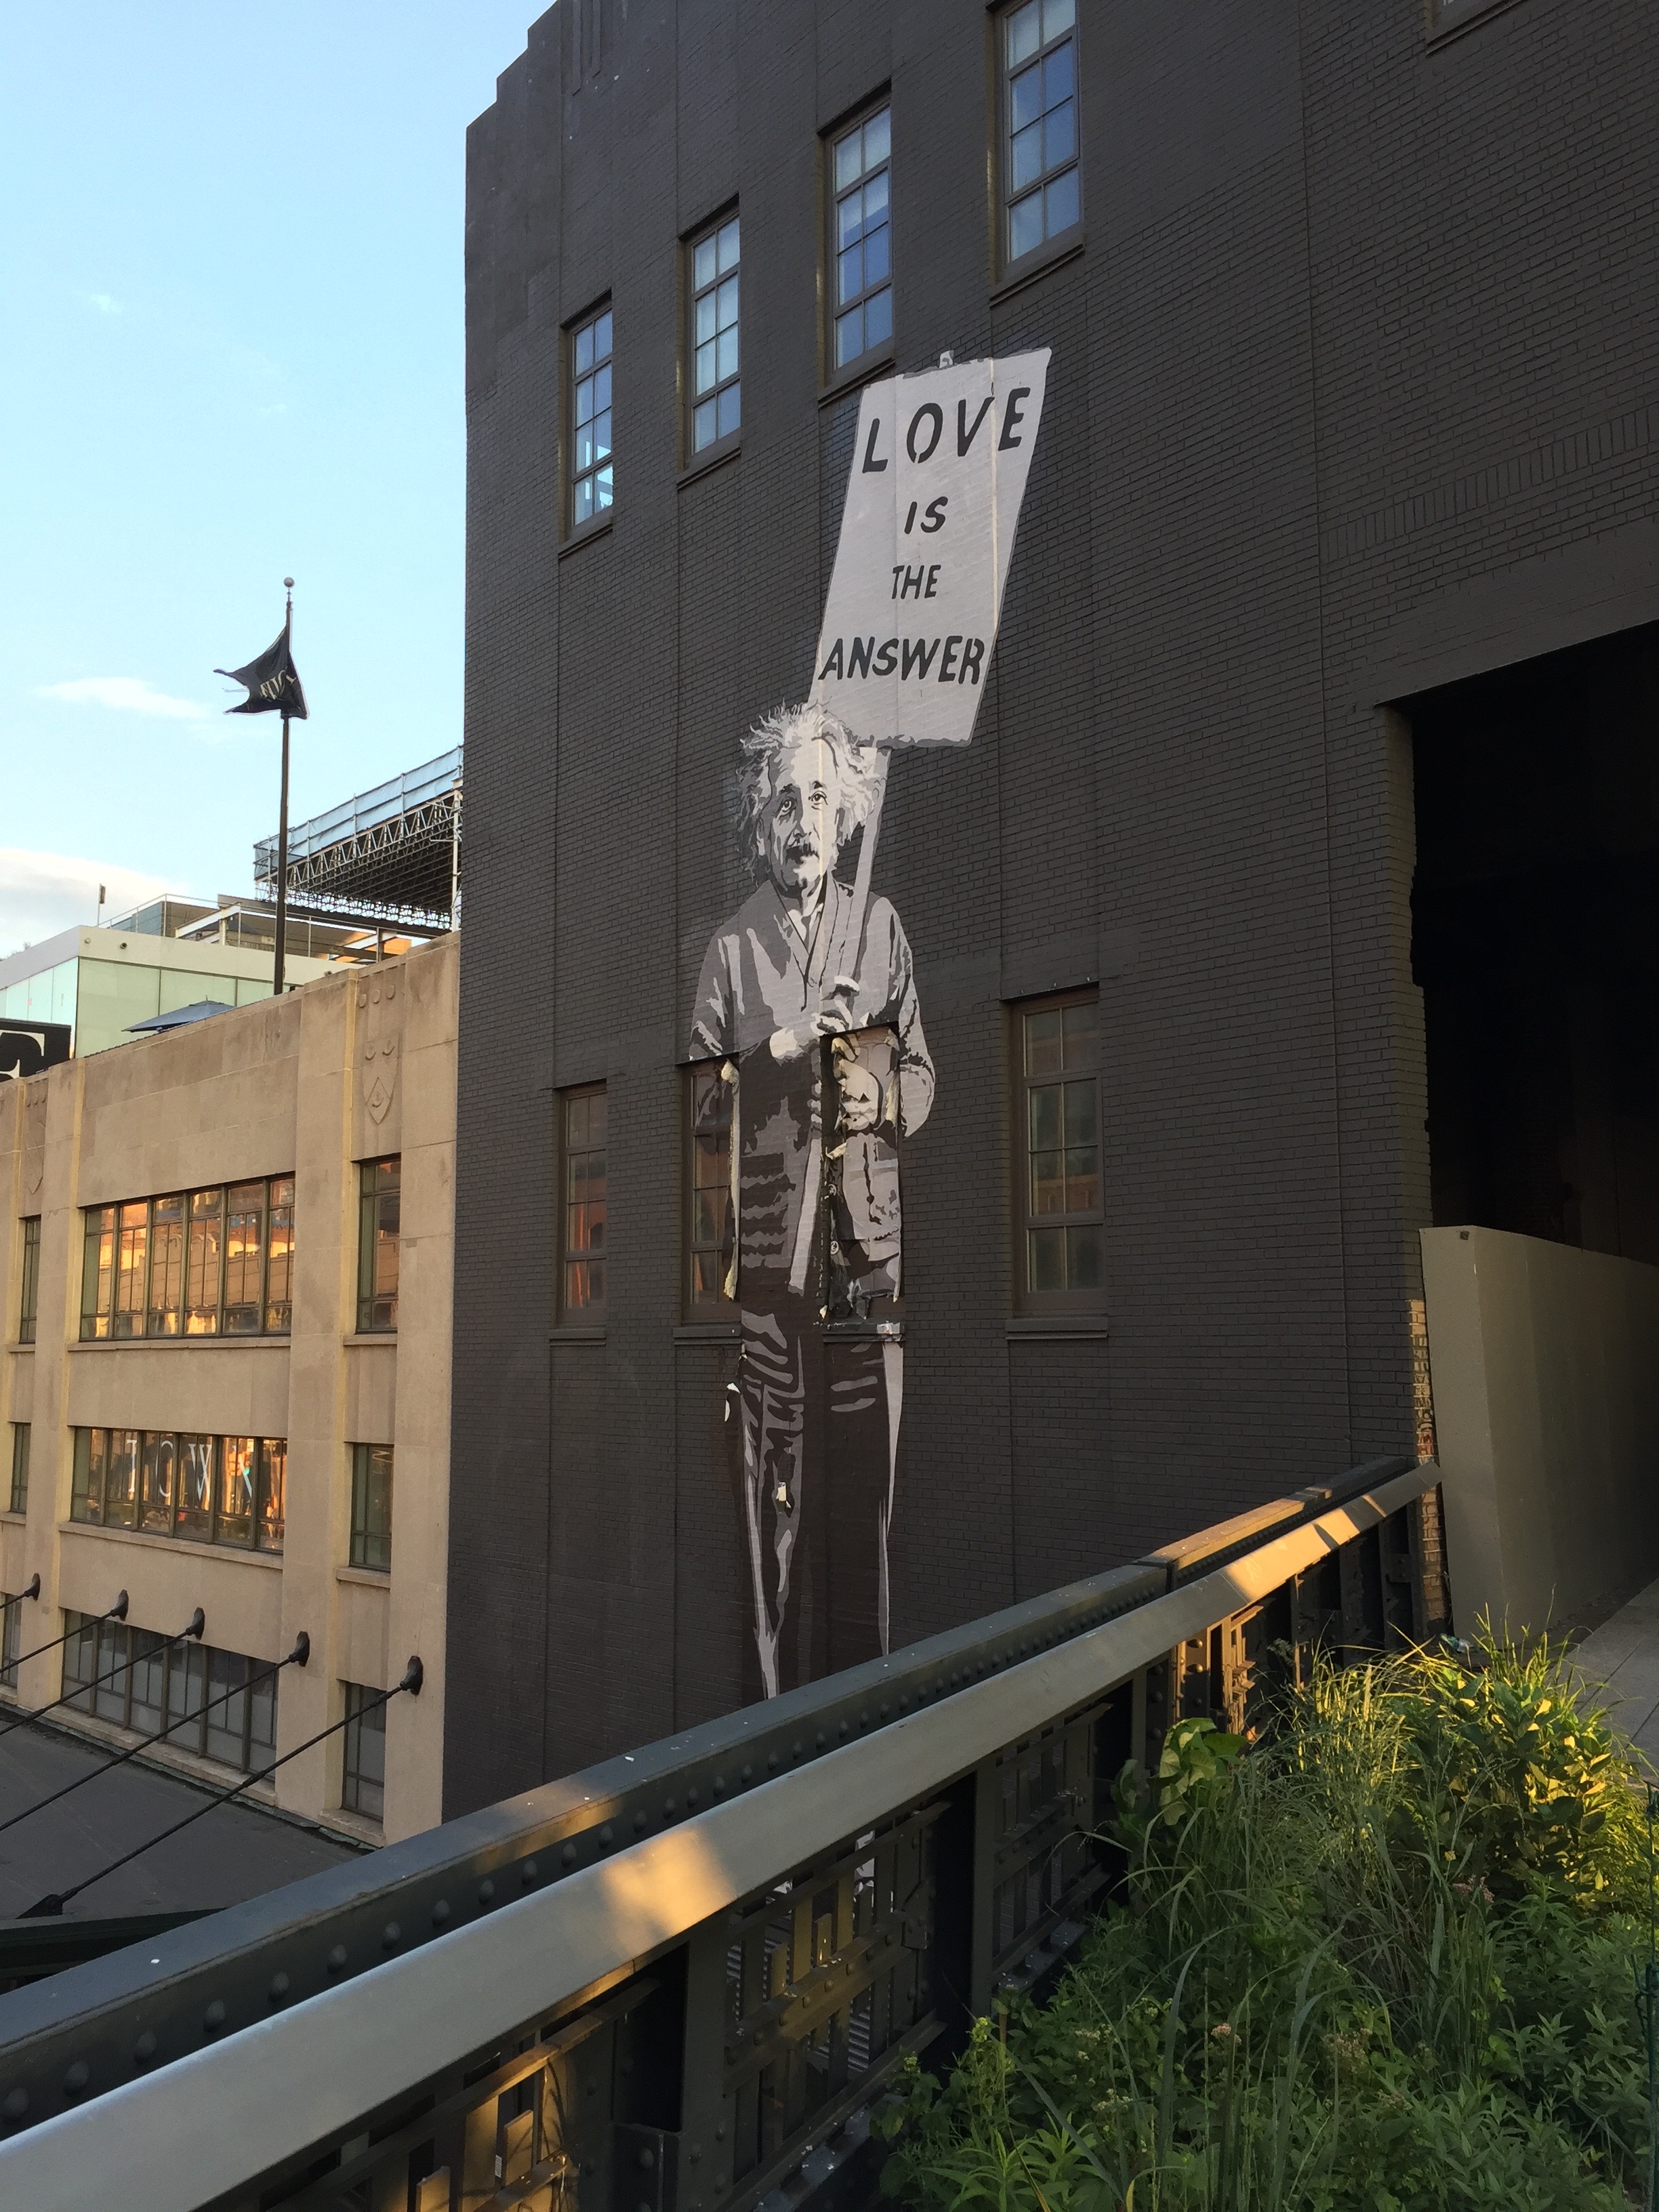
Albert Einstein on the side of a building, now that’s just cool!

High-Line Sunset 1

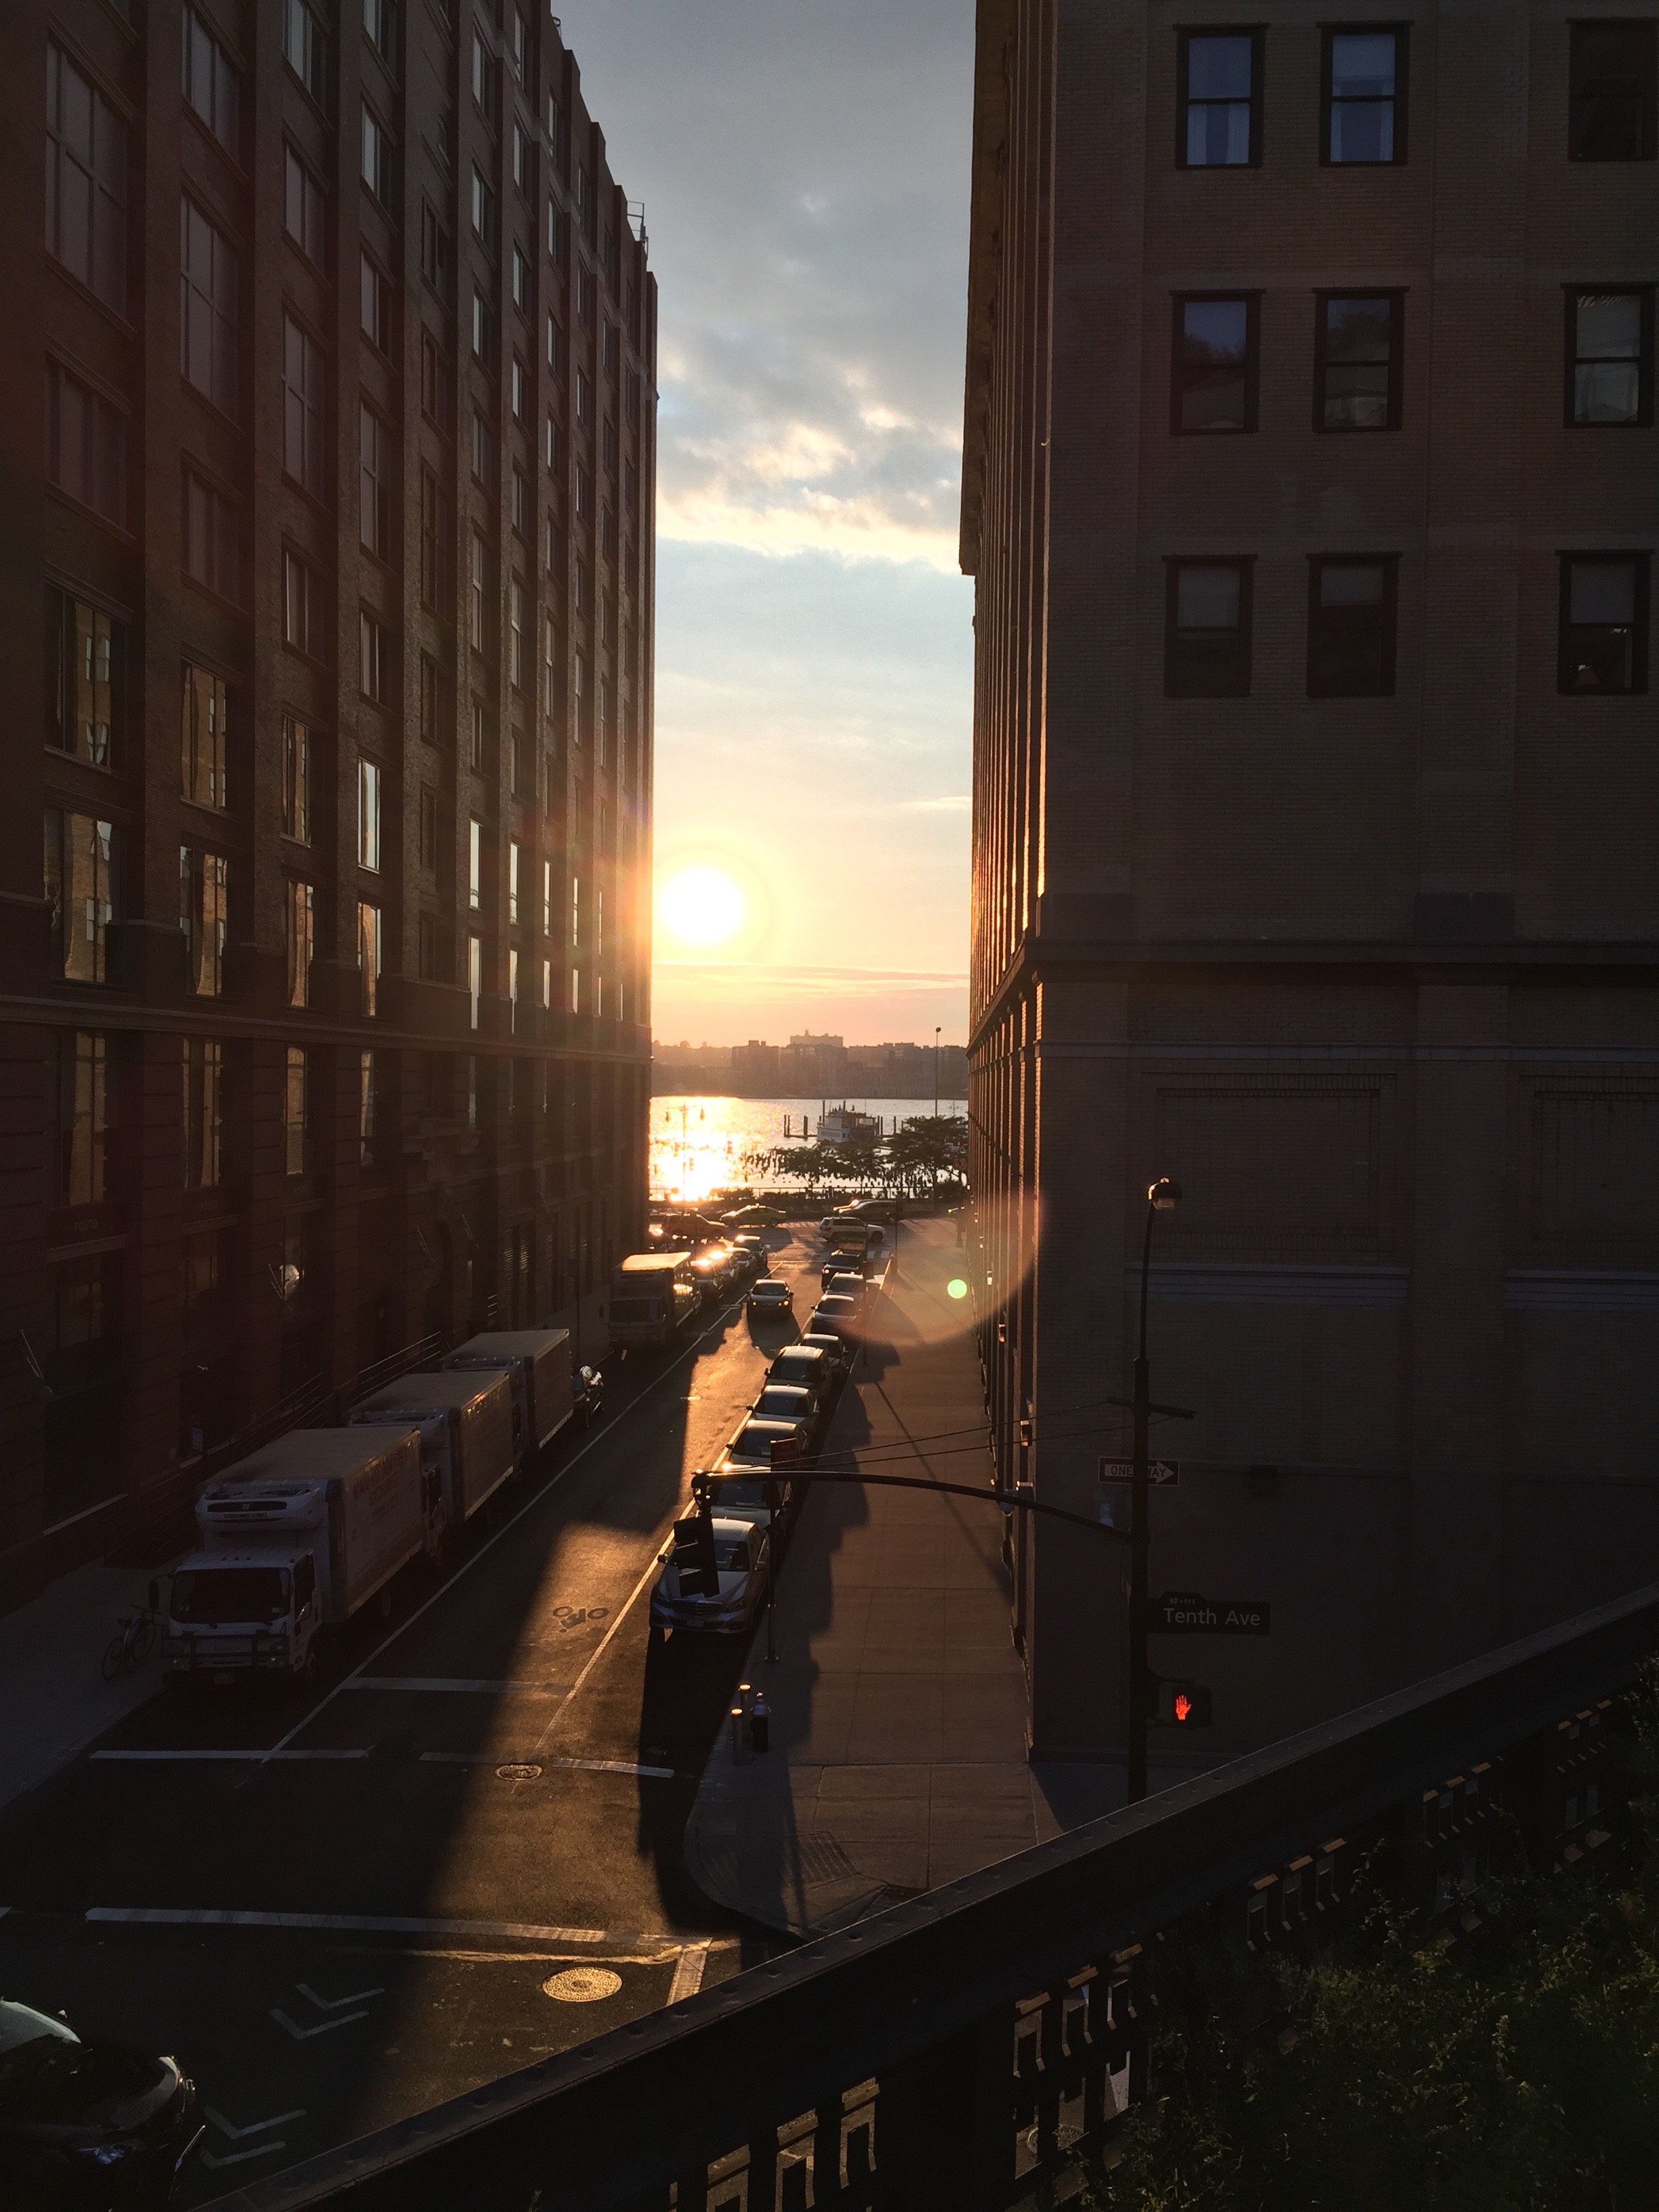
Just a sliver between the buildings.
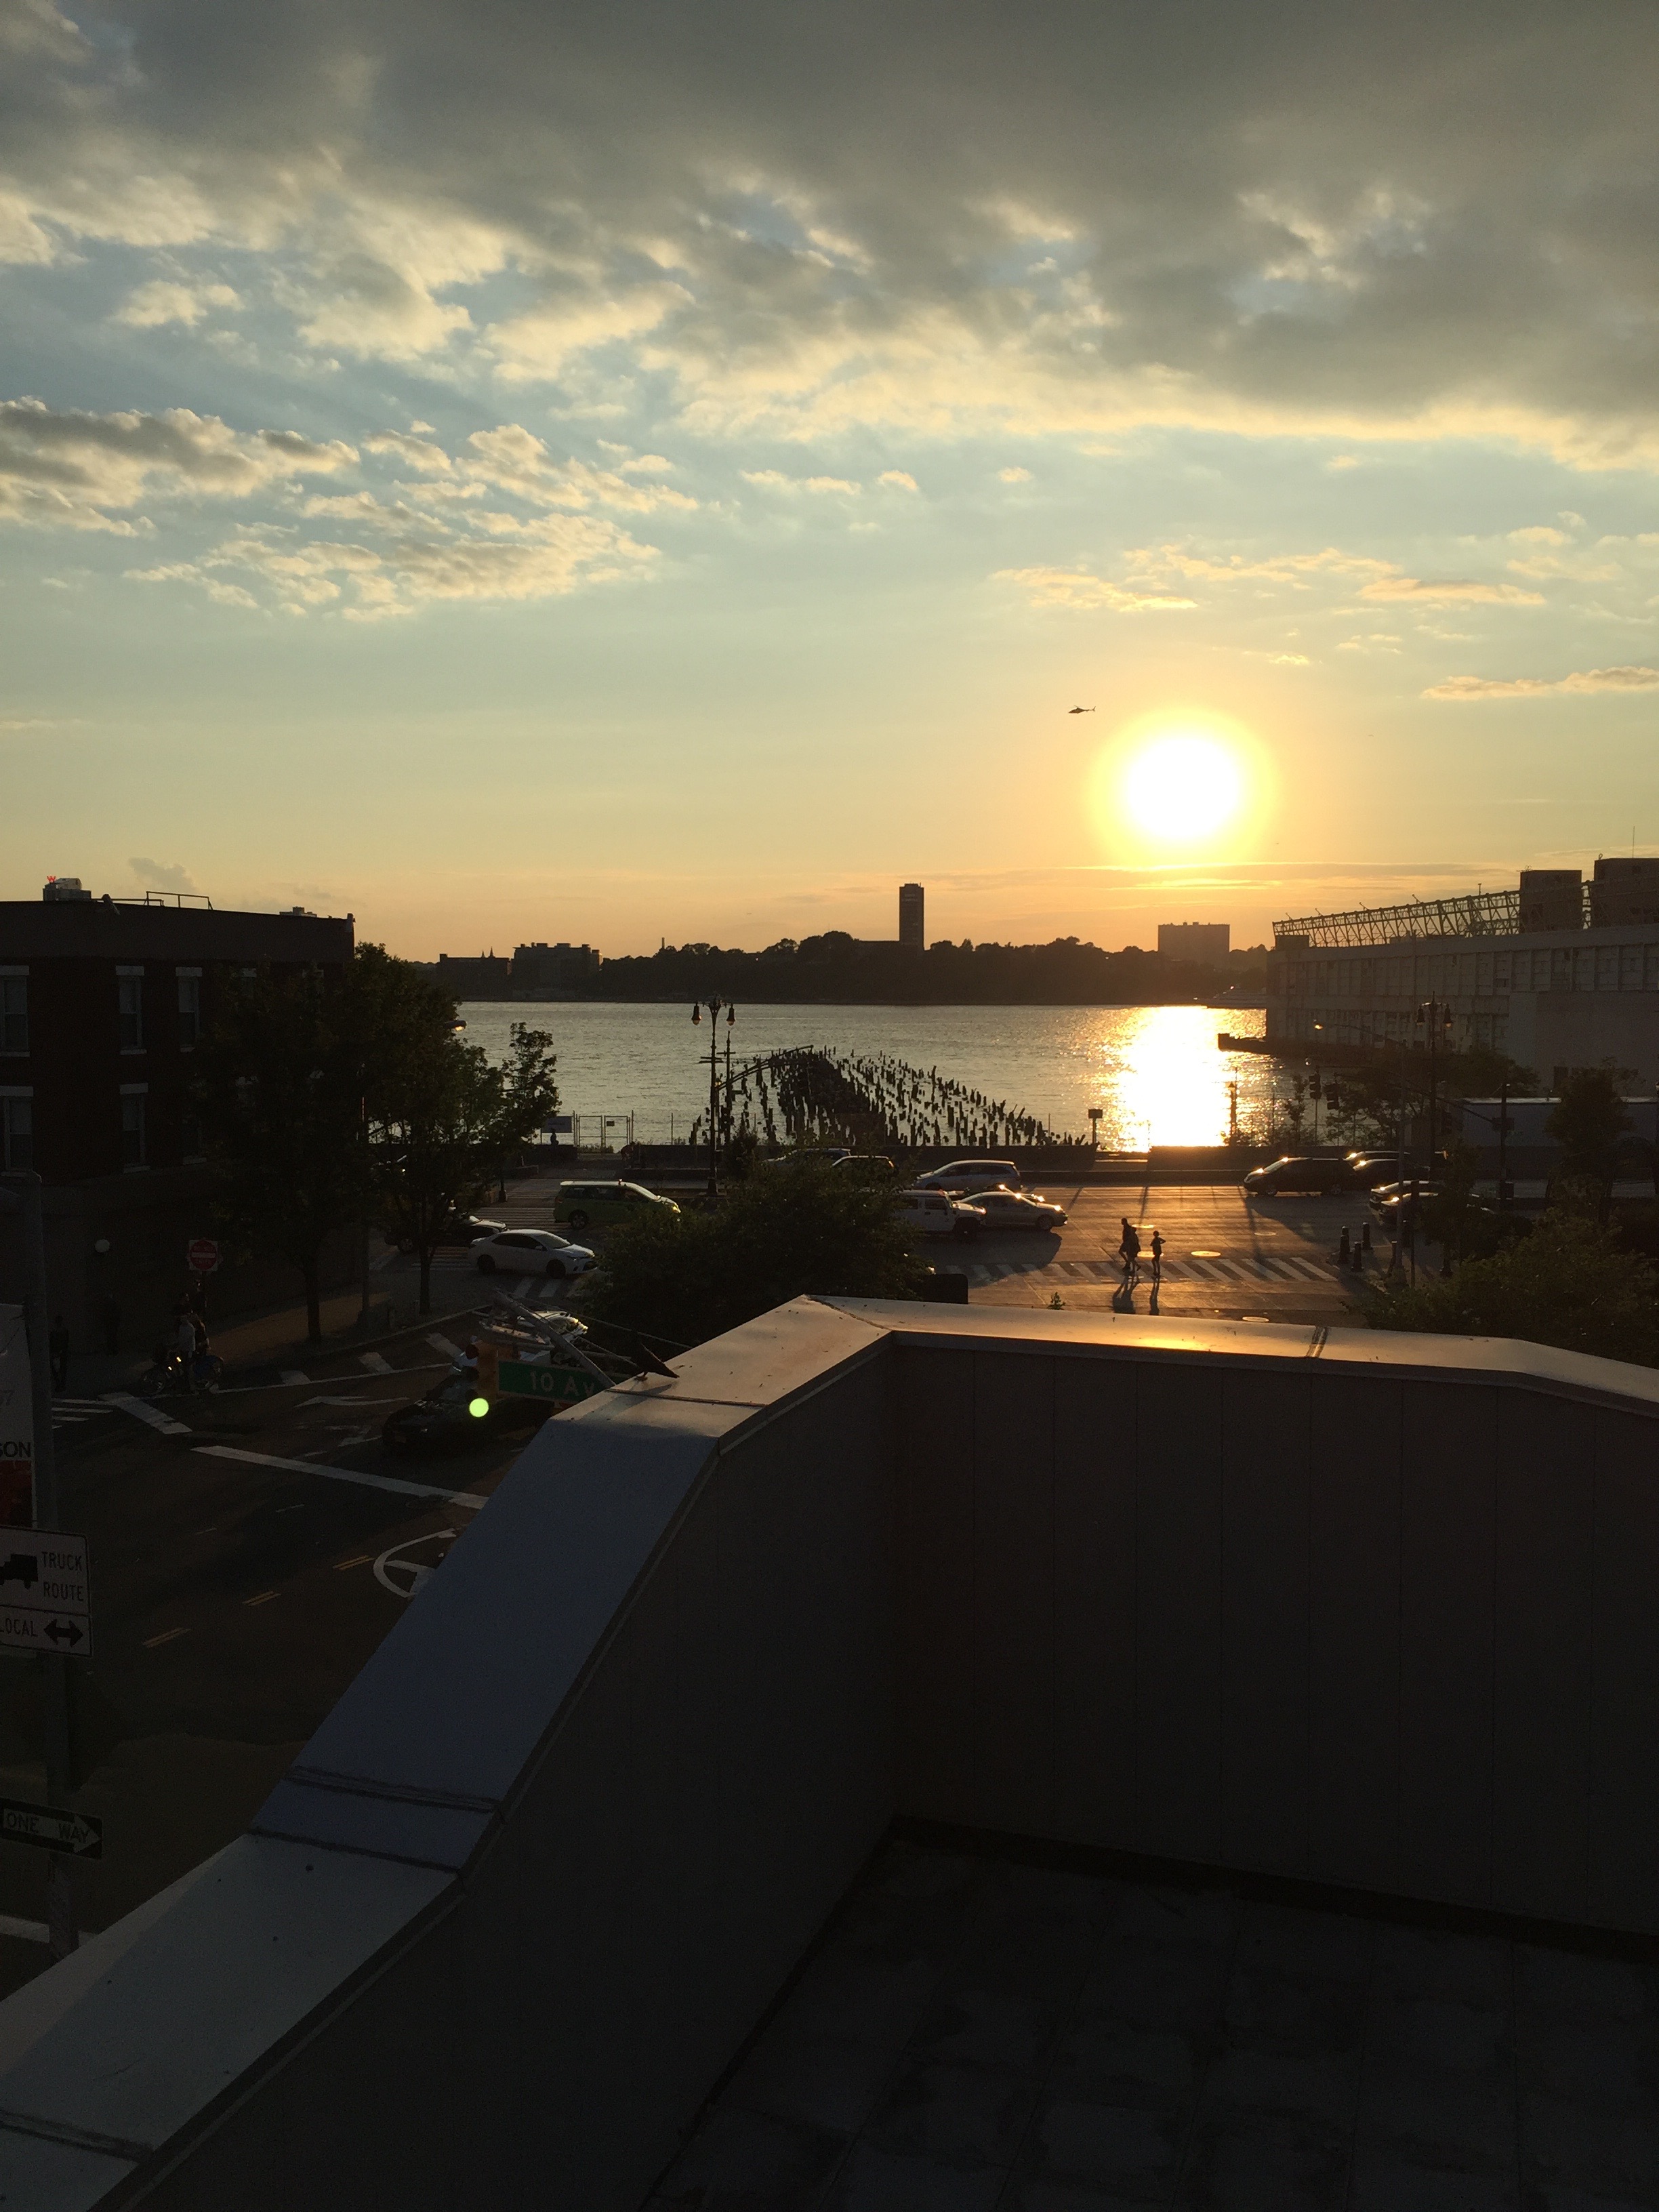
High-Line Sunset 2

Look at that sun!

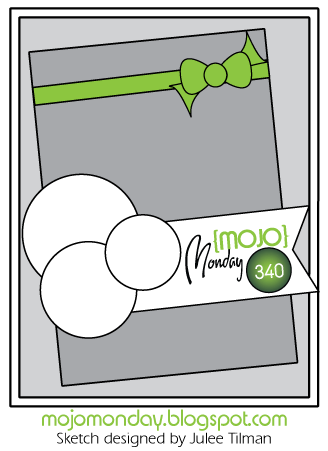
One good thing about Monday’s, it’s time for this week’s Mojo Monday sketch…

Mojo408

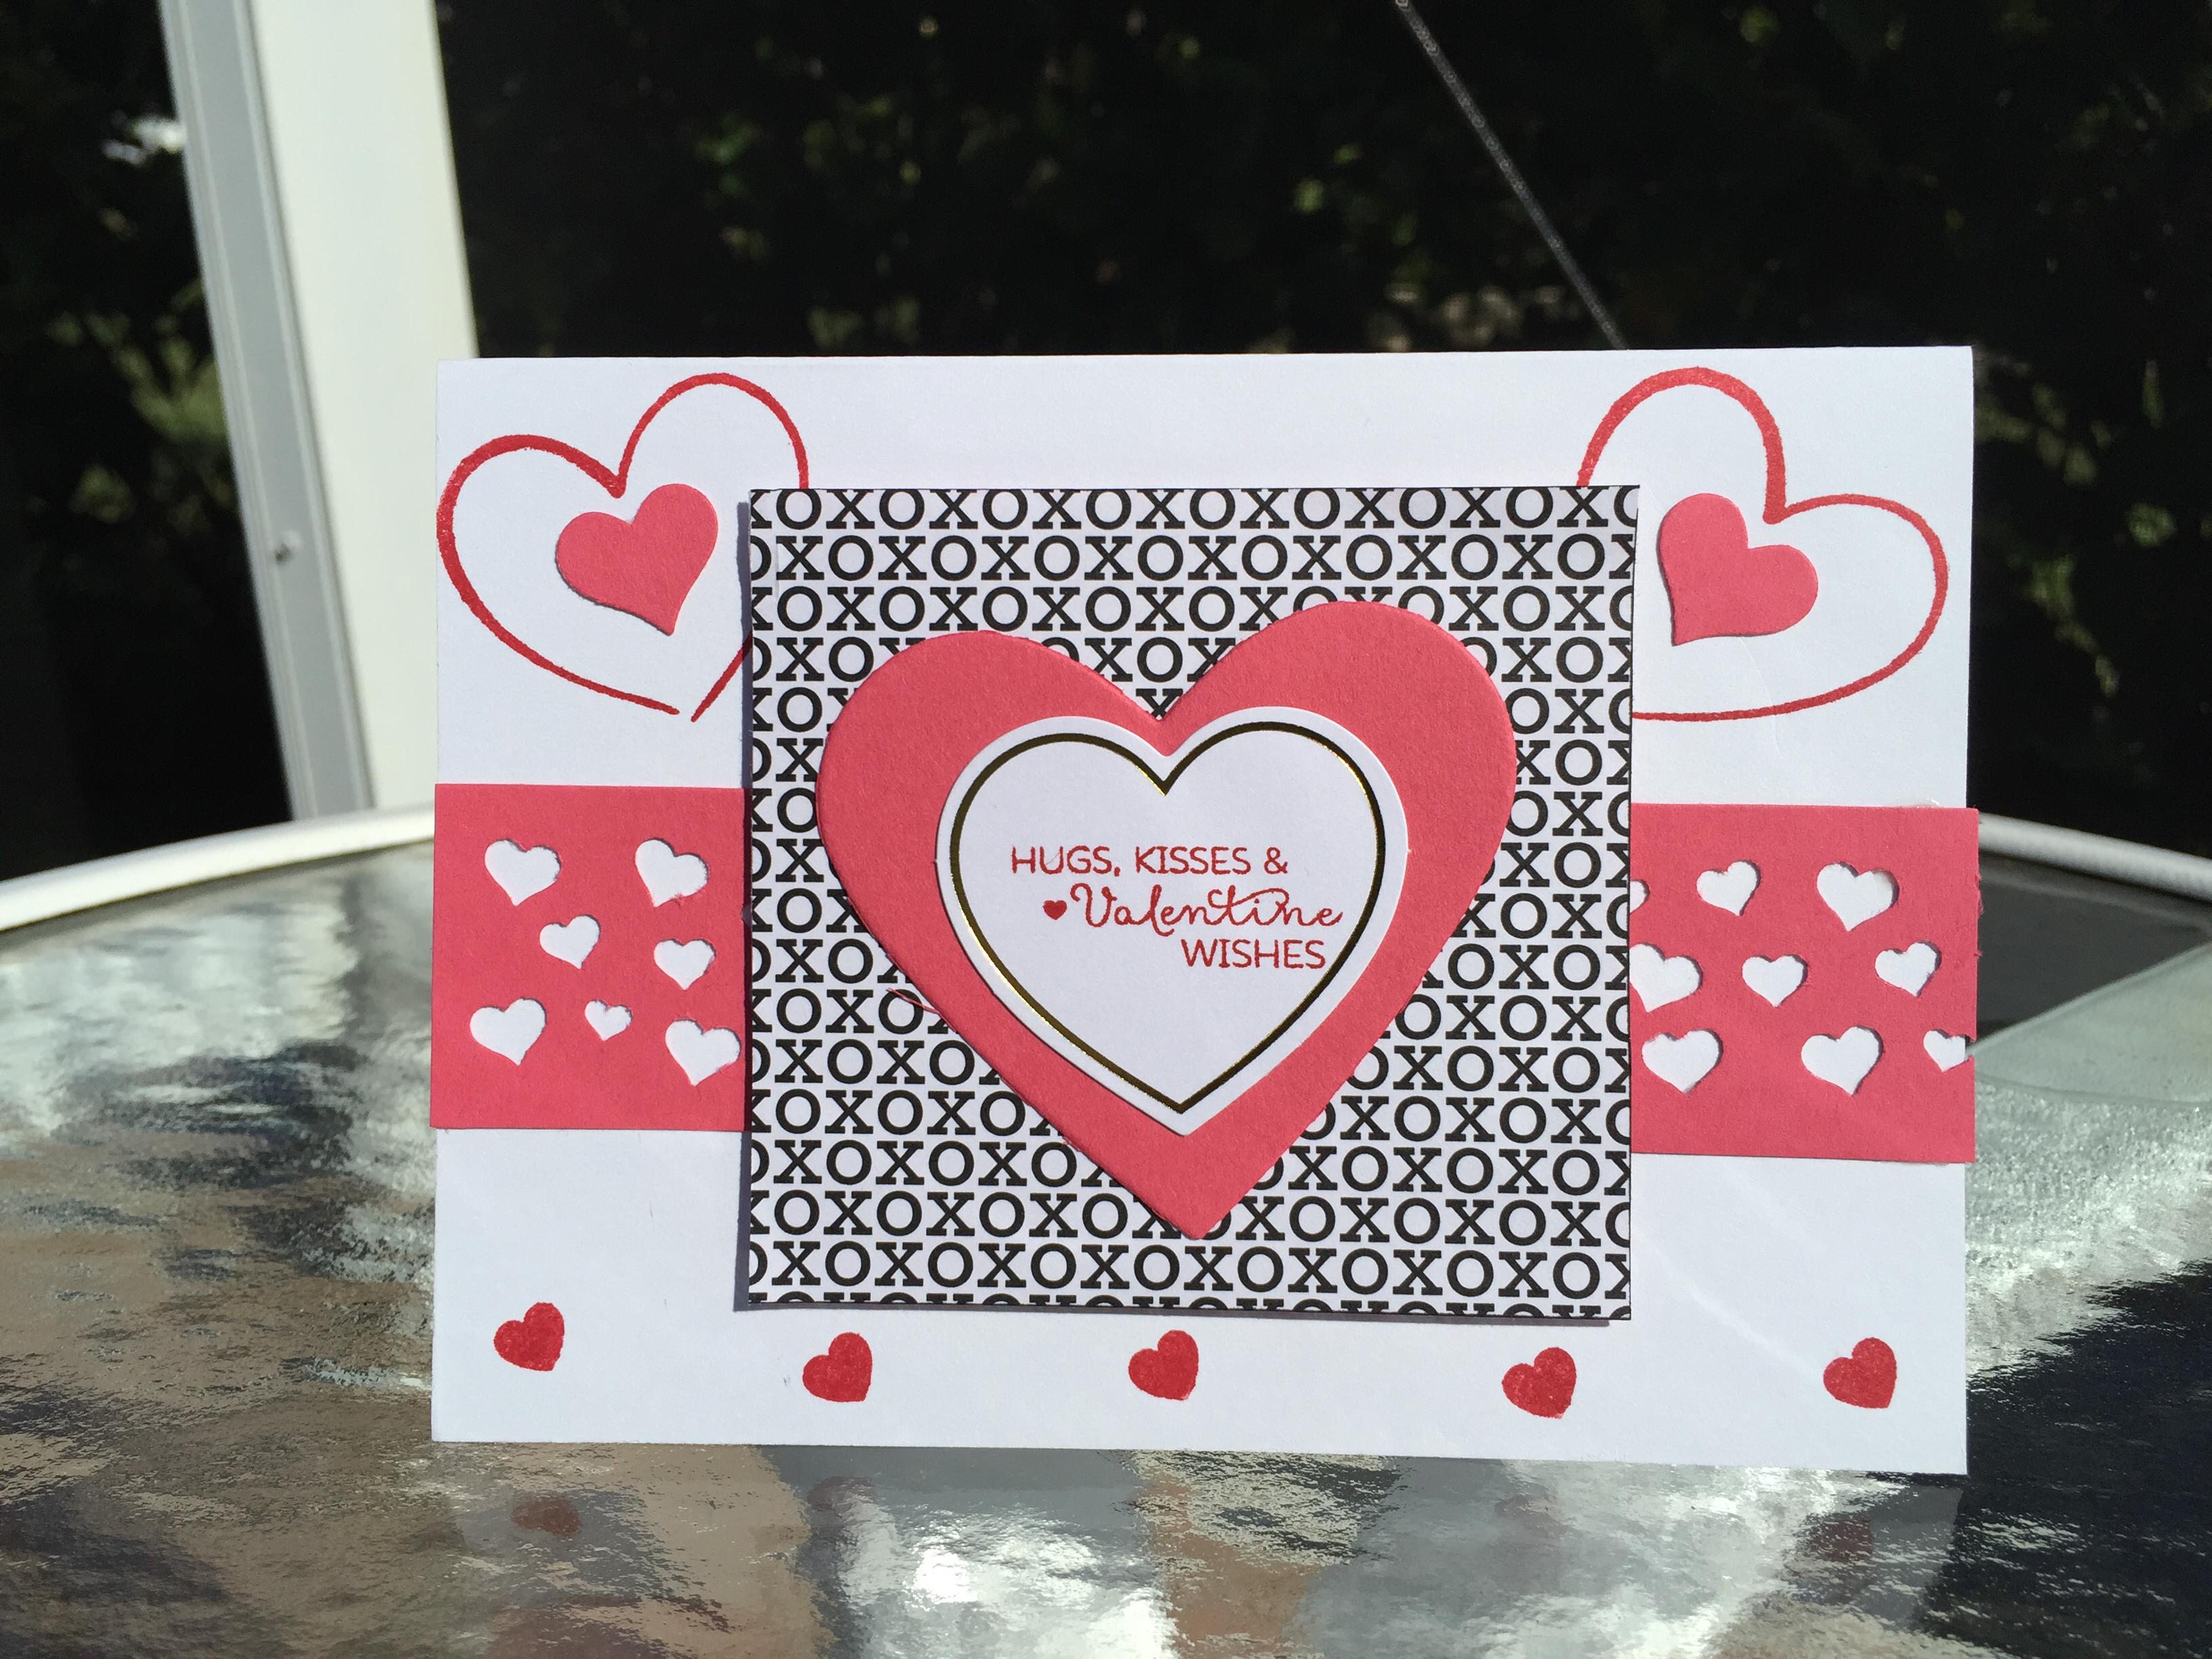
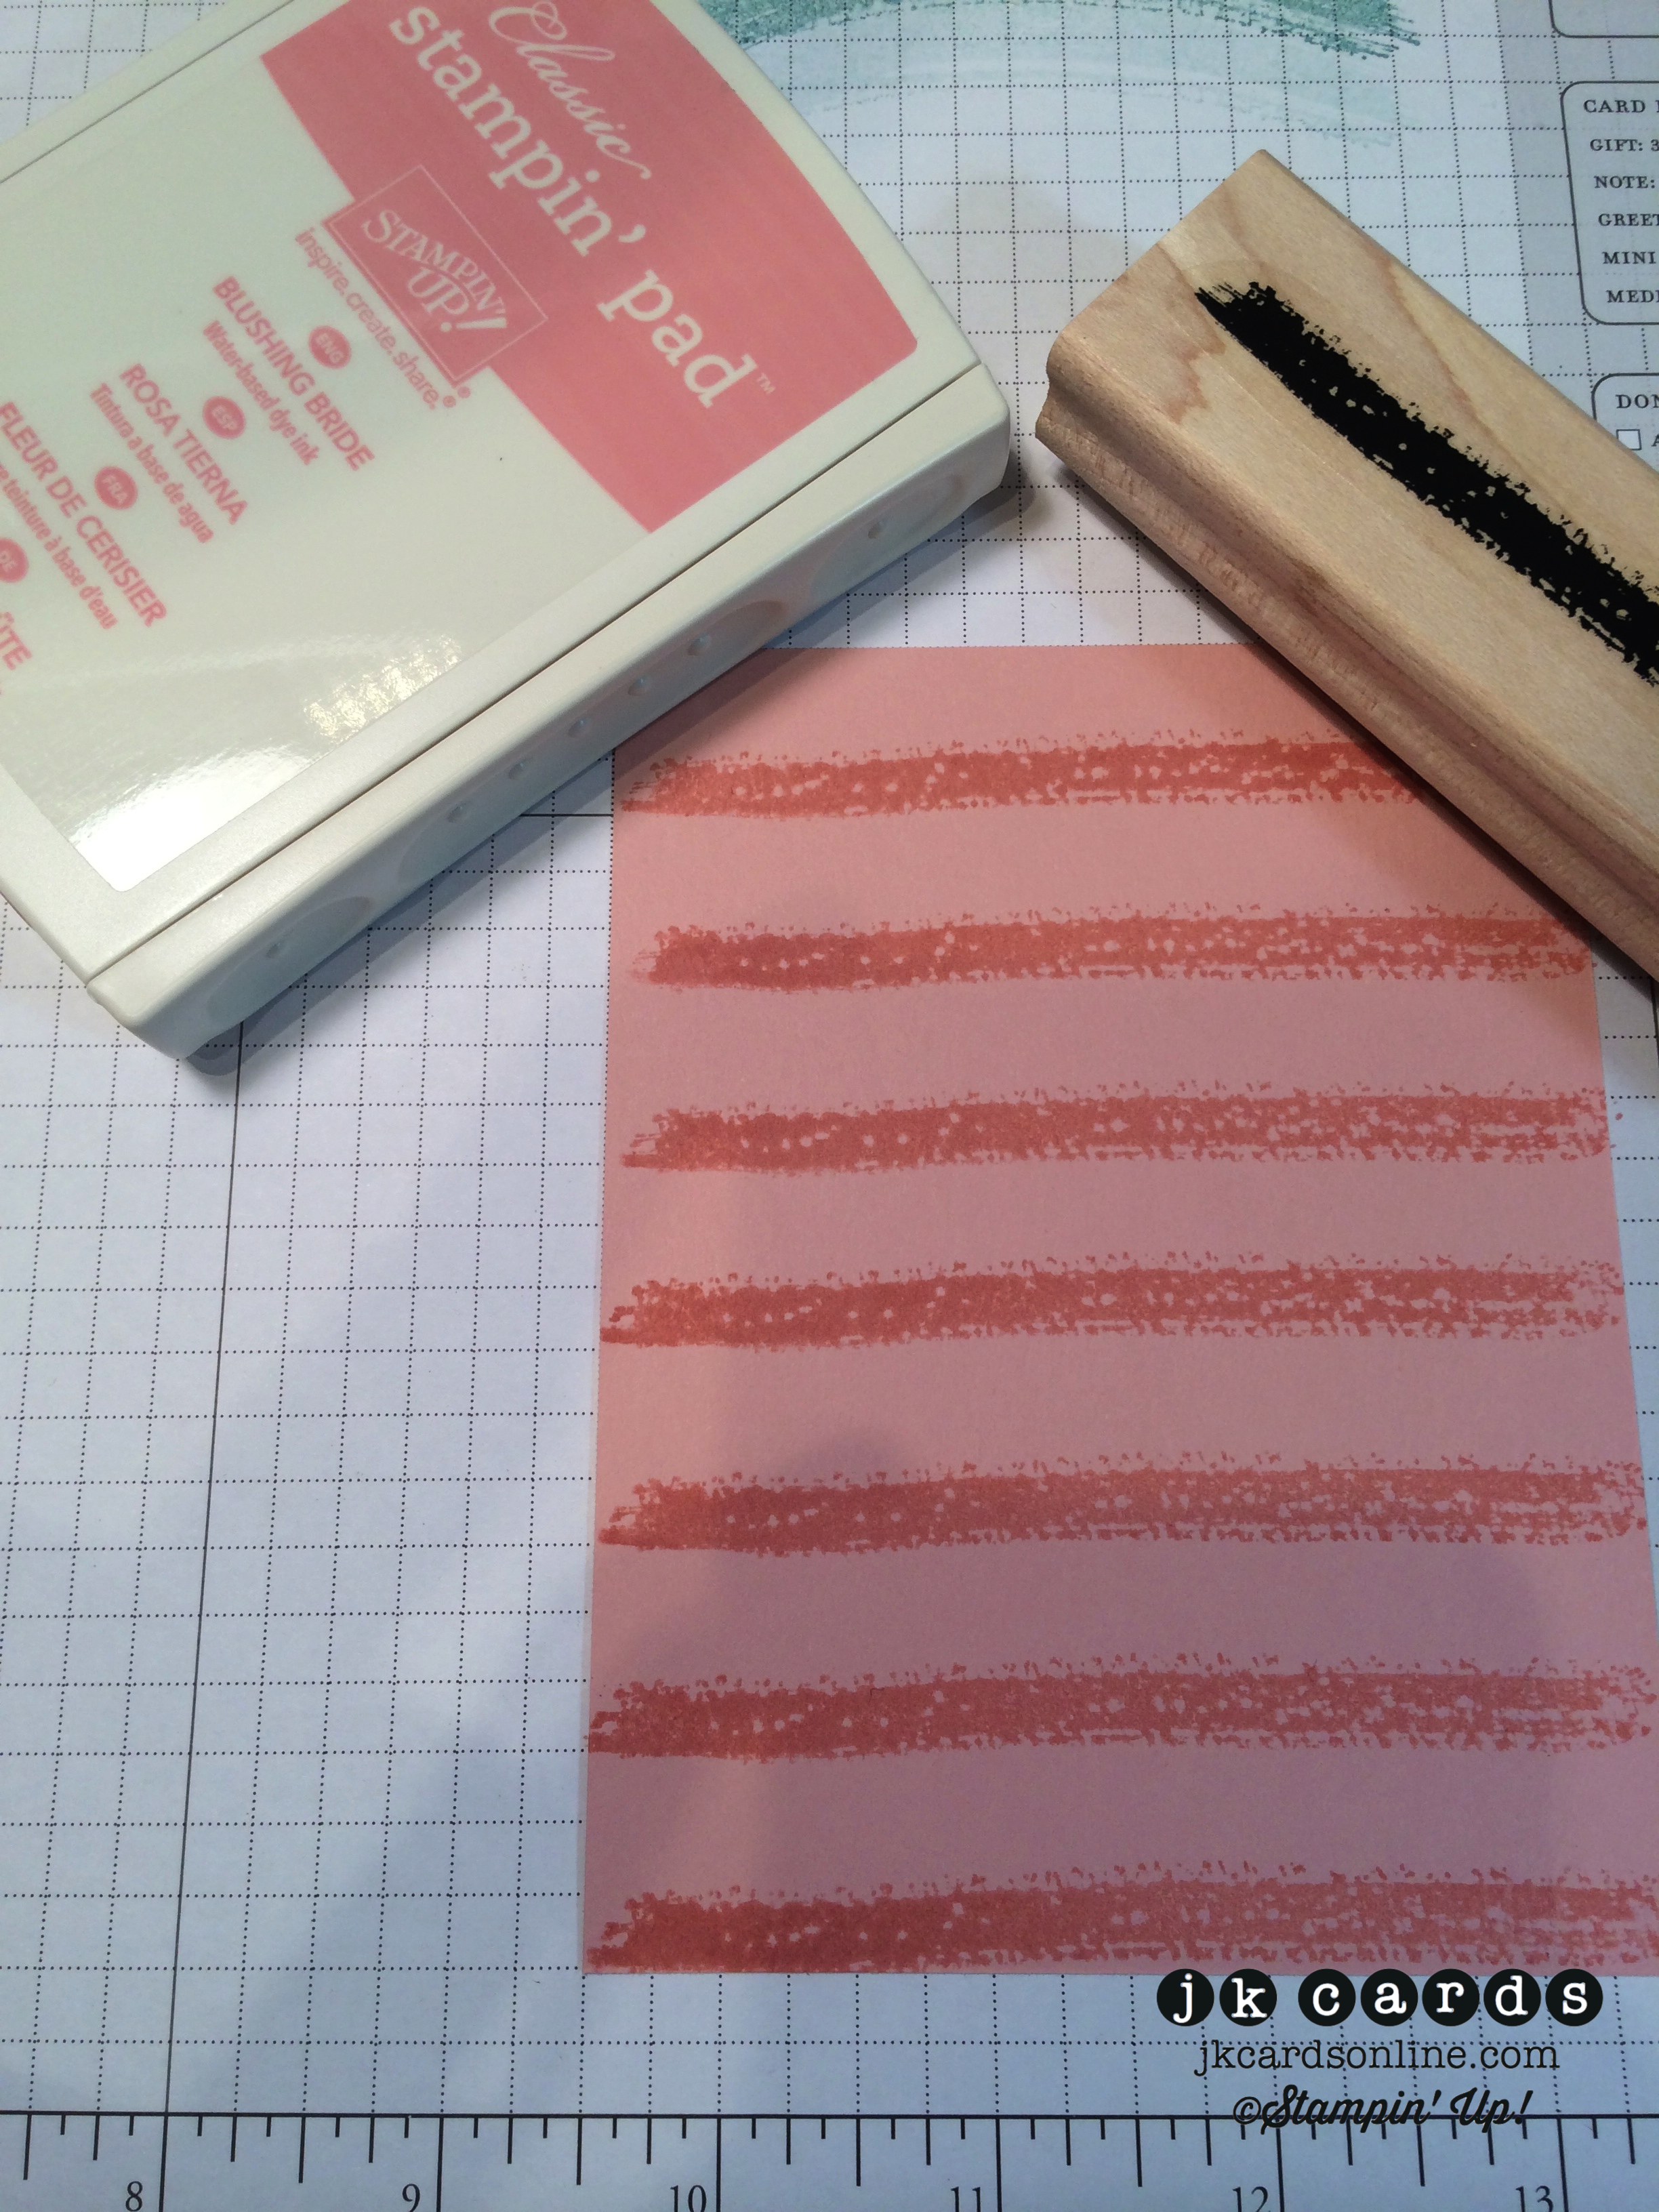
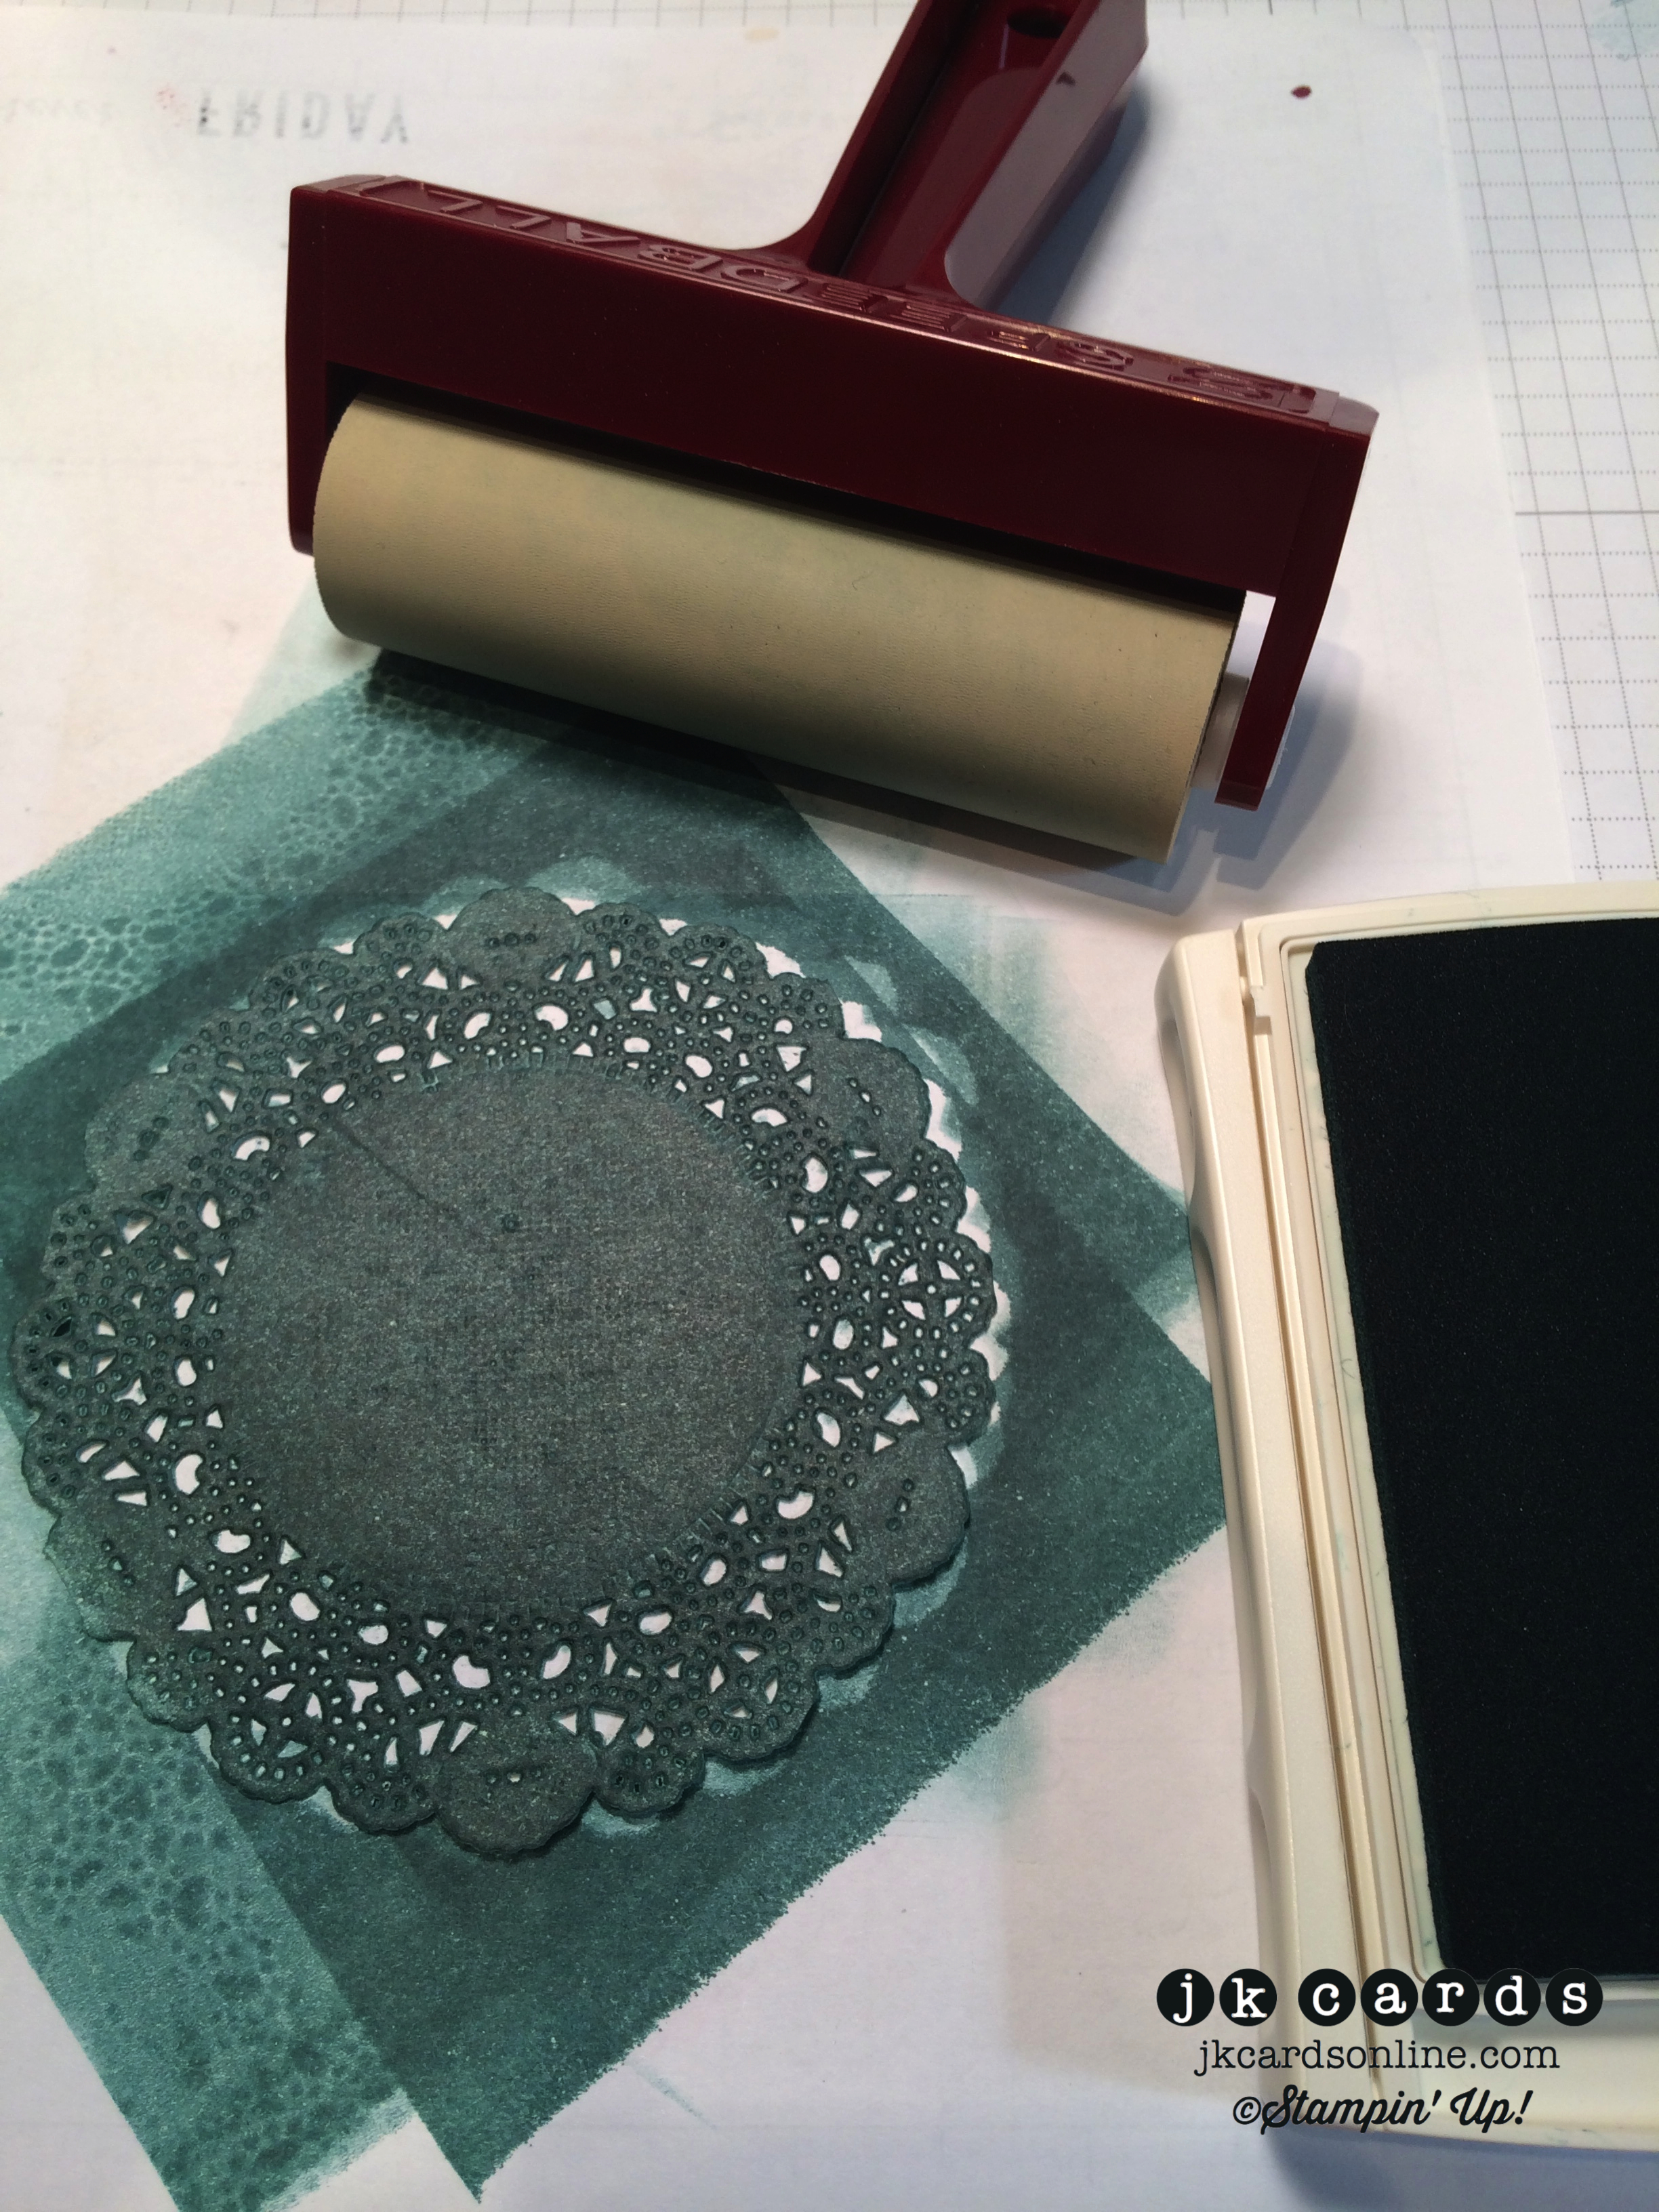
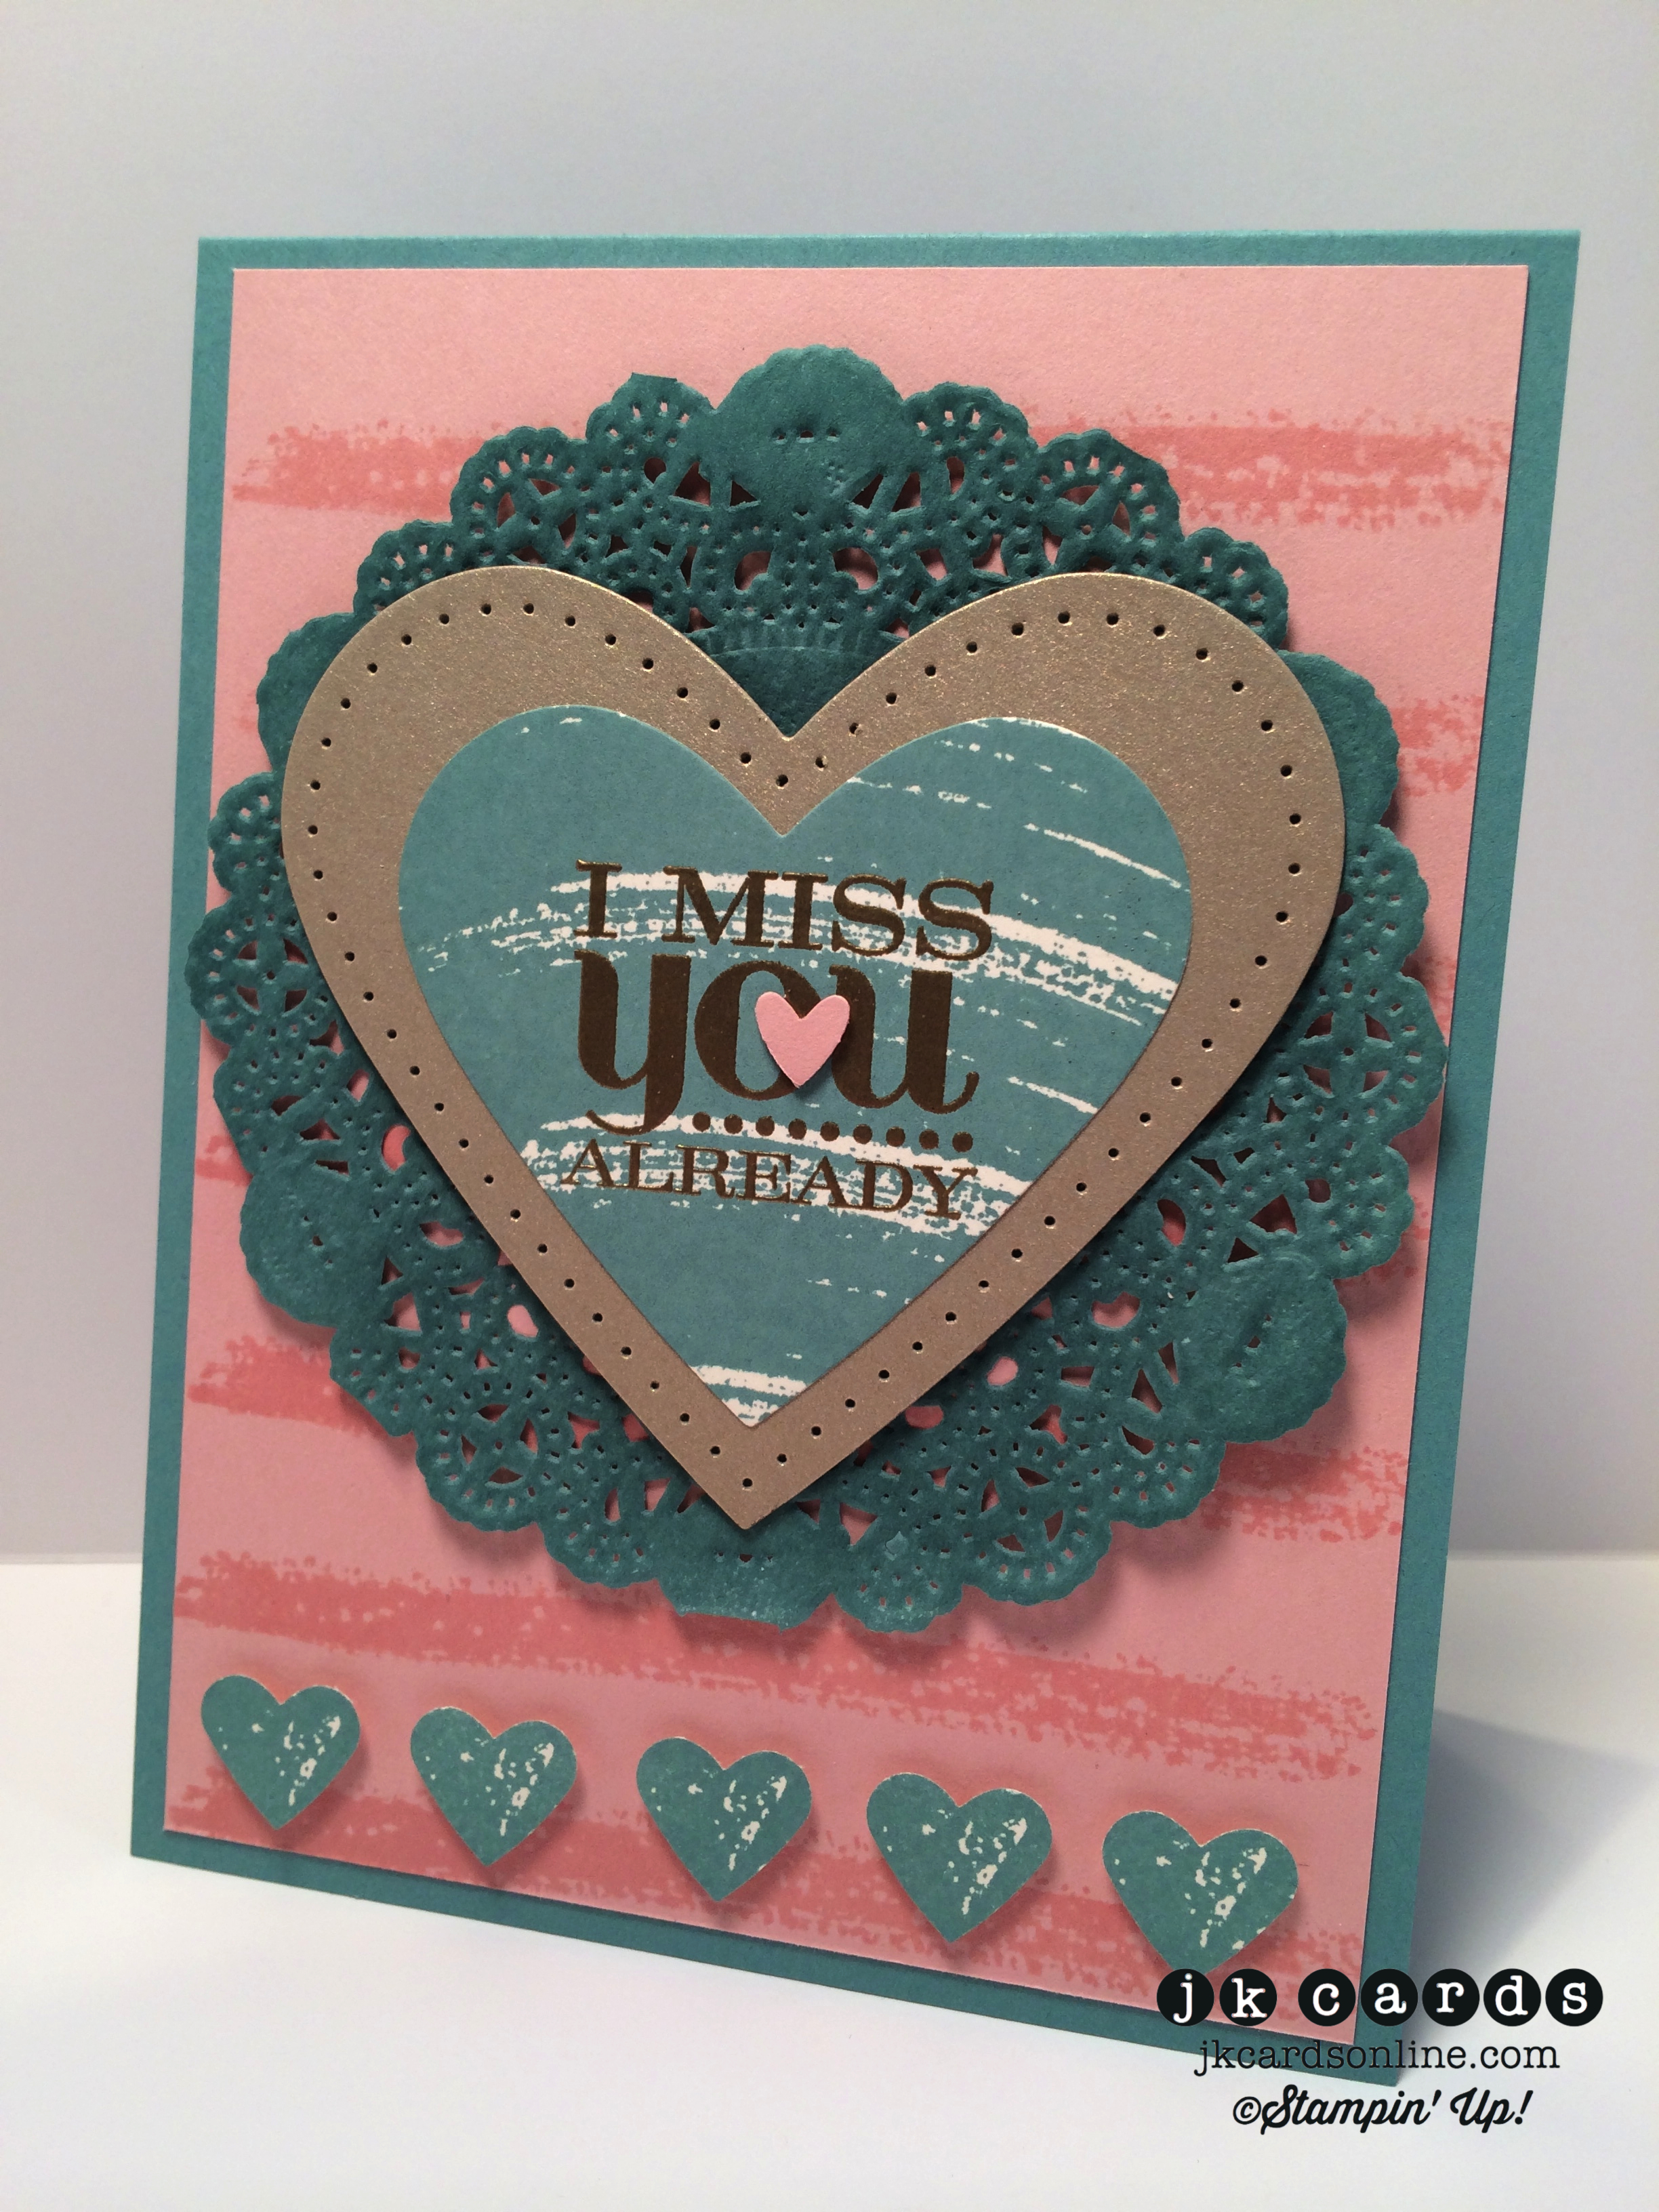
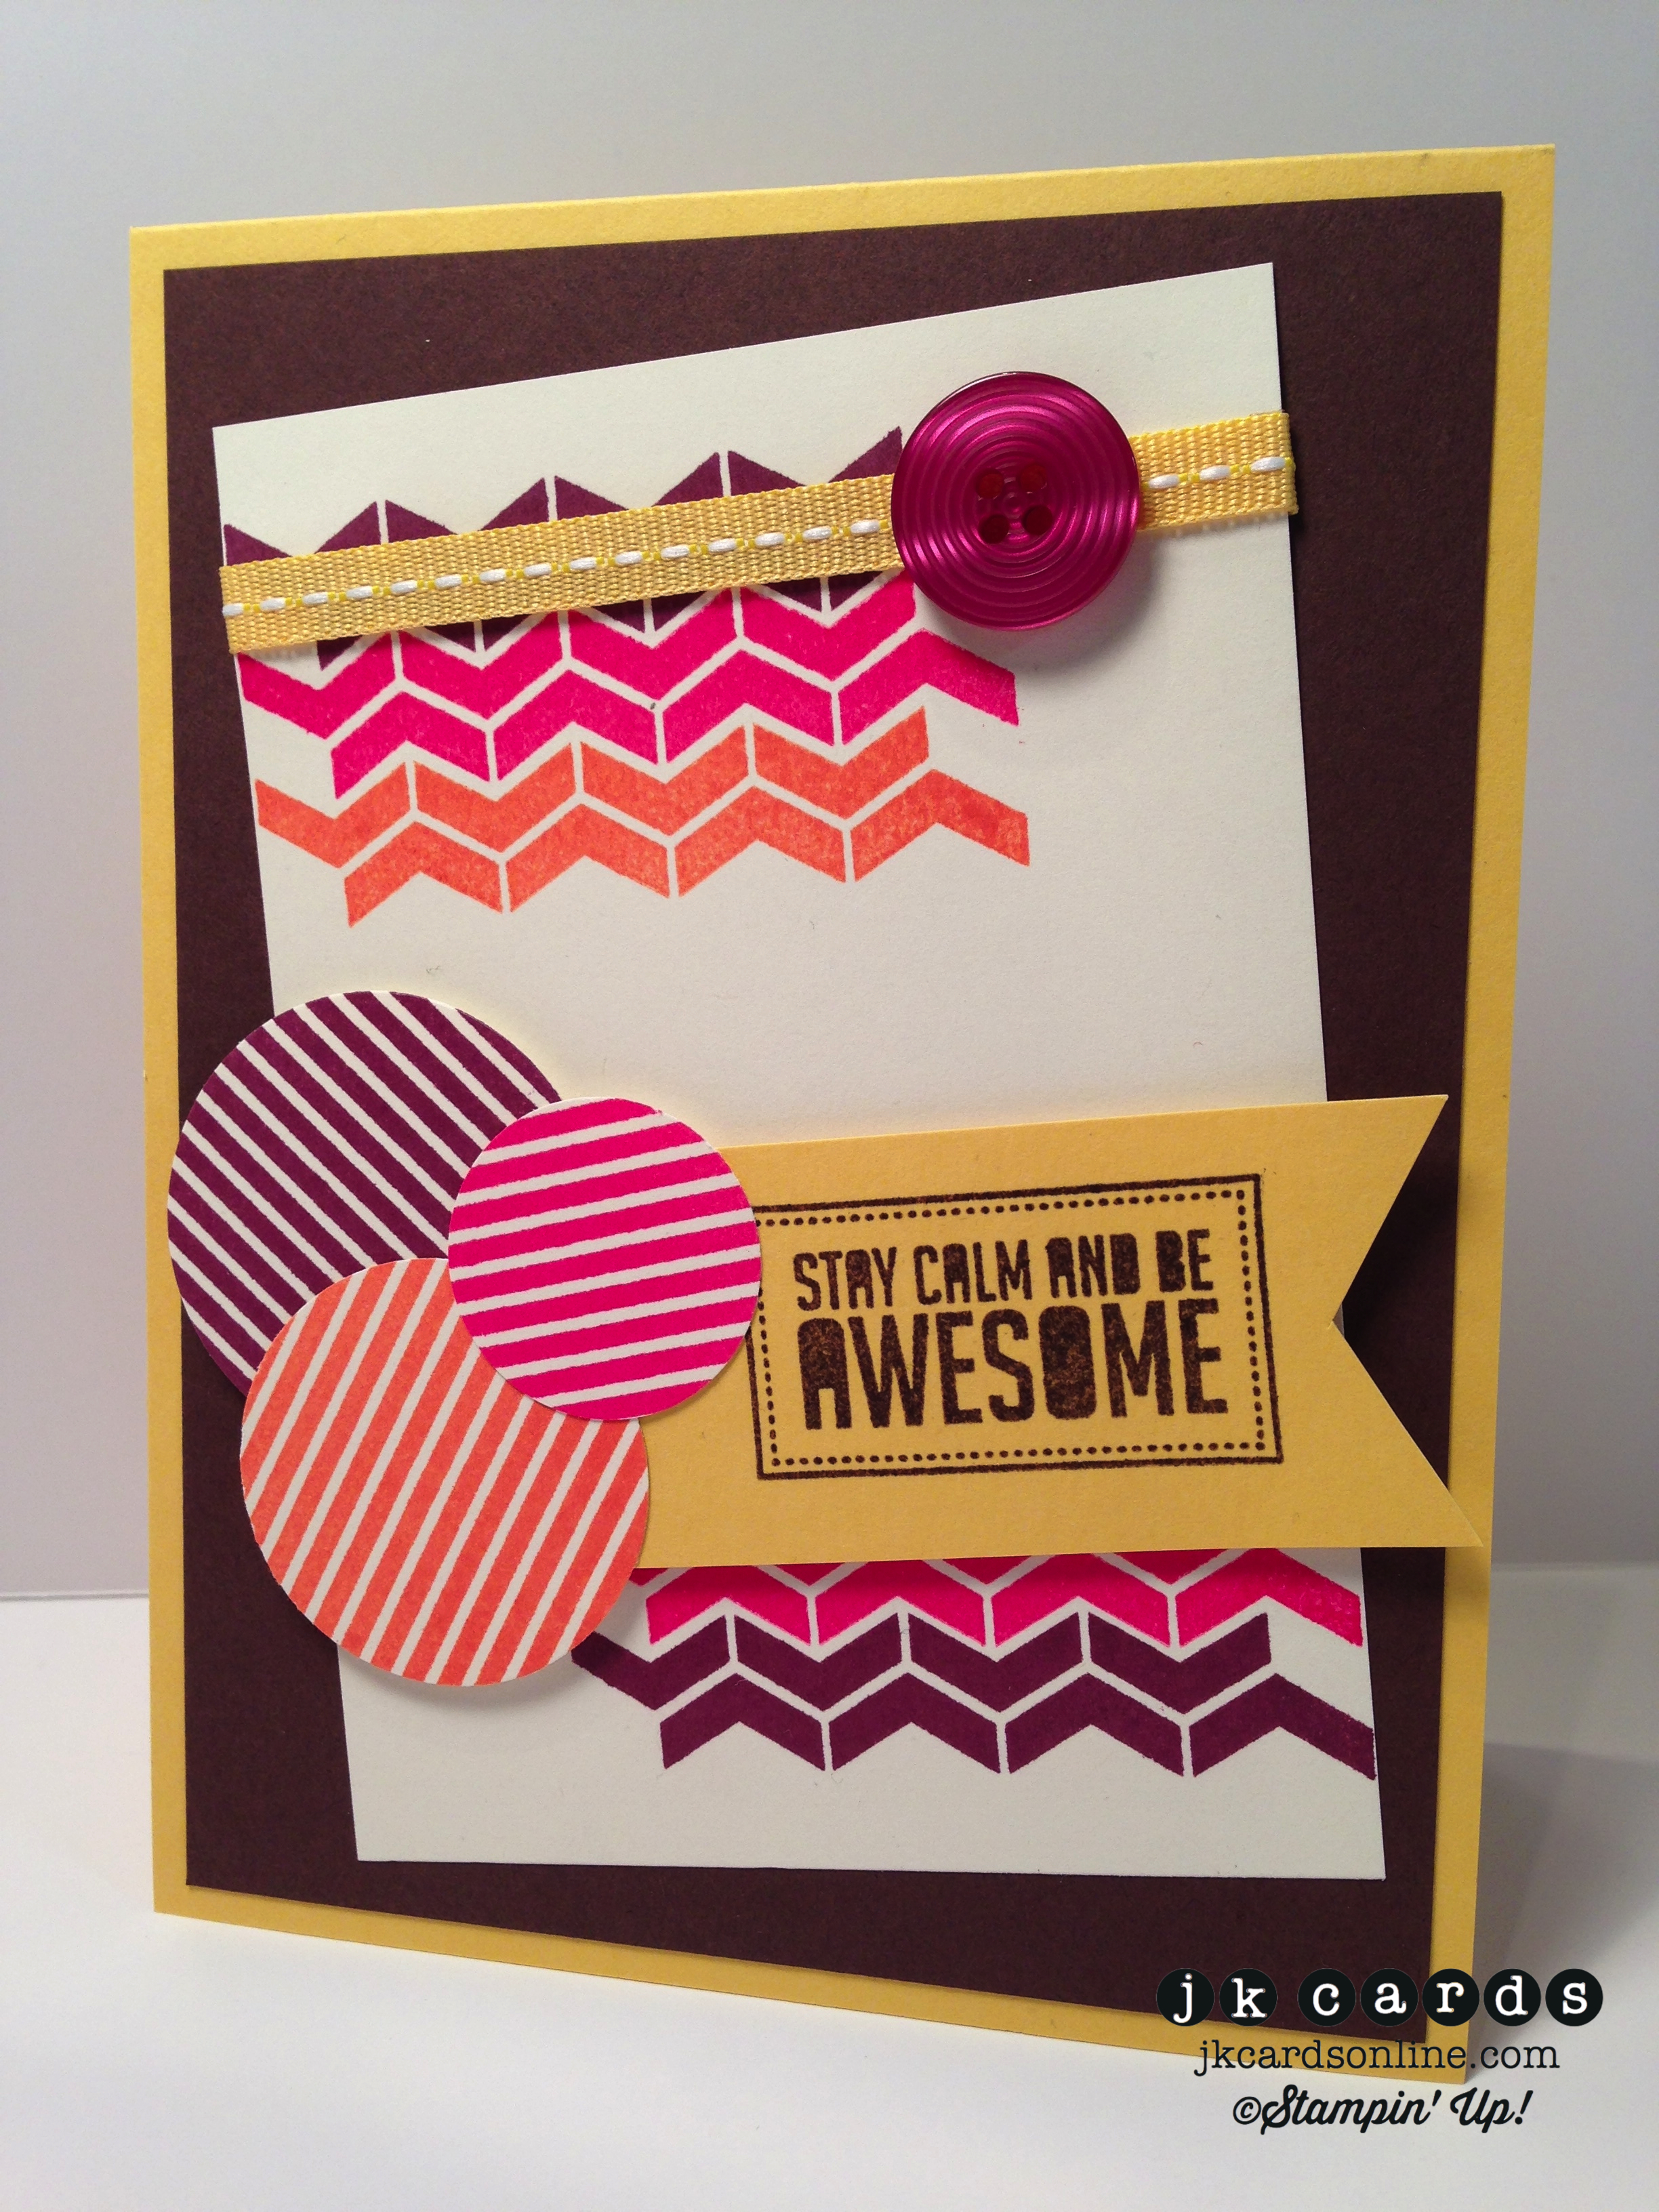
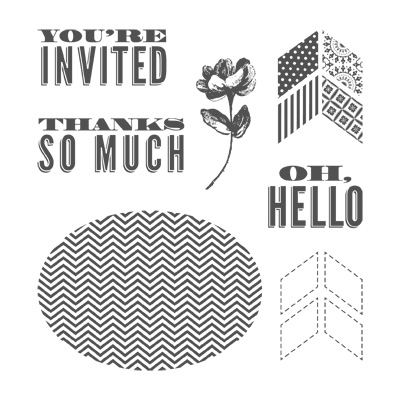
Oh how I love a tall & skinny! LOL! My card base is Neenah Solar White 110lb Card Stock and the background is a piece of paper from the Typeset Designer Series Paper Pack. Across the lower half is a piece of Pear Pizzaz that I used the Simon Says Stamp Bundle of Stitched Shapes dies along the top and bottom. My main panel is a piece of Basic Black that is cut out with the Simon Says Stamp Stitched Rectangles Dies with another piece of Typeset DSP on top. I adhered a sliver of Basic Black along the bottom and then adhered the panel to the card with Fun Foam and SNAIL. The neat cup is from this month’s Paper Pumpkin Kit and is stamped in Memento Tuxedo Black and the succulent in Pear Pizzaz. It’s cut out with the Simon Says Stamp Stitched Circles and adhered to the card with more Fun Foam and SNAIL. I say it all the time but I really do love the stamps in the Paper Pumpkin Kits! I hope that you enjoyed my Design Team card for this week’s Mojo Monday sketch challenge! Take a minute to head on over the blog and check out the rest of the Design Team’s cards and enter yours in the gallery! Oh, I hope that you enjoyed the pictures too, I’ll have some more tomorrow! I will also be catching up on my comments today, thanks for writing! Have a magnificent Monday! 🙂

Mojo Monday 408-JK-WM

Products used:

Stamp Set: July Paper Pumpkin (Stampin’ Up!)

Ink: Pear Pizzaz Classic Stampin’ Ink (Stampin’ Up!) and Memento Tuxedo Black

Card Stock: Solar White 110lb and 80lb (Neenah), Basic Black and Pear Pizzaz (Stampin’ Up!)

Designer Series Paper: Typeset Specialty (Stampin’ Up!)

Dies: Stitched Rectangles, Stitched Circles and Bundle of Stitched Shapes (Simon Says Stamp)

Adhesives: SNAIL

Tools: Big Shot and Fun Foam


Built for Free Using: My Stampin Blog

It’s here! The 2015-2016 Stampin’ Up! Annual Catalog! Get your lists ready and place your orders by clicking on the catalog to the right!!

Piglet MAT

Freshly Made Sketches 188 & Pals Paper Arts 253

Well, my trend of sleeping in on Saturdays continues! Not that 7:30 is late but it is for me! Yesterday was another nice day, warm, a little humid but the sun felt nice! My friend Danielle stopped by after work to pick up two birthday cards. I am being good and using ones that I already have in my stash! I Skyped with Andrea for a while and we crafted together. I made my two cards for today and she worked on some swaps. Taylor stopped by and watched some Netflix, she is a little addicted to it! I spent a little time watching TV and then called it a day. Today I’m not sure what I’m doing, which sometimes is nice!

So of the two cards that I have for you today my first one is for this week’s Freshly Made Sketches challenge…

Freshly Made Sketches 188

Thanks to Jen B. for choosing my card for last week’s challenge! The card base is Neenah Solar White 110lb. I used the Simon Says Stamp Stitched Rectangles to cut out a piece of Early Espresso for the frame and also a piece of Window Sheet. Thin strips of foam tape around the frame adheres it to the card. Some American Crafts Gold Glitter Paper is backed with some Stick-it and cut out with the Simon Says Stamp Hello Die and then adhered to the window. My flowers are created with the Tim Holtz Sizzix Tiny Tattered Florals Thinlits from Cherry Cobbler and the leaves from Old Olive. They are adhered to the window frame with Glue Dots. I was going to make it a shaker card but I really like the way the hello just seems to float above the card with nothing behind it!

FMS 188-WM

The second card I made is for this week’s Pals Paper Arts sketch challenge…

PPA 253

A neat sketch and I’m loving that funky edge! The card base on this one is also Neenah Solar White 110lb. The background is a piece of paper from the NEW Cherry on Top Designer Series Paper Stack and I just used a ruler to draw the angled edge and cut it with my Paper Snips. My panel in the middle is a piece of Whisper White that I cut out with the Simon Says Stamp Flag Card Die. The greeting is from the May Paper Pumpkin Kit and is stamped in Island Indigo. I adhered the card to the base with SNAIL and Fun Foam. The flag at the top is also cut out with the same die from a piece of Gold Glimmer Paper. I doubled up the Fun Foam to adhere it and give it a little more dimension. A scattering of Pretty Pink Posh Gold Sequins adhered with Crystal Effects gives the card some sparkle. I love the simplicity and that funky edge!

PPA 253-WM

So there you have your double dose of my creativity for your Saturday! I hope that you like both the Freshly Made Sketches and Pals Paper Arts card for this week’s challenges! I really do appreciate you taking the time to come by and visit with me, you always make my day! Now go and have yourselves an amazing Saturday! 🙂

Products used:

Freshly Made Sketches card:

Card Stock: 110lb Solar White (Neenah) and Early Espresso, Cherry Cobbler and Old Olive (Stampin’ Up!)

Specialty Paper: Window Sheet (Stampin’ Up!) and Gold Glitter Paper (American Crafts)

Dies: Stitched Squares and Small Hello (Simon Says Stamp) and Tiny Tattered Florals (Tim Holtz/Sizzix)

Adhesives: Stick-it Adhesive Sheets (Ken Oliver), Bling Glue Dots (Therm-O-Web) and 3M Foam Tape

Tools: Big Shot

Pals Paper Arts card:

Stamp Set: May 2015 Paper Pumpkin (Stampin’ Up!)

Ink: Island Indigo Classic Stampin’ Ink (Stampin’ Up!)

Card Stock: Solar White 110lb (Neenah) and Whisper White (Stampin’ Up!)

Specialty Paper: Gold Glimmer (Stampin’ Up!)

Designer Series Paper: Cherry on Top Stack (Stampin’ Up!)

Die: Flag Card (Simon Says Stamp)

Embellishments: Gold Sequins (Pretty Pink Posh)

Adhesives: SNAIL and Crystal Effects

Tools: Big Shot and Fun Foam


Built for Free Using: My Stampin Blog

Current Promotions:

With our personalized stamps you can create a cool address label or even use it for everything from marking your territory on books or other belongings to having a fun way to give a personal touch to gifts and goodies. Click HERE for a PDF of the flyer.

It’s here! The 2015 Occasions Catalog is ready for you to place your order! It’s packed with fun trendy products and quick kits! Click on the image in the sidebar and place your order today!

Need some cards quicky? Stampin’ Up! has a brand new kit that allows you to create 20 cards, all you need is some adhesive and you’re all set. Click here for the Everyday Occasion Card Kit!

Make your own stamp! New Undefined stamp carving kit. Available now! Click here for the PDF.

Check out all of the Photopolymer Stamp Sets! The newest set is Lovely Amazing You. It’s a completely clear stamping option you are going to love!

Piglet MAT

Germaine’s Paper Pumpkin Class

Am I happy to be back in freezing NY… that would be a no! LOL! I’m glad to get to see my peeps again but I’m really missing the Florida sunshine and much warmer temps! I had a nice flight home last night, the plane actually left 10 minutes early and it didn’t take forever to get my luggage. Andrew picked me up and came in for a little while once we got back to my house. I will miss all of my friends, especially Maggie, Nicole and Brian, but I’ll see them again soon. As you can see I’m a little late today, I think I went to bed at 2:00am. I will also get all caught up on all of my comments today, yesterday I got caught up on my emails at the airport and on the plane, all 620 of them!! I needed a little vacation from it for a while!

Today I’m sharing the cards that were made at my friend Germaine’s Paper Pumpkin class. She was nice enough to let me play along with them last Monday and I had so much fun! I made three cards, Germaine made one and her friend Susan made four cards and the treat bags. So enjoy the pictures of the cards, they use supplies from the kit and some other punches, stamps and card stock. I hope that they give you lots of ideas as to what else you can do with the amazing little Paper Pumpkin kits! Enjoy!

Here are the ladies from left to right starting in the front, Dawn Walker-Randall, Dale Strileckis, Germaine Meilach, Barbara Jones, Mary Lou Kopinj

GM PP Class Ladies

Here is Germaine’s card

GM PP Card

My three

GM PP Class JK Card 1-WM

GM PP Class JK Card2-WM

GM PP Class JK Card 3-WM

And the four cards and treat bags that Germaine’s friend Susan Superak made

GM PP Class Susan Card 5

GM PP Class Susan Card 4

GM PP Class Susan Card 3

GM PP Class Susan Card 1

GM PP Class Susan Card 2


I hope that you enjoyed them all! Thank you so much for coming by today! I’ll have more pictures from Leadership tomorrow! Have a super Sunday! 🙂

Current Promotions:

With our personalized stamps you can create a cool address label or even use it for everything from marking your territory on books or other belongings to having a fun way to give a personal touch to gifts and goodies. Click HERE for a PDF of the flyer.

It’s here! The 2015 Occasions Catalog is ready for you to place your order! It’s packed with fun trendy products and quick kits! Click on the image in the sidebar and place your order today!

Need some cards quicky? Stampin’ Up! has a brand new kit that allows you to create 20 cards, all you need is some adhesive and you’re all set. Click here for the Everyday Occasion Card Kit!

Make your own stamp! New Undefined stamp carving kit. Available now! Click here for the PDF.

Check out all of the Photopolymer Stamp Sets! The newest set is You’re Wonderful. It’s a completely clear stamping option you are going to love!

Piglet MAT

Control Freaks January Blog Tour

freakwelcome2013

Hello! I hope that your week is off to a good start! I had a nice day at work and another crafty evening when I got home apart from my little Target run. Guess what?! It’s time for another Control Freaks Blog Tour! This month our theme is Love and just in time for Valentine’s day! There are lots of fun new products in the 2015 Occasions Catalog with a love theme and I hope that you get some inspiration from my projects today. If you are following along with the tour you have arrived here from my talented friend Debbie Henderson’s blog. I have two cards and a little treat holder for you this time around so let’s get to them!

The first card that I have is a fun Valentine that would work for anyone. The base of the card is Whisper White Card Stock. I took a piece of Soft Sky and used the Word Bubbles Framelits to cut out the negative in the upper right corner. I also used the dies for the clouds that are cut from more Whisper White. The greeting is from the You Plus Me Stamp Set and is stamped in Real Red, using the negative cut out for placement and my Stamp-a-ma-jig. The ballon and the bow are cut out from Real Red and Red Glimmer paper using the Balloons Framelits. I cut out the heart in the middle of the ballon and another one from Red Glimmer Paper using the Hearts Collection Framelits. The basket is stamped in Soft Suede from the Celebrate Today Photopolymer Stamp Set. A piece of Stacked With Love Designer Series Paper is adhered behind the negative heart in the ballon and the balloon and red glimmer heart are adhered with Stampin’ Dimensionals. Finally I adhered my clouds to the background and the background to the base using Stampin’ Dimensionals. I think that this card would work for just about any age, don’t you?

Control Freaks January Blog Tour Love Balloon Card-WM

My second card is a nice simple one that would work for many different occasions. It begins with a base of Sahara Sand Card Stock. I used the You Plus Me Stamp Set and repeatedly stamped the ampersand in Pool party on Pool Party for the background. A piece of Vellum Card Stock cut to the same size as the Pool Party and has one of the greetings from the same set heat embossed in Gold Stampin’ Emboss Powder. I used the Spiral Border Punch along the left side and a Mini Metallic Clothespin holds the two sheets together. Some Stampin’ Dimensionals along the back of the Pool Party piece adhere the background to the card. A simple card that would make a great birthday, thank you or Valentine!

Control Freaks January Blog Tour Sweet Notebook Paper Vellum Card-WM

My last project for today is a little treat holder. I used some Vellum Card Stock and the Curvy Keepsake Box Thinlits for the holder. I cut another piece of Vellum out with the Hearts Collection Framelits for my topper. All of the stamps are from the January Paper Pumpkin Kit and are heat embossed in Gold Stampin’ Emboss Powder. Some Gold Glimmer paper is punched out with the heart from the Itty Bitty Accents Punch Pack and adhered to the Vellum heart with Glue Dots. A Mini Metallic Clothespin is adhered to the back of the heart with Sticky Strip and holds it to the handle on the that box. I would have filled this up with some M&M’s but unfortunately I finished the bag the other day! Time to get some more!

Control Freaks January Blog Tour Vellum Gold Lover Treat Holder-WM

So there you have my projects for this month’s Control Freak Blog Tour. I hope that you enjoyed them and that you are inspired to get started on some of your Valentine’s Day Cards! Next up is Clever Julie Davidson! Enjoy the rest of the tour and thanks so much for spending some time with me! Have a wonderful Tuesday!! 🙂

clickhere2013

Stampin’ Up! products used:

Love Balloon Card:

Stamp Sets: You Plus Me Clear Mount and Celebrate Today Photopolymer

Ink: Real Red and Soft Suede Classic Stampin’ Ink

Card Stock: Whisper White, Soft Sky and Real Red

Specialty Paper: Red Glimmer

Designer Series Paper: Stacked with Love stack

Framelits: Word Bubbles, Hearts Collection and Balloons

Tools: Bog Shot, Stampin’ Dimensionals and SNAIL


Sweet Notebook Paper Vellum Card:

Stamp Set: You Plus Me Clear Mount

Ink: Pool Party Classic Stampin’ Ink

Specialty Ink: Versa- Mark

Stampin’ Emboss Powder: Gold

Card Stock: Sahara Sand and Pool Party

Specialty Card Stock: Vellum

Punch: Spiral Border

Embellishments: Mini Metallic Clothespins

Tools: Sticky Strip, Stampin’ Dimensionals and SNAIL


Vellum Gold Love Treat Holder:

Stamp Set: January paper Pumpkin Kit

Specialty Ink: Versa-Mark

Stampin’ Emboss Powder: Gold

Specialty Card Stock: Vellum

Thinlits: Curvy Keepsake Treat Box

Framelits: Hearts Collection

Embellishments: Mini Metallic Clothespins

Tools: Big Shot, Fast Fuse, Sticky Strip and Glue Dots

Piglet MAT


Pals Paper Arts 236

A late happy Saturday to you! I don’t know why but I just can’t seem to get up on the weekends anymore! I guess the bed was little too comfy with all of the blankets! So yesterday was a nice sunny but chilly day again. I got a lot done at work and then came home and Andrew stopped by for a bit. He’s out in the Hamptons this weekend for the Satellite Lane retreat. They rehearse and get ready for Harmony Sweeps all weekend. A little chilly for the Hamptons but maybe that help them concentrate! I went out to dinner to Friday’s with Anthony and Bill, that’s always a good time! Tonight I have a work Holiday party to go to so Danielle is going to come by here so we can go together. I’m off to Scrap-A-Latte in a bit to help Renee get ready for some classes, that will be fun! What are you up to this weekend?

As promised here is another video from the concert. This is the opening and the song is called Life Support…

My card for today is for this weeks Pals Paper Arts sketch…

PPA 236

I got my Paper Pumpkin Kit in the mail yesterday and love the stamps that came in it so I used one of them on today’s Valentine’s card. The base of the card is Whisper White Card Stock and the background is a piece of paper from the Stacked with Love Designer Series Paper stack that I adhered a piece of 1/4″ Whisper White Cotton Ribbon around the back before adhering it to the base. For my greeting I used the You Plus Me Stamp Set and heat embossed it in White Stampin’ Emboss Powder on Real Red. I used an element from the Mini Treat Bag Thinlits to cut it out. The heart on the top right is the one from the Paper Pumpkin Kit and is heat embossed in White Stampin’ Emboss Powder on Vellum and cut out with my Paper Snips. Some Stampin’ Dimensionals adhere the banner and heart to the card. I drew a few lines down from the tag and used another one of the elements from the Mini Treat Bag Thinlits to cut out three hearts from Red Glimmer Paper, they are also adhered with Stampin’ Dimensionals. Finally I sprinkled some sequins in the upper right and adhered them with Crystal Effects. I love the way the heart looks “clipped” to the side of the banner! A fun simple Valentine for your love! I hope that you enjoyed today’s card for this week’s Pals Paper Arts sketch challenge and the opening video from the concert! Thanks very much for coming by and enjoy your Saturday my friends! 🙂

PPA 236-WM

Stampin’ Up! products used:

Stamp Sets: You Plus Me Clear Mount and January Paper Pumpkin Photopolymer

Specialty Ink: Versa-Mark

Stampin’ Emboss Powder: White

Card Stock: Whisper White and Real Red

Specialty Paper: Red Glimmer and Vellum Card Stock

Designer Series Paper: Stacked with Love Stack

Thinlits: Mini Treat Bag

Embellishments: 1/4″ Whisper White Cotton Ribbon

Tools: Big Shot, Heat Tool, Paper Snips, Crystal Effects, Stampin’ Dimensionals and SNAIL

NON-Stampin’ Up!: Pretty Pink Posh Classic Christmas and Sparkling Clear 4MM Sequins

Built for Free Using: My Stampin Blog

Current Promotions:

With our personalized stamps you can create a cool address label or even use it for everything from marking your territory on books or other belongings to having a fun way to give a personal touch to gifts and goodies. Click HERE for a PDF of the flyer.

It’s here! The 2015 Occasions Catalog is ready for you to place your order! It’s packed with fun trendy products and quick kits! Click on the image in the sidebar and place your order today!

Need some cards quicky? Stampin’ Up! has a brand new kit that allows you to create 20 cards, all you need is some adhesive and you’re all set. Click here for the Everyday Occasion Card Kit!

Make your own stamp! New Undefined stamp carving kit. Available now! Click here for the PDF.

Check out all of the Photopolymer Stamp Sets! The newest set is You’re Wonderful. It’s a completely clear stamping option you are going to love!

Piglet MAT

Happy Halloween!!

It’s a Friday and it’s Halloween!! I had a nice evening last night, I went to a class at The Playground that my friend Michael taught. We made four Christmas cards and had a very good time. After we went out for some coffee at Starbucks and just hung out. I had a bit of a headache last night and didn’t get much sleep so I took the day off from work and   am going to try and go back to bed for a while. I haven’t had a really bad headache in years. Oh well, hopefully I can get some rest and it will be all gone later. Did you all finish you preparations for the trick or treaters tonight?! I love to see all of the little kids in their costumes, I wonder what Daniel will be. Hopefully I will see him later and get to take a few pictures!

I had to make a fun Halloween card to post today. I had see a card on Pinterest a while back that did a fun thing with a tag so that is my inspiration for today’s card. The base is Whisper White Card Stock with a piece of Basic Black on top. My background is a piece of Whisper White and I used the Gorgeous Grunge Stamp Set and some Tangelo Twist ink for my splotches. I stamped them off so they wouldn’t be too bold. A piece of Tangelo Twist is is used to make my tag along with the Angled Tag Topper Punch. I cut a strip of Tangelo Twist and used some temporary adhesive so I could cut around the tag with a craft knife to create the negative space. The greeting and the bats are from the September Paper Pumpkin Kit and are heat embossed in Black Stampin’ Emboss Powder. I adhered the negative part of the tag to the card with SNAIL, along with a thin strip of Basic Black and the positive part of the tag with Stampin’ Dimensionals.  A few black enamel dots finish off the card. I love the layout and the negative and positive parts of the tag. I hope that you enjoyed today’s card and that you all have a fantastic Friday and a safe and Happy Halloween! Thanks so much for visiting! 🙂

Halloween Half Tag-WM

Stampin’ Up! products used:

Stamp Sets: September Paper Pumpkin Kit and Gorgeous Grunge Clear Mount

Ink: Tangelo Twist Classic Stampin’ Ink

Specialty Ink: Versa-Mark

Stampin’ Emboss Powder: Black

Card Stock: Whisper White, Basic Black and Tangelo Twist

Punch: Angled Tag Topper

Tools: Heat Tool, Craft Knife, Stampin’ Dimensionals and SNAIL

NON-Stampin’ Up!: Black Enamel Dots


Current Promotions:

With our personalized stamps you can create a cool address label or even use it for everything from marking your territory on books or other belongings to having a fun way to give a personal touch to gifts and goodies. Click HERE for a PDF of the flyer.

It’s here! The 2014 Holiday Catalog is ready for you to place your order! It’s packed with fun trendy products and quick kits! Click on the image in the sidebar and place your order today!

Need some cards quicky? Stampin’ Up! has a brand new kit that allows you to create 20 cards, all you need is some adhesive and you’re all set. Click here for the Everyday Occasion Card Kit!

Make your own stamp! New Undefined stamp carving kit. Available now! Click here for the PDF.

Check out all of the Photopolymer Stamp Sets! The newest set is You’re Wonderful. It’s a completely clear stamping option you are going to love!

Creation Station Tour – Fall Fest

creation station header

Hello peeps! How is your weekend going so far? Mine is going well! I was in Manhattan most of the day yesterday and despite it being dreary and rainy I had a nice time seeing my friend Isabella! After I took the subway down to the Ink Pad and made a new friend. Michael is another crafty person and I had a nice chat with him. Hopefully I will see him again soon! After I came home I made a card, I had to it was World Card Making Day after all! Did you get to make a card or two yesterday?!

Sometimes Sunday’s mean it’s time for another Creation Station Blog Tour! Today is one of those Sundays! This time around we are doing a Harvest theme focusing on the Fall Fest Photopolymer Stamp Set and the Tiny Treat Boxes. If you are following the tour then you have arrived here from the very talented Jennifer Downey’s Blog. I have three projects for you today, two cards and a little box. Lets get to them shall we?!

My first card uses the night sky technique that I did a little while ago. I really loved the way it looked and had to do it again! The base of the card is Night of Navy Card Stock. I used a piece of Watercolor Paper and the Tim Holtz Mini Ink Blending Tool with some Daffodil Delight first to create the moon. I then took some Post-it Tape and used the 1 1/4″ Punch to punch out a piece to mask over the moon.

Creation Station Tour 11 6-WM

Night of Navy and Blackberry Bliss are used to create the rest of the sky. The stars are Perfect Pearls mixed with a little water and dotted on with a paintbrush.

Creation Station Tour 11 7-WM

To make my ghost I took my Smoky Slate Stampin’ Write Marker and colored around just the edge of the ghost stamp and stamped it on some more Watercolor Paper.

Creation Station Tour 11 2-WM

I then used a paintbrush and water to pull the ink into the middle of the ghost.

Creation Station Tour 11 3-WMCreation Station Tour 11 4-WM

A quick trip through the Big Shot with the Fun Fall Framelits and some black eyes that are punched out with the 1/8″ Circle Punch and he’s ready to go on the card.

Creation Station Tour 11 5-WM

But first I heat embossed one of the greetings from the September Paper Pumpkin Kit in White Stampin’ Emboss Powder. A simple mailable card that uses two fun techniques!

Creation Station Tour 11 Boo Night Sky-WM

Next up is another neat card. The base of this one is Basic Black Card Stock and the background is a piece of paper from the Motley Monsters Designer Series Paper Pack. The panel is Sahara Sand and I used the Project Life Corner Rounder to round the corners. My partial circle is cut out with the Circles Collection Framelits. The greeting is from the For All Things Stamp Set and is stamped in Memento Tuxedo Black. For a little extra detail I used the Essentials Paper-Piercing Pack to pierce all around the edges before adhering the panel to the base with Stampin’ Dimensionals. The pumpkin and leaves are all from the Fall Fest Photopolymer Stamp Set and are stamped in Tangerine Tango, Crushed Curry and Pear Pizzaz. I cut them out with the Fun Fall Framelits and adhered the to the card with more Stampin’ Dimensionals. Another simple card but I love the piercing detail and the circle cut out!

Creation Station Tour 11 Hello Fall Pierced-WM

My last project is a box that I made using the Tiny Treat Boxes. They are 25 in a pack for $6.95! How can you go wrong?! To make my box I first separated it at the seam by prying the two pieces apart. I did this so I could cut out the pumpkins using the Fun Fall Framelits from the opposite sides of the box.

Creation Station Tour 11 1-WM

I then took some Vellum Card Stock and glued it to the inside of the box before using some Sticky Strip to adhere it back together. The embellishment on the top of the box is a piece of 1 1/4″ Burlap Ribbon that I trimmed the sides off of and pulled some threads out. I adhered it to the box top with some more Sticky Strip. Next up is some of the Tangelo Twist Sequin Trim from the September Paper Pumpkin Kit adhered with some Glue Dots. My pumpkin is from the Fall Fest Set and is cut out with the Fun Fall Framelits. I cut out one of the leaves stamped in Pear Pizzaz and used one of the Autumn Wooden Elements along with some of the black twine from the Paper Pumpkin Kit. A Stampin’ Dimensionals holds it in place.  Again, I have forgotten to pick up some of the tea lights! When I do get some I will take pictures of the place card holder and this box! LOL! I love all of the elements and simplicity of the box!

Creation Station Tour 11 Tiny Harvest Box Side-WM


Creation Station Tour 11 Tiny Harvest Box Top-WM

Creation Station Tour 11 Tiny Harvest Box Side-WM

And there you have my three projects for the Creation Station Blog Tour for our Fall Fest theme. I really hope that you enjoyed the projects and are inspired to make some of your own. Now continuing on with the tour your next stop is our fearless leader Jen Arkfeld. She’s a clever one isn’t she?! Thank you for coming by to see my projects! I appreciate your visit and hope you have an amazing Sunday! 🙂

creation station backcreation station next


Jen Arkfeld

Ilina Crouse


Stampin’ Up! products used:


Boo Night Sky Card:

Stamp Sets: Fall Fest and September Paper Pumpkin Photopolymer

Ink: Blackberry Bliss, Night of Navy and Daffodil Delight Classic Stampin’ Ink

Specialty Ink: Versa-Mark

Stampin’ Emboss Powder: White

Stampin’ Write Marker: Smoky Slate

Card Stock: Night of Navy

Specialty Paper: Watercolor

Framelits: Fun Fall

Punch: 1 1/4″ Circle

Tools: Big Shot, Heat Tool, SNAIL

NON-Stampin’ Up!: Tim Holtz Mini Ink Blending Tool, Perfect Pearls


Hello Fall Pierced Card:

Stamp Sets: Fall Fest Photopolymer and For All Things Clear Mount

Ink: Tangerine Tango, Crushed Curry, Pear Pizzaz Classic Stampin’ Ink and Memento Tuxedo Black

Card Stock: Basic Black, Sahara Sand and Whisper White

Designer Series Paper: Motley Monsters

Framelits: Circles Collection and Fun Fall

Punch: Project Life Corner Rounder

Tools: Big Shot, Essentials Paper-Piercing Pack, Paper-Piercing Tool, Stampin’ Dimensionals and SNAIL


Tiny Harvest Box:

Stamp Set: Fall Fest Photopolymer

Ink: Tangelo Twist and Pear pizzaz Classic Stampin’ Ink

Card Stock: Whisper White

Specialty Card Stock: Vellum

Accessories: Tiny Treat Boxes and September Paper Pumpkin Kit

Framelits: Fun Fall

Embellishments: 1 1/4″ Burlap Ribbon and Autumn Wooden Elements

Tools: Big Shot, Sticky Strip, Glue Dots, Multi-Purpose Glue, Stampin’ Dimensionals and SNAIL


Creation Station Blog Tour – Work of Art

creation station header

Happy Sunday and welcome to the second blog tour for the Creation Station! Thanks so much for joining us. If you came by on the last one you know that we focus on one stamp set and an accessory every other Sunday to give you inspiration! If this is your first time with us welcome! If you are following the Tour you have arrived here from the very clever Deborah Smart’s blog. How was that for inspiration?! I hope that I can give you some ideas on how to use our featured stamp set Work of Art and accessory Bakers Twine. The post has lots of pictures that I have taken during the process of making the projects so sit back relax and enjoy!

My first project is a card and it’s packed full of new goodies! I used my new favorite color Lost Lagoon* for my base. The background is created with a piece of Blushing Bride that I stamped in Blushing Bride with the longest stroke from the Work of Art* Stamp Set. I used my Gird Paper to help me line it it all up.

Creation Station Blog Tour 4

Next up is a Tea Lace Paper Doily that I brayed in Lost Lagoon*. I went over it a few times to make it nice and dark to help my heart in the middle stand out a bit more.

Creation Station Blog Tour 6

The smaller heart is stamped in Lost Lagoon* using my Stamp-a-ma-jig to make sure they are nice and even. The greeting is from the Really Good Greetings Stamp Set and is stamped in Versa-Mark and heat embossed with Gold Stampin’ Emboss Powder.

Creation Station Blog Tour 1Creation Station Blog Tour 3

I used the Hearts Collection Framelits to cut it out and a piece of Brushed Gold Card Stock. I used the Occasions Paper-Piercing Pack to pierce around the edge.

Creation Station Blog Tour 2

Across the bottom are 5 hearts that I stamped in Lost Lagoon* and punched out with the Small Heart Punch. Stampin’ Dimensionals hold them and the large heart to the card.

Creation Station Blog Tour 5

Finally I used the Owl Builder Punch to punch out a tiny heart from some Blushing Bride to go in the middle of the greeting. I have to say that Lost Lagoon* goes really well with so many different colors. I think it looks quite snazzy paired with Blushing Bride and some Gold thrown in for good measure!

Creation Station Blog Tour 7

Creation Station Blog Tour 8

Next up is a card again using the Work of Art Stamp Set for a Background and my favorite little fish! This card starts off with a base of Basic Black and the background is Whisper White embossed with the Chevron Textured Impressions Embossing Folder. The background for the goodies are the zig zags from the Work of Art Stamp Set, stamped in Island Indigo, Lost Lagoon*, Pool Party and Soft Sky.

Creation Station Blog Tour 9

I backed it with more Basic Black and adhered it to the card with Stampin’ Dimensionals. My fish is from the By the Tide Stamp Set and is heat embossed in Black Stampin’ Emboss Powder and cut out with my Paper Snips. Some Silver Foil Sheet punched out with the Itty Bitty Shapes Punch Pack and a standard hole punch make the bubbles.

Creation Station Blog Tour 11

The greeting is from the May Paper Pumpkin Kit and is stamped in Memento Tuxedo Black on adhesive cork sheet and cut out with the Word Bubbles Framelits.

Creation Station Blog Tour 10

I really love using cork sheet, it cuts nicely with our Framelits and takes ink pretty well. The stamps that come with the Paper Pumpkin kits are some of my favorites too!

Creation Station Blog Tour 12

Creation Station Blog Tour 13

My final card uses our featured accessory Bakers Twine. The base for this card is Soft Sky and the background is s piece of So Saffron that is embossed with the Decorative Dots Textured Impressions Embossing Folder from Sale-A-Bration that is in the new Catalog! I used the Something for Baby Stamp Set* to stamp the safety pins and heat embossed them in Silver Stampin’ Emboss Powder, I think it gives a nice real look to them.

Creation Station Blog Tour 14

They are cut out with the Baby’s First Framelits*, love matching Framelits don’t you?! Next up I cut out a piece of Soft Sky with the same Framelits and used the Eclectic Paper-Piercing Pack* to pierce around the edge. A needle and White Bakers Twine sew the twine through the piercing.

Creation Station Blog Tour 15

My greeting is from the Baby, We’ve Grown Stamp Set from the Occasions Catalog, it’s carried over! I stamped it in Soft Sky and punched it out with the Extra Large Oval Punch. Stampin’ Dimensionals hold all of the elements to the card. I think that the sewn Bakers Twine adds so much along with the silver safety pins. A fun card to welcome in a new little one!

Creation Station Blog Tour 16

Creation Station Blog Tour 17

And that’s a wrap on my second Creation Station post! I really hope that you enjoyed the projects and sneak peeks at some of the new 2014-2015 Annual Catalog* goodies! Now you are off to see what Jen Arkfeld has created for you. I’m sure that you win’t be disappointed! Thanks so much for coming along, I really hope that you enjoyed yourself! Have a super Sunday! 🙂

creation station nextcreation station back

Full Blog Tour List:

Jen Arkfeld

Ilina Crouse

Kathy Kartak

Cindy Beach

Teneale Williams

Sarah Levin

Heidi Boos

Jennifer Frost

Kallan Quinn

Jennifer Downey

Deborah Smart

Justin Krieger – That’s Me! LOL!

*2014-2015 Annual Catalog

Stampin’ Up! products used:

Card 1:

Card Stock: Lost Lagoon*, Blushing Bride and Very Vanilla

Ink: Lost Lagoon and Blushing Bride Classic Stampin’ Ink

Specialty Ink: Versa-Mark

Stampin’ Emboss Powder: Gold

Stamp Sets: Work of Art* and Really Good Greetings Clear Mount

Framelits: Hearts Collection

Punches: Small Heart and Owl Builder

Embellishments: Tea Lace Paper Doilies

Tools: Big Shot, Occasions Paper-Piercing Pack, Paper-Piercing Tool, Heat Tool, Stamp-a-ma-jig, Brayer, Stampin’ Dimensionals and SNAIL

Card 2:
Card Stock: Basic Black and Whisper White
Specialty Card Stock: Silver Foil Sheet
Ink: Island Indigo, Lost Lagoon*, Pool Party and Soft Sky Classic Stampin’ Ink and Memento Tuxedo Black
Specialty Ink: Versa-Mark
Stampin’ Emboss Powder: Basic Black
Framelits: Word Bubbles
Embossing Folder: Chevron
Tools: Big Shot, Paper Snips, Stamp-a-ma-jig, Heat Tool, Stampin’ Dimensionals and SNAIL
Card 3:
Card Stock: Soft Sky, So Saffron and Whisper White
Ink: Soft Sky Classic Stampin’ Ink
Specialty Ink Versa-Mark
Stampin’ Emboss Powder: Black
Stamp Sets: Something for Baby* and Baby, We’ve Grown Clear Mount
Framelits: Baby’s First
Punch: Extra Large Oval
Tools: Big Shot, Eclectic Paper-Piercing Pack*, Paper-Piercing Tool, Heat Tool, Stampin’ Dimensionals and SNAIL

Mojo 340

It was another very nice day here again yesterday. The temperature got up into the low 60’s and the sun was out all day. After that Winter I’m really appreciating the nice weather! Work was busy but I did get to take a field trip to one of my favorite places, the Apple Store. I had to pick up an iMac for the COO. After work I went to my parents for dinner and my brother, his wife and little Daniel were there. He really is just the cutest, happiest little guy. He has a great smile and laughs all the time. Taylor was there too and she got a tattoo for her birthday of Zero from the Nightmare Before Christmas, her favorite movie. After, I came home and crafted for a bit and attempted to get my stuff together for my taxes, it just dawned on me that I only have 5 days left! LOL!

My post for today is for this week’s Mojo Monday sketch from Julee Tilman…

Mojo340

I decided that I wanted to make a card that only used Photopolymer Stamps. The new ones in the last two Paper Pumpkin kits are Photopolymer so I included them too! I also wanted to use some different colors. My card starts off with a base of Daffodil Delight Card Stock and the background is a piece of Chocolate Chip. My tilted panel is Very Vanilla and the chevron stamp is from last month’s Paper Pumpkin kit. I stamped it in Rich Razzleberry, Melon Mambo and Tangerine Tango on opposite sides of the top and bottom. A piece of Daffodil Delight 1/4″ Stitched Grosgrain Ribbon is adhered around the back and then I adhered the panel to the card base with SNAIL. The three circles are from the February Paper Pumpkin kit and are also stamped in Rich Razzleberry, Melon Mambo and Tangerine Tango. I cut the large circle out with the Circles Collection Framelits, I originally used the 1 3/4″ Circle Punch but there was a white border around the circle that just didn’t fit with the look of the card. The other two circles are punched out with the 1 3/8″ and 1″ Circle Punches. The greeting is from the Show and Tell 2 Photopolymer Stamp Set and is stamped in Chocolate Chip on a piece of Daffodil Delight which I flagged the right side of before adhering it and the circles to the card with Stampin’ Dimensionals. A Brights Collection Designer Button adhered to the ribbon with a Mini Glue Dot finishes off the card. I really like the retro feel of the card which I attribute to the colors. Often times I take color inspiration from a DSP, but I was proud of myself for coming up with a funky color combination! I hope you are inspired to try some different color combinations yourself and that you enjoyed my card for this week’s Mojo Monday sketch challenge. I appreciate your visit and hope that you have an amazing day!

Mojo 340-WM

Stampin’ Up! products used:

Card Stock: Daffodil Delight, Chocolate Chip and Very Vanilla

Ink: Rich Razzleberry, Melon Mambo, Tangerine Tango and Chocolate Chip Classic Stampin’ Ink

Stamp Sets: Show and Tell 2 and Paper Pumpkin Photopolymer

Framelits: Circles Collection

Punches: 1 3/8″ and 1″ Circle

Embellishments: Daffodil Delight 1/4″ Stitched Grosgrain Ribbon and Brights Collection Designer Buttons

Tools: Big Shot, Paper Snips, Sticky Strip, Mini Glue Dots, Stampin’ Dimensionals and SNAIL


Current Promotions:

With our personalized stamps you can create a cool address label or even use it for everything from marking your territory on books or other belongings to having a fun way to give a personal touch to gifts and goodies. Click HERE for a PDF of the flyer.

It’s here! The 2014 Occasions Catalog is ready for you to place your order! It’s packed with fun trendy products and quick kits! Click on the image in the sidebar and place your order today!

Need some cards quicky? Stampin’ Up! has a brand new kit that allows you to create 20 cards, all you need is some adhesive and you’re all set. Click here for the Everyday Occasion Card Kit!

Make your own stamp! New Undefined stamp carving kit. Available now! Click here for the PDF.

Check out all of the Photopolymer Stamp Sets! The two newest sets are Sweetie Pie and Sweetie Pie Frames. It’s a completely clear stamping option you are going to love!

Retro Scallop Garden Thanks

Wow! Sunday already?! Time is just chugging along! LOL! I had a nice day yesterday, I got some projects finished in the morning and then headed into Manhattan with Anthony and Bill to see Harmony Sweepstakes at the Miller Theater at Columbia University. We had a great time and it was sold out! Andrew and his group Satellite Lane won Audience Favorite for the second year in a row! They also won for best choreography! Congratulations to them on two well deserved wins! We hit up the diner after and I had some pancakes, haven’t had those in a while! I did manage to snap two quick pictures, the first one is of the outside of the theater…

Miller Theater

And here is of one of the statues that stands outside a set of gates next to the theater. If you click on the picture and look he has six toes, I thought that was interesting!

Columbia University Statue

Every so often when I’m working on a project I stop for a bit and make a just for fun card. I know, it’s odd that when you are working on craft projects that you would stop and make another one to take a break but that’s what I do! Today’s card is one of those.

The card uses a base of Whisper White Card Stock and I covered the entire front with a piece of Kaleidoscope Designer Series Paper. Two strips of Retro Fresh Designer Washi Tape go across the bottom. The tag is made using the Scallop Tag topper Punch. I trimmed the sides off to get a thinner tag and stamped the tag with one of the Paper Pumpkin Stamps in Gumball Green. The flower and leaves are from the Secret Garden Stamp Set and are both cut out with the Secret Garden Framelits. The leaves are stamped in Gumball Green and the Flower is heat embossed with White Stampin’ Emboss Powder on Daffodil Delight and sponged with some White Craft Ink. My greeting is from the Oh, Hello Stamp Set and is heat embossed in Tangerine Tango on a piece of Vellum Card Stock and adhered just under the flower. The tag has some White Bakers Twine on the top and Stampin’ Dimensionals adhere it to the card. I really am having fun with Vellum lately, it adds so much to a card. I also like the subtle background with the bold colors. I hope you enjoyed today’s just for fun card! I appreciate your taking some time to come and see what I’m up to and hope you have a lovely Sunday! 🙂

Retro Scallop Garden Thanks-WM

Stampin’ Up! products used:

Card Stock: Whisper White and Daffodil Delight

Specialty Card Stock: Vellum

Designer Series Paper: Kaleidoscope

Ink: Gumball Green Classic Stampin’ Ink

Specialty Ink: Versa-Mark

Stampin’ Emboss Powder: Tangerine Tango and White

Stamp Sets: Secret Garden, Oh, Hello and Paper Pumpkin Clear Mount

Framelits: Secret Garden

Punch: Scallop Tag Topper

Embellishments: White Bakers Twine

Tools: Big Shot, Heat Tool, Stamp-a-ma-jig, Stampin’ Dimensionals and SNAIL

Oh, Hello CM

Secret Garden CM

Kaleidoscope Designer Series Paper

Secret Garden Framelits

Scallop Tag Topper Punch

Retro Fresh This And That Designer Washi Tape

White Stampin' Emboss Powder

Tangerine Tango Stampin' Emboss Powder

White Bakers Twine

Current Promotions:

With our personalized stamps you can create a cool address label or even use it for everything from marking your territory on books or other belongings to having a fun way to give a personal touch to gifts and goodies. Click HERE for a PDF of the flyer.

It’s time for Sale-A-Bration! January 28th thru March 31st get a free product from the 2014 Sale-A-Bration Catalog for every $50 you spend (does not include tax and shipping). Click HERE for a PDF of the Catalog!

Big Clearance Rack Sale starts today! New items added up to 80% off!

It’s here! The 2014 Occasions Catalog is ready for you to place your order! It’s packed with fun trendy products and quick kits! Click on the image in the sidebar and place your order today!

Need some cards quicky? Stampin’ Up! has a brand new kit that allows you to create 20 cards, all you need is some adhesive and you’re all set. Click here for the Everyday Occasion Card Kit!

Make your own stamp! New Undefined stamp carving kit. Available now! Click here for the PDF.

Check out all of the Photopolymer Stamp Sets! The two newest sets are Sweetie Pie and Sweetie Pie Frames. It’s a completely clear stamping option you are going to love!