Control Freaks December Blog Tour!

freakwelcome

Hello there! How are all of you people doing? I’m doing great, and how could I not be?! It’s time for this month’s Control Freaks December Blog Tour featuring Winter Fun! I am the first stop on the tour but you also may have arrived here from the ĂĽber talented Connie Babbert’s blog. Didn’t she have some amazing projects?! I have two projects for you this time. One is a masculine box with a lodge feel and the other is a fun card that would be good for just about anything.

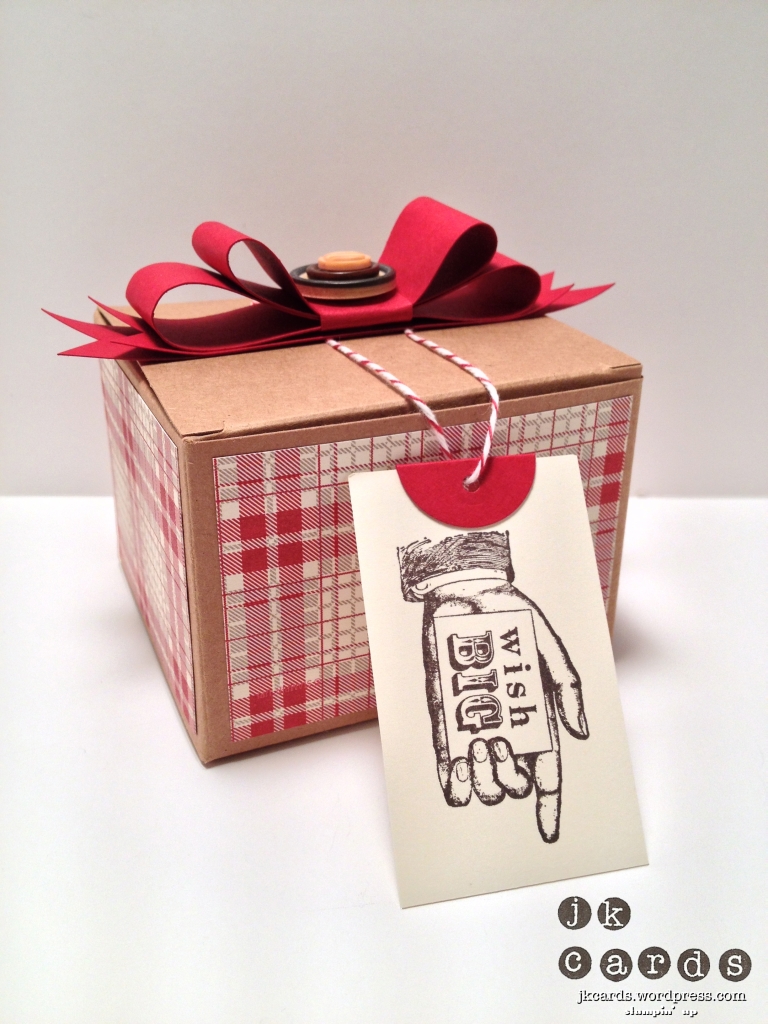
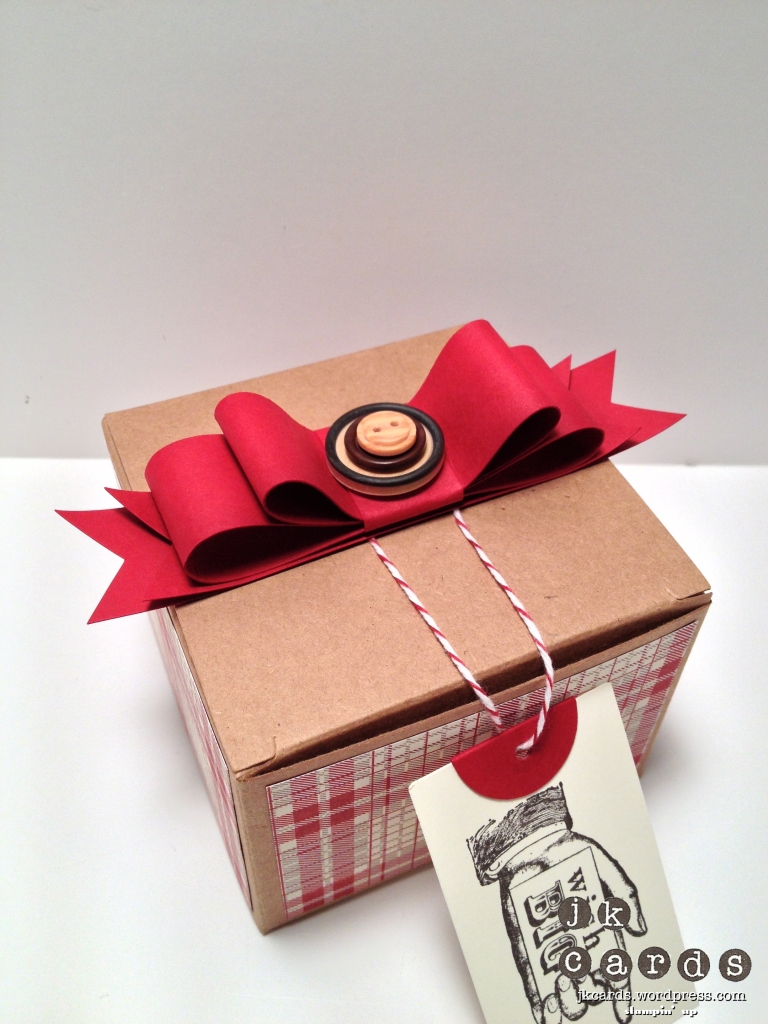
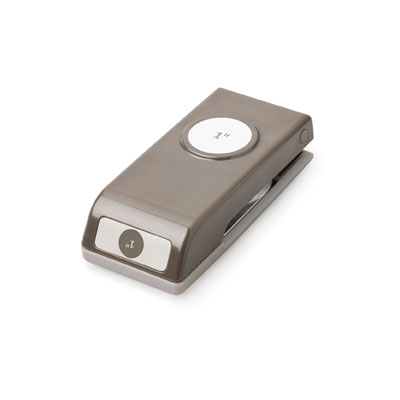
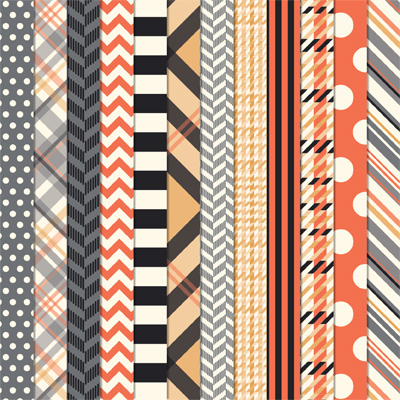
First up we have the box. I used one of the Kraft Gift Boxes. These are great item from the Annual Catalog. They are great to decorate with some Designer Series Paper and embellishments. I adhered some paper from the Festival of Prints Designer Series Paper Stack around the sides. I like the plaid pattern in Cherry Cobbler, Early Espresso and Early Espresso. On the top of the box I made a paper bow from some Cherry Cobbler Card Stock. It’s 3/4″ wide and if you use your Bone Folder to “curl” it a little it tends not to crease when you make the bow. On top of the bow I stacked three of the Naturals Designer Buttons, adhering them together with Mini Glue Dots. For the tag I stamped an image from the Bring on the Cake Stamp Set in Early Espresso on a piece of Very Vanilla. I punched out a piece of Cherry Cobbler with the 1″ Circle Punch, scored it down the center and adhered it to the tag with some Sticky Strip. A quick punch through the top and some Cherry Cobbler Bakers Twine to attach it to the bow and you’re done. Quick and easy, great for a masculine treat!

IMG_2173

IMG_2175

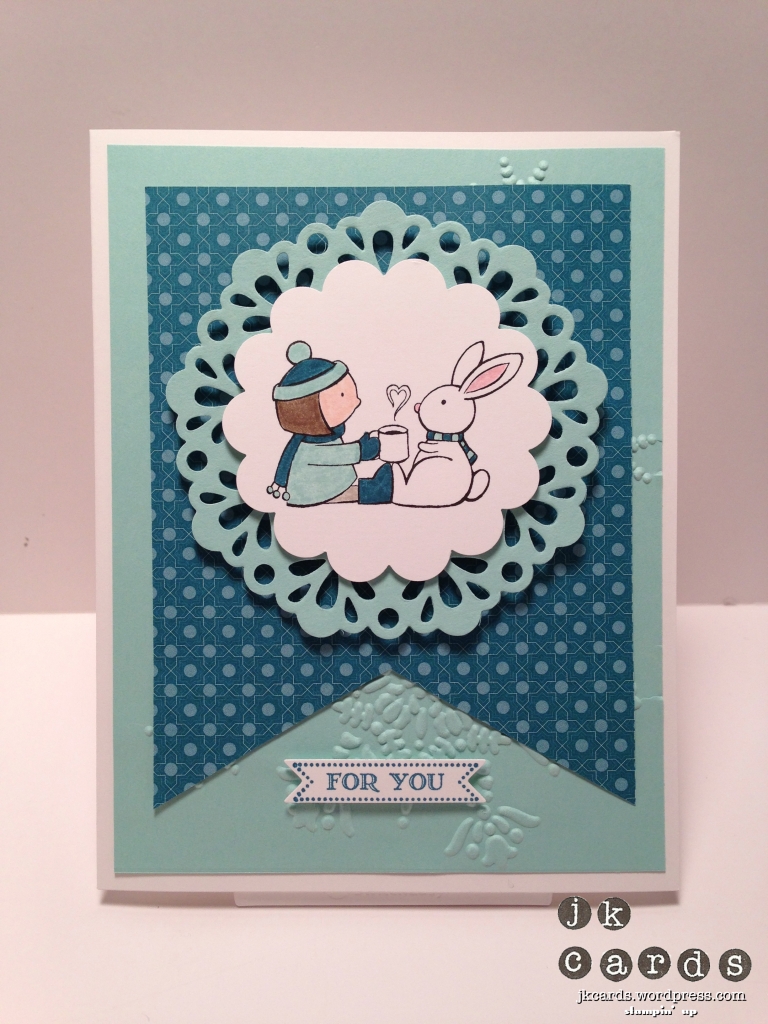
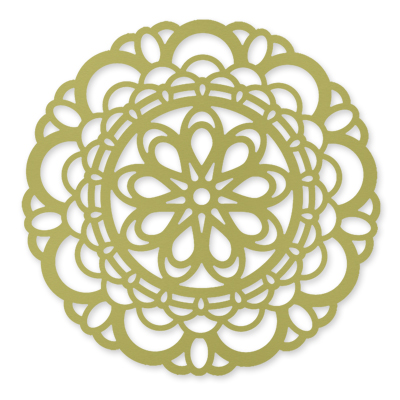
Next up we have the card. The base of the card is Whisper White Card Stock. I embossed a piece of Pool Party with the Northern Flurry Textured Impressions Embossing Folder for the background. A piece of paper from the Festival of Prints Designer Series Paper Stack is flagged and adhered to the background. The stamped image is form the Wonderful Winterland Stamp Set stamped in Basic Black. I colored it in with Island Indigo, Pool Party, Blush Blossom, Soft Suede, Sahara Sand and Pink Pirouette Stampin’ Write Markers. The 2 3/8″ Scallop Circle Punch is used to punch it out and a piece of Pool Party cut out with the Delicate Doilies Large Sizzlit Die backs it. They are mounted to each other and to the card with Stampin’ Dimensionals. The greeting is form the Itty Bitty Banners Stamp Set and is stamped in Island Indigo. I cut it out with the Bitty Banners Framelits Dies and adhered it to the card with Stampin’ Dimensional pieces. I love the little girl and bunny sharing some cocoa, a friendly little card for someone special.

IMG_0001

I hope that you enjoyed my project for the December Control Freaks Tour featuring Winter Fun. Next up we have Yvette Ash. She has some super fun projects to share with you! Thanks so much for stopping here and enjoy the rest of the projects from the Control Freaks. Have a great day! 🙂

tourclickhere

Stampin’ Up! products used:

Card Stock: Cherry Cobbler, Ver Vanilla, Whisper White, Island Indigo and Pool Party

Designer Series Paper: Festival of Prints Designer Series Paper Stack

Ink: Early Espresso, Basic Black and Island Indigo Classic Stampin’ Ink

Stamp Sets: Bring on the Cake, Wonderful Winterland and Itty Bitty Banners Clear Mount

Embellishments: Big Shot, Bitty Banners Framelits Dies, Cherry Cobbler Bakers Twine, Naturals Designer Buttons, Delicate Doilies Large Sizzlit, 1″ Circle Punch, 2 3/8″ Scallop Circle Punch, Mini Glue Dots, Sticky Strip, Stampin’ Dimensionals and SNAIL

Paper Players 126 & News!

Ahh… Monday… back again I see! How was your weekend? Mine was GREAT! I got most of my to do list accomplished and had so much fun at my two parties. Just when I thought that it couldn’t get any better I got some exciting news! I will be a Guest Designer on the Paper Players Challenge for the next six months starting in January! WOW! I’m a huge fan of the talented group of ladies and am honored to be with them. I can’t wait to get started. How fitting that today is my post for this week’s challenge!

This week’s challenge will last for two weeks and Ann has given us a Clean & Simple Challenge with snowflakes…

Paper Players #126

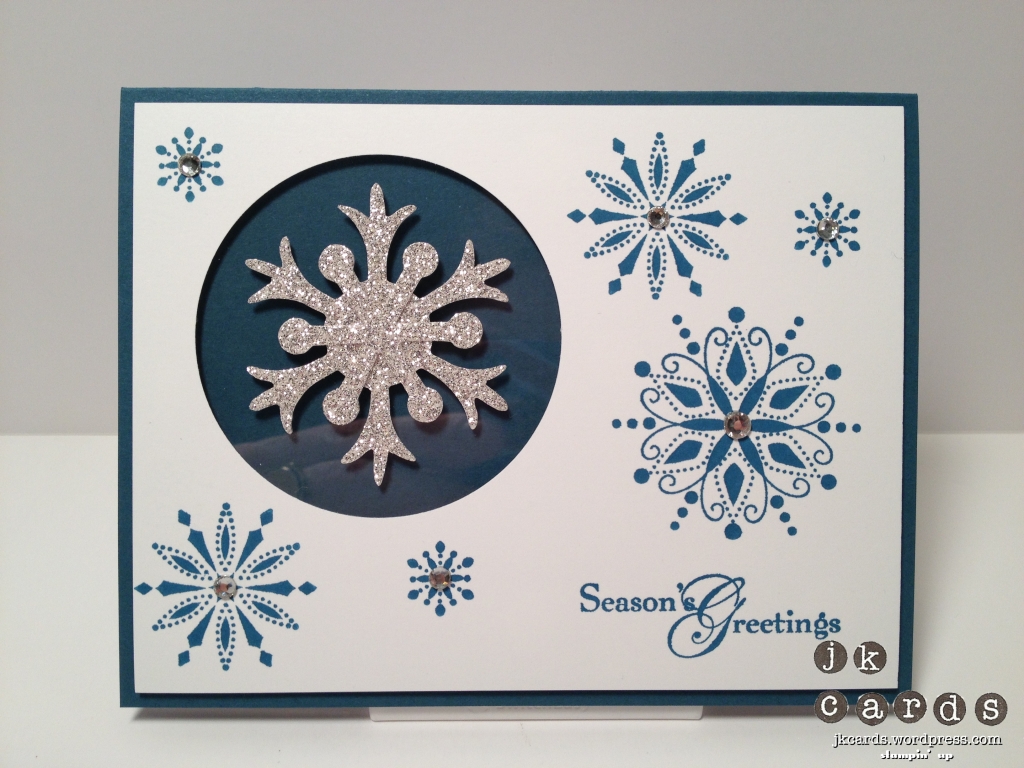
I love snowflakes, just as long as they are on a card and not floating through the air! My card starts off with a base of Not Quite Navy Card Stock. For the Whisper White panel I started by punching a hole in the upper left with the 2 1/2″ Circle Punch. I cut out a piece of Window Sheet and adhered it to the back over the hole. The stamped snowflakes and greeting are from the Snow Swirled Stamp Set and are stamped in Not Quite Navy. All of the snowflake images have a Basic Jewel Rhinestone in the center of them. The snowflake on the Window Sheet is created but cutting out some Silver Glimmer Paper with the Snow Flurry Bigz Die. I adhered the two parts together and to the Window Sheet with some Mini Glue Dots.  The panel is then adhered to the card base with Stampin’ Dimensionals. I love the simple elegance of the card and the shadow that the Silver Glimmer Paper snowflake casts on the card base. I hope you enjoyed my Paper Players Challenge card for this week. Thank you for checking in with me and I hope that you have a good Monday! 🙂

Stampin’ Up! products used:

Card Stock: Not Quite Navy and Whisper White

Specialty Paper: Silver Glimmer

Ink: Not Quite Navy Classic Stampin’ Ink

Stamp Set: Snow Swirled Clear Mount

Embellishments: Basic Jewels Rhinestones

Tools: Big Shot, Snow Flurry Bigz Die, 2 1/2″ Circle Punch, Mini Glue Dots, Stampin’ Dimensionals and SNAIL

Paper Players 126

Paper Players 126 Close

Snow Swirled CM

Snow Flurry Bigz Die

2 1:2%22 Circle Punch

Basic Rhinestones

Silver Glimmer Paper

Don’t forget to check out the Anchor Rewards tab at the top. Earn 10 Anchors and get a FREE Stamp Set of your choice from any current catalog. If you purchase $150 worth of product you will be eligible for $25 in Host(ess) dollars to get one of the great new Host(ess) Sets or any other items from the NEW 2012-2013 Catalog or the NEW Holiday Catalog!

Stylin’ Stampin’ Squad Bog Hop!

Blog Hop Badges December 2012

Hello everyone and welcome to this month’s Stylin’ Stampin’ Squad Blog Hop. Most likely you have arrived here from Terry Blais’ Blog, didn’t she have some great projects?! This is my first time out with these talented ladies and I hope that you enjoy my projects. This month we have a holiday theme and I have a card and a 3D project for you today.

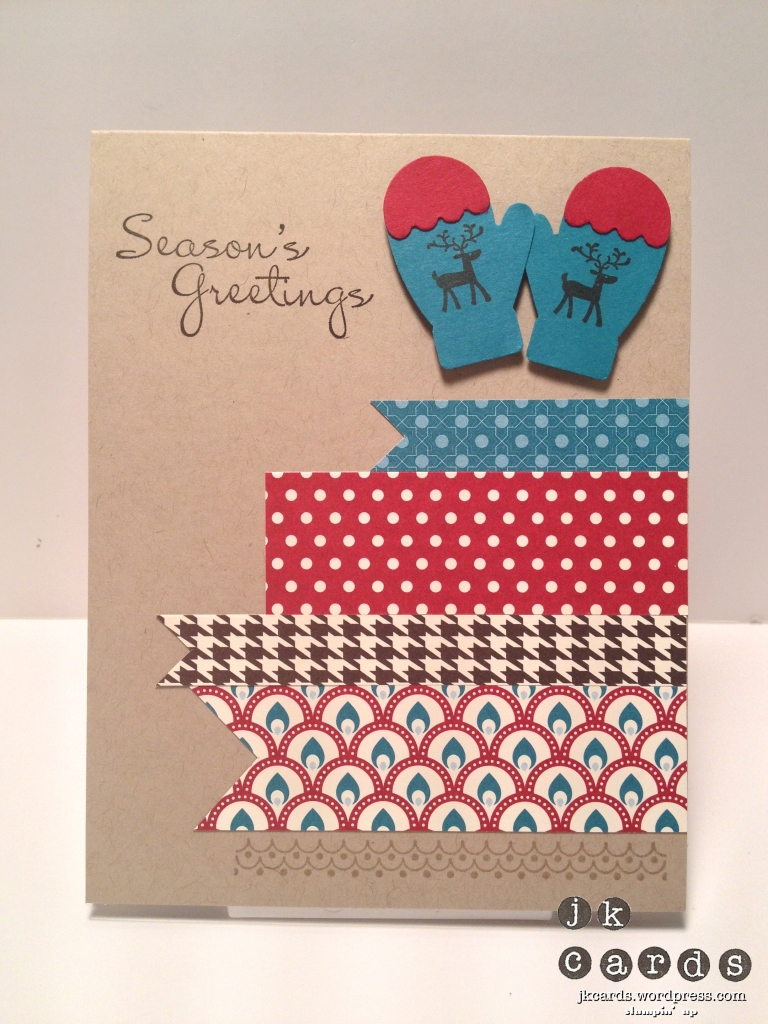
First up is the card that I CASE’d it from Stampin’ Success. The base of the card is Crumb Cake Card Stock. I stamped the greeting from the More Merry Messages Stamp Set in Early Espresso. The border that is stamped across the bottom in Crumb Cake is from the Make a Mitten Stamp Set. All of the paper is from the Festival of Prints Designer Series paper Stack, cut into strips and some ends are flagged. The mittens are punched out from Island Indigo and Cherry Cobbler with the Mitten Builder Punch. The reindeer are from the Make a Mitten Set and are stamped in Early Espresso. I really like the simplicity of the card and it’s a great way to use some of your scraps of DSP.

IMG_2061

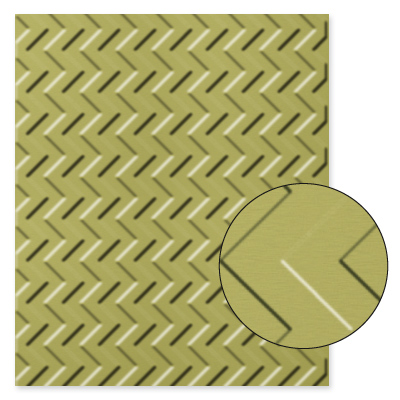
Next up we have the 3D project. I was in one of the local craft stores and I saw this small printer’s tray. I thought it would be great to fill with some Stampin’ Up! goodies to make a little Christmas display. All of the interior of the tray is lined with Crumb Cake Card Stock that I embossed with the Chevron Textured impressions Embossing Folder. They are adhered to the inside with Sticky Strip. The gingerbread men and the mug are from the Scentsational Season Stamp Set and are stamped in Soft Suede and Island Indigo. I cut them out with the Holiday Collection Framelits Dies and adhered them with some Stampin’ Dimensionals. In the other side we have a piece of Island Indigo that I punched the edge with the Scallop Edge Border Punch. A piece of Raspberry Ripple Stitched Satin Ribbon is adhered around the back with Sticky Strip. I punched a piece of Soft Suede with the 2 3/8″ Scallop Circle Punch and embossed it with the Delicate Designs Textured Impressions Embossing Folder. A set of mittens in Island Indigo and Raspberry Ripple are punched out with the Mitten Builder Punch and the reindeer is from the Make a Mitten Stamp Set and is stamped in Early Espresso. They are all adhered together and the the tray with Stampin’ Dimensionals. The greeting is form the More Merry Messages and is stamped in Raspberry Ripple on Very Vanilla and the corners rounded with the 3/16″ Corner Rounder. I backed it with a piece of Raspberry Ripple and adhered it with some more Stmapin’ Dimensionals. I love this and will definitely make some more to give as gifts. How cute would this be hanging up for the holidays?!

Stylin' Stampin' Squad Blog Hop 3D

I hope that you enjoyed my projects and the rest on the hop. Click on the graphic below to visit the talented Heidi Boos over at Stuck on Stampin’ who is the next stop on the hop:

Blog Hop Badges Next

Thank you to the Stylin’ Stampin’ Squad for inviting me to join them this month and thank you to all of you for visiting! I hope you have found some inspiration and that you have a wonderful day! 🙂

Stampin’ Up! products used:

Card Stock: Crumb Cake, Very Vanilla, Island Indigo, Raspberry Ripple, Soft Suede and Cherry Cobbler

Designer Series Paper: Festival of Prints Stack

Ink: Soft Suede, Crumb Cake, Island Indigo and Early Espresso

Stamp Sets: Make a Mitten, Scentsational Season and More Merry Messages Clear Mount

Embellishments: Raspberry Ripple 3/8″ Stitched Satin Ribbon

Tools: Big Shot, Chevron Textured Impressions Embossing Folder, Delicate Designs Textured Impressions Embossing Folder, Holiday Collection Framelits Dies, Mitten Builder Punch, 2 3/8″ Scallop Circle Punch, Paper Snips, Sticky Strip, Stampin’ Dimensionals and SNAIL

Paper Craft Crew Sketch Challenge 19

Yeah! It’s Wednesday and that means we are halfway to the weekend! How are you all doing so far? I’m doing ok, I’ll be better of course later because my pre-order from the new Spring Catalog will be in my hands! I can’t wait to play! I’ll have some sneak peeks for you and I’m looking forward to sharing them with you in the coming weeks.

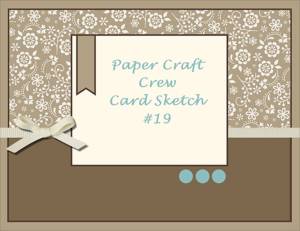
Today’s post is for my Design Team card for the Paper Craft Crew. This week we have a sketch and/or color challenge. I opted to do the sketch part…

PCCCS019-Sketch

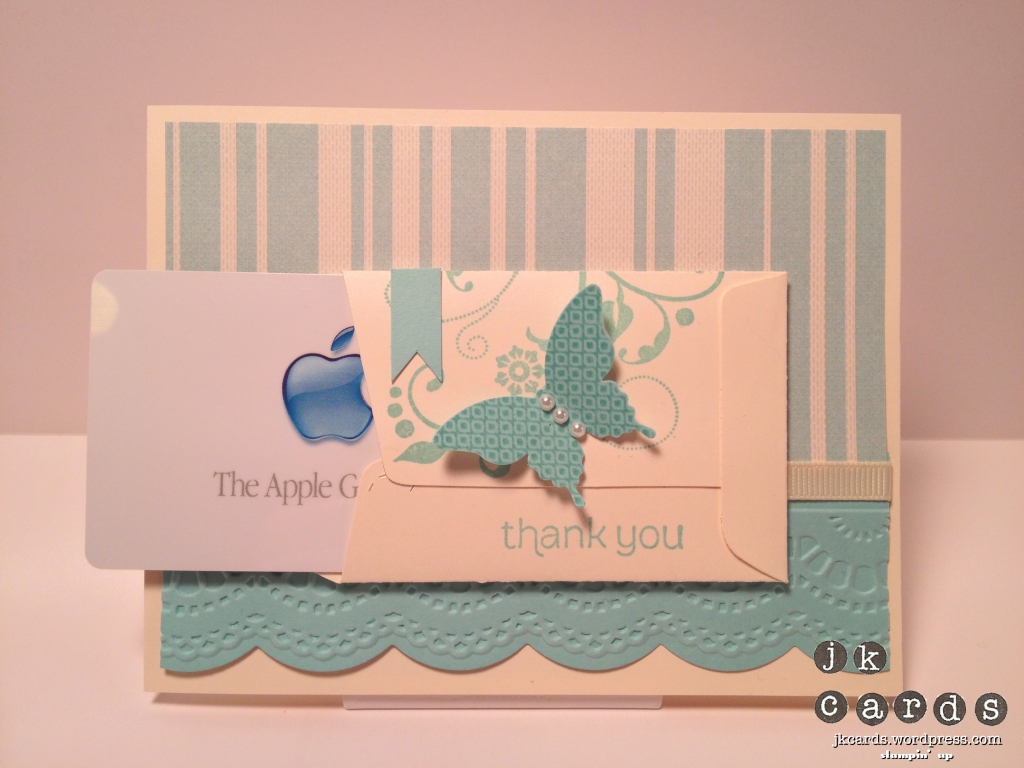
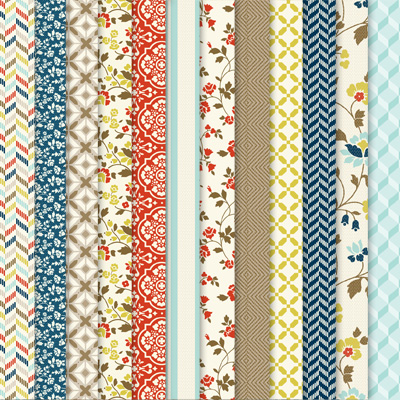
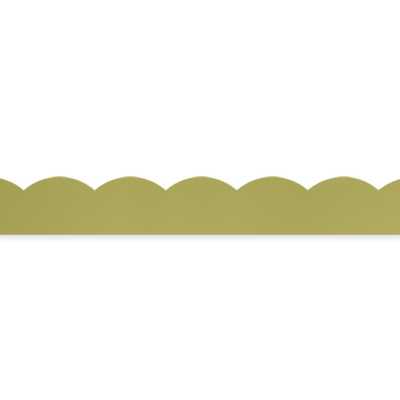
I have been a little obsessed of late with the Scallop Envelope Bigz Die. I love it made to look like a manila envelope. The base of my card is Very Vanilla Card Stock. The top half of the background is a piece of paper from the Comfort CafĂ© Designer Series Paper. The bottom is created with a piece of Pool Party that I cut with the Large Scallop Edgelits Die and then embossed with the Delicate Details Textured Impressions Embossing Folder. A piece of “Vintage” Very Vanilla 1/4″ Grosgrain Ribbon conceals the seam. I used the Scallop Envelope Bigz Die to cut out a piece of Very Vanilla and adhered the one side and the flap to make the tiny manila envelope. The image stamped on it is from the Flowering Flourishes Stamp Set and is inked in Pool Party. I stamped the butterfly from the Papillon Potpourri Stamp Set in Pool Part on Pool Party and punched it out with the Elegant Butterfly Punch. A thin piece of Sticky Strip holds it to the envelope and some Basic Jewels Pearls make the body. The greeting is from the Made for You Stamp Set and is stamped in Pool Party. The final touch is a piece of Pool Party that I flagged and adhered in the upper left of the envelope. I love the fact that you can fit a gift card inside the envelope as you can see in the second picture. I hope that you enjoyed this week’s Paper Craft Crew Sketch card. Thank you for visiting with me today and I hope you have a very nice Wednesday!

Stampin’ Up! products used:

Card Stock: Very Vanilla and Pool Party

Designer Series Paper: Comfort Café

Ink: Pool Party Classic Stampin’ Ink

Stamp Sets: Papillon Potpourri, Made for You and Flowering Flourishes Clear Mount

Embellishments: Basic Jewels Pearls and Very Vanilla 1/4″ Grosgrain Ribbon (Vintage)

Tools: Big Shot, Delicate Details Textured Impressions Embossing Folder, Large Scallop Edgelit Die, Scallop Envelope Bigz Die, Elegant Butterfly Punch, Sticky Strip, Stampin’ Dimensionals and SNAIL

PCCCS019 TCC

PCCCS019 TCC GC

Papillion Potpourri CM

Flowering Flourishes CM

Made for You CM

Comfort Café DSP

Large Scallop Edgelits Die

Delicate Designs Textured Impressions Embossing Folders

Scallop Envelope Bigz Die

Elegant Butterfly Punch

Don’t forget about the limited availability of the Ornament Elegance Kit! Order yours today!

Create 10 heirloom ornaments–or stunning tags to attach to a special gift.

The Ornamental Elegance Kit (132832) is $14.95 and includes:

  • Die-Cut Cardstock Elements
  • Cherry Cobbler 3-1/2″ Scalloped Tulle Ribbon
  • Natural Linen Thread
  • Vintage Faceted Designer Buttons
  • Large Pearl Basic Jewels

Now that is a great idea! Click here to go and order one or a few and get them in plenty of time to make for the holidays!

Don’t forget to check out the Anchor Rewards tab at the top. Earn 10 Anchors and get a FREE Stamp Set of your choice from any current catalog. If you purchase $150 worth of product you will be eligible for $25 in Host(ess) dollars to get one of the great new Host(ess) Sets or any other items from the NEW 2012-2013 Catalog or the NEW Holiday Catalog!

A new month starts a new promotion! From now until December 16th when you host a workshop and get over $450 in sales you will get a FREE collection of InkPads!!!! You can have the Subtles, Regals or Brights collection of full size ink pads. What a great way to expand your color palate. Book your party soon to take advantage of the Holiday cards that people want to make! Contact me for more information.

(You can also earn the Stamp Pad Collection by placing an online order over $450 (does not include shipping or tax.)

Control Freaks November Blog Tour!

Hello everyone and welcome to the November Control Freaks Blog Tour featuring Stampin’ Up! products. This month our theme is Christmas projects. I’m the first stop on the tour this month! You may also have gotten here from Robin Spinner’s blog. Didn’t she have some awesome projects?! Make sure that you follow along and see all of the projects on this month’s tour. I made 4 projects for you to see!

The first one is a card that I actually made back in August. I saw a tag that Shelli (Stampin’ Up! CEO) had posted on her blog and I loved it. I wanted it to be a card so I made the necessary adjustments. The base of the card is Early Espresso Card Stock. The large flagged pieces are a piece of Cherry Cobbler embossed with the Fancy Fan Textured Impressions Embossing Folder. On top of that is a piece of Candlelight Christmas Designer Series Paper. I stamped some images from the Affection Collection Stamp Set in Crumb Cake and Cherry Cobbler that I cut out with the Window Frames Collection Framelits Dies and then layered the Heart of Christmas Stamp, stamped in Early Espresso, on top. I stamped it again and cut out and flagged the middle of the greeting and adhered it to the stamped piece with Stampin’ Dimensionals. The pinecone and pine needles are from the Watercolor Winter Stamp Set and are stamped in Early Espresso and cut out with my Paper Snips and also adhered with Stampin’ Dimensionals. The star is punched from a piece of Champagne Glimmer Paper with the Merry Minis Punch Pack. A small piece of  1/4″ Very Vanilla Grosgrain Ribbon (Retired) is folded and adhered under it. A piece of Crumb Cake is also cut out with the Window Frames Collection Framelits and I pierced the edge with the Festive Paper Piercing Pack and Paper-Piercing Tool. The top frame and bottom frame are adhered to each other and the card with Stampin’ Dimensionals. I love the layering and the colors, not traditional but warm and delicious!

My next project is a place card for Christmas dinner. I took a piece of Very Vanilla Card Stock and used the Window Frames Collection Framelits Dies to partially cut out a piece. I then scored it and folded it. A piece of Lucky Limeade cut out with the same dies and pierced with the Festive Paper-Piercing Pack creates a nice base for the ornament. The ornament is stamped in Raspberry Ripple with the Keepsake Ornaments Stamp Set and cut out with the Holiday Ornaments Collection Framelits. The frame and the ornament are mounted to the Very Vanilla base with Stampin’ Dimensionals. The Happy Christmas is from the More Merry Messages Stamp Set and is stamped in Lucky Limeade. I flagged the ends and adhered it to the ornament. My name is stamped in Raspberry Ripple using the Simply Serif Mini Alphabet and my Stamp-a-ma-jig. It’s a quick and easy way to add some personality to your holiday place settings.

For my third project I made some cute little gift tags. The main piece of the tag is created using the Scallop Envelope Bigz Die. I folded the top and bottom and adhered them to each other and then just the one side. I punched a piece of Gumball Green out with the Itty Bitty Shapes Punch Pack and attached them to the tags with some 3/16″ Metallic Brads. A piece of Whisper White Bakers Twine is wrapped around the two brads to make the loop. The first tag uses the Make a Mitten Stamp Set and the Mitten Builder Punch. The mittens are stamped in Primrose Petals and adhered with Stampin’ Dimensionals. The greeting is from the More Merry Messages Stamp Set and is stamped in Primrose Petals too. I used the Small Heart Punch and the Owl Builder Punch to create the hearts that are punched out in Gumball Green.

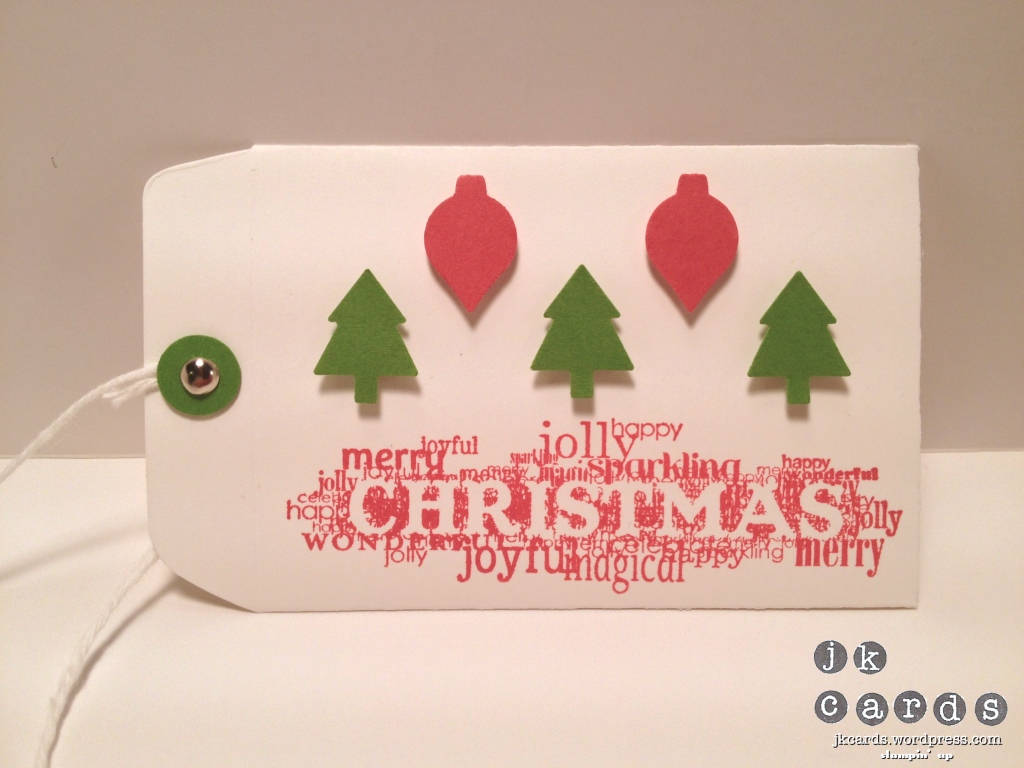
The next tag has trees and ornaments that are punched out with the Merry Minis Punch Pack in Primrose Petals and Gumball Green. They are adhered with Stampin’ Dimensionals. The greeting on this tag is form the Seasonal Sayings Stamp Set and is stamped in Primrose Petals.
The last Tag uses the images and greeting from the Joyous Celebrations Stamp Set. The reindeer and greeting are stamped in Primrose Petals and the oval, which is punched out with the Extra Large Oval Punch, in Gumball Green. The border on each side is from the Make a Mitten Stamp Set and is also stamped in Gumball Green. All of the tags have a little card that has a piece of Primrose Petals punched out with the Mitten Builder Punch and the to and from is from the Chock Full of Cheer Stamp Set. The best thing about these tags is that they also fit a gift card inside! They also look like little manila envelopes!

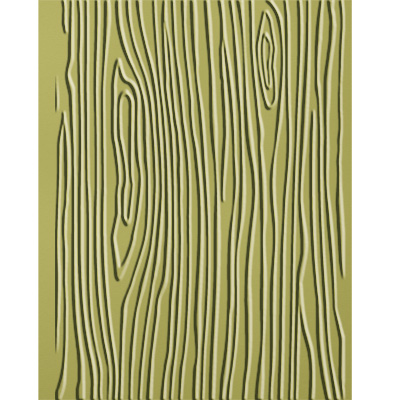
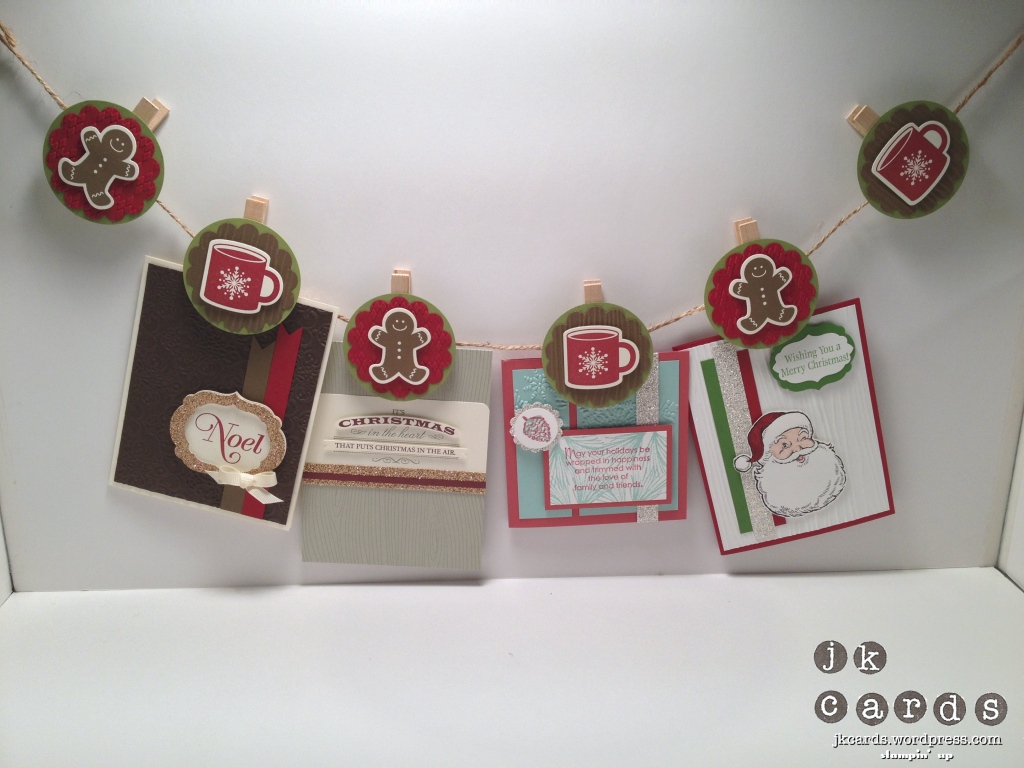
For my final project I made a card holder. The images are from the Scentsational Season Stamp Set. The gingerbread men are stamped in Soft Suede and the mugs are stamped in Cherry Cobbler. I used the coordinating Holiday Collection Framelits Dies to cut them out. The gingerbread men have a piece of Cherry Cobbler that is punched out with the 2 3/8″ Scallop Circle Punch and embossed with the Argyle Textured Impressions Embossing Folder. They are adhered to pieces of Lucky Limeade that is punched out with the 2 1/2″ Circle Punch. The mugs have pieces of Soft Suede that I punched out with the same scallop punch and embossed with the Woodgrain Textured Impressions Embossing Folder. They too are adhered to the same size Lucky Limeade circles. All of the images are adhered to the circle pieces with Stampin’ Dimensionals. I used some Sticky Strip to adhere them to the pegs and some hemp twine gives them something to hang from. This is a simple project and a great way to display your holiday cards!
I hope that you enjoyed my Christmas projects form this month’s Control Freaks Blog Tour. Next on your tour is the awesome blog of Patty Bennett. She has some great stuff in store for you to take a look at! Thank you very much for visiting me and I hope that your holidays are magical and filled with happiness!

The complete tour:

1 Justin Krieger https://jkcardsonline.com
4 Connie Babbert http://inkspiredtreasures.com/
5 Mary Brown http://stampercamper.com
9 Jason Casper http://stampindad.com
11 Dawn Olchefske http://dostamping.typepad.com
12 Barb Mulikin www.barbstamps.com
13 LeeAnn Greff http://flowerbug.typepad.com
14 Gretchen Barron http://gretchenbarron.typepad.com
17 Robin Spinner http://robinlea.blogspot.com

Stampin’ Up! products used:

Card Stock: Very Vanilla, Whisper White, Crumb Cake, Early Espresso, Cherry Cobbler, Lucky Limeade, Primrose Petals, Gumball Green and Soft Suede

Designer Series Paper: Candlelight Christmas

Specialty Paper: Champagne Glimmer Paper

Ink: Crumb Cake, Cherry Cobbler, Early Espresso, Soft Suede, Raspberry Ripple, Gumball Green and Primrose Petals

Stamp Sets: More Merry Messages, Affection Collection, Keepsake Ornaments, Make a Mitten, Watercolor Winter, Seasonal Sayings, Joyous Celebrations, and Scentsational Season Clear Mount and Heart of Christmas and Simply Serif Alphabet Wood Mount

Embellishments: Whisper White Bakers Twine and 3/16″ Metallic Brads

Tools: Big Shot, Fancy Fan Textured Impressions Embossing Folder, Woodgrain Textured Impressions Embossing Folder, Argyle Textured Impressions Embossing Folder, Window Frames Collection Framelits Dies, Holiday Collection Framelits Dies, Holiday Ornaments Framelits Dies, Festive Paper-Piercing Pack, Paper-Piercing Tool, Merry Minis Punch Pack, Itty Bitty Shapes Punch Pack, 2 3/8″ Scallop Circle Punch, 2 1/2″ Circle Punch, Owl Builder Punch, Mitten Builder Punch, Scallop Envelope Bigz Die, Paper Snips, Stamp-a-ma-jig, Sticky Strip, Stampin’ Dimensionals and SNAIL

Paper Players #118

Good morning! I’ll say it again just like I did last Monday… where does the weekend go?!?! I hope that you had a “longer” weekend than me and that it was as good as mine! I had a nice time in Manhattan yesterday and got some of my other to-do list accomplished. Today’s post is for this week’s Paper Players Challenge. The lovely Anne Marie has give us this challenge…

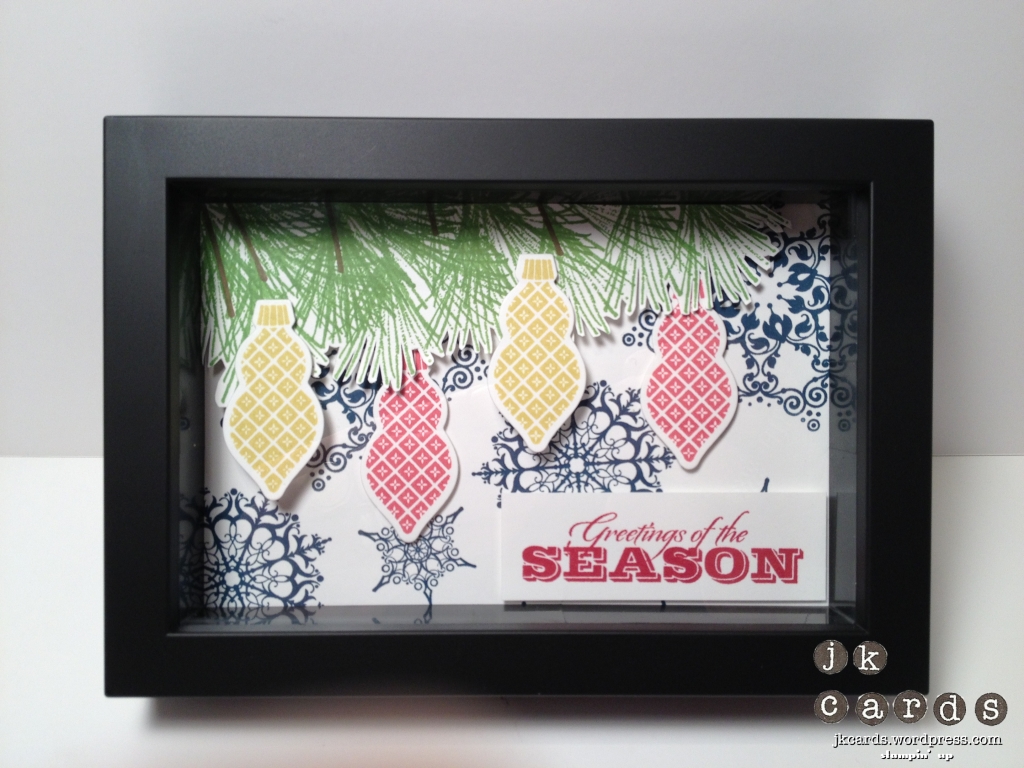
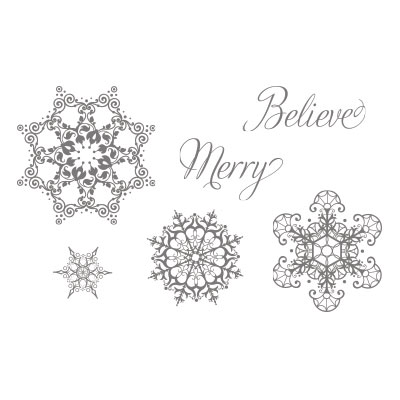
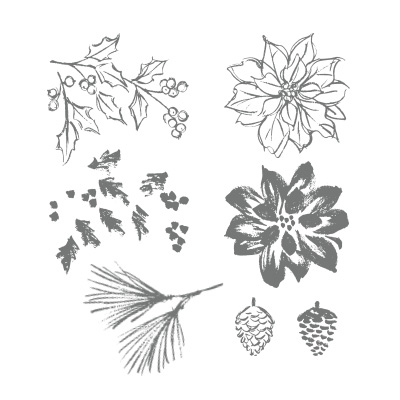
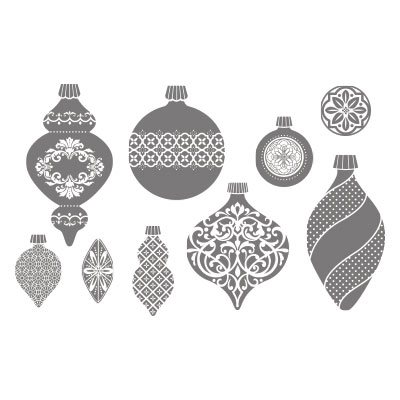
I had a little chuckle when I saw this. I just did a frame like card for Pals yesterday! Psychic… probably not! I decided that I would take the challenge literally and do a project in a frame. I got these great “shadow box” frames on clearance in Kohls a while ago and I wish I would have gotten more. I love the extra 3D effect that you can get when you have the room. The base of my project is Whisper White Card Stock that I stamped randomly in Midnight Muse with the Snowflake Soiree Stamp Set. The tree branch is created with the Watercolor Winter Stamp Set. The pine needles are stamped in Gumball Green and then I used a piece of leftover rubber to stamp the stems in Soft Suede. I stamped the ornaments from the Keepsake Ornaments Stamp Set in Summer Starfruit and Primrose Petals and cut them out with the coordinating Holiday Ornaments Framelits Dies. The branch is mounted to the base with a double stacked layer of Stampin’ Dimensionals. The ornaments are mounted with a single layer, some behind and some on top of the branch. The greeting is from the Greetings of the Season Stamp Set and is stamped in Raspberry Ripple. It is also mounted it to the base with Stampin’ Dimensionals. I know the challenge also said CAS but this actually wasn’t that difficult or time consuming. The longest part was the fussy cutting of the branch. I tried it without doing it and just didn’t look right. Did you also notice that I used all of the new In-Colors?!?! I think they look great together. I hope that you enjoyed my framed project for this week’s Paper Players Challenge. Thank you for stopping by and have a super day! 🙂

Stampin’ Up! products used:

Card Stock: Whisper White

Ink: Midnight Muse, Gumball Green, Summer Starfruit, Primrose Petals, Raspberry Ripple and Soft Suede Classic Stampin’ Ink

Stamp Sets: Snowflake Soiree, Watercolor Winter, Ornament Keepsake and Greeting of the Season

Tools: Big Shot, Holiday Ornaments Framelits Dies, Paper Snips and Stampin’ Dimensionals

Non SU!: Shadow Box Frame

Don’t forget to check out the Anchor Rewards tab at the top. Earn 10 Anchors and get a FREE Stamp Set of your choice from any current catalog. If you purchase $150 worth of product you will be eligible for $25 in Host(ess) dollars to get one of the great new Host(ess) Sets or any other items from the NEW 2012-2013 Catalog or the NEW Holiday Catalog!

It’s only October, but Stampin’ Claus is coming to town! Get a FREE Festive Paper-Piercing Pack when you purchase the Ornament Keepsakes Set and Candlelight Christmas Specialty Designer Series Paper. Get your FREE paper-piercing pack by purchasing the Ornament Keepsakes Set and Candlelight Christmas Specialty Designer Series Paper or the Ornament Keepsakes Bundle and Candlelight Christmas Specialty Designer Series Paper. Remember: the bundle gets you an additional 15 percent off the set and the Holiday Ornaments Framelits Dies. So many options!

Control Freaks October 2012 Tour!

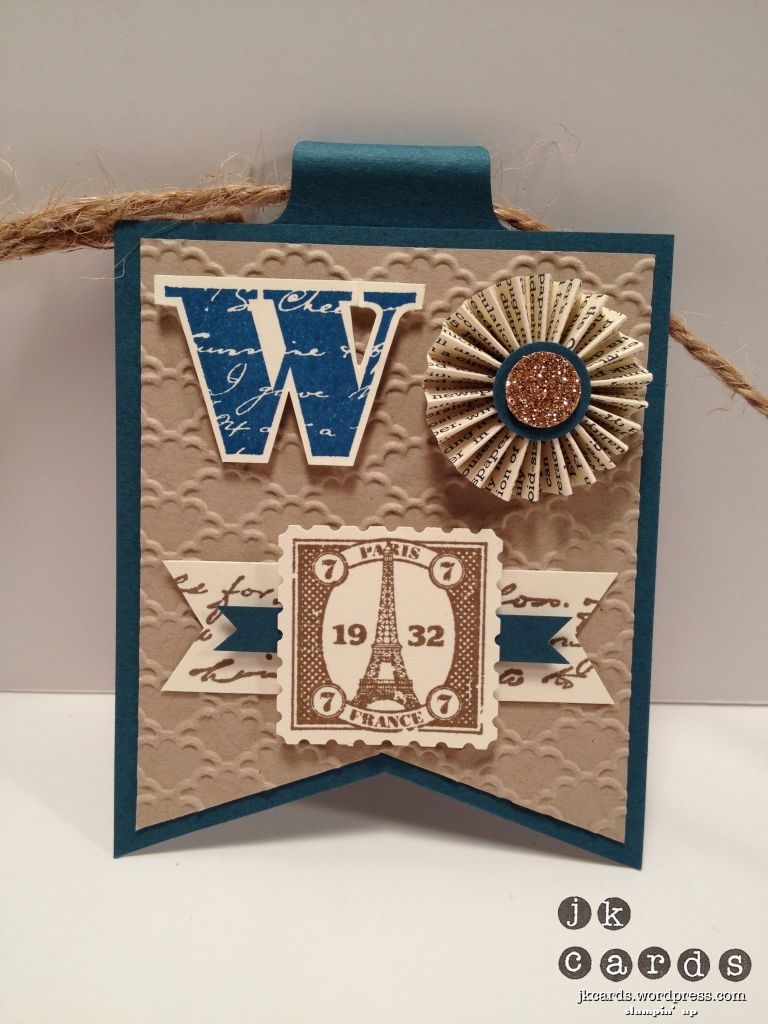
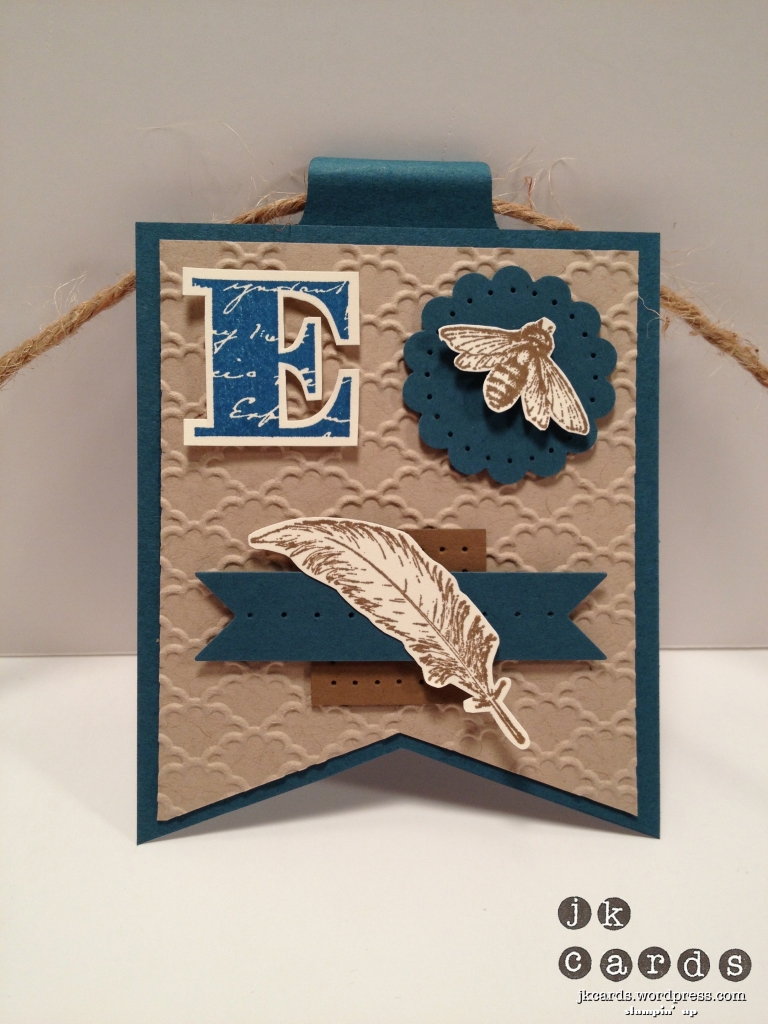
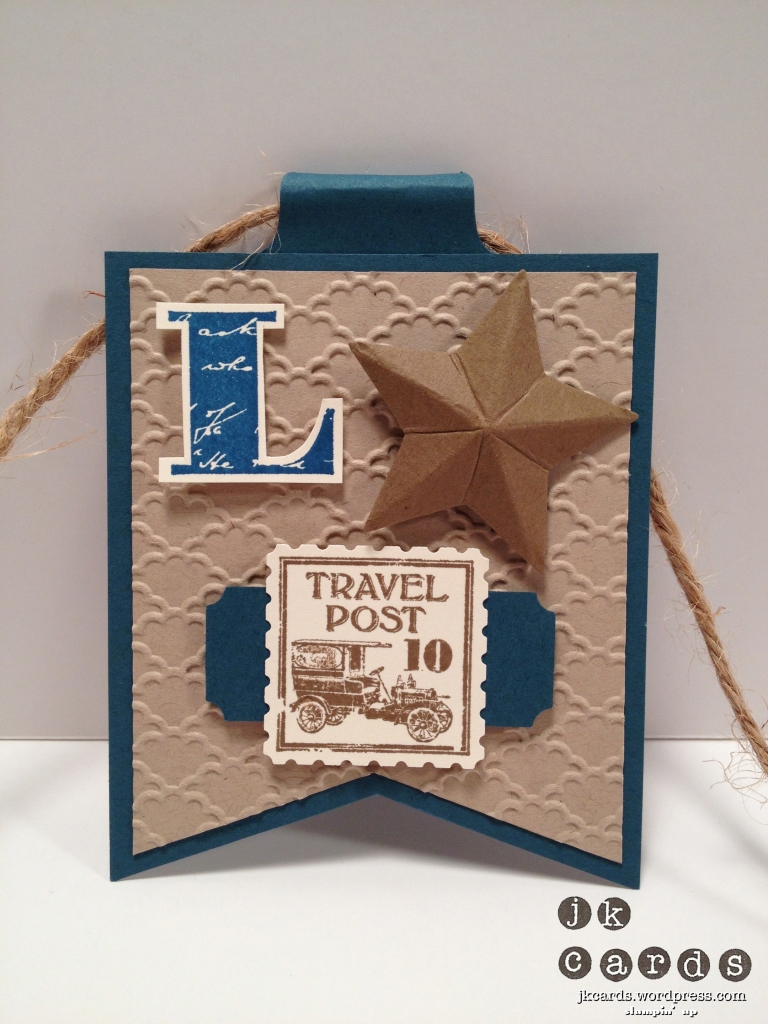
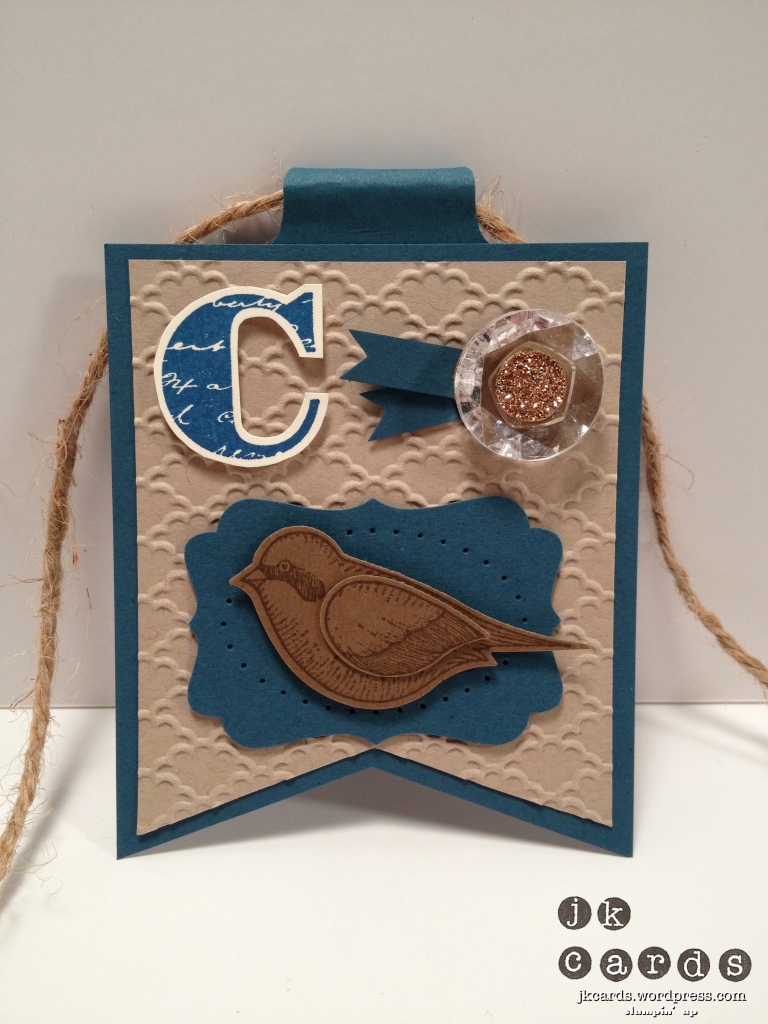
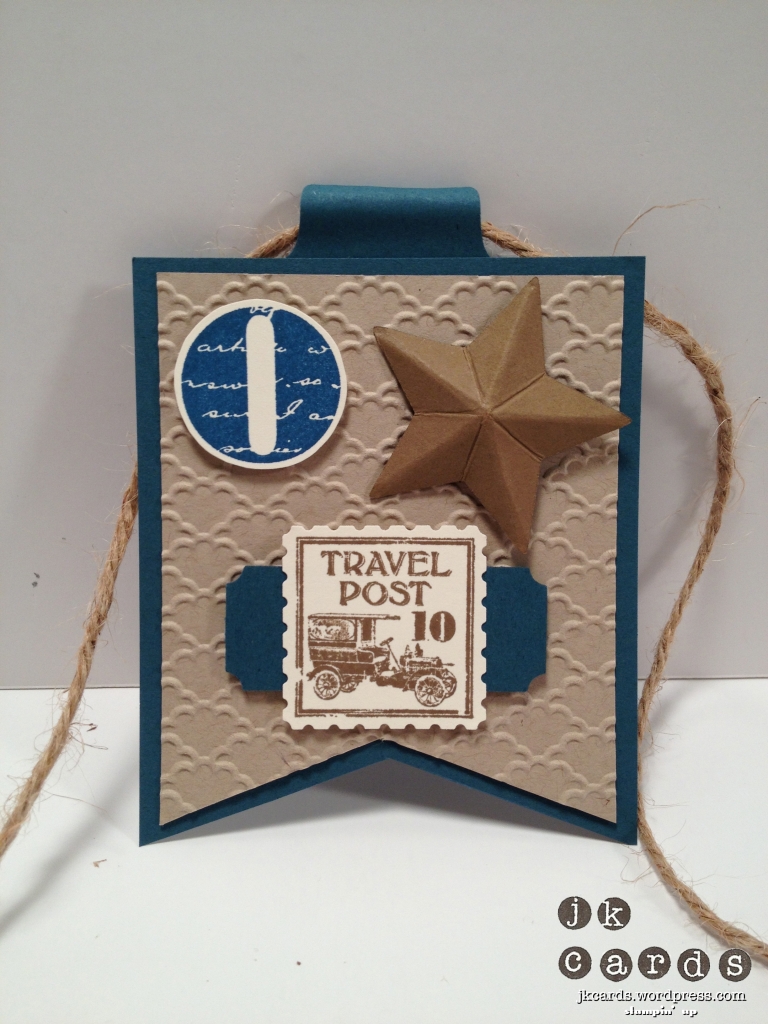
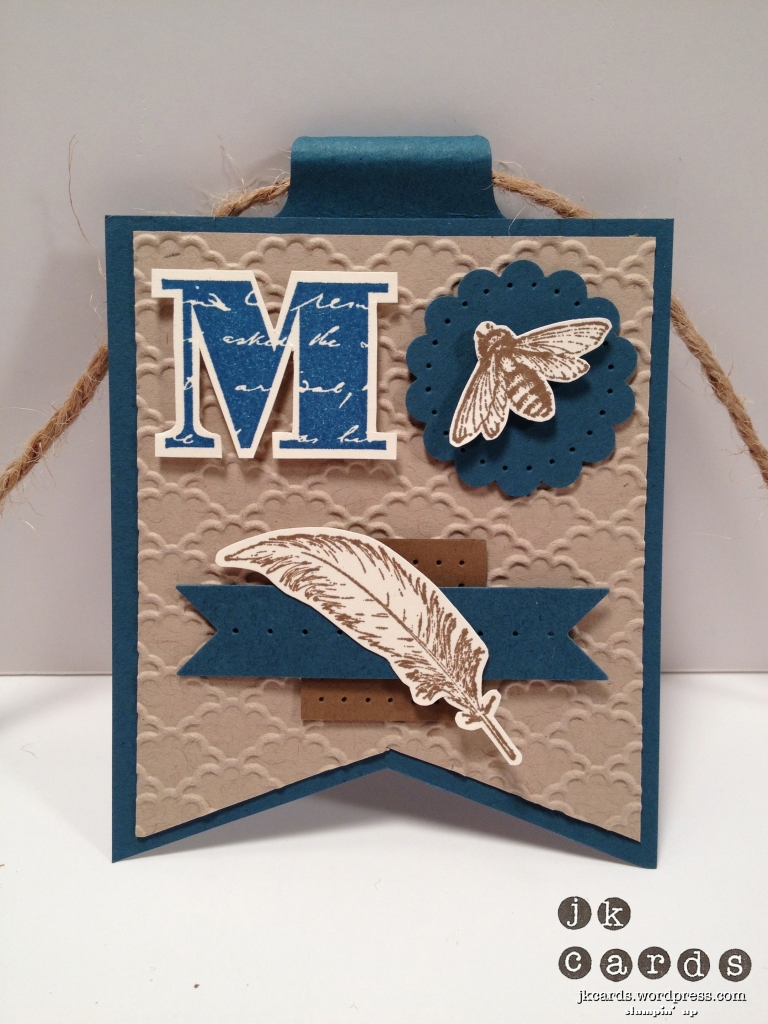
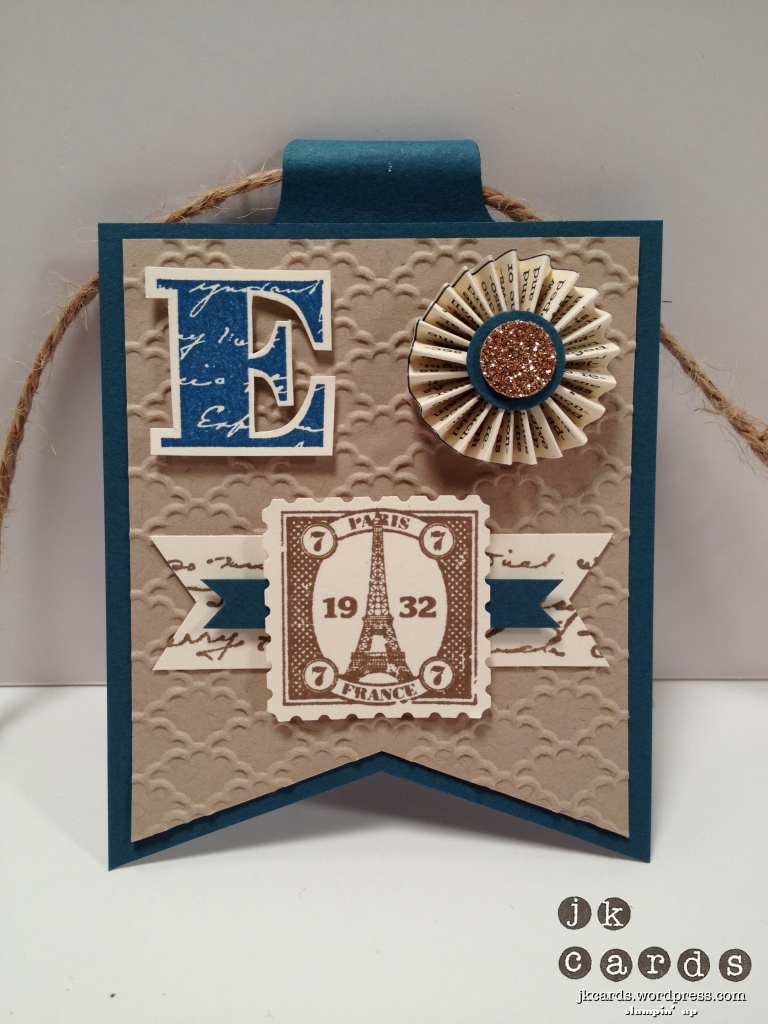
Welcome to the Control Freaks October 2012 Tour! You are probably arriving here from LeeAnn Greff’s blog! Didn’t she have some awesome projects?!?! This month’s theme is “The Men in our Lives” featuring masculine projects. The men in my life would be my dad, my brother… oh and me! LOL! I love to do masculine projects, there are some great stamp sets that you can use. I have featured some of my favorites, Postage Due, Fine Feathers, Nature Walk and You’re Amazing. I have two 3D projects to share with you today. The first one is a box and the second one is a banner. We’ll start off with the box.

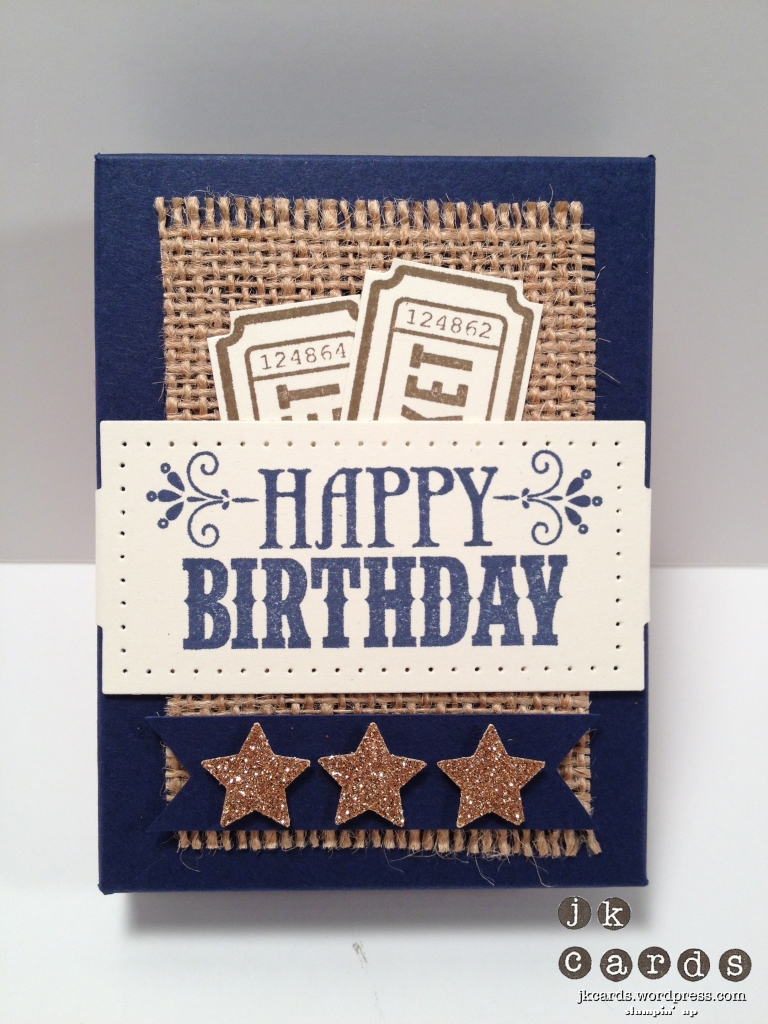
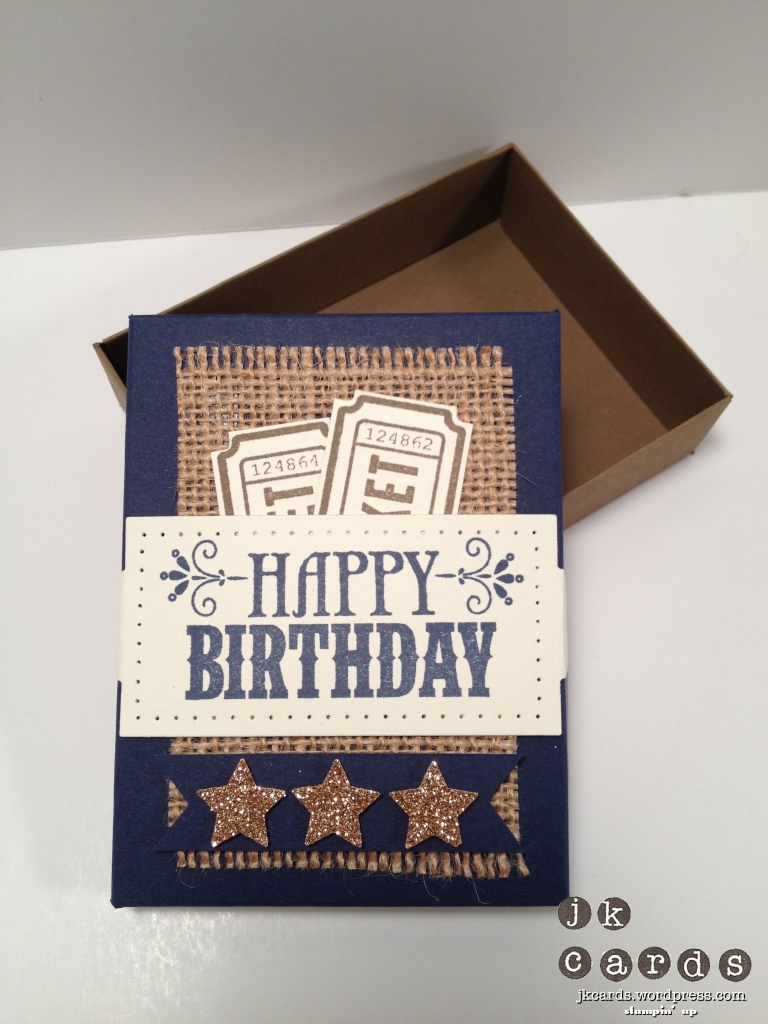
The bottom of the box is Soft Suede and the top is Night of Navy. I used my Simply Scored Scoring Tool to create it. A great tip to remember is when you go to make the lid move your card stock ever so slightly over to the right for each side. It really helps the lid fit much better. I used a piece of burlap for the background, it gives it a nice rough feel. The greeting is from the You’re Amazing Stamp Set and is stamped in Night of Navy. I used the Apothecary Accents Framelits Dies to cut it out and the Essentials Paper-Piercing Pack and the Paper-Piercing Tool to pierce around the edge. I scored the tabs and adhered them to the sides of the lid with Sticky Strip. The two tickets poking out are stamped in Soft Suede using the Take a Ticket Wheel and cut out with my Paper Snips.I flagged a piece of Night of Navy and adhered it with Stampin’ Dimensionals to the burlap. Some Champagne Glimmer Paper is punched out with the Merry Minis Punch pack and they too are adhered to the flagged piece with Stampin’ Dimensionals. The box is not overly complicated and I think makes a nice place for your dad or brother’s birthday gift!

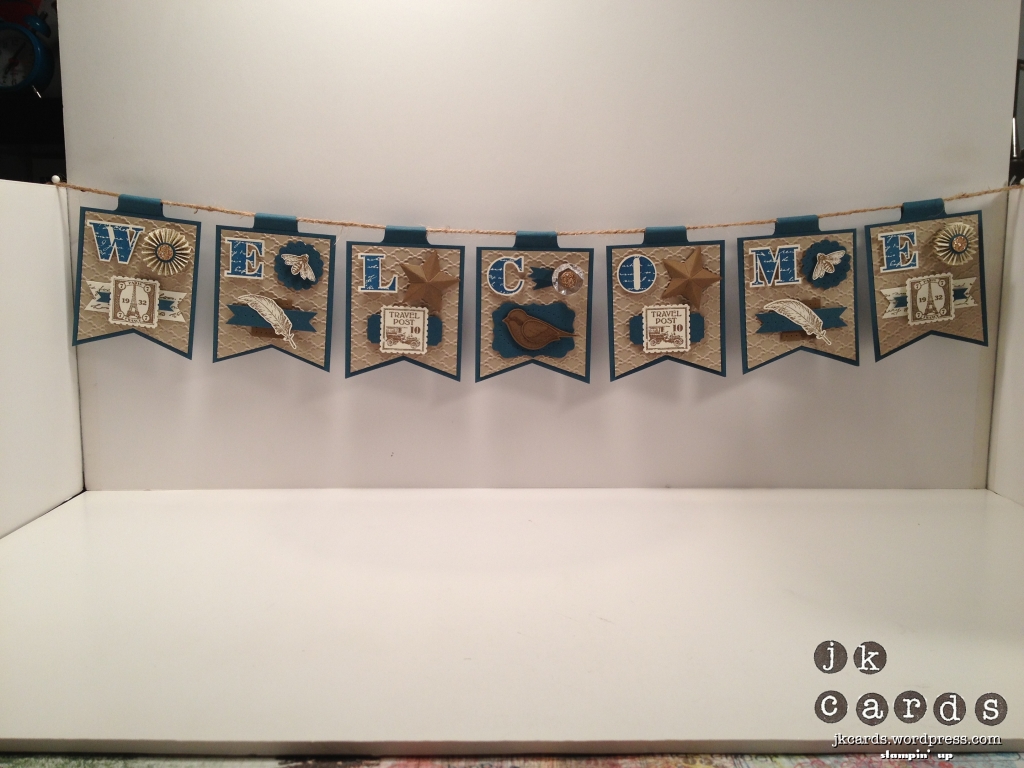
The banner contains a lot of elements! The base of each banner consists of a piece of Not Quite Navy that is flagged on the bottom and a piece of Crumb Cake that is also flagged on the bottom and the embossed using the Fancy Fan Textured Impressions Embossing Folder. All of the letters are stamped in Not Quite Navy using the Morning Post Alphabet and cut out with my Paper Snips. On the first and last banners we have a piece of Very Vanilla that is stamped using the Travel Journal Builder Wheel in Soft Suede and then flagged on both ends. A thin piece of Not Quite Navy is flagged and placed on top of that. The stamped image is from the Postage Due Stamp Set and is stamped in Soft Suede and punched out with the Postage Stamp Punch. The rosette is made from First Edition Designer Series Paper and has a piece of Not Quite Navy and Champagne Glimmer Paper punched out with Circle Punches. The second and sixth banners have a piece of Soft Suede punched out with the 1″ Square Punch and pierced around the edge using the Essentials Paper-Piercing Pack. A piece of Not Quite Navy is flagged on each end and pierced along the middle and placed on top of that. The stamped image is from the Fine Feathers Stamp Set and is stamped in Soft Suede and cut out with my Paper Snips. In the upper corner is a piece of Not Quite Navy that is punched out with the 1 1/4″ Scallop Circle Punch and pierced around the edge. The bee is from the Nature Walk Stamp Set and is stamped in Soft Suede and cut out with my Paper Snips. The third and fifth banners have a piece of Not Quite Navy that is punched out with the Ticket Duo Builder Punch. The stamped image is from the Postage Due Stamp Set and is stamped in Soft Suede and punched out with the Postage Stamp Punch. The 3D star is cut from a pattern and scored using the Simply Scored Scoring Tool, folded and mounted on a few Stampin’ Dimensionals. Finally the center banner has a piece of Not Quite Navy  that is punched out with the Decorative Label punch and an oval is pierced in the center. The bird is from the Language of Friendship Stamp Set and is stamped in Soft Suede on Soft Suede and punched out with the Bird Builder Punch. In the upper left corner is a Vintage Faceted Button with a piece of Champagne Glimmer Paper in the center and a piece of Not Quite Navy cut out with the Bitty Banner Framelits Dies, cut in half and adhered underneath.

WOW! That was a lot of product! LOL! I really hope that you enjoy my two projects for this month’s Control Freaks Blog Tour. Don’t forget to click on the link below and visit Cindy Major to see what great projects she has in store for you! Thank you for stopping by to see me and don’t forget to leave a comment! Have a Freaky Day! 🙂

A CASE from Shelli

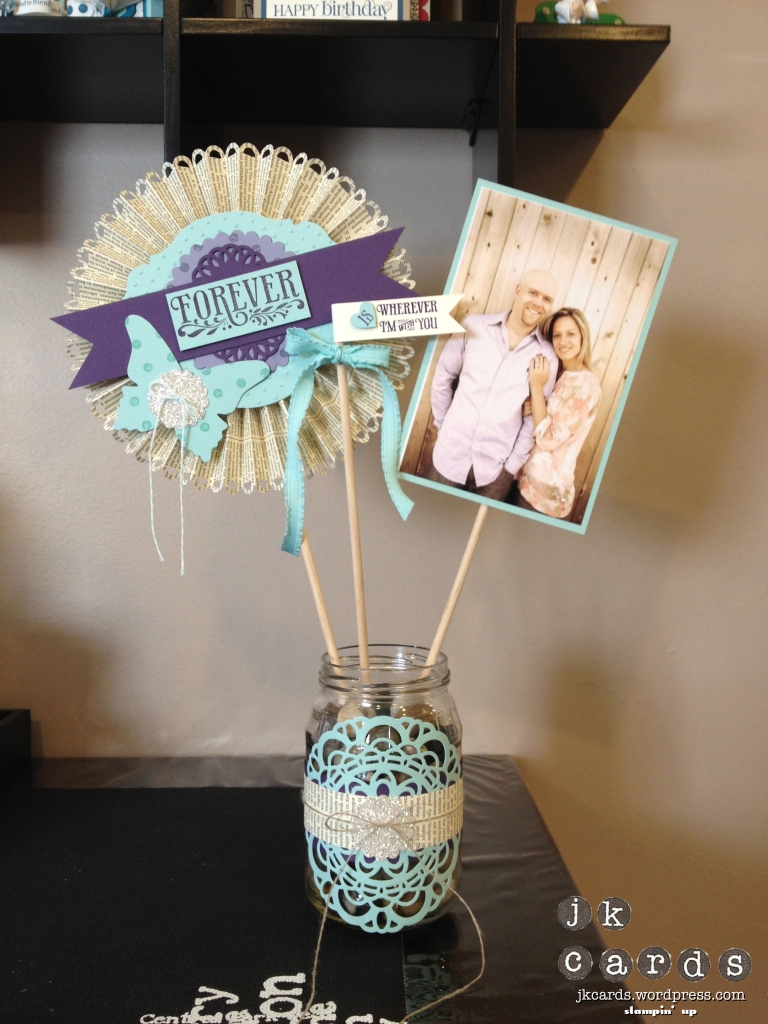
Good morning everyone! It’s the weekend and I couldn’t be happier! I have some projects to finish and peeps to see, it’s going to be a good time! Today’s post is a CASE from So Shelli. Last month there were a bunch of projects posted by Sara Douglass and I fell in love with this one. I thought it would be the perfect Wedding surprise for my brother and Erika on their special day. I only change some minor details but kept it mostly the same. You can see the original post here.

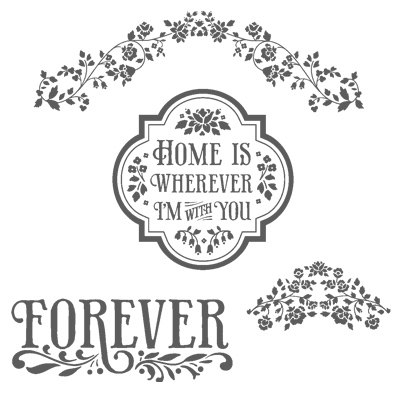
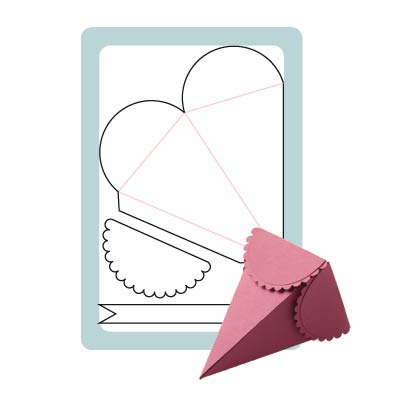
Where to begin! I cut out some First Edition Designer Series Paper with the Designer Rosette Bigz XL Die, I think it was three pieces all together. I used some Sticky Strip and a Jumbo Sticky round to form the rosette. A piece of Pool Party is cut out with the Oval Accents Bigz Clear Die and embossed with the Perfect Polkadots Textured Impressions Embossing Folder. On top of that are two of the scalloped pieces from the Perfect Pennants Bigz L Die cut from Wisteria Wonder and stamped with the Distressed Dots Background Stam in Wisteria Wonder. I used the Delicate Doilies Large Sizzlits Dies to cut out a piece of Elegant Eggplant and cut one in half and put that on top of the other pieces. A piece of Elegant Eggplant is flagged on both ends and mounted to that with Stampin’ Dimensionals. The greeting is stamped from the Forever With You Stamp Set in Elegant Eggplant on Pool Party. The butterfly is cut from the Beautiful Butterflies Bigz Die in Pool Party and stamped in Pool Party with the Distressed Dots Background Stamp. I punched a piece of Silver Glimmer Paper and pierced two holes in it and threaded some Pool Party Bakers Twine through it before adhered it to the butterfly. The greeting on the Very Vanilla flag is stamped in Elegant Eggplant and the “is” is stamped on a piece of Pool Party that is punched out with the Small Heart Punch. A piece of Pool Party Ruffled Ribbon is tied just underneath it. The picture is backed with a piece of Pool Party and they are all adhered to dowels with Sticky Strip and hot glue. The jar has a piece of Pool Party that was cut out using the Paper Doily Large Sizzlits Die. I wrapped a piece of First Edition DSP around it, punched another piece os Silver Glimmer Paper out with the 1 1/4″ Scallop Circle Punch and tied a piece of Linen Thread around it. To keep everything in place I filled the jar with small river rocks.

Erika and Jason both loved their little surprise waiting for them on their table and I hope that you enjoyed it too. Thank you so much for spending some time with me today, I appreciate your visiting and love to read your comments! I hope that you all enjoy your Saturday! 🙂

Stampin’ Up products used:

Card Stock: Very Vanilla, Pool Party, Elegant Eggplant and Wisteria Wonder

Ink: Elegant Eggplant, Wisteria Wonder and Pool Party

Stamp Sets: Forever With You Clear Mount and Distressed Dots Background

Designer Series Paper: First Edition Specialty

Specialty Paper: Silver Glimmer Paper

Embellishments: Pool Party Bakers Twine, Pool Party 3/8″ Ruffled Ribbon and Linen Thread

Tools: Big Shot, Beautiful Butterflies Bigz Die, Designer Rosette Bigz XL Die, Petal Cone Bigz L Die, Oval Accent Bigz Clear Die, Delicate Doilies Large Sizzlit, Paper Doilies Large Sizzlit, 1 1/4″ Scallop Circle Punch, Small Heart Punch, Paper Snips, Paper-Piercing Tool, Sticky Strip, Stampin’ Dimensionals and SNAIL
Don’t forget to check out the Anchor Rewards tab at the top. Earn 10 Anchors and get a FREE Stamp Set of your choice from any current catalog. If you purchase $150 worth of product you will be eligible for $25 in Host(ess) dollars to get one of the great new Host(ess) Sets or any other items from the NEW 2012-2013 Catalog or the NEW Holiday Catalog!

It’s only October, but Stampin’ Claus is coming to town! Get a FREE Festive Paper-Piercing Pack when you purchase the Ornament Keepsakes Set and Candlelight Christmas Specialty Designer Series Paper. Get your FREE paper-piercing pack by purchasing the Ornament Keepsakes Set and Candlelight Christmas Specialty Designer Series Paper or the Ornament Keepsakes Bundle and Candlelight Christmas Specialty Designer Series Paper. Remember: the bundle gets you an additional 15 percent off the set and the Holiday Ornaments Framelits Dies. So many options!

Paper Players #116

Good morning, is it Monday already?! Where did the weekend go?! I would like to go back in time and find the genius that thought a five day work week and two days off was a good idea! LOL! It was gloomy and cold here most of the day yesterday and rained. It definitely feels like fall. I’m also not a fan of it getting dark so early and soon it will be dark at 4:00, bummer! Anyway, there is my morning rant, now on to more pleasant things!

Today’s post is for this week’s Paper Players Challenge. This week the lovely LeAnne has given us this interesting challenge…

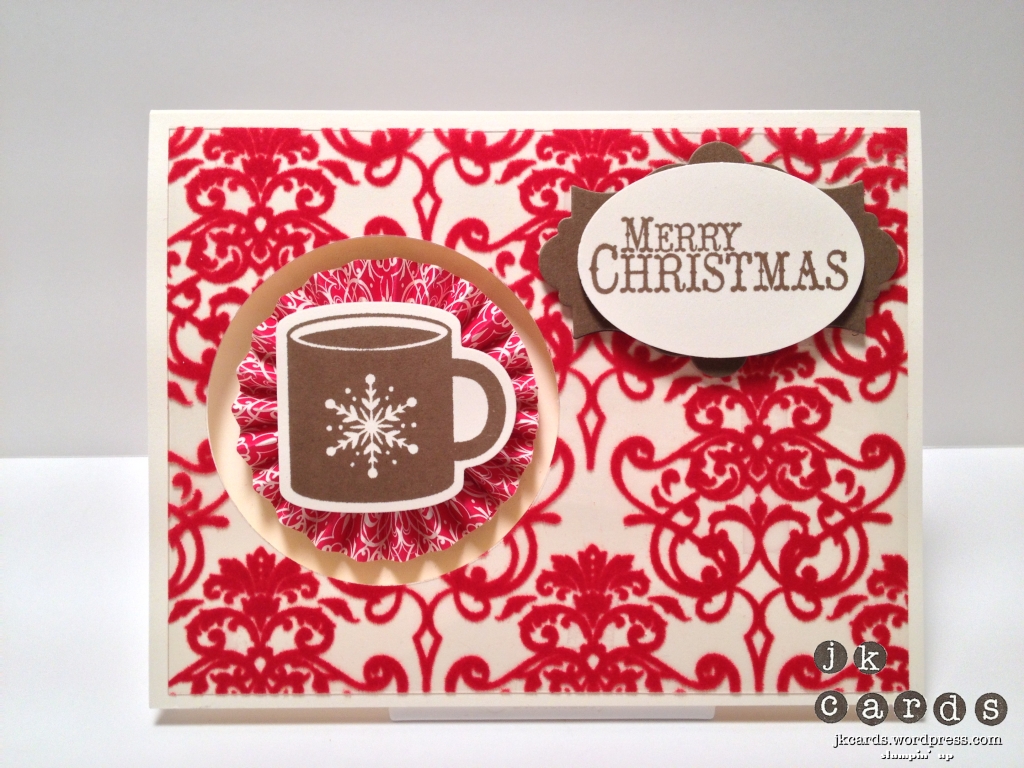
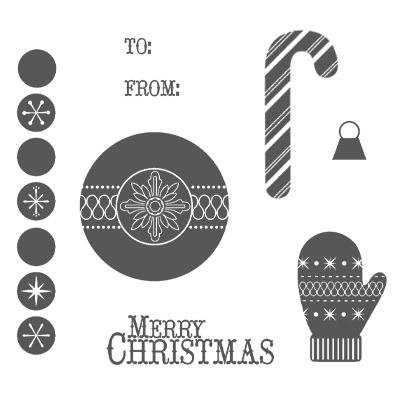
I was thinking of using the Tea Shoppe set but I opted for a holiday theme instead. The base of my card is Very Vanilla Card Stock. I used a piece of the flocked window sheet from the Candlelight Christmas Specialty Designer Series Paper. I punched a hole in both the card and the flocked window sheet with the 2 1/2″ Circle Punch. Some very carefully placed glue holds the flocked window sheet to the card base. I also used a piece of the Candlelight Christmas Specialty DSP and my Simply Scored Tool to make a rosette which I adhered with some Mini Glue Dots inside the punched circle. The mug is from the Scentsational Season Stamp Set. It is stamped in Soft Suede and cut out with the Holiday Collection Framelits Dies. I adhered it to the rosette with a Stampin’ Dimensional. The greeting is from the Chock Full of Cheer Stamp Set and is also stamped in Soft Suede. I used the Extra Large Oval Punch to punch it out and backed it with a piece of Soft Suede that I cut out using the Apothecary Accents Framelits Dies. They are adhere to each other and to the card with Stampin’ Dimensionals. I really like the flocked window sheet and rosettes are my favorite embellishment. I hope that you enjoyed this week’s Paper Player Challenge card. Thank you so very much for checking in with me today, I hope that your day is amazing!

Stampin’ Up! products used:

Card Stock: Very Vanilla and Soft Suede

Ink: Soft Suede Classic Stampin’ Ink

Stamp Sets: Scentsational Season and Cock Full of Cheer Clear Mount

Designer Series Paper: Candlelight Christmas Specialty

Tools: Big Shot, Holiday Collection Framelits Dies, Apothecary Accents Framelits Dies, 2 1/2″ Circle Punch, Extra Large Oval Punch, Simply Scored, Stampin’ Dimensionals and SNAIL

Don’t forget to check out the Anchor Rewards tab at the top. Earn 10 Anchors and get a FREE Stamp Set of your choice from any current catalog. If you purchase $150 worth of product you will be eligible for $25 in Host(ess) dollars to get one of the great new Host(ess) Sets or any other items from the NEW 2012-2013 Catalog or the NEW Holiday Catalog!

It’s only October, but Stampin’ Claus is coming to town! Get a FREE Festive Paper-Piercing Pack when you purchase the Ornament Keepsakes Set and Candlelight Christmas Specialty Designer Series Paper. Get your FREE paper-piercing pack by purchasing the Ornament Keepsakes Set and Candlelight Christmas Specialty Designer Series Paper or the Ornament Keepsakes Bundle and Candlelight Christmas Specialty Designer Series Paper. Remember: the bundle gets you an additional 15 percent off the set and the Holiday Ornaments Framelits Dies. So many options!

Control Freaks September 2012 Tour!

Hello everyone and welcome to the September Control Freaks Tour featuring Fall projects! I’m so excited to be a part of this incredibly talented group. If you have arrived here from the tour you have just come from Jason Casper’s site. Didn’t he have some great projects?!?! This is my first tour with the Freaks, how awesome is that?!?! I’m a little excited, can you tell?!?!

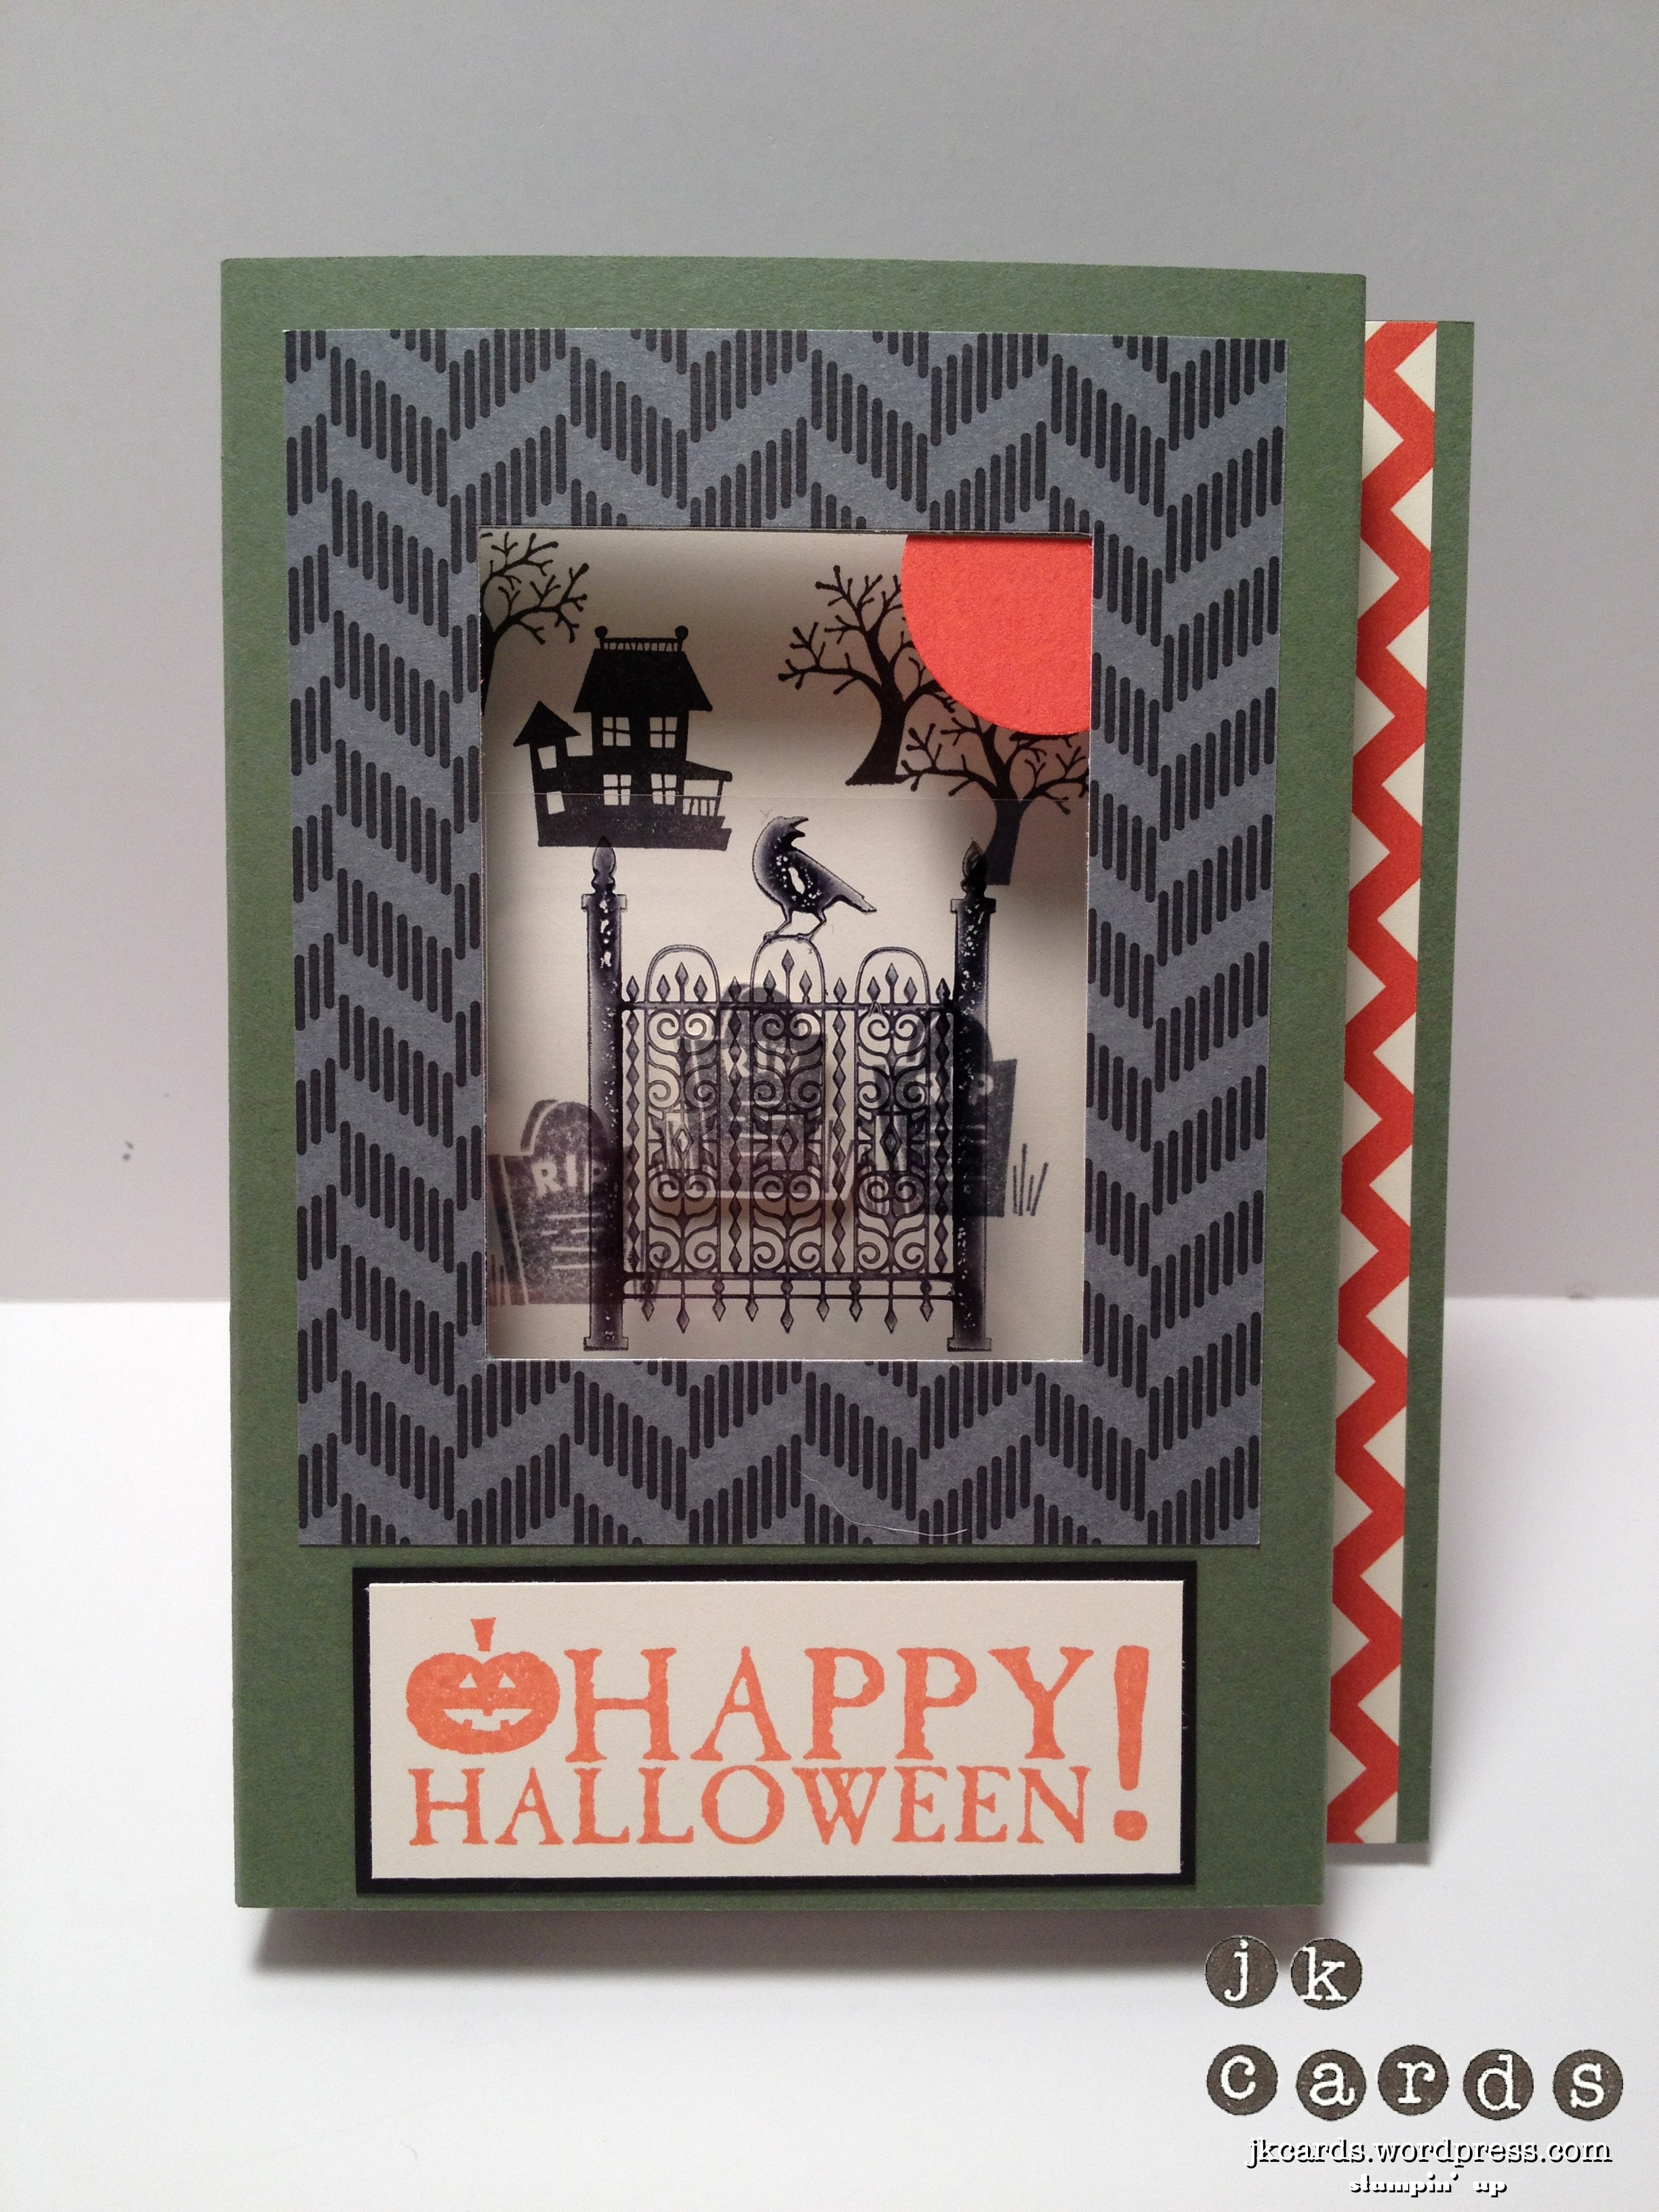
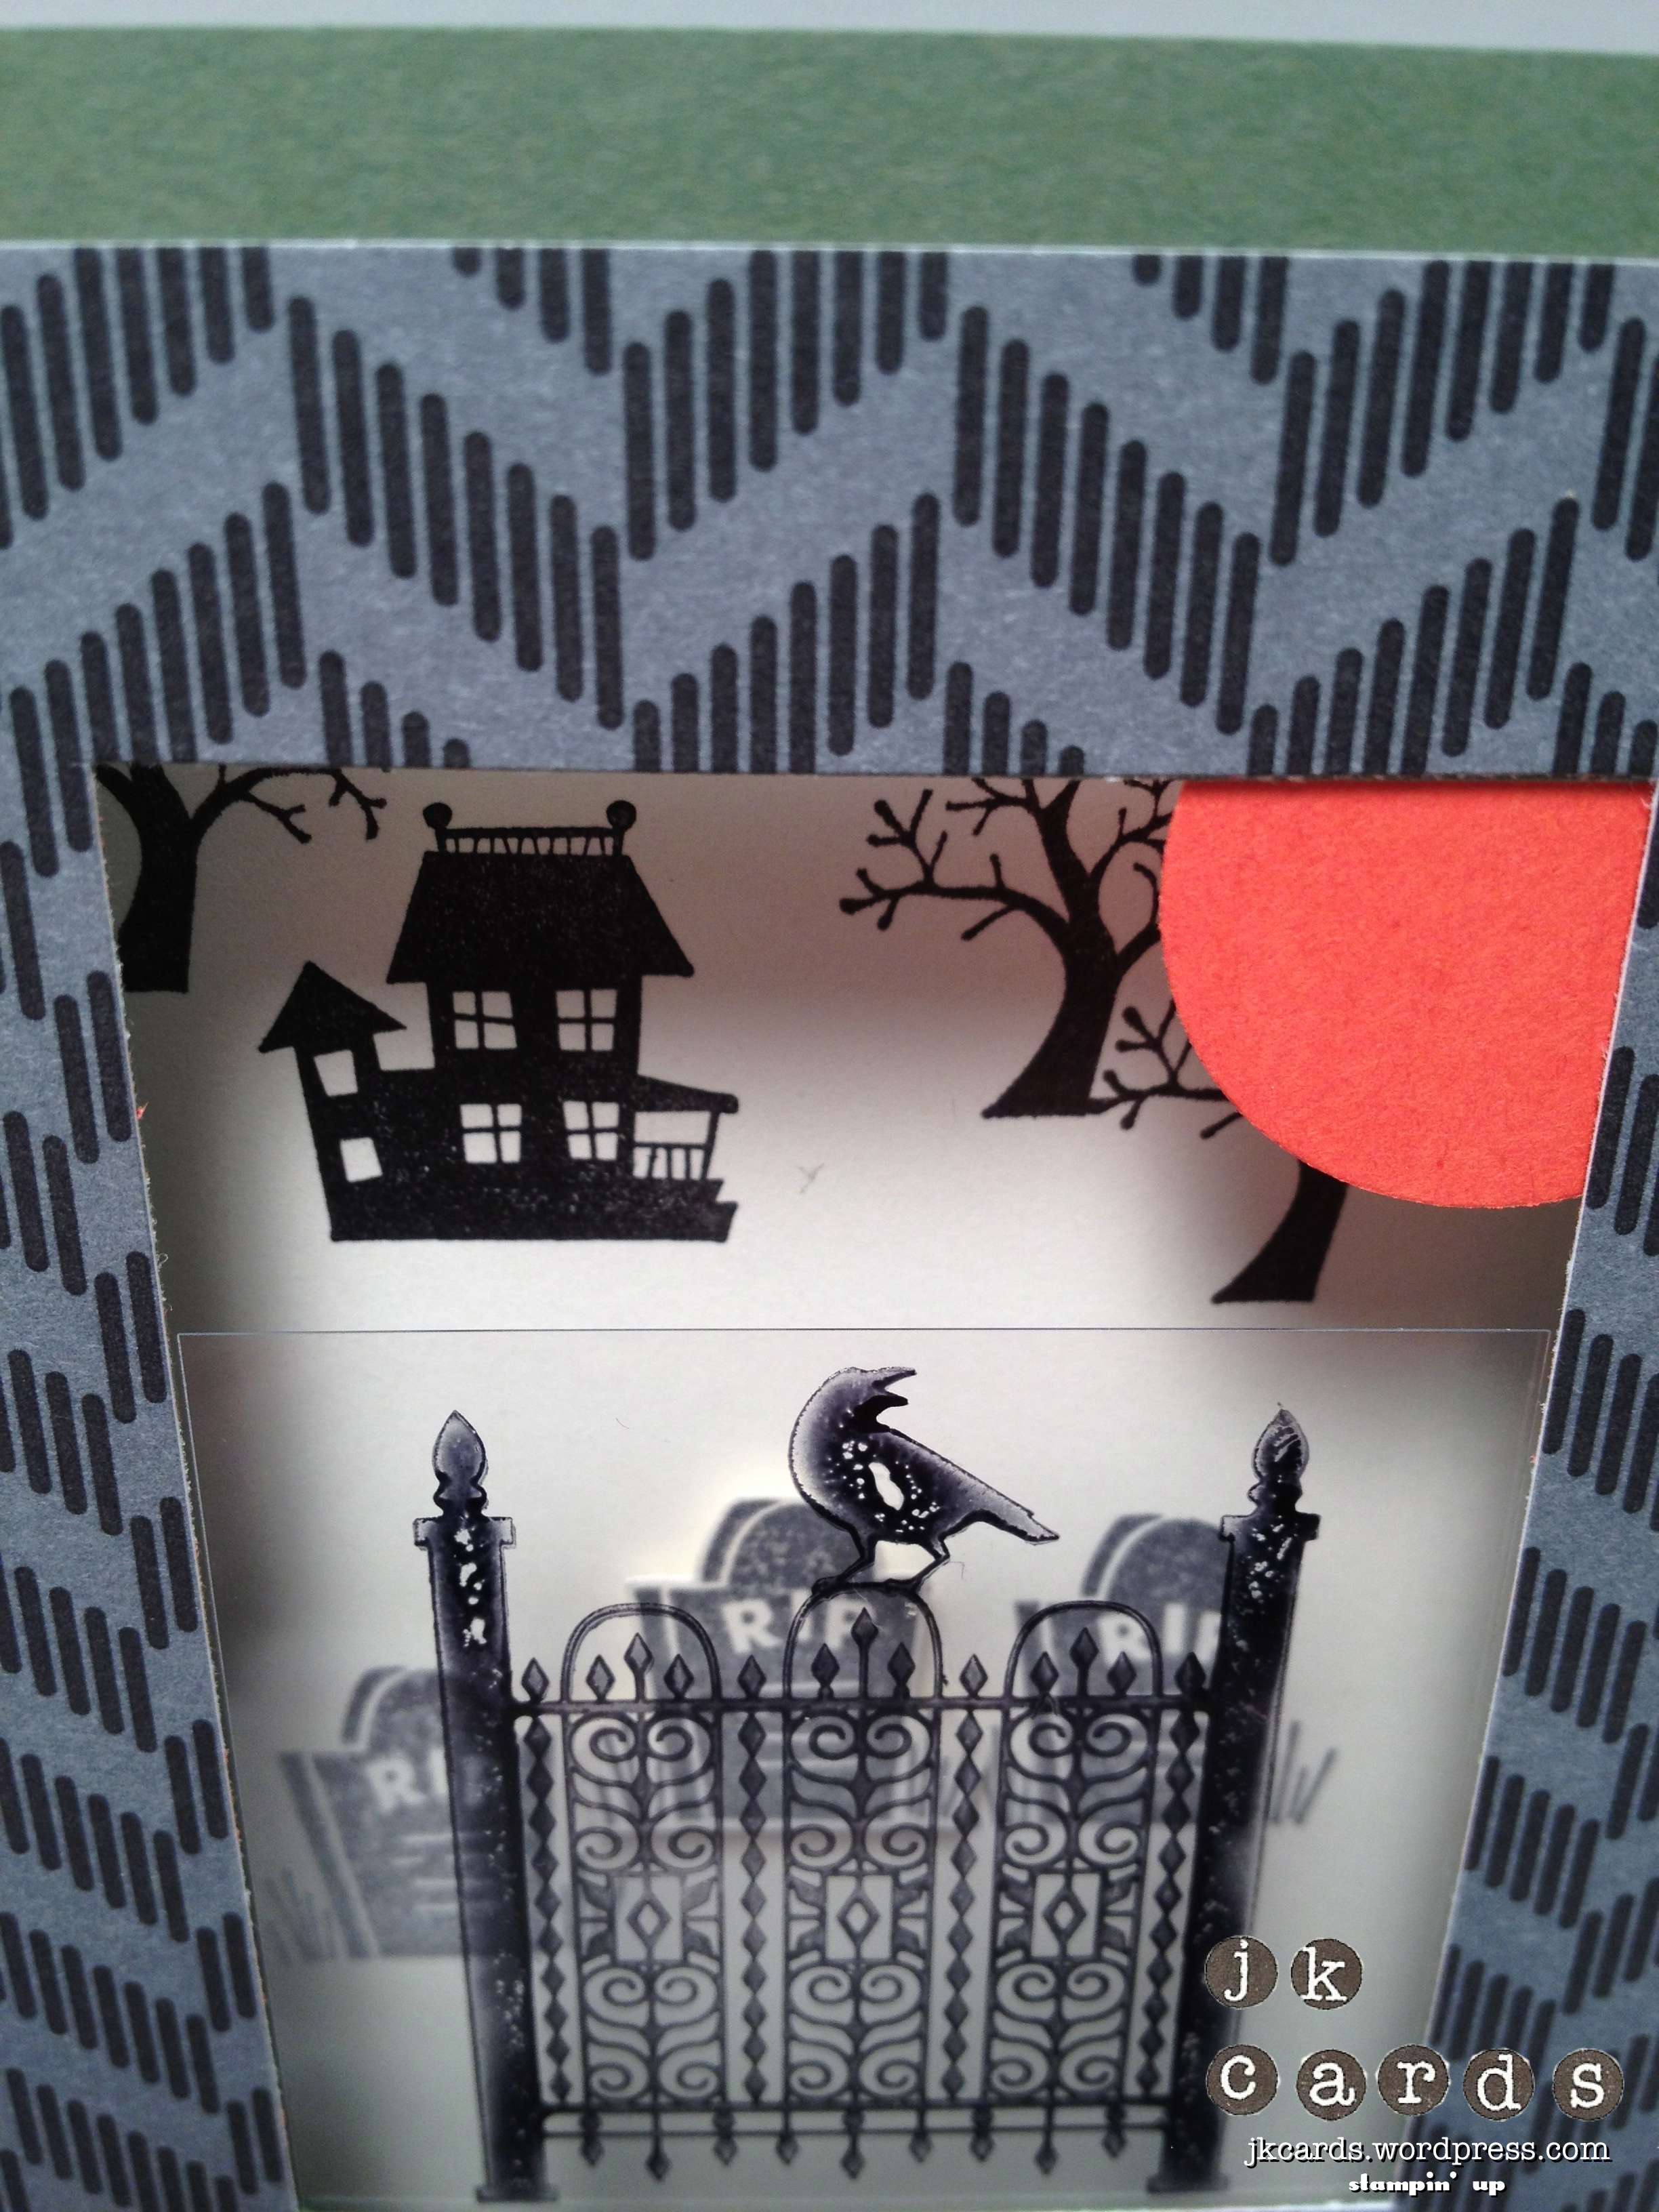
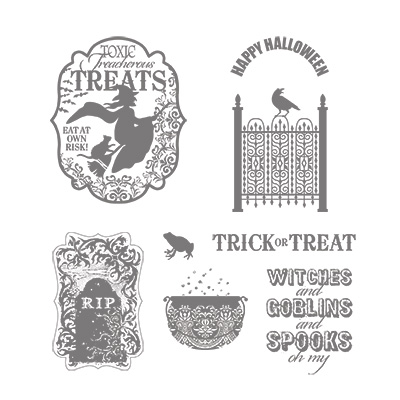
The first project I have to show you is a card. Not just any card but a 3D window card that folds flat so that you can still mail it. The base of the card is Always Artichoke Card Stock. I used a piece of Howlstooth & Scaringbone Designer Series Paper to frame the window and I also used a piece down the right side. The images in the back are from the Spooky Bingo Bits Stamp Set and are stamped in Basic Gray, Basic Black and Early Espresso. I also cut one of the tombstones out and adhered it with a Stampin’ Dimensional. The image on the piece of Window Sheet is form the Toxic Treats Stamp Set and is stamped in Jet Black Staz-On. The little moon in the upper right corner is made with Tangerine Tango and the 1″ Circle Punch. For the greeting I used the Seasonal Sayings Stamp Set stamped in Tangerine Tango and backed with a piece of Basic Black.

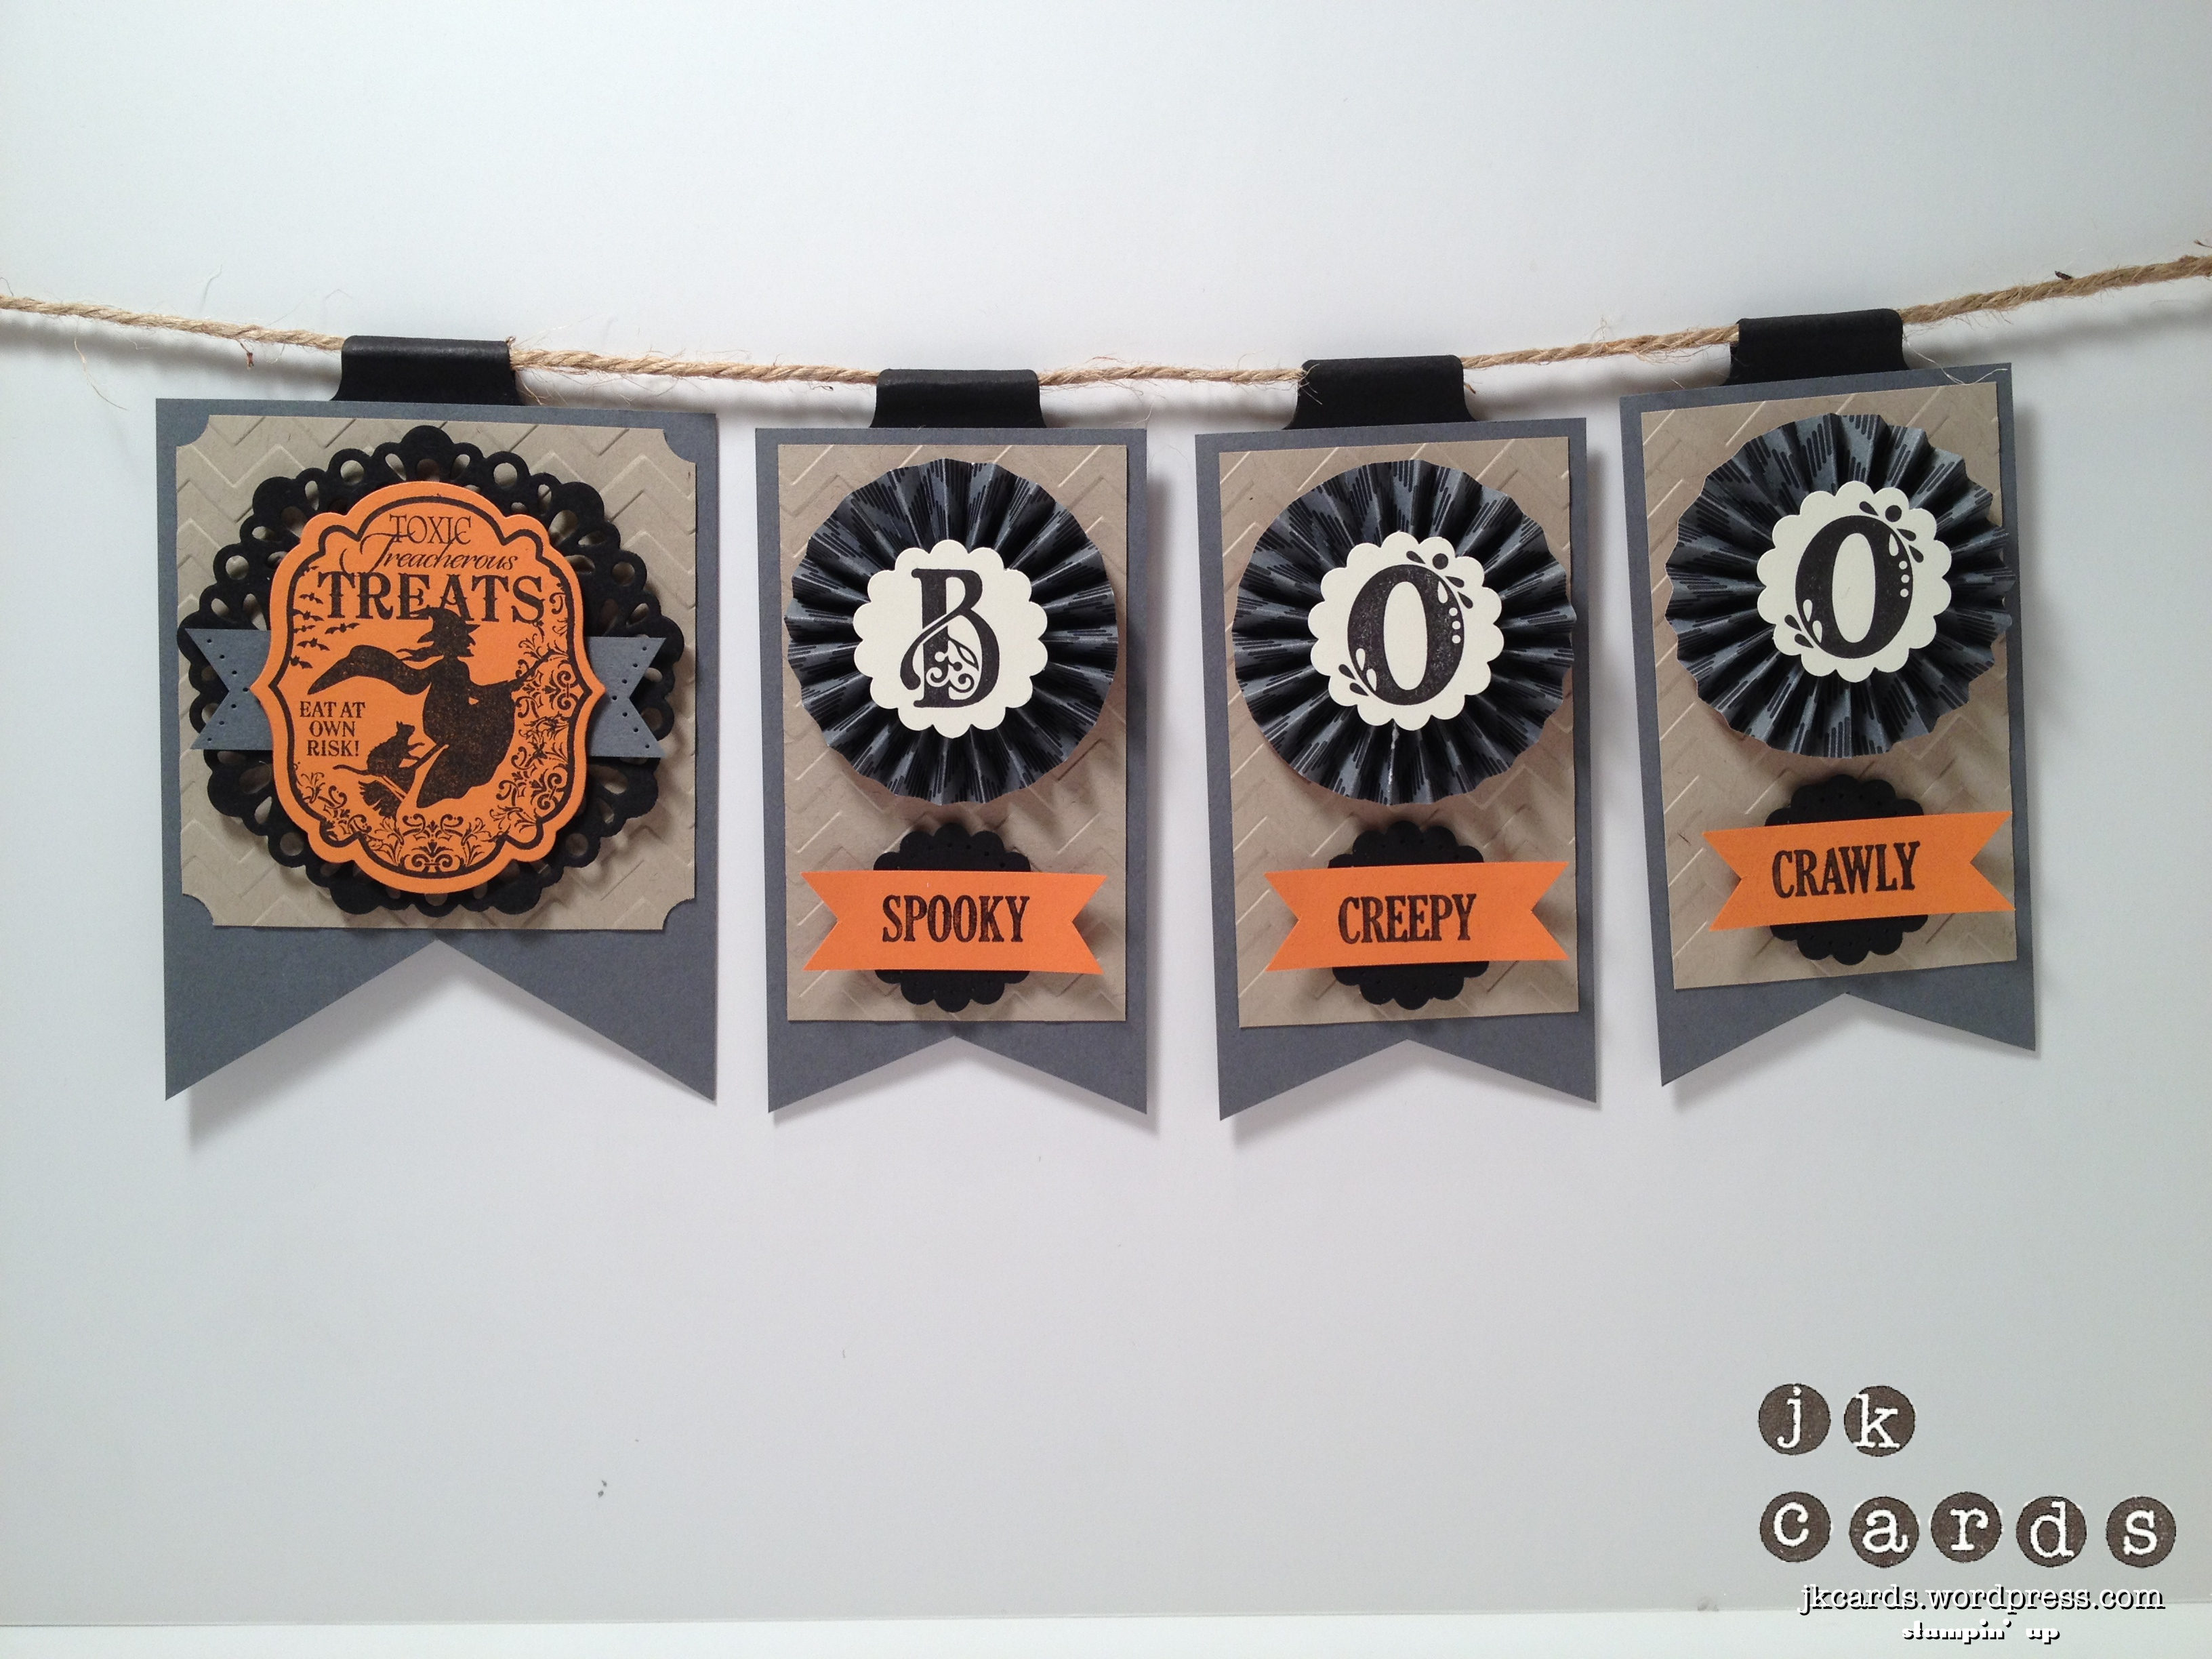
The next project I have to show you is a Halloween Banner. The base of all of the banners is Basic Gray, that I flagged the ends on, with a piece of Crumb Cake that is embossed with the Chevron Textured Impressions Embossing Folder. The image on the first banner is from the Toxic Treats Stamp Set and is stamped in Basic Black on Pumpkin Pie and cut out with the Labels Collection Framelits Dies. Some Basic Black is cut out using the Paper Doily Large Sizzlits Die. I cut out a piece of Basic Gray, flagged the ends and used the Essentials Paper-Piercing Pack to pierce the edges. All of the pieces are adhered using Stampin’ Dimensionals. The next three banners all have a rosette made with Howlstooth & Scaringbone DSP and my Simply Scored. The letters are form the Broadsheet Alphabet Stamp Set and are stamped in Basic Black and punched out with the 1 1/4″ Scallop Circle Punch. The flagged pieces of Pumpkin Pie are stamped with the Border Banter Stamp Set and are backed with pieces of Basic Black that are punched out with the 1 1/4″ Scallop Circle punch and paper-pierced around the edges too.

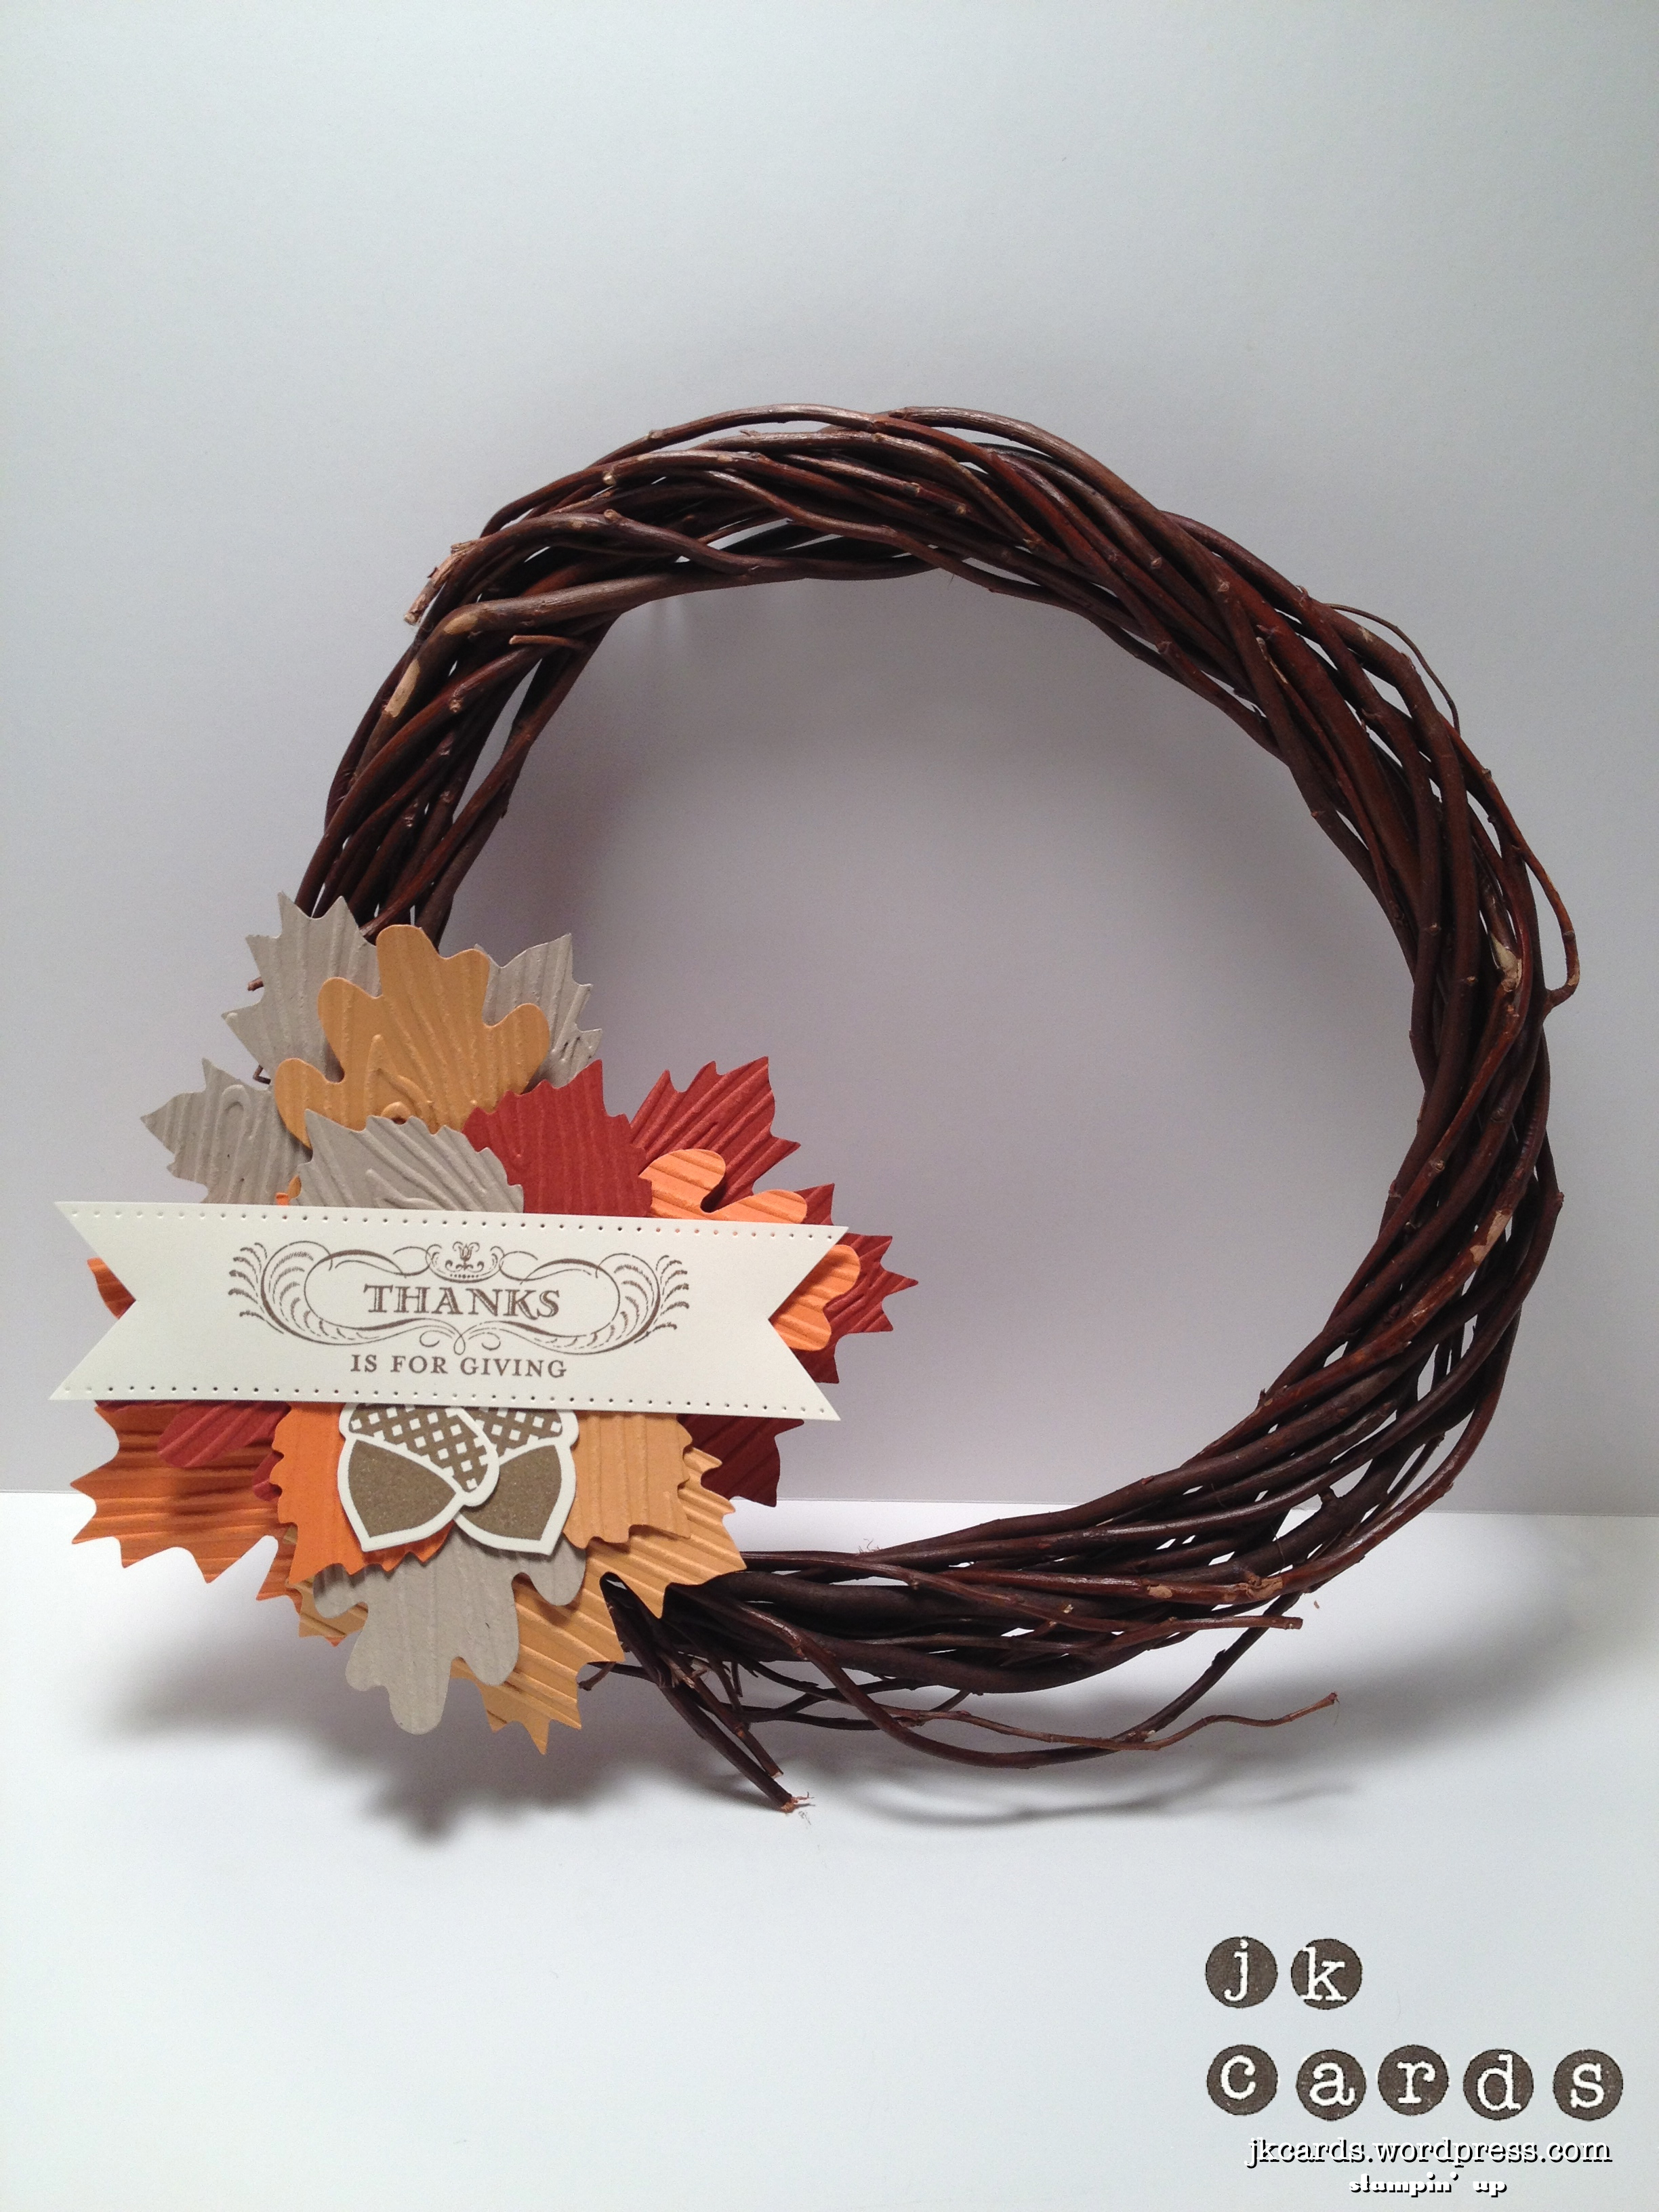
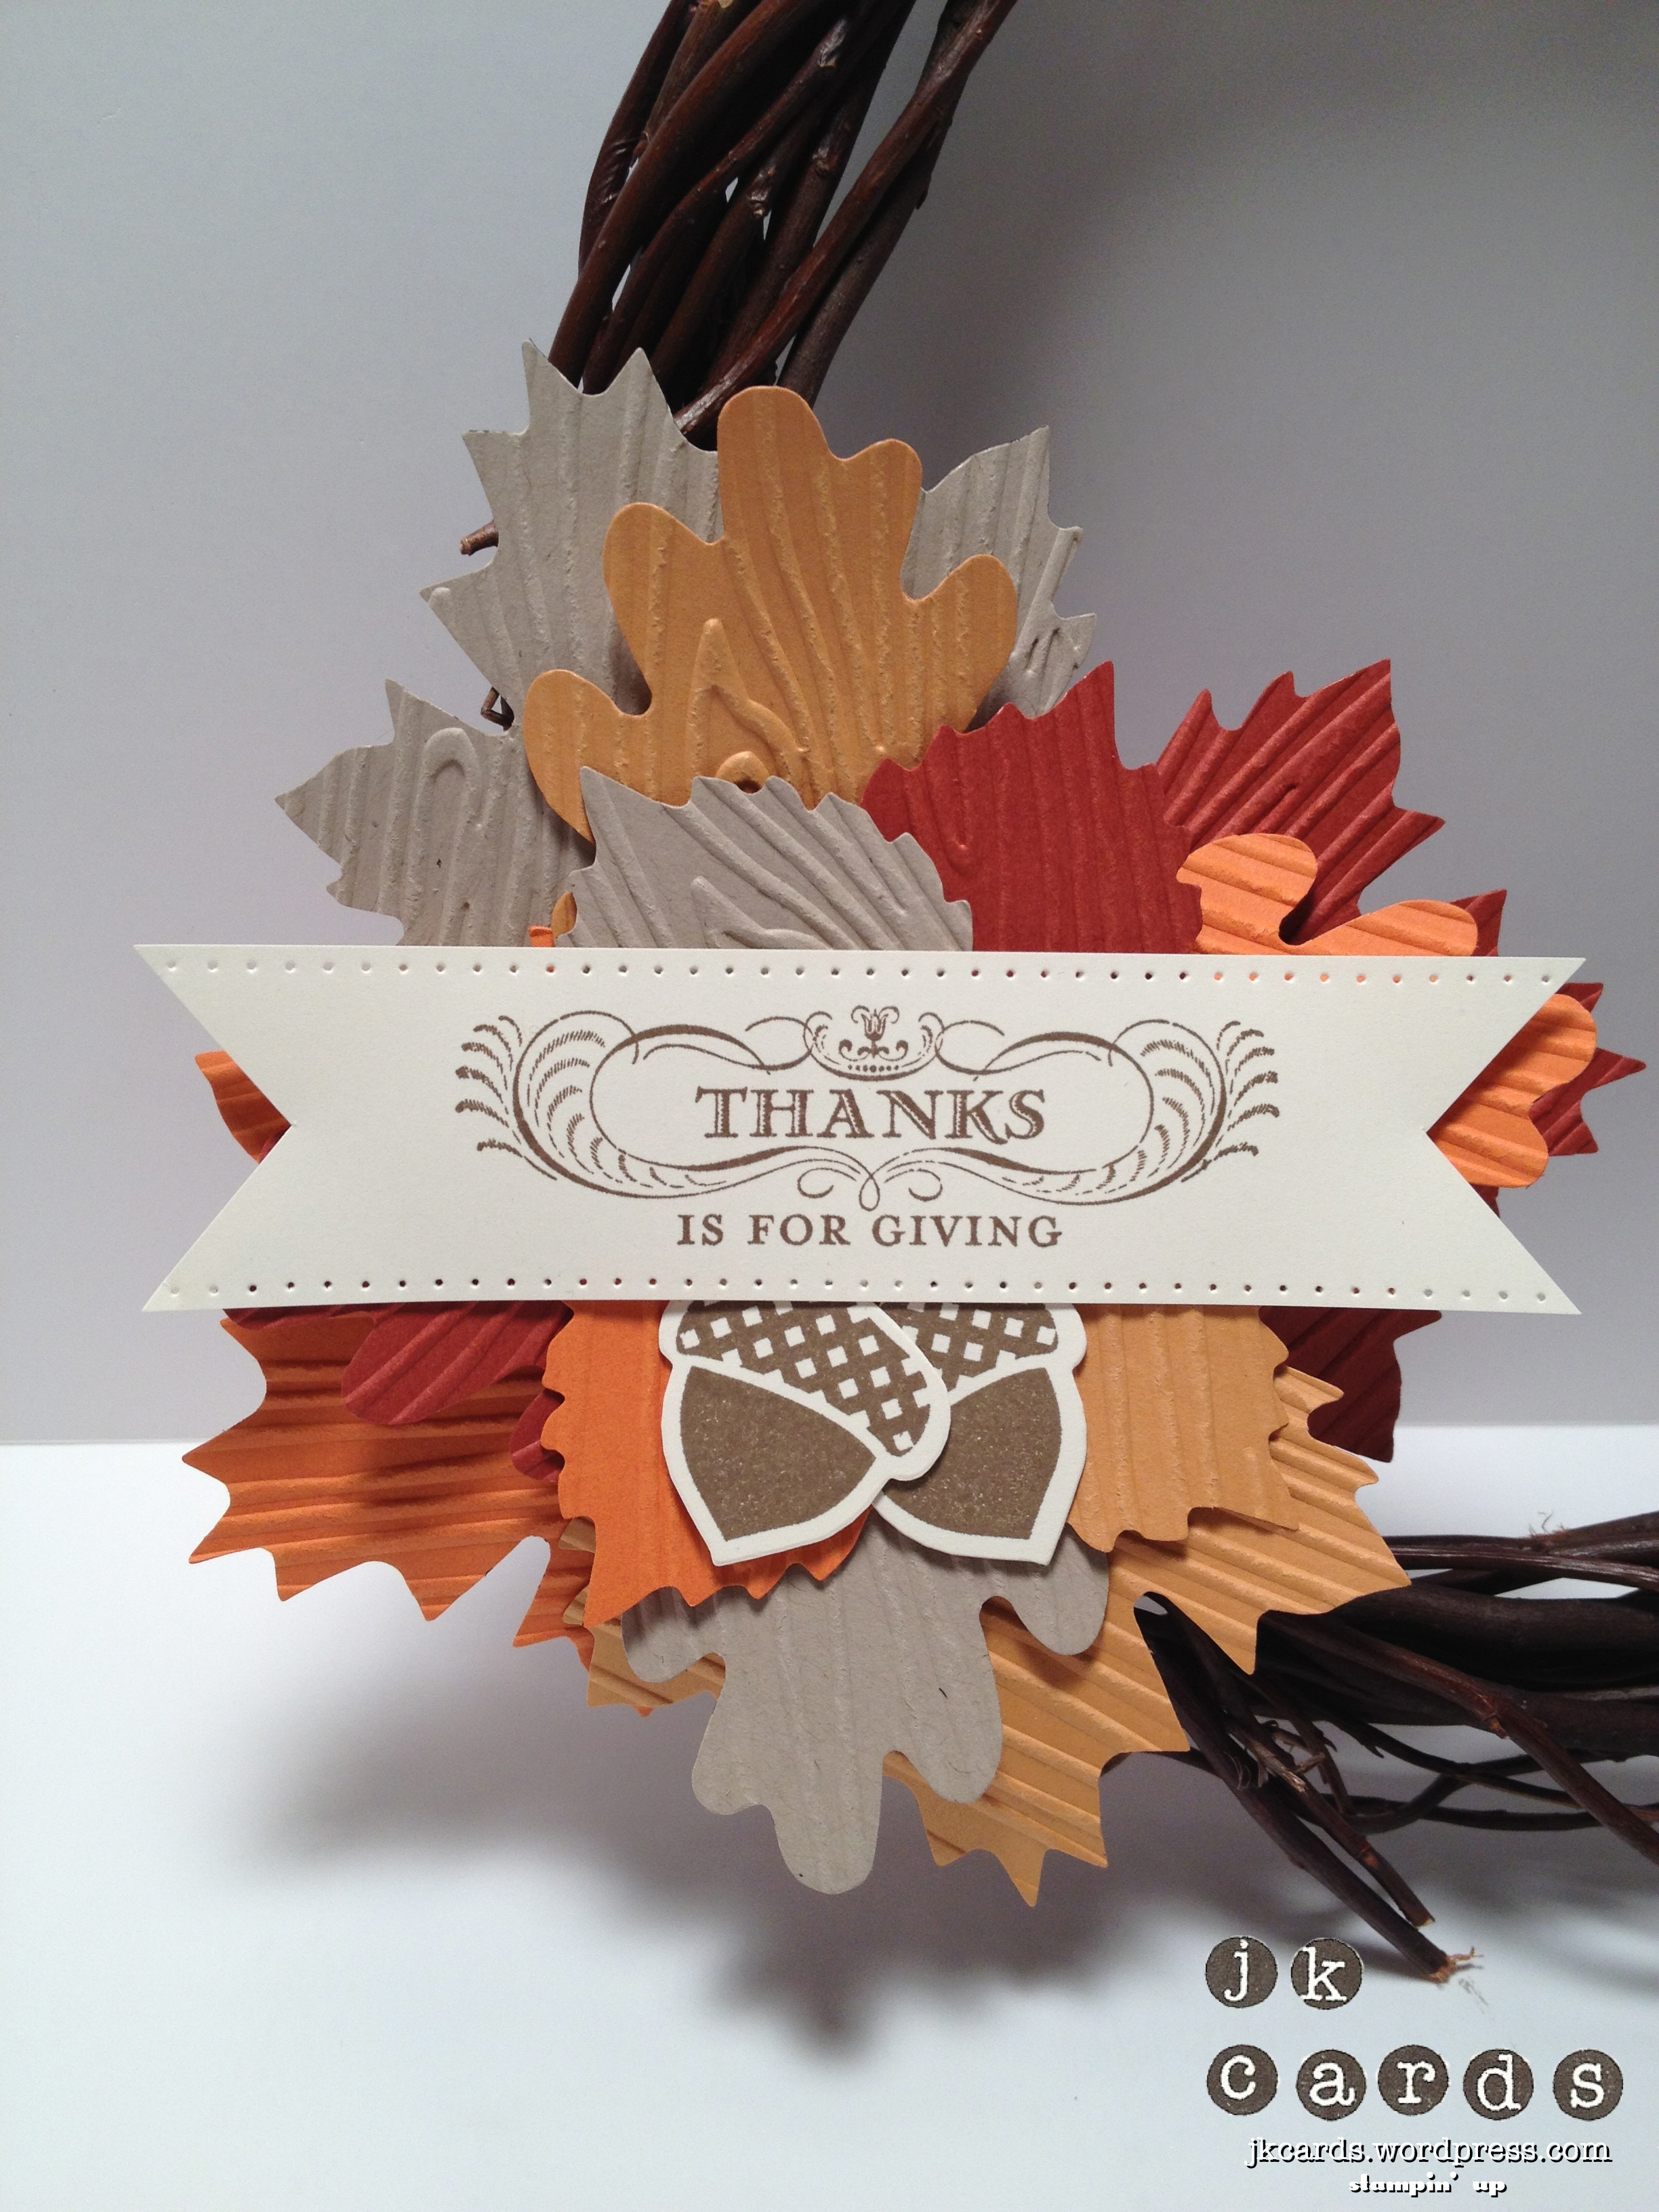
The last project I have to show you is a wreath. I used the Autumn Accents Bigz Die to cut out all of the leaves from Crumb Cake, Pumpkin Pie, Cajun Craze and More Mustard Card Stock. They are all embossed with the Woodgrain Textured Impressions Embossing Folder. I used a hot glue gun and the Silicone Craft Sheet to attach them to the wreath. The greeting is from the Seasonal Sayings Stamp Set and is stamped in Soft Suede. I flagged the ends and paper-pierced the top and bottom. The acorns are from the Wonderfall Stamp Set and are stamped in Soft Suede and adhered to the back of the greeting with some Sticky Strip. The greeting is then adhered to the leaves with Stampin’ Dimensionals.

I hope that you enjoyed your stop here on the Control Freaks September Tour. Thanks so much for visiting. Now click below to hop on over to Yvette Ashe who is your next stop on the tour and see what fun projects she has in store for you! Enjoy!!

Stampin’ Up! products used:

Card Stock: Very Vanilla, Whisper White, Basic Black, Basic Gray, Tangerine Tango, Pumpkin Pie, Crumb Cake, Cajun Craze, More Mustard and Always Artichoke

Ink: Basic Black, Basic Grey, Early Espresso and Soft Suede

Specialty Ink: Jet Black Staz-On

Stamp Sets: Toxic Treats, Spooky Bingo Bits, Broadsheet Alphabet, Border Banter, Seasonal Sayings and Wonderfall Clear Mount

Designer Series Paper: Howlstooth & Scaringbone

Other: Window Sheets

Tools: Big Shot, Chevron Textured Impressions Embossing Folder, Labels Collection Framelits Dies, 1 1/4″ Scallop Circle Punch, 1″ Circle Punch, Paper Doily Large Sizzlits Die, Autumn Accents Bigz Die, Essentials Paper-Piercing Pack, Paper-Piercing Tool, Paper Snips, Sticky Strip, Hot Glue, Stampin’ Dimensionals and SNAIL